


Over the past year, I’ve been using my Lab Rax system for a few different homelab builds. The basic design has been working quite well, but there were a few things I wanted to improve. Some were small changes to make the rack stronger and easier to assemble, and I’ve also designed and upgraded a few new accessories, including wall mounting, storage and probably my favourite upgrade, a programmable logo that can be used to display useful information.
So today, I’m going to show you what’s changed and how you can use these parts to build a capable homelab for yourself.
Here’s my video showcase of the improvements and accessories, read on for the write up and download links:
Parts Used In These Builds
- M6x10mm Button Head Screws – Buy Here
- M6 Brass Inserts 8mm OD, 4mm Length – Buy Here
- M6 Brass Inserts 8mm OD, 5mm Length – Buy Here
- M6 Nuts – Buy Here
- Wall Mounting Cleats
- Wall Mount Screw & Plug Kit – Buy Here
- NeoPixel Light-Up Lab Rax Logo
Tools & Equipment Used
Some of the above parts are affiliate links. By purchasing products through the above links, you’ll be supporting my projects, at no additional cost to you.
Improvements To The Lab Rax Homelab
Let’s start with the improvements that I’ve made to the rack itself. The overall design hasn’t changed because I want to keep the parts all compatible, it’s still a modular 10-inch rack system that’s designed to be entirely 3D printed and all of your older prints will still be compatible with the upgraded parts.
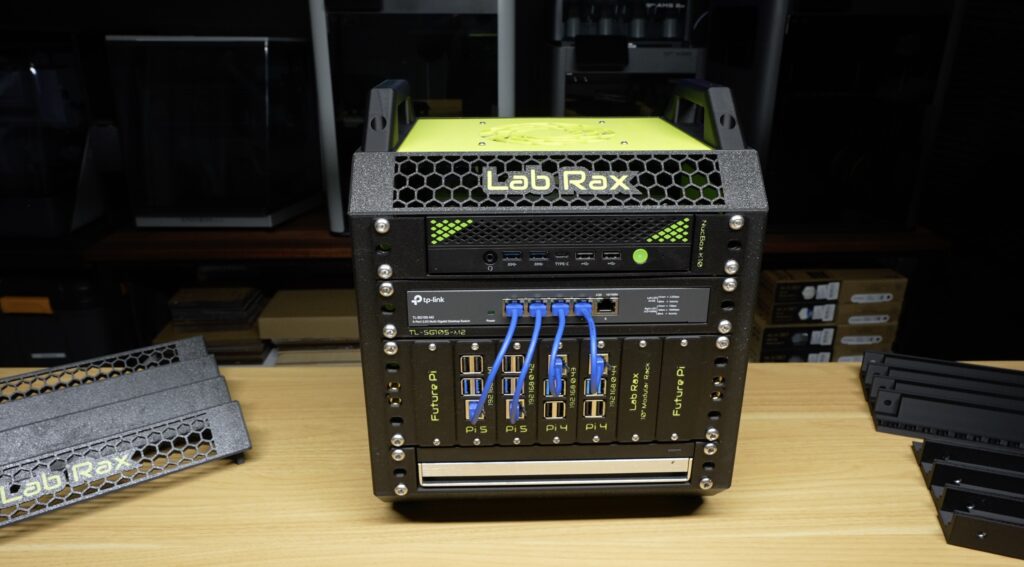
Brass Insert Lab Rax Homelab 3D Print Files
Nut Version Lab Rax Homelab 3D Print Files
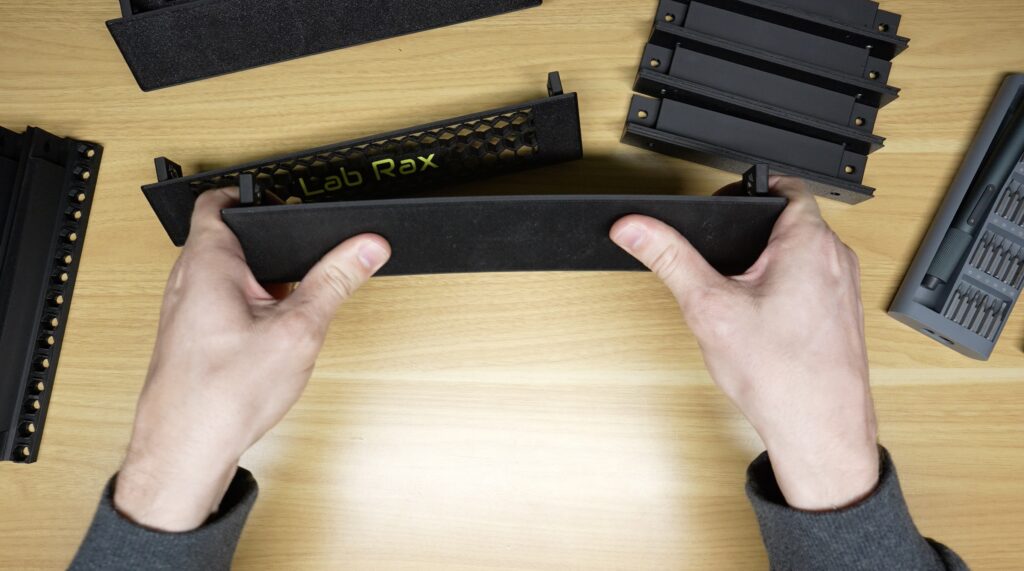
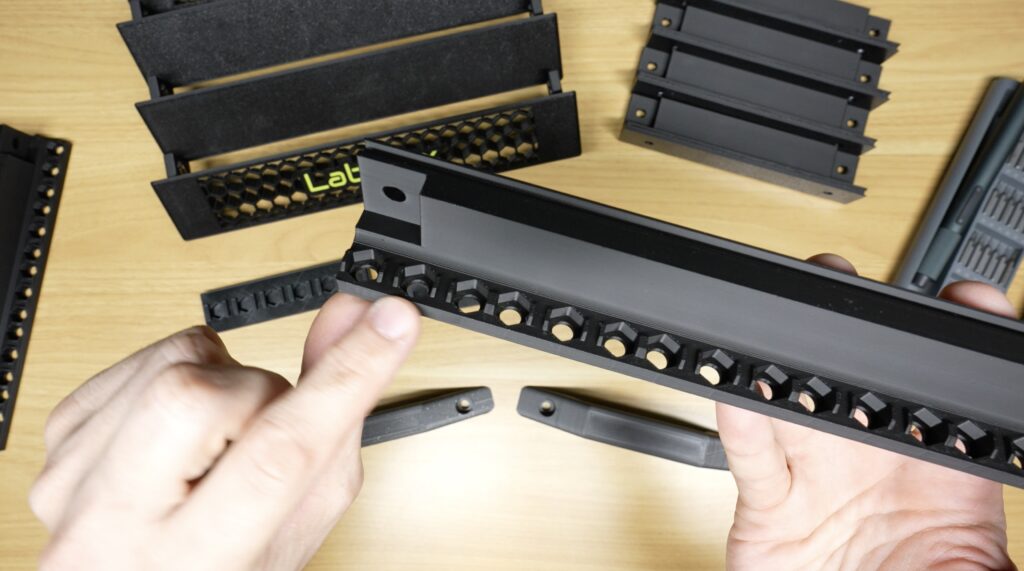
The main changes are ones that aren’t immedietly obvious. I’ve gone through the main structural components, stiffened them up a bit and tightened some of the tolerances. These obviously aren’t visually exciting changes, but they make quite a noticeable difference to its overall strength and rigidity. There’s less movement between the components, and the assembled rack feels a lot more solid.
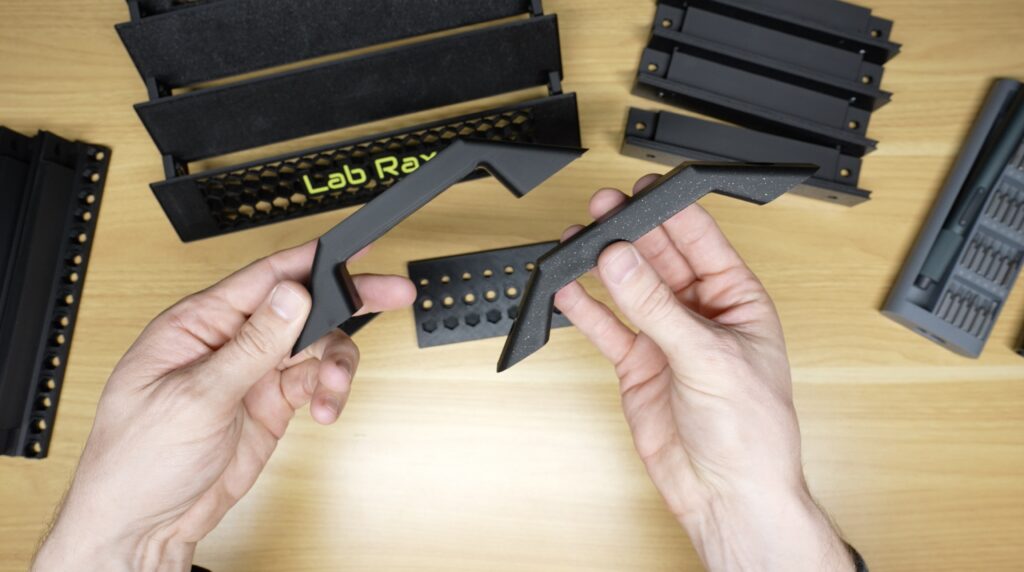
I’ve also redesigned the handles. They’re a little bigger and stronger than the originals, so they’re more comfortable to actually grab and carry the rack with. They keep the generaly profile of the originals, so you may not immedietly notice a visual difference but it’s very apparent when you pick the homelab up.
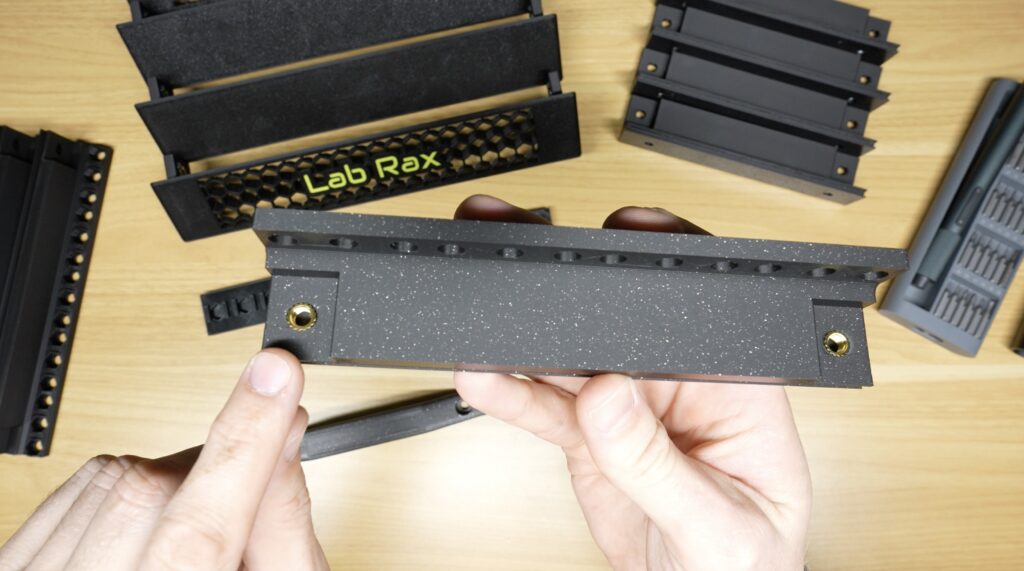
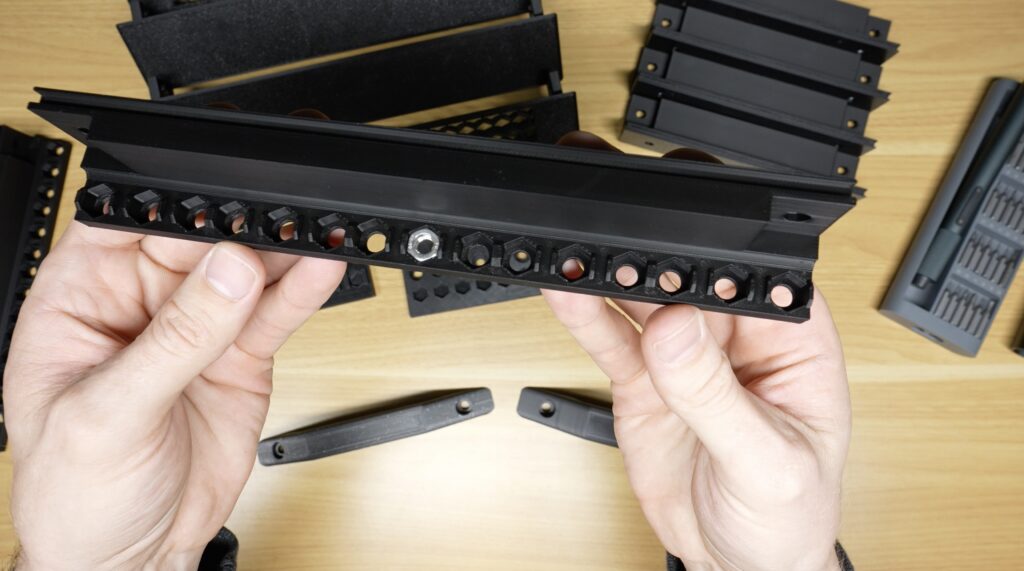
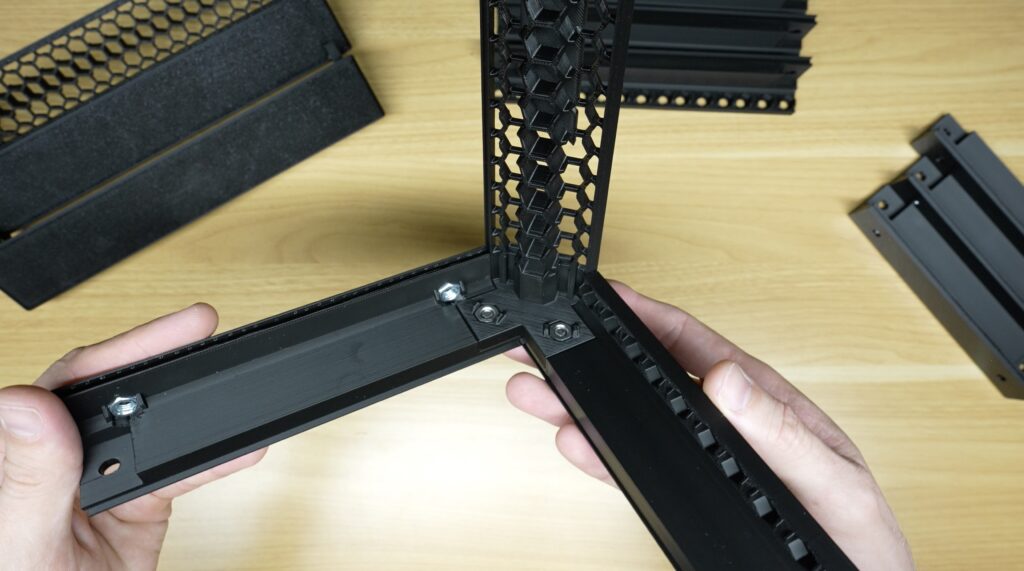
I’ve also made a couple of changes to make assembly easier. There are two versions of the Lab Rax homelab, one that uses heat-set brass inserts and another that uses standard M6 nuts.
On the brass insert version, I’ve adjusted the insert holes to accommodate two different length inserts, which makes them easier to source and you don’t need to find the exact inserts I originally designed it around. You can now use M6 x 8mm OD brass inserts in either 4mm or 5mm lengths. The 5mm ones are more commonly available on both Amazon and Aliexpress.
The nut version now has nut retaining clips. On my previous version, if you didn’t glue them into place then the nuts could move around slightly or fall out while you were assembling the rack. With the retaining clips added, you now press them into the pockets. It’s a tight fit, but you only have to do it once and they’re then captured by the print. This is a small change, but it makes assembly quite a lot easier.
New Lab Rax Accessories
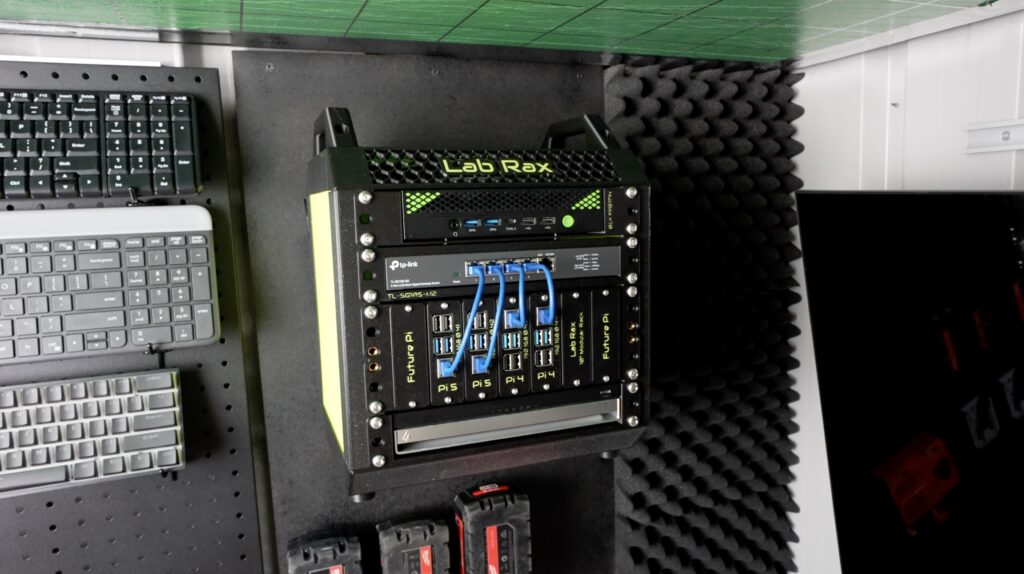
Wall Mounting Cleats
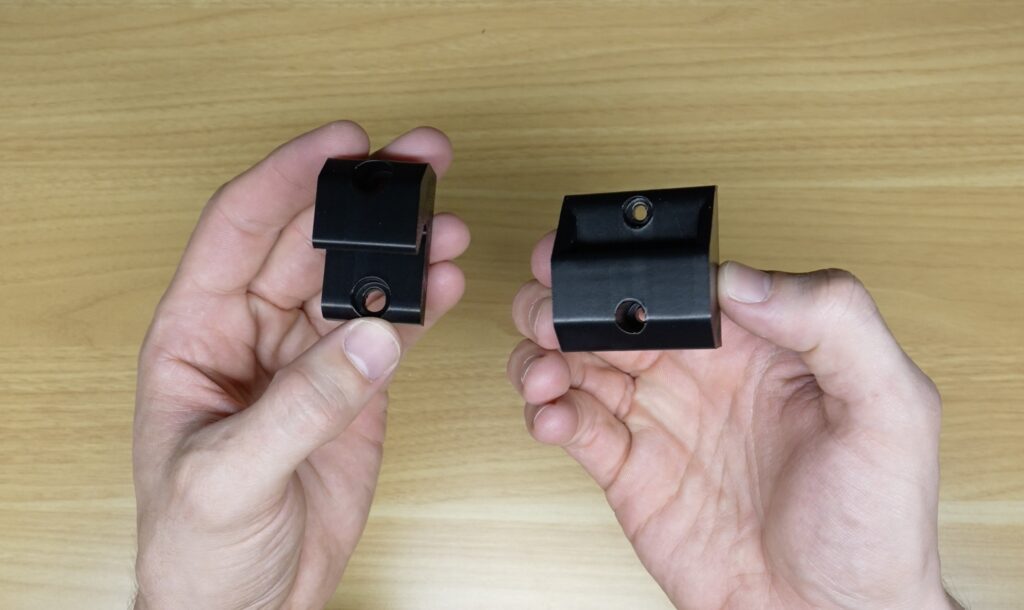
The Lab Rax Wall Mounting Cleats provide a simple and secure way to mount a Lab Rax homelab directly onto a wall. The system uses a pair of interlocking cleats. One set attaches to the rear posts of the Lab Rax and the opposing set mounts to the wall. Once installed, the rack simply slides down onto the wall-mounted cleats and locks into position. A pair of lower spacers is also included to keep the bottom of the rack correctly spaced from the wall so that the Lab Rax sits vertically.
For heavier builds, or if you’d simply like some additional support, a second set of cleats can be installed at the bottom of the rack instead of the spacers.
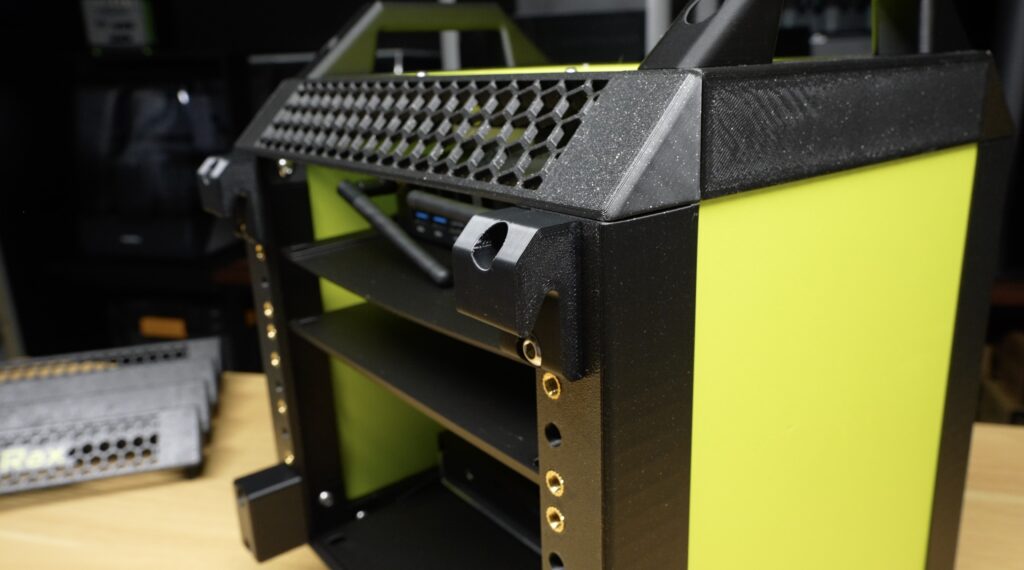
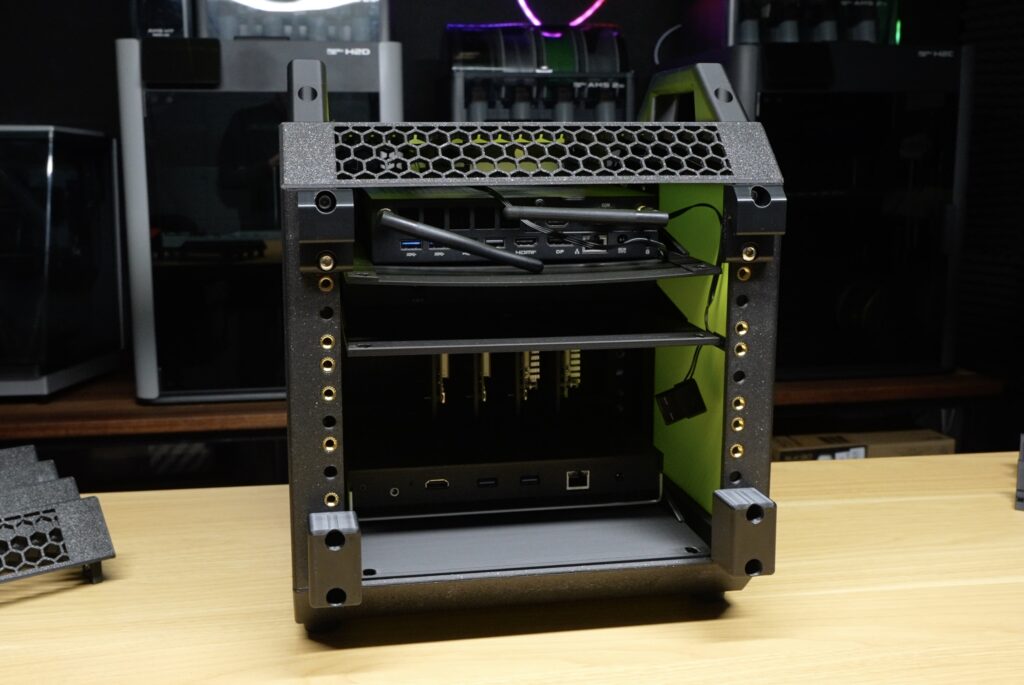
Download the Wall Mounting Cleats
Hardware Required
For a standard installation using one pair of upper cleats and two lower spacers (or a pair of cleats at the bottom too):
- 8 × M6 × 10 mm screws for attaching the rack cleats and lower spacers to the rack – Buy Here
- 4 × 3–5 mm diameter screws and plugs for securing the cleats to the wall – Buy Here
If you’re using additional cleats for a heavier rack, you’ll need additional mounting hardware accordingly.
Printing & Installation
The cleats should be printed in the orientation provided in the print profile. This orientation is intentional so that the weight of the rack is not supported across the layer lines, significantly improving the strength of the printed parts.
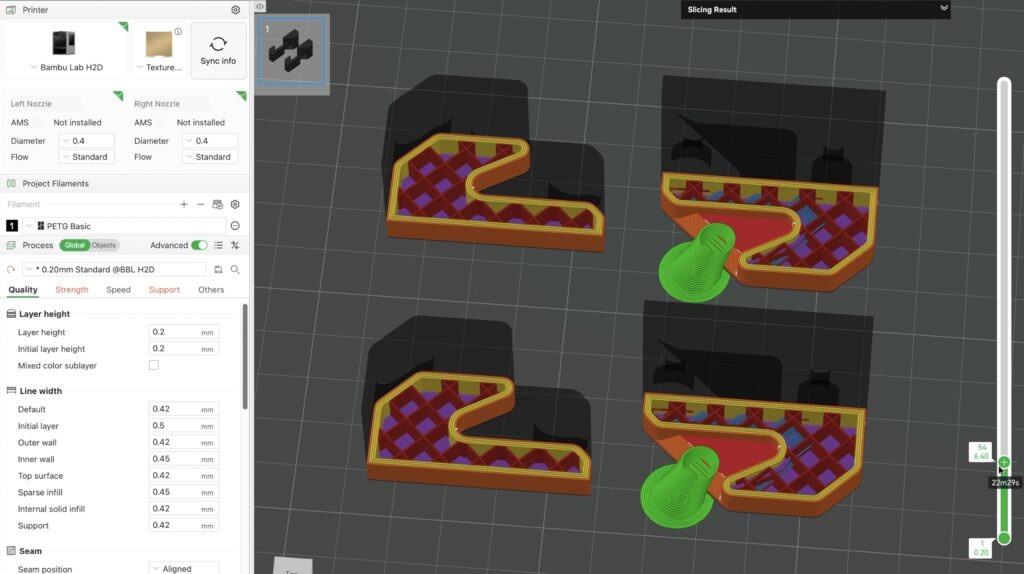
Make sure the wall-mounted cleats are fixed into a suitable structural surface using fasteners appropriate for your wall construction and the weight of your completed homelab.
Once everything is installed, simply align the rack with the wall cleats and slide it down into position.
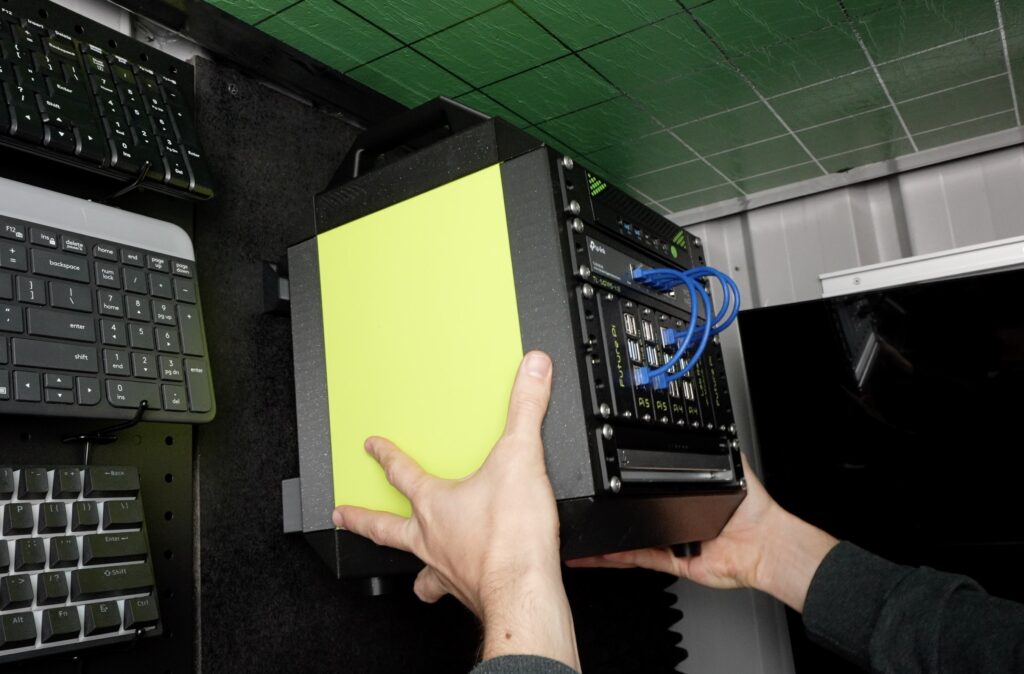
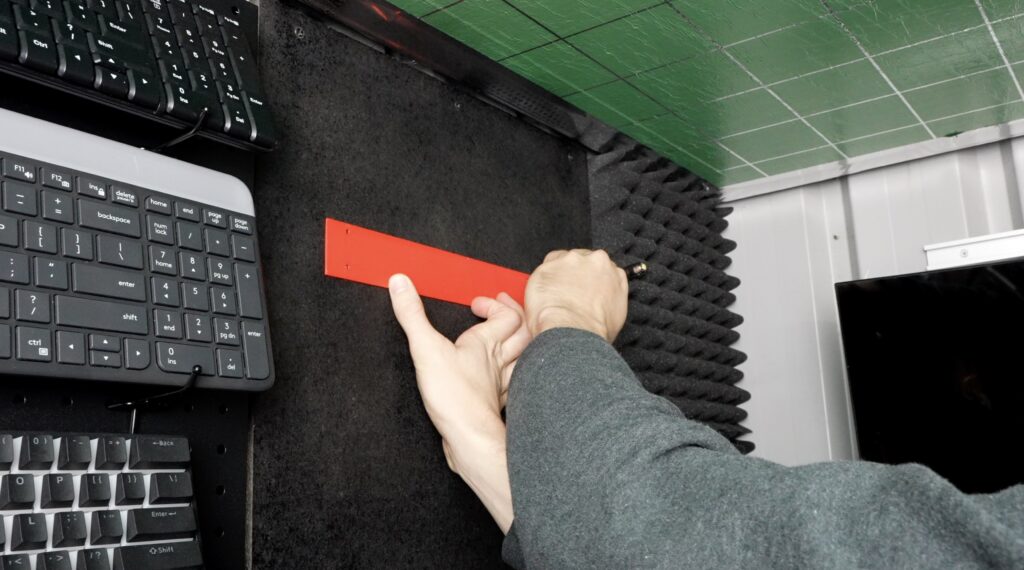
Mounting Template
I’ve also designed two printable mounting templates to make installation and alignment easier:
- Single Cleat Template – correctly positions the two wall cleats for a standard installation.
- Up to 5U Template – includes mounting positions for racks up to 5U, allowing additional sets of cleats to be installed for heavier racks or additional support.
The templates take the guesswork out of positioning the individual wall cleats and ensure that they line up correctly with the cleats installed on the rack.
New Lab Rax Expansion Module
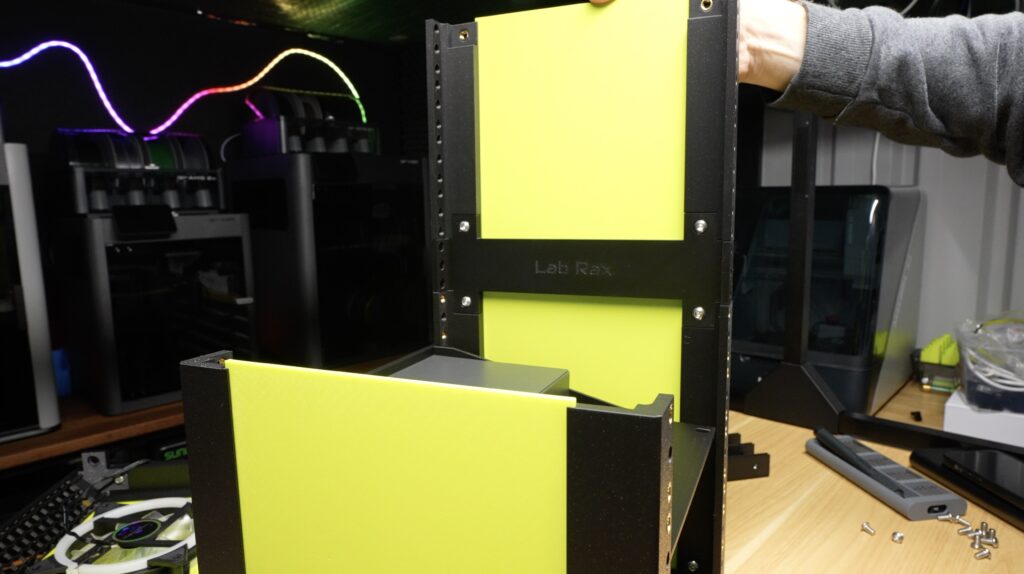
Next is probably my favourite mechanical upgrade. Lab Rax has always been expandable using a set of small domino connectors. They work, but they’re a little light and require a special set of side panels to use as extensions. So, I wanted to rather design something that felt more like a proper structural extension and eliminated the side panel issue.
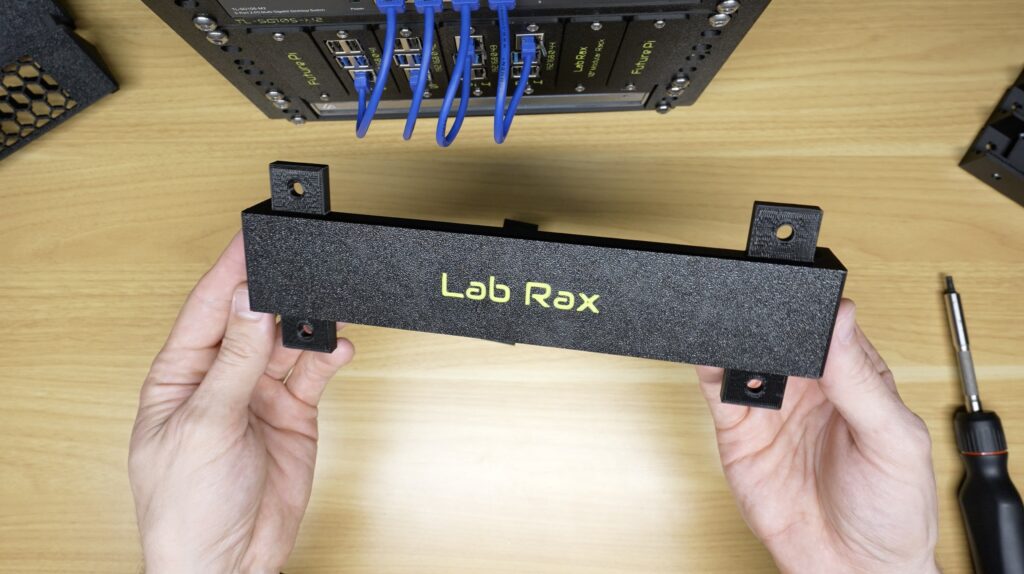
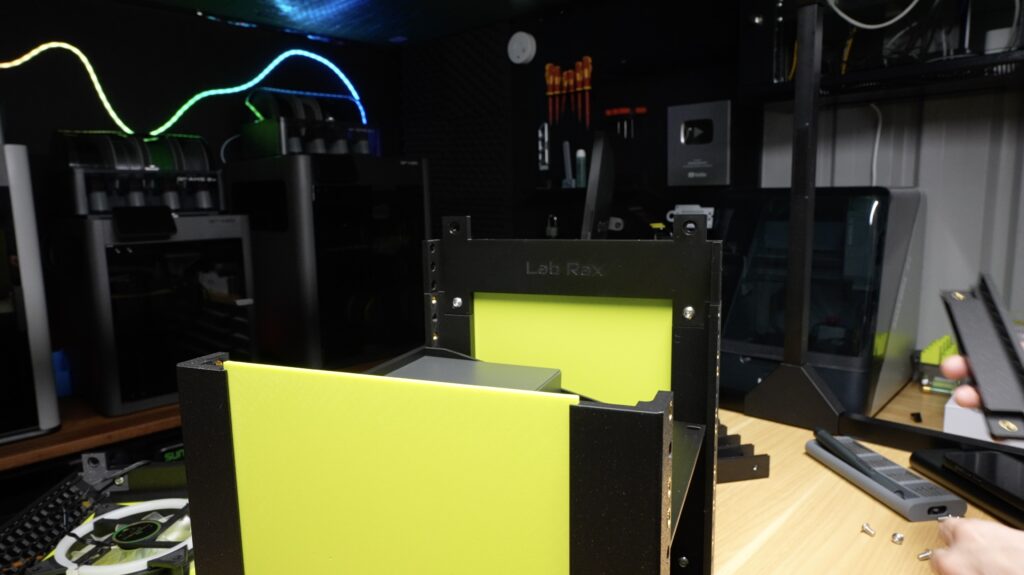
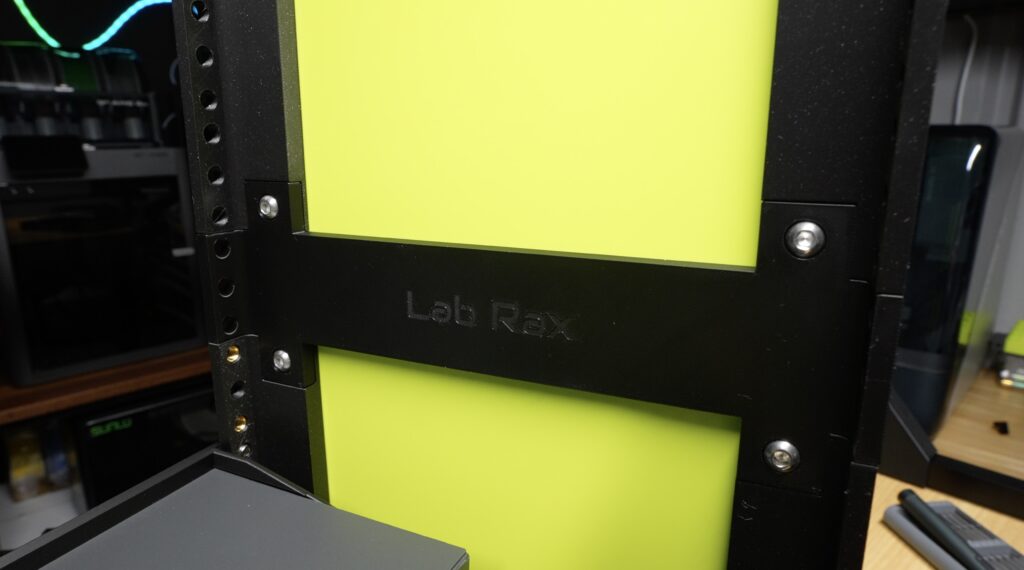
The Lab Rax 1U Extension provides a stronger and more useful way to expand an existing Lab Rax homelab. Rather than simply joining two sets of posts together, the extension adds an additional 1U of usable rack space while also creating a structural cross brace between the front and rear posts. This helps strengthen and stiffen the connection between the two sections of the rack.
The extension is fully compatible with the original Lab Rax posts and side panels, so you can expand an existing build without having to reprint the rest of your rack.
Each extension attaches using 4 × M6 button head screws per side, creating a secure connection between the existing sections.
- M6 x 10mm Button Head Screws (8 Required In Total) – Buy Here
This is a useful option if you’ve outgrown your original Lab Rax and want to add more equipment without printing an entirely new rack.
Download the Extension Module Print Files
So, like with the original domino connections, you can start with a small homelab and when it inevitably gets out of control, you don’t have to print an entirely new rack. You can just keep expanding it.
Stackable Handles
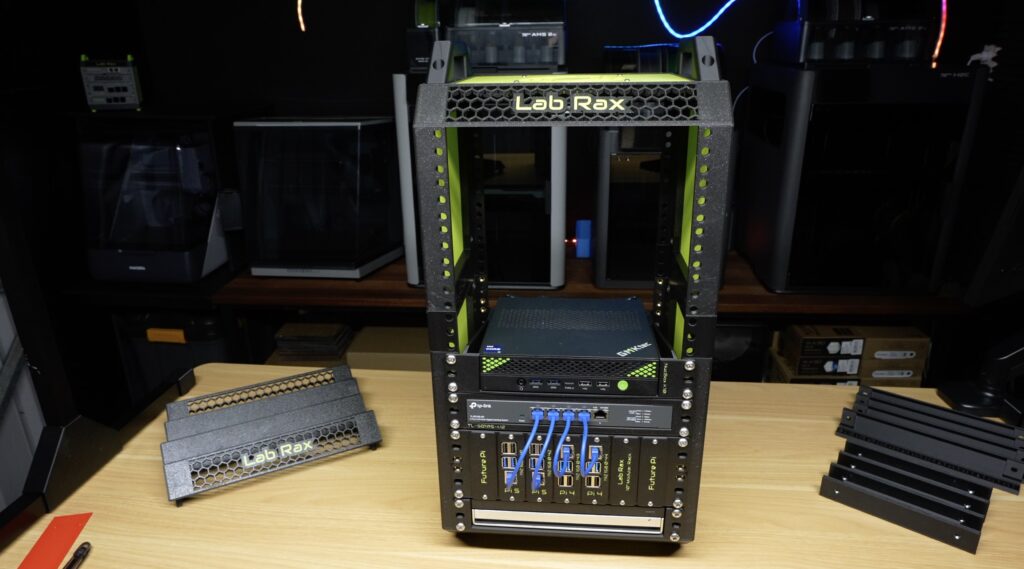
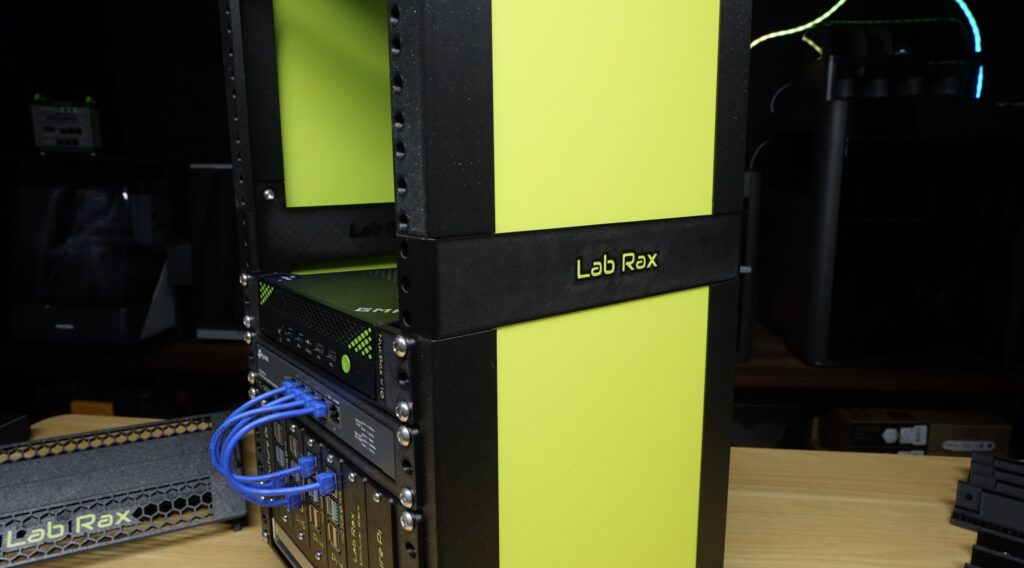
What if instead of extending your homelab, you went and built two? The Lab Rax Stackable Handles are an alternative to the standard handles that allow multiple Lab Rax homelabs to be securely stacked on top of each other.
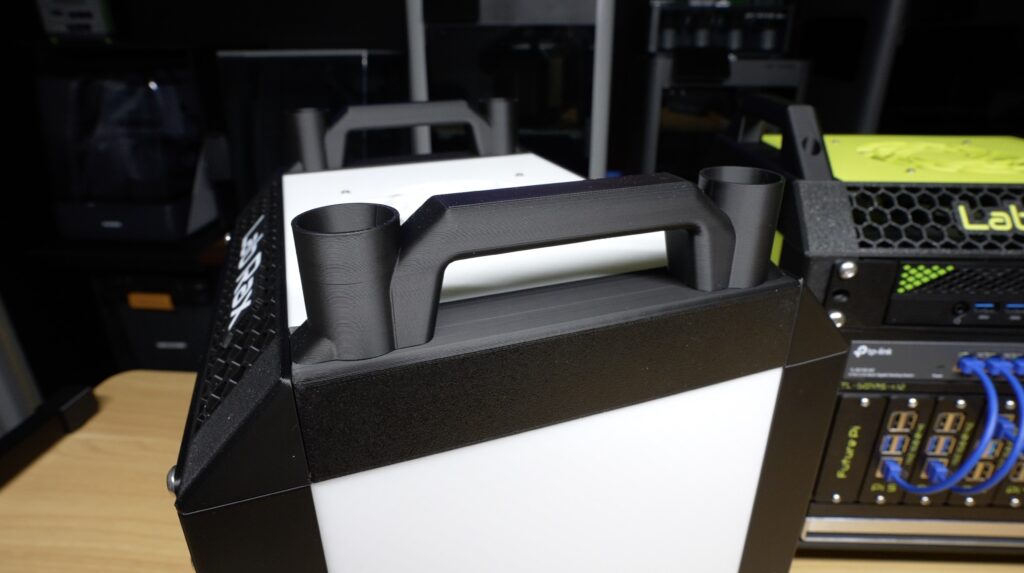
Download the Stackable Handles Print Files
They retain the general profile and function of the original handles, but the top has been redesigned to locate and support the original Lab Rax feet from the rack above. Rather than simply balancing one Lab Rax on top of another, the feet locate into the stackable handles, keeping the two racks aligned and creating a much more stable stack. This is particularly useful if you want to keep different parts of your homelab separate, for example, using one Lab Rax for networking equipment and another for servers or storage, while still keeping everything together in a compact setup.
Hardware Required
Each handle is attached to the Lab Rax using:
- 2 × M6 × 10 mm screws – Buy Here
A set of two handles therefore requires:
- 4 × M6 × 10 mm screws – Buy Here
The upper homelab needs to use the standard Lab Rax feet, which locate directly into the recessed sections on top of the stackable handles.
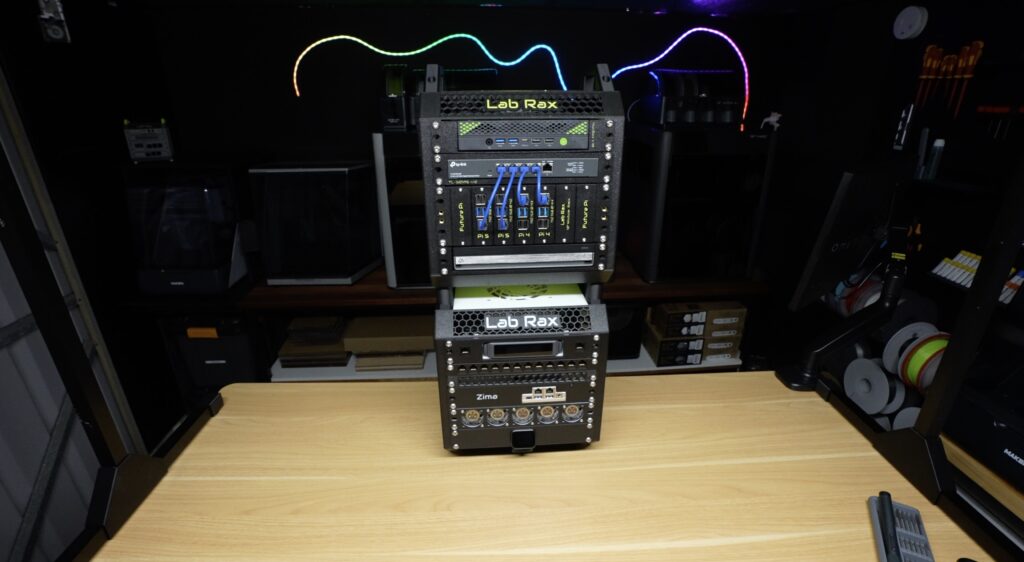
NeoPixel Light-Up Lab Rax Logo
Next, if I dim the lighting you’ll notice that the Lab Rax logo on this build is glowing.
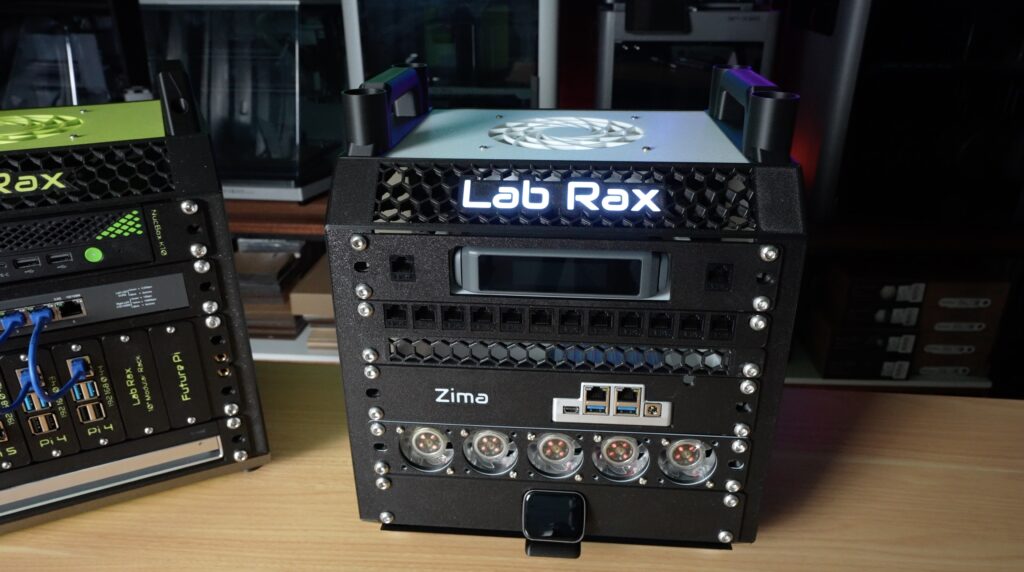
Download the NeoPixel Light-Up Lab Rax Logo
This turned into a slightly bigger project than I originally intended. I’ve integrated addressable NeoPixel LED bars behind the logo.
The NeoPixel Light-Up Lab Rax Logo replaces one of the standard horizontal front pieces with an illuminated Lab Rax logo that can be used for decorative lighting, animations or even homelab status information.
The logo is illuminated using two 8-pixel addressable NeoPixel LED bars, giving you 16 individually addressable LEDs that can be controlled using an ESP32, Arduino or Raspberry Pi.
This means the logo doesn’t have to be just decorative. You can integrate it with your homelab and use different colours and animations to indicate things like CPU load, temperature, network activity, storage usage, Docker container status, backup progress or system warnings.
Hardware Required
- 2 × 8-pixel NeoPixel LED bars – Buy Here
- 2 x M3 Brass inserts OD 4-5mm – Buy Here
- 2 x M3 x 8mm Button Head Screws – Buy Here
- Breadboard jumpers – Buy Here
- Microcontroller or Pi, an ESP32 is a cheap and easy way to drive the light – Buy Here
Assembling the NeoPixel Bars
The lighting assembly uses two 8 pixel NeoPixel bar lights, which need to be positioned end-to-end and soldered together to bridge their terminals. Bridge the corresponding power and ground terminals between the two bars and connect the OUT terminal of the first bar to the IN terminal of the second. This allows all 16 pixels to operate as a single addressable LED strip.
You’ll also need to solder a set of jumper wires onto the IN end of the first bar for power, ground and the data connection to your chosen controller.
The combined NeoPixel bar assembly mounts to the rear cover plate, positioning the LEDs directly behind the Lab Rax logo.
There are two mounting options:
- Secure the bars using small screws through the provided mounting holes.
- Glue the bars directly onto the cover plate using 3D print compatible glue.
If using screws, make sure the screw heads and hardware do not contact or bridge any of the surrounding electrical components or PCB traces on the NeoPixel bars. The microcontroller can then either be mounted to the rear of the cover plate or installed separately on a tray inside the Lab Rax.
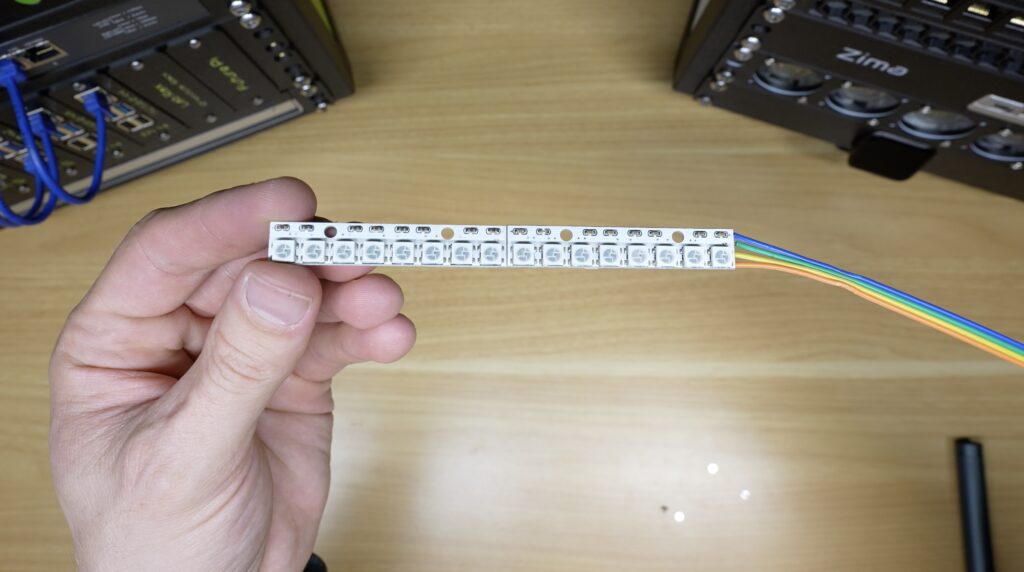
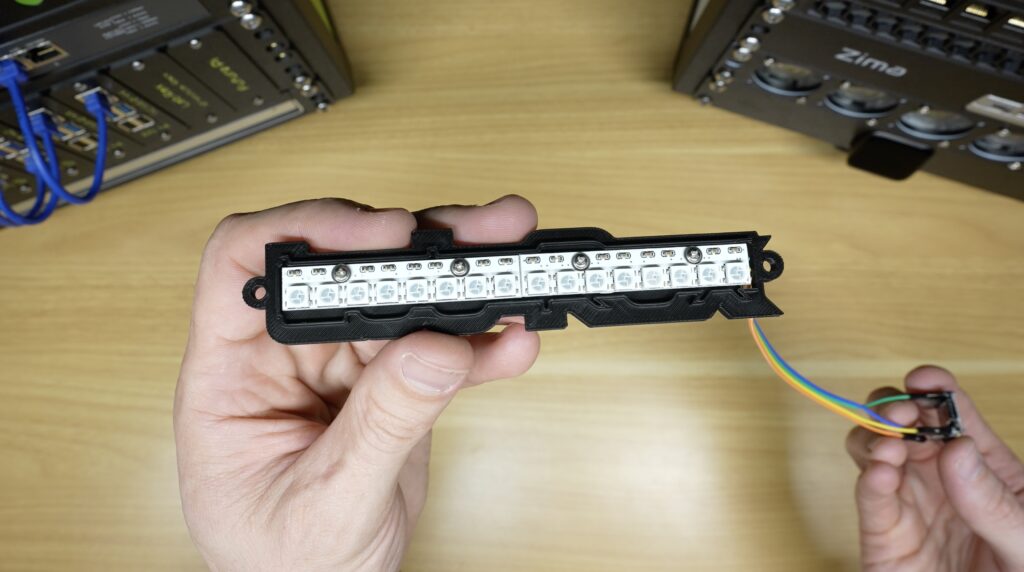
The rear cover can either be glued permanently into position or made removable using M3 screws.
To keep the cover plate removable, install the brass inserts into the two holes alongside the logo. The cover plate can then be secured with the M3x8mm screws, allowing access to the NeoPixel bars if you ever need to repair or modify the lighting.
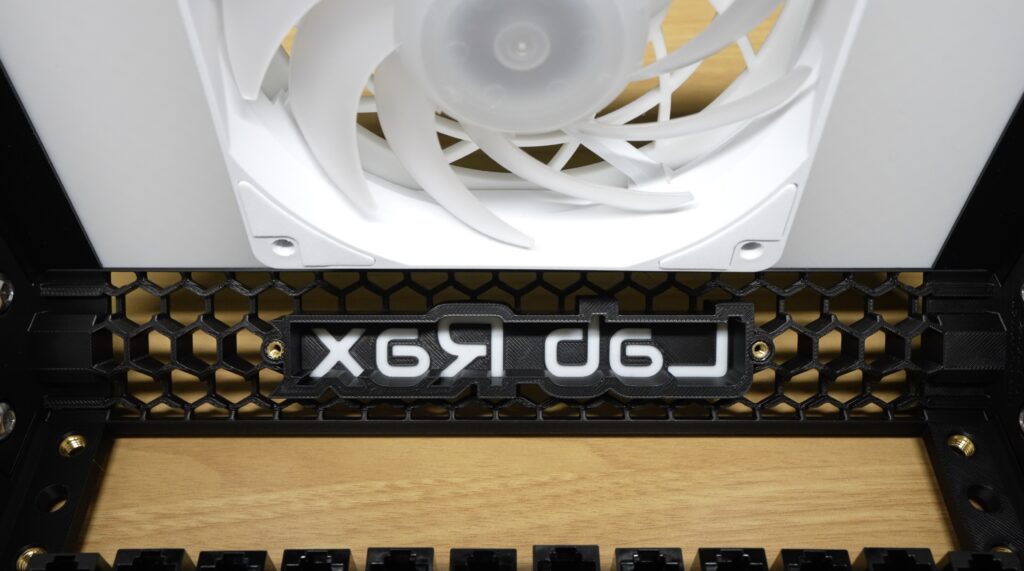
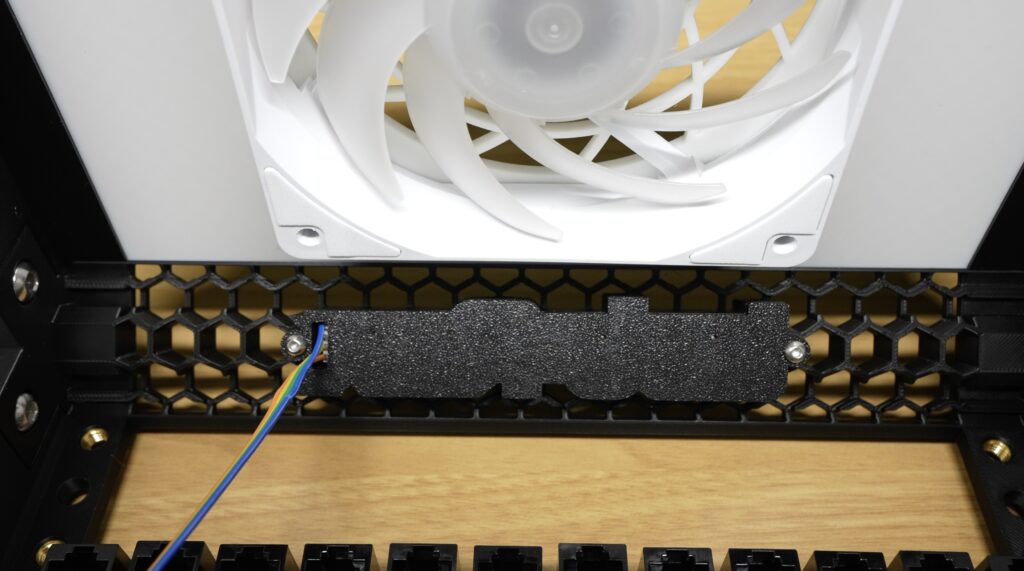
The main logo piece is designed as a direct replacement for an original Lab Rax horizontal front edge piece, so it integrates into the existing rack structure.
It’s designed to be installed across the front of the rack where the illuminated logo is easily visible, but it can also be installed at the bottom or rear of the Lab Rax if that better suits your build.
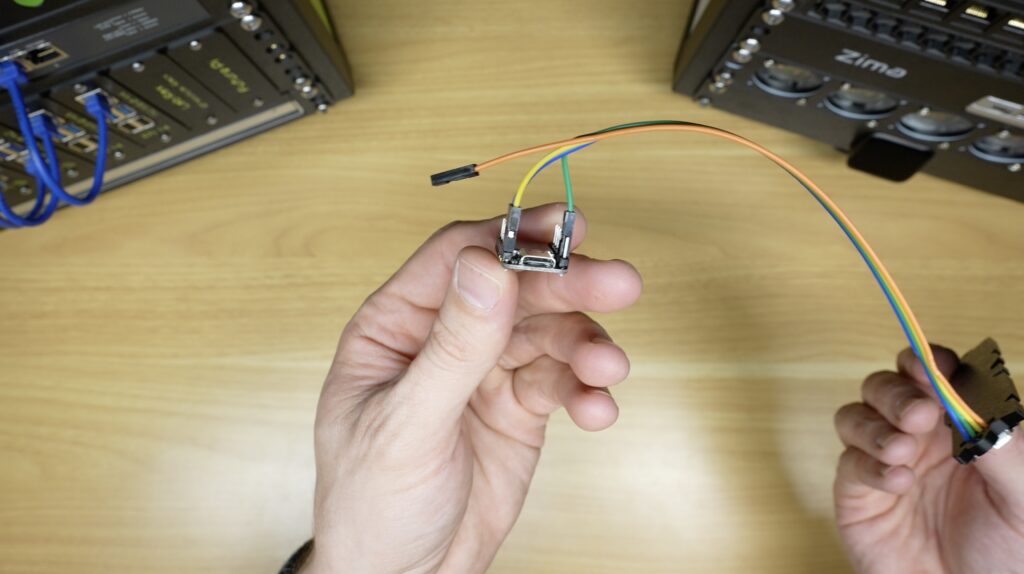
Example Illuminated Lab Rax Logo Code For an ESP32
Here are some ideas for it:
- Decorative white or blue light glow
- As a decorative effect, during normal operation, it’s just got a subtle white and blue glow.
- Activity white pulse across the logo
- When there’s significant network or CPU activity, a white pulse travels across the display.
- Boot up animation
- When your main rack computer boots up, the light sweeps across the logo.
- Amber warning pulse
- A warning or notification changes the logo to a slow amber pulse.
- Red service alert pulse
- If a service or node goes down, the logo pulses red.
- CPU Load Monitor
- At low load, the logo is green and it then progresses through yellow towards red as CPU load increases and drops back towards green as the load decreases.
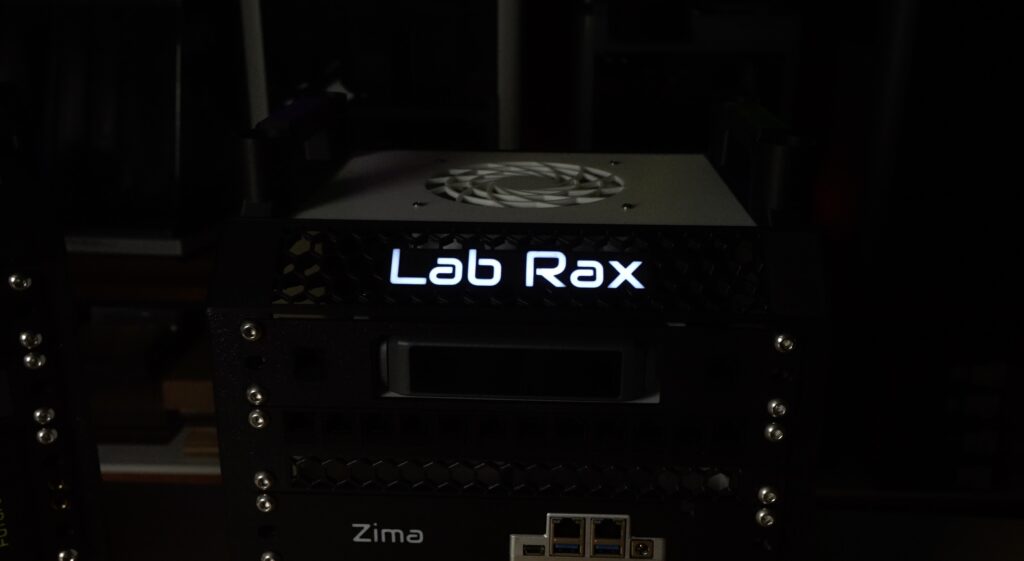
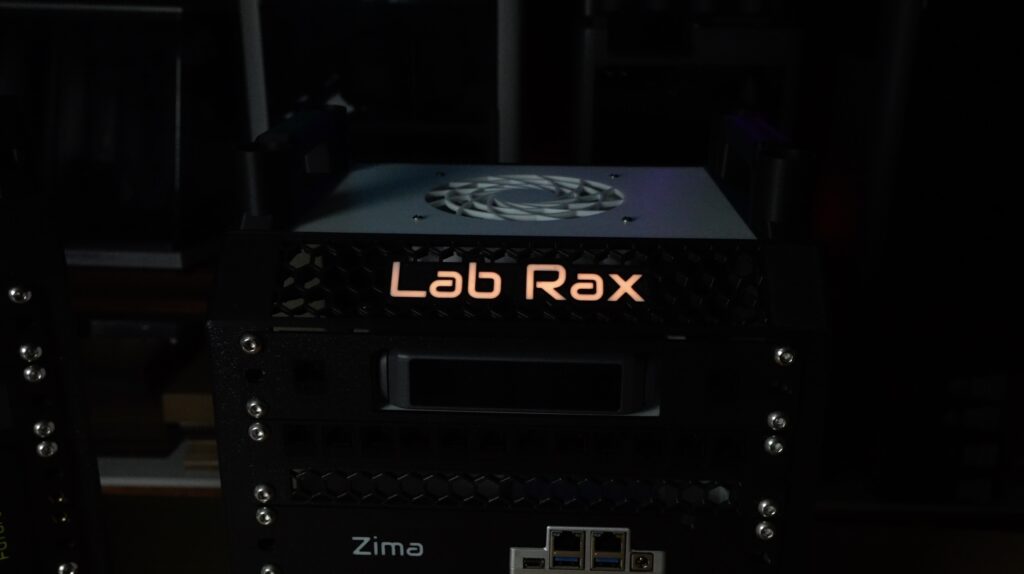
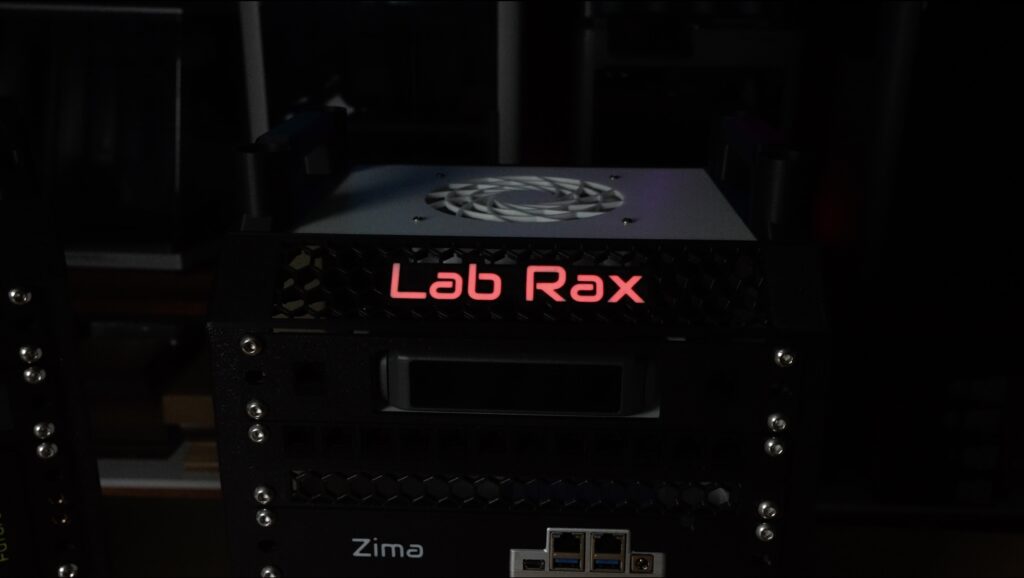
These are just a few easy examples. You could tie it into CPU temperature, storage usage, network activity, Docker container status, Home Assistant alerts, or pretty much anything your server can monitor. I really like this because it gives the lighting an actual purpose. You can now glance across the room and immediately get an idea of what your homelab is doing.
Lab Rax Bottom Accessory Drawer
The Lab Rax Bottom Drawer makes use of the otherwise wasted space underneath the lowest rack unit, turning it into a convenient storage drawer for small homelab accessories.
Rather than adding a drawer to the existing base, this model replaces the entire lower section of the Lab Rax with a single printable part. The bottom panel, two lower horizontal members and two lower edge pieces have all been combined into one part, with the drawer integrated into the free space.
Once printed, the original Lab Rax vertical posts can be installed directly onto the new base.
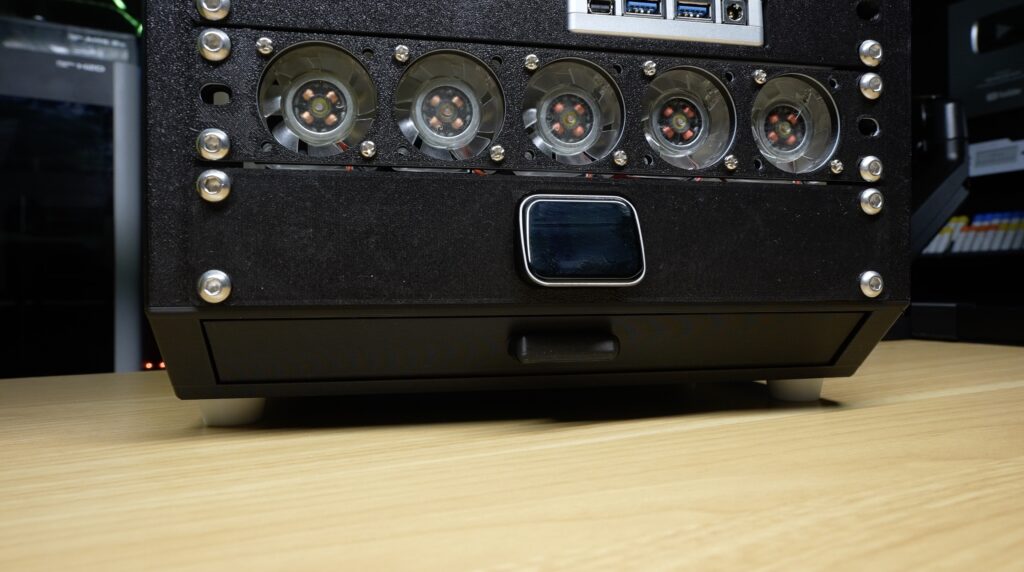
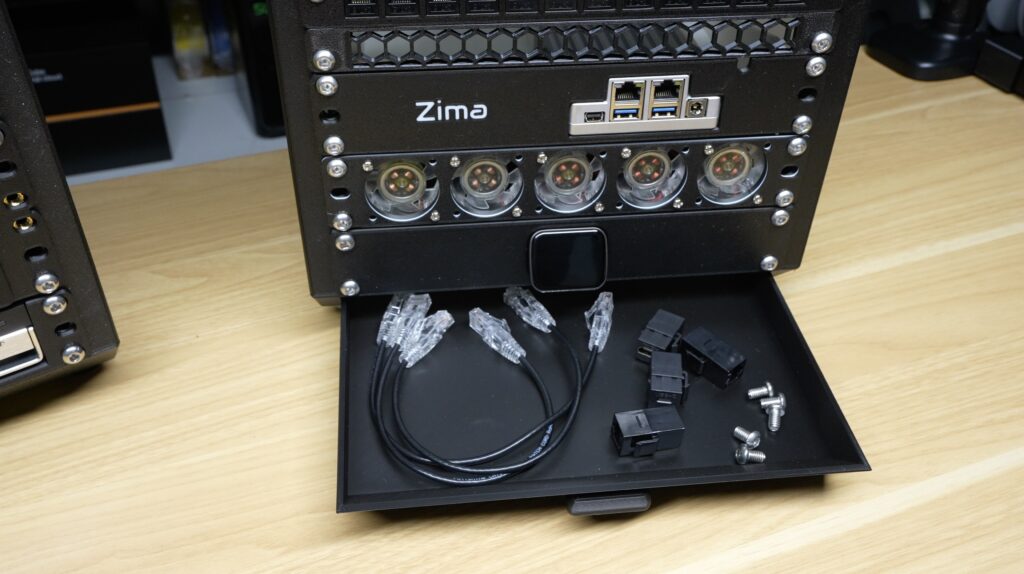
It’s not very big, but the drawer is ideal for storing the small parts that tend to accumulate around a homelab, such as short patch cables, keystone jacks, USB adapters, rack screws and small tools.
Download the Bottom Accessory Drawer Print files
Hardware Required
No additional drawer hardware or parts are required.
You’ll only need:
- 4 × M6 × 10 mm screws for securing the four vertical posts to the new base (from standard Lab Rax build) – Buy Here
Everything else required for the drawer assembly is 3D printed.
What’s Replaced?
The new one-piece drawer base replaces the original:
- Bottom panel
- 2 × bottom horizontal pieces
- 2 × bottom edge pieces
These are all incorporated into the single printable base, so you don’t need to print the original parts as well.
Drawer End Stops
Two printable end stops are included to prevent the drawer from being accidentally pulled completely out of the rack.
With the drawer already installed, press the two end stops into the receivers in the base, located behind each of the front vertical posts.
The stops capture the drawer once installed, so make sure the drawer is in place before fitting them. Once the stops are fitted and the rack is assembled, the drawer cannot be removed without removing the stops.
The stops should be a press fit. If they print slightly loose on your printer, either reprint them with a 1.05% scaling and try again or a small amount of glue can be used to secure them in place.
Cable Management Add-ons
Lastly, there’s one thing that ruins every nice-looking homelab, and that’s a mess of cables. So I’ve done a bit of work on cable management.
First up are some cable guides for the sides. These keep cables bundled together and against the posts. This is particularly useful around the back of the rack.
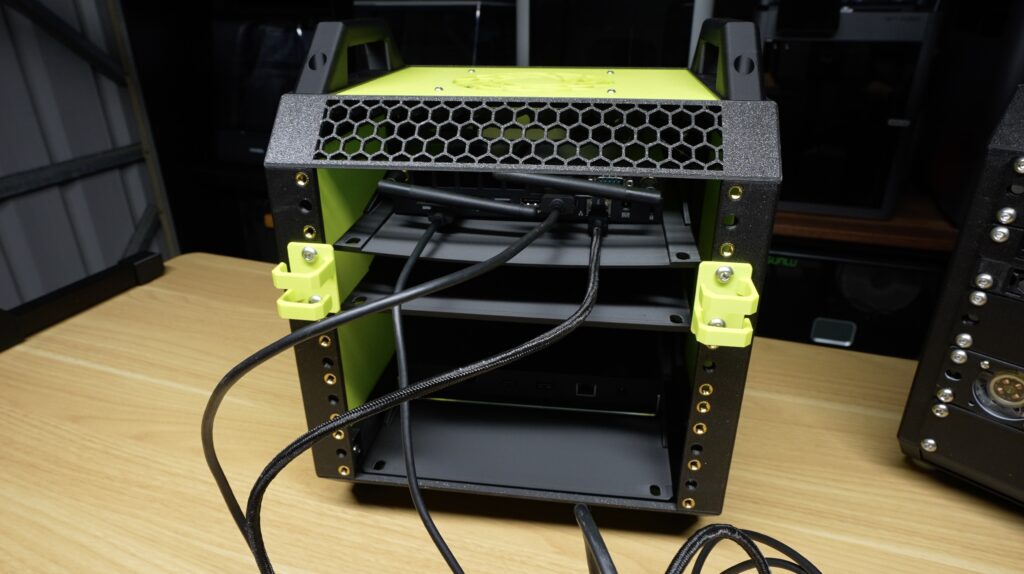
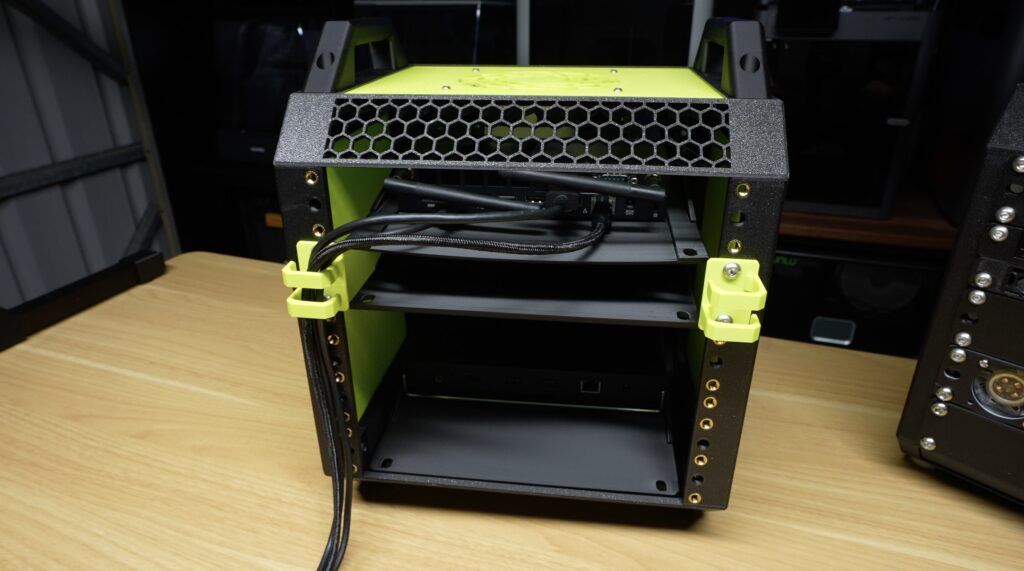
Rather than having cables hanging through the middle where they interfere with connectors, USB devices or ventilation, the guides keep them all running neatly down the structure of the rack. They’re also designed in a way that keeps the cables securely within the guide, but cables can be easily added or removed without unscrewing anything. They fit into one rack unit, so you can add them wherever you need them.
I’ve also designed two simple cable combs for network and power cables. These mount directly onto a post and keep individual cables separated and evenly spaced. I’ve made them for either horizontal or vertical cable runs, depending on how your equipment is laid out.
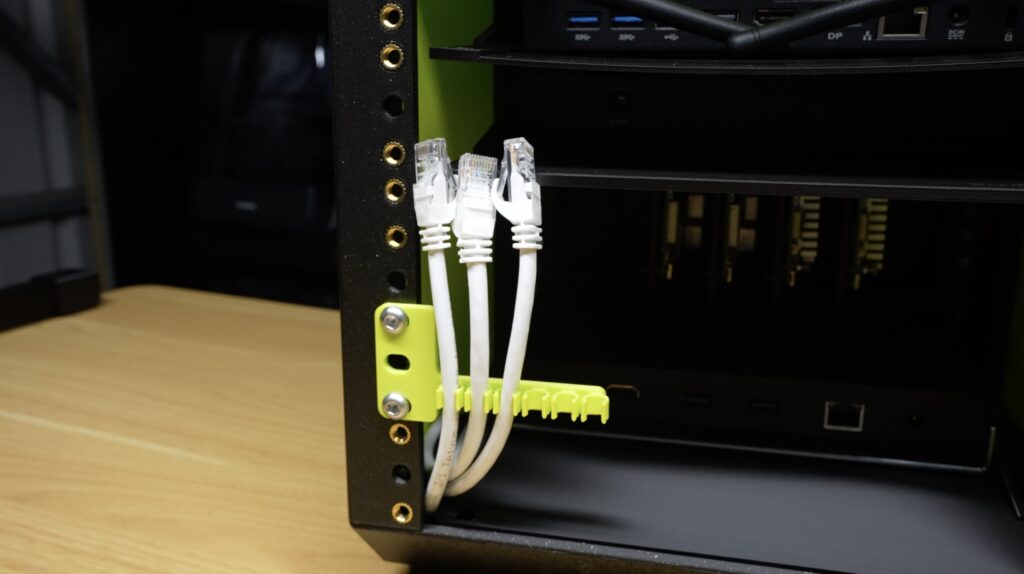
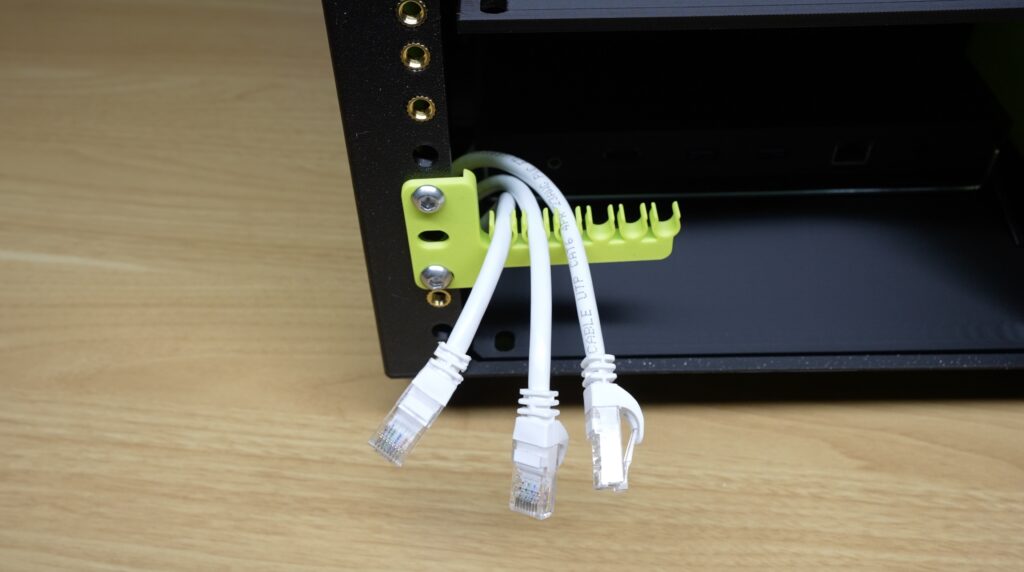
Lab Rax Cable Management Combs (6 Cables)
That’s everything I’ve added to Lab Rax for now, but I’m sure it won’t be the last round of upgrades. One of the things I enjoy most about a modular system like this is that there are always new ways to improve it or another accessory that could make it more useful.
If you’re using Lab Rax yourself, or you’ve got an idea for an accessory or upgrade that you’d like to see added, let me know in the comments below. I’m always looking for ideas for what to design next.
Hey Michael
I wished I had seen your posts before I bought the other system I use. I have printed your hard drive caddys and they are brilliant. But your cable management system is a game changer. But I can’t find the stl files. Are they available please?
Thanks
Rich
Hi Michael, love the new upgrades! I’m building out a rack using the new Nut/Bolted Version (M6 / #10-32) since I prefer not dealing with heat-set inserts. I noticed the current files for the 1U Extension Module, NeoPixel Logo panel, and Bottom Drawer only seem to be set up for the brass insert version.
Do you have plans to release nut/bolted variants for these three accessories, or add them to the Bolted Version 5U profile set down the road?
Thanks for all the incredible work on this system!