


What if you could take a useful portion of the internet with you anywhere, completely offline?
In this box is access to Maps, Wikipedia, an AI assistant, useful tools, and even things my own media library, all running locally, without needing an internet connection.
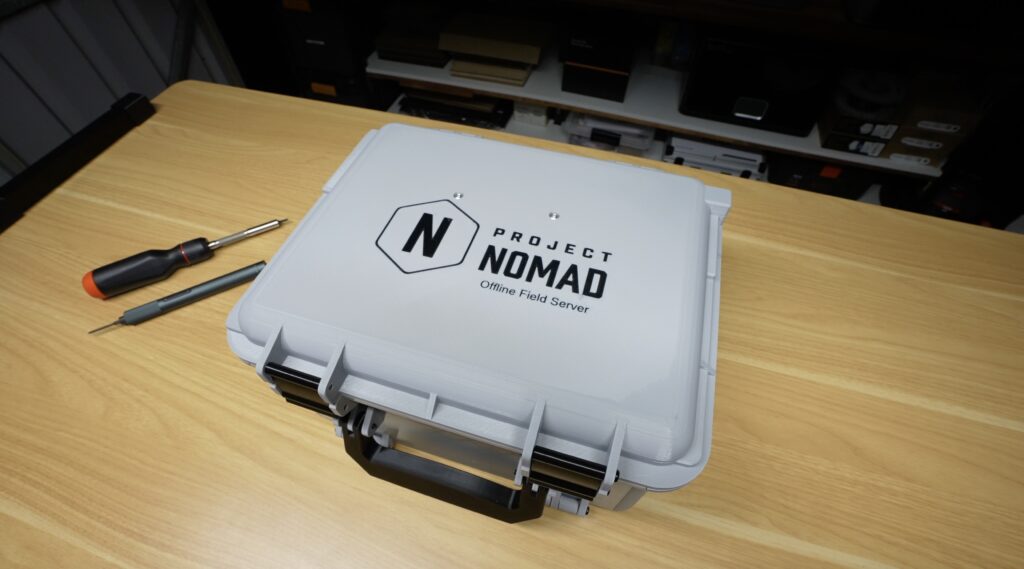
This is Project Nomad, a portable offline internet and I’ve built the whole system into this portable case, with its own computer, network infrastructure, Wi-Fi 7 router and OLED touchscreen.
You can use it like a standalone computer, or connect your phone, tablet or laptop to it and access all of these offline services over the network, just like you would normally access things on the internet.
While something like this obviously has applications for emergency preparedness, there are actually practical everyday uses for it too. You can take it off-grid camping, use it on a boat, keep it at a remote property or on a farm with unreliable internet, take it travelling, or just use it as a portable homelab.
Let me show you how I built it.
What You Need For This Build
- Beelink SER 9 Max – Buy Here
- Uperfect GR14BU 14″ 3K OLED Display – Buy Here
- 10G QNAP Network Switch – Buy Here
- GLiNet Slate 7 Router – Buy Here
- Ethernet Keystone Jacks – Buy Here
- HDMI Keystone Jacks – Buy Here
- Network Patch Leads – Buy Here
- Noctua NF-A4x10 Fan – Buy Here
- DC-DC Buck Converter – Buy Here
- M6x10mm Button Head Screws – Buy Here
- M6 Brass Inserts 8mm OD, 5mm Length – Buy Here
- M3 x 8mm Button Head Screws – Buy Here
- M3 Brass inserts OD 4-5mm – Buy Here
Tools & Equipment Used:
Some of the above parts are affiliate links. By purchasing products through the above links, you’ll be supporting this channel, at no additional cost to you.
What Is Project Nomad?
The starting point for this build is open-source software called Project Nomad. The idea behind it is to give you a collection of useful services and information that are hosted entirely locally.
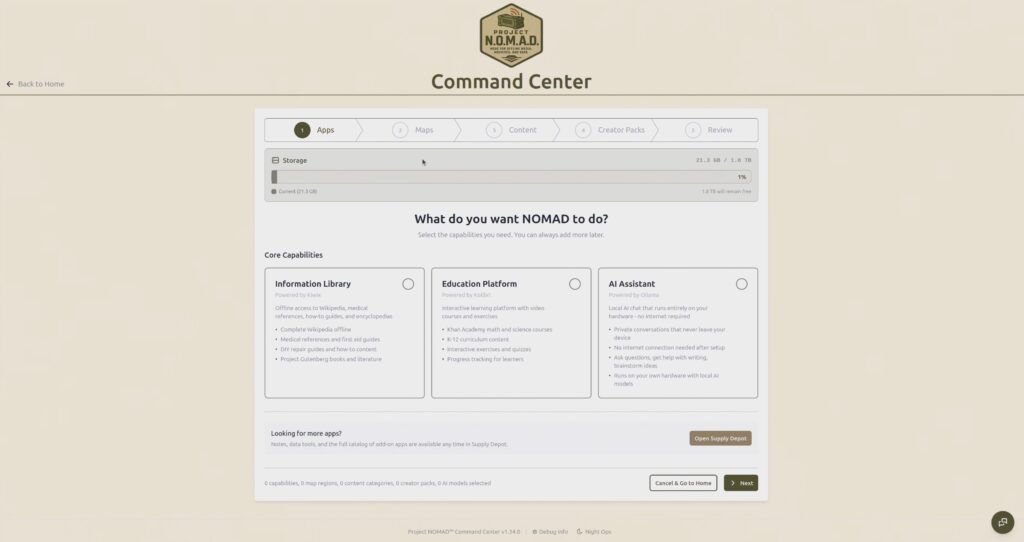
So, instead of opening Google Maps and downloading map data from the internet, you can host your own offline maps.
Instead of going to Wikipedia, you can have an entire copy of Wikipedia stored locally.
And rather than sending a question off to ChatGPT or another cloud AI service, you can run a large language model locally on your own hardware.
None of these require an internet connection once everything has been downloaded and configured.
Making It An Offline Internet
There’s an important distinction I wanted to make with this build. I didn’t want an offline PC, I wanted an offline internet.
I want to be able to open my phone, connect to this system over Wi-Fi, and access Wikipedia, or open a tablet and look at a map, or have somebody else connected to the same network using the AI assistant from their laptop.
So the next step was to build a complete portable network around Project Nomad and for that I’m using three main pieces of hardware.
Beelink SER9 Max
At the centre of the build is the Beelink SER9 MAX.
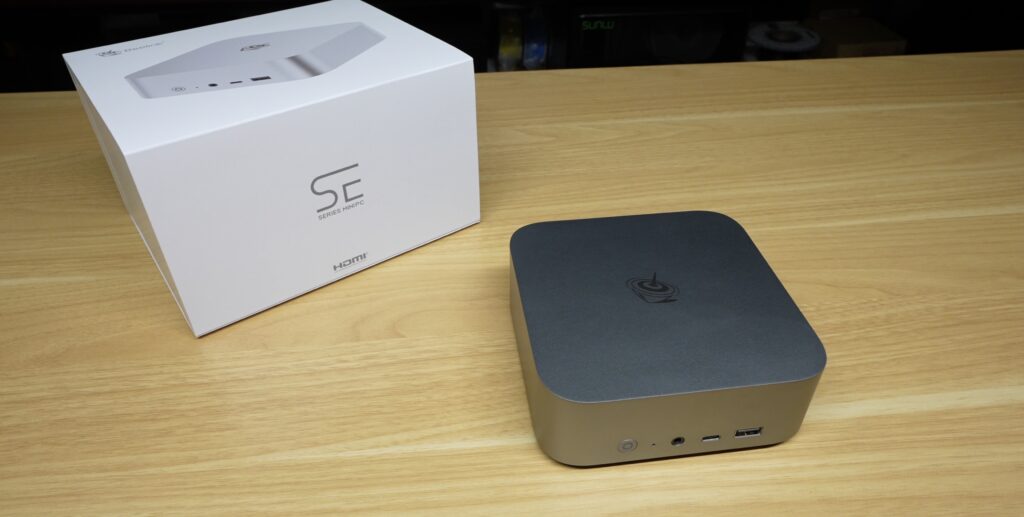
Beelink provided this PC for the project and it’s quite a lot more powerful than you need to just to host offline maps and Wikipedia.
This model has an AMD Ryzen 7 H 350 processor, 32 gigabytes of RAM and a 1 terabyte SSD. Importantly for this project, it has a fairly powerful Radeon 860M integrated GPU.
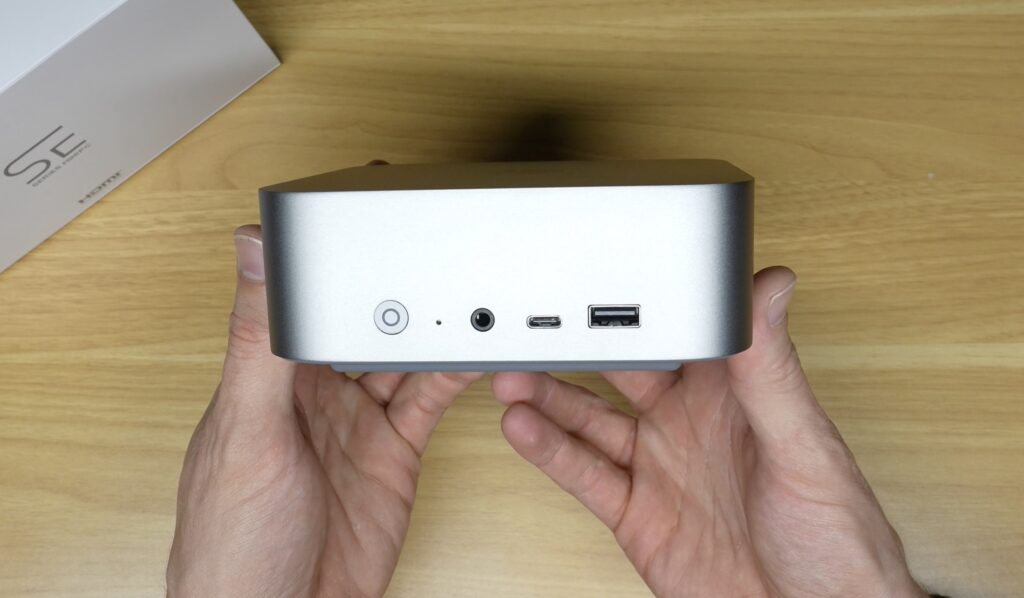
Memory is dual channel and it’s got a second NVMe slot internally so you can easily upgrade storage for more media.
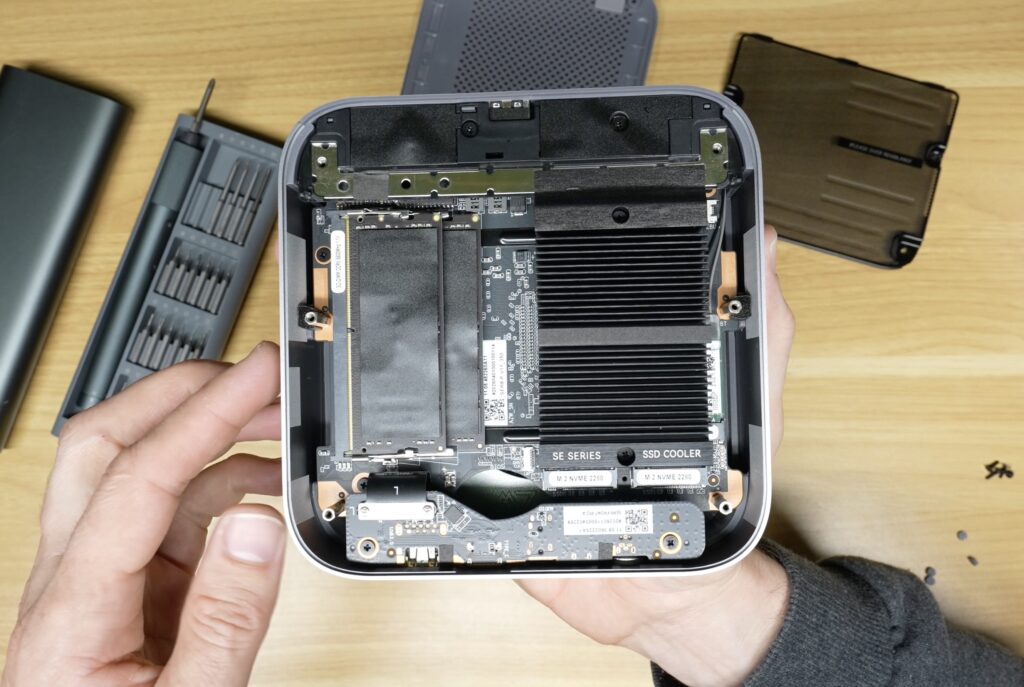
Wikipedia and maps are quite easy to host but the demanding part is running the AI models. You can run smaller local models on less powerful hardware, but if you’re waiting around for each word to appear, it quickly stops feeling like a useful assistant.
The RAM, CPU and GPU performance of the SER9 Max means I can run more capable models locally and still get useful inference speeds.
The SER9 MAX also has built in 10-gigabit Ethernet, which is another feature that works particularly well with the rest of this build.
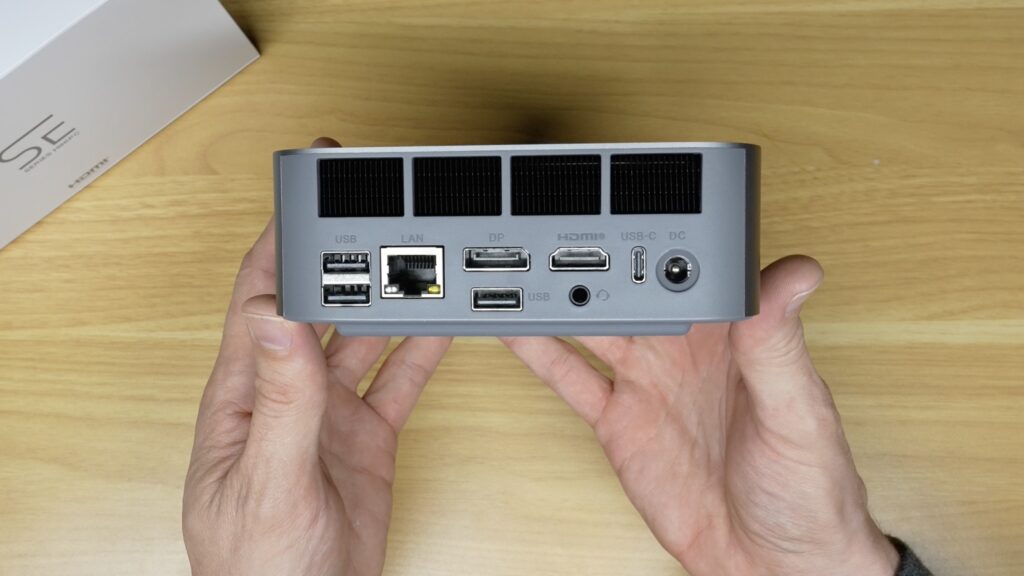
GL.iNet Slate 7
The second part of the system is the router. I’m using the GL.iNet Slate 7, which creates the Project Nomad network.
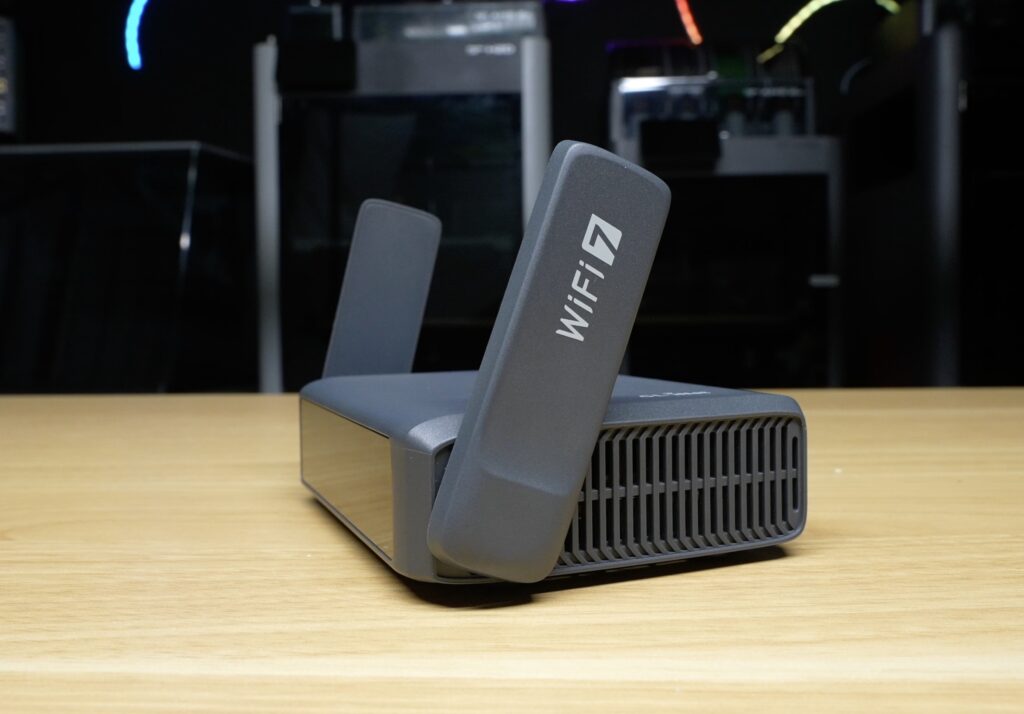
This gives me a portable Wi-Fi 7 access point that phones, tablets and laptops can connect to. So once you’re connected to the network, you simply open a browser, enter the address of the Nomad server and you’ve got access to the dashboard and all of the locally hosted services.
If I’m somewhere with an internet connection, I can connect the Slate 7 to that network and use Project Nomad alongside the normal internet. Project Nomad automatically recognises this and keeps maps, wikipedia and the other applications updated.
Then when that connection disappears, the local network doesn’t.
The router keeps running, Project Nomad keeps running, and all of the locally hosted services are still accessible. You lose the outside internet while keeping yours.
10G QNAP Network Switch
I’ve then added a QNAP network switch. This has two 10-gigabit ports and four 2.5-gigabit ports.
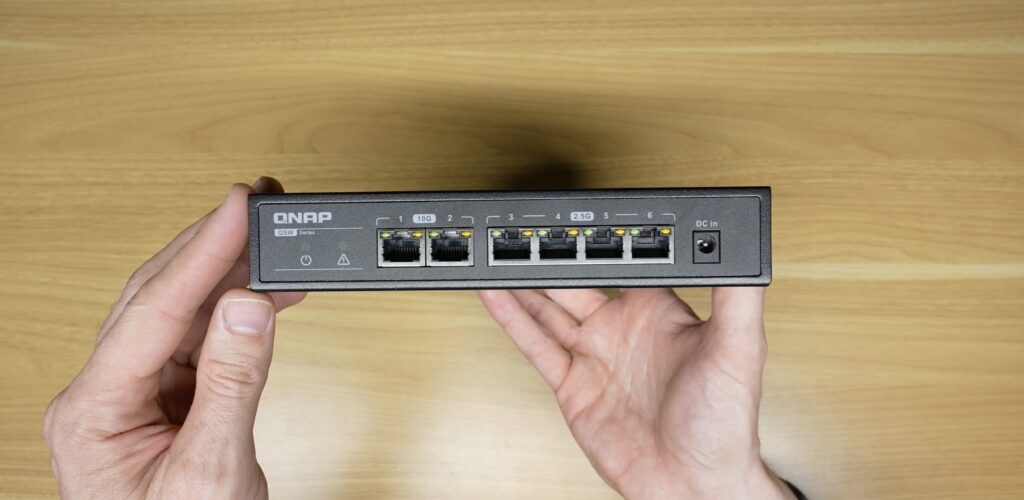
Because the Beelink SER 9 has 10-gigabit networking, I can connect the Project Nomad server to the switch at the full 10 gigabits per second.
That is obviously overkill for serving maps or a wikipedia page, but this is effectively a portable homelab. I can also run Jellyfin and take a complete offline media library with me, accessible by all devices on the network. So I could also host file storage, documentation, photo libraries or other Docker services.
Designing & Building The Case
This brings me to the carry case. I initially looked at putting all of this into something like a Pelican case, but I didn’t really want to buy an expensive case and then immediately start drilling holes and cutting chunks out of it. Because I wanted this to work almost like a chunky portable laptop, I needed some fairly specific features anyway. So I designed my own enclosure from scratch in Fusion.
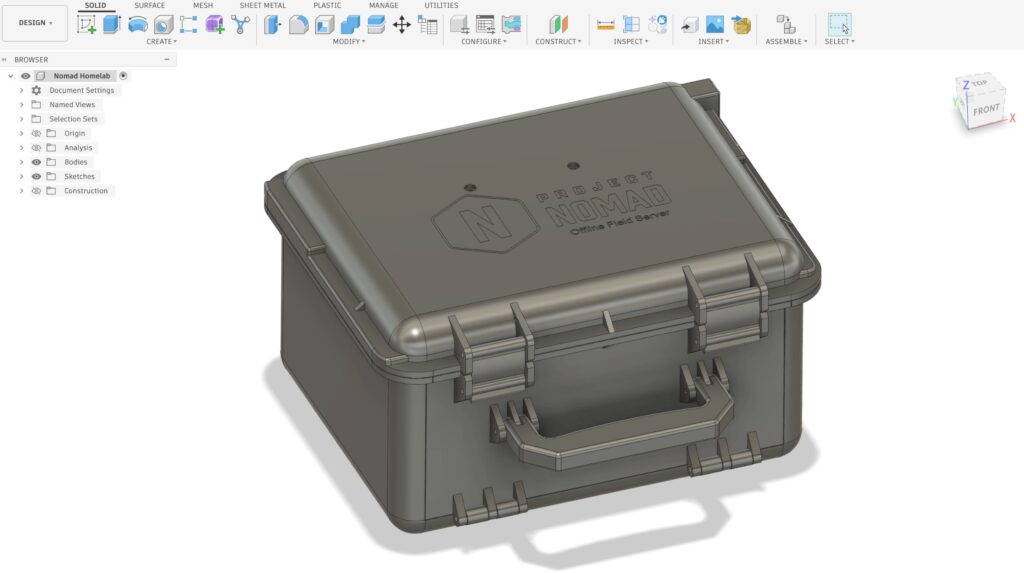
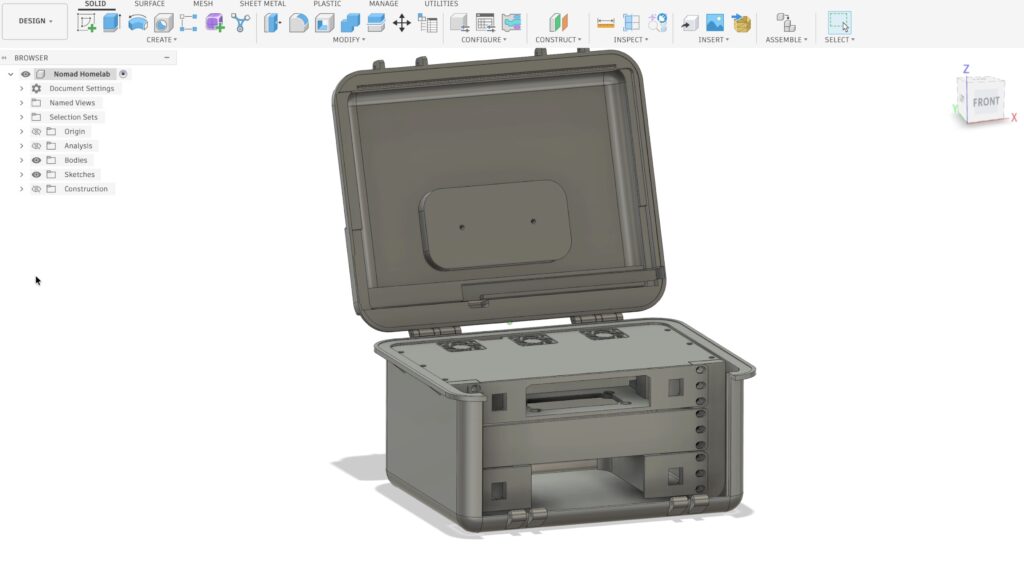
The design is intended to be 3D printed, so I’ve deliberately kept the geometry relatively simple.
The bottom half of the case contains a 3U 10-inch rack.
I 3D printed the case components from grey and black PETG, which took around two and a half days to complete. Depending on the print orientation it will also need some supports.
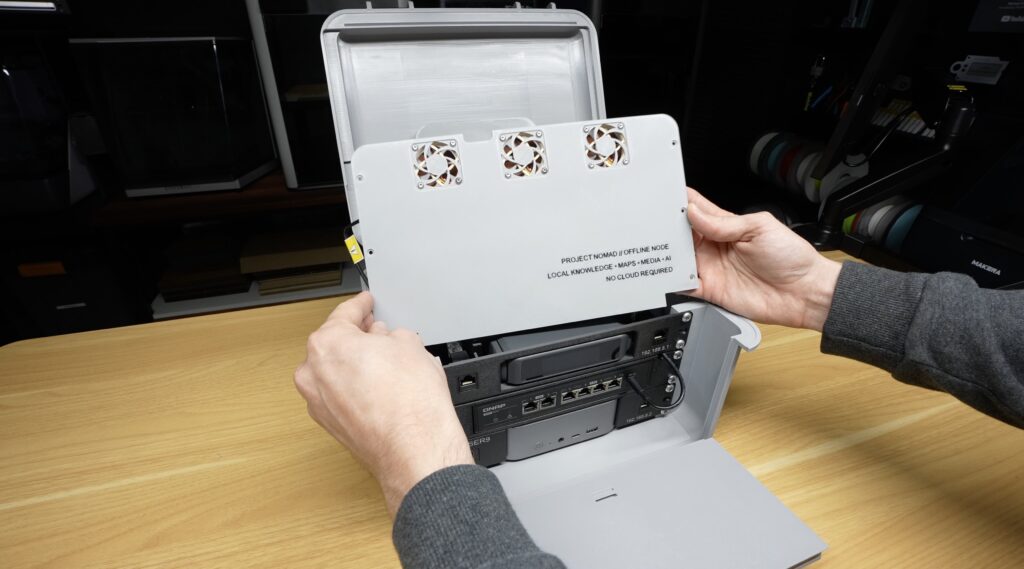
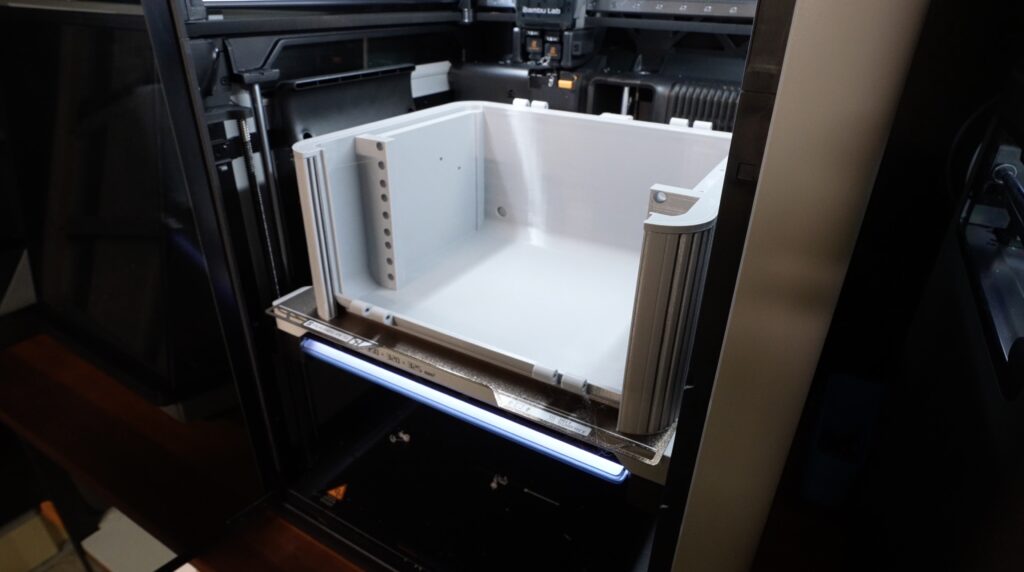
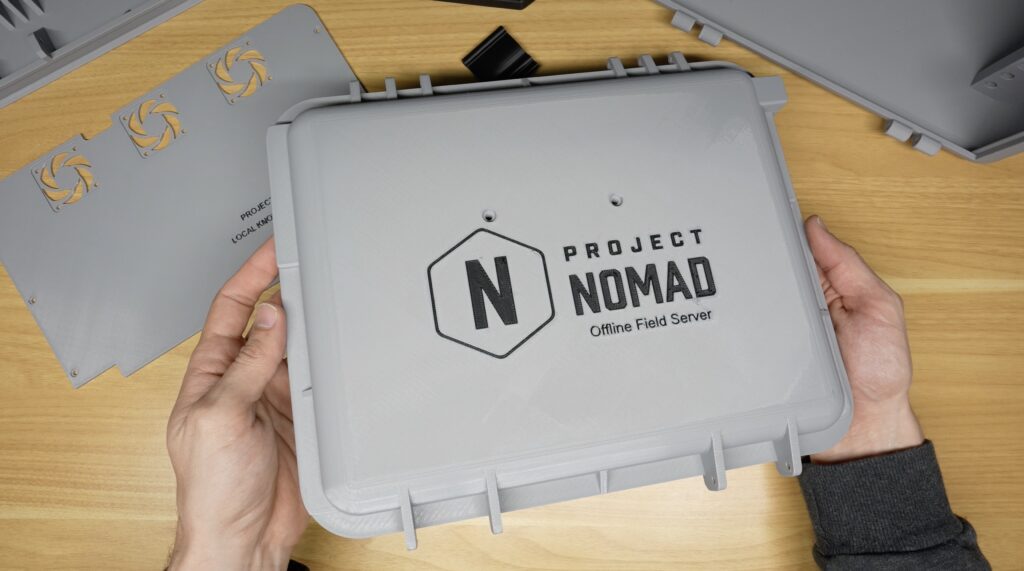
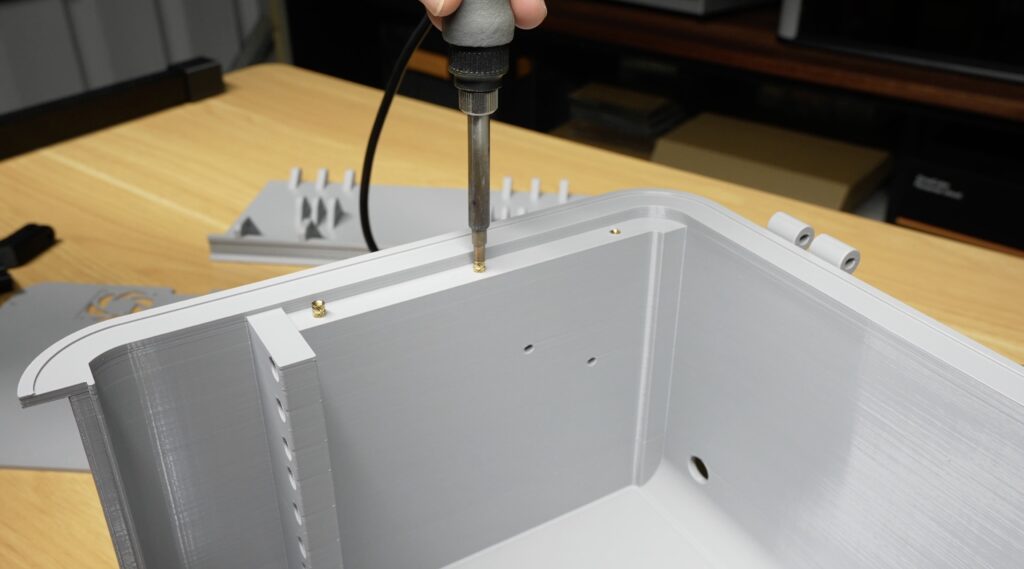
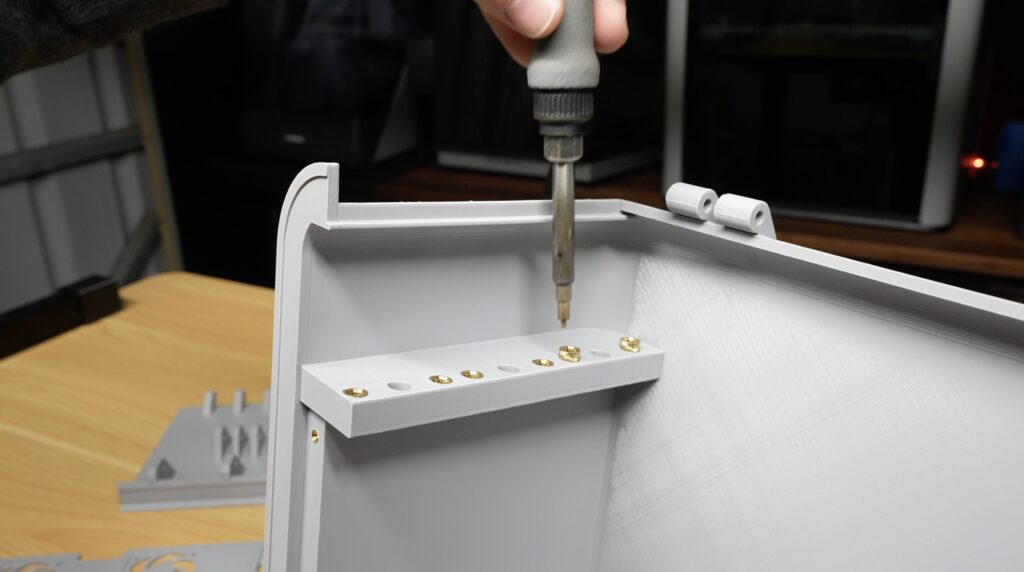
To finish them off, I installed some M3 heat set brass inserts for the top cover plate and M6 ones for the racks.
Powering The Portable System
I wanted the complete system to be as simple as possible to power. So, despite having three main pieces of hardware inside, the entire case is designed to have one 19-volt DC input.
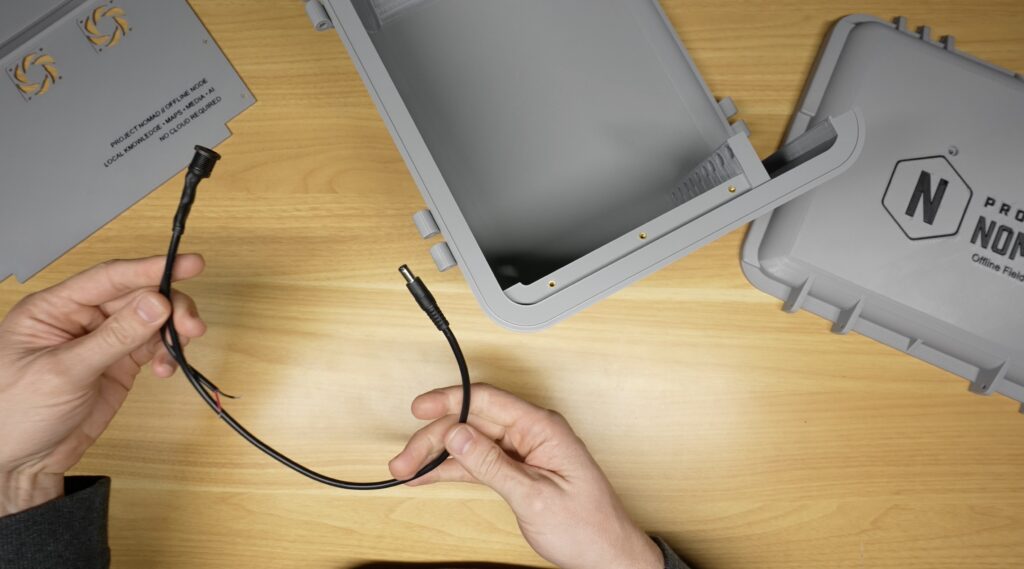
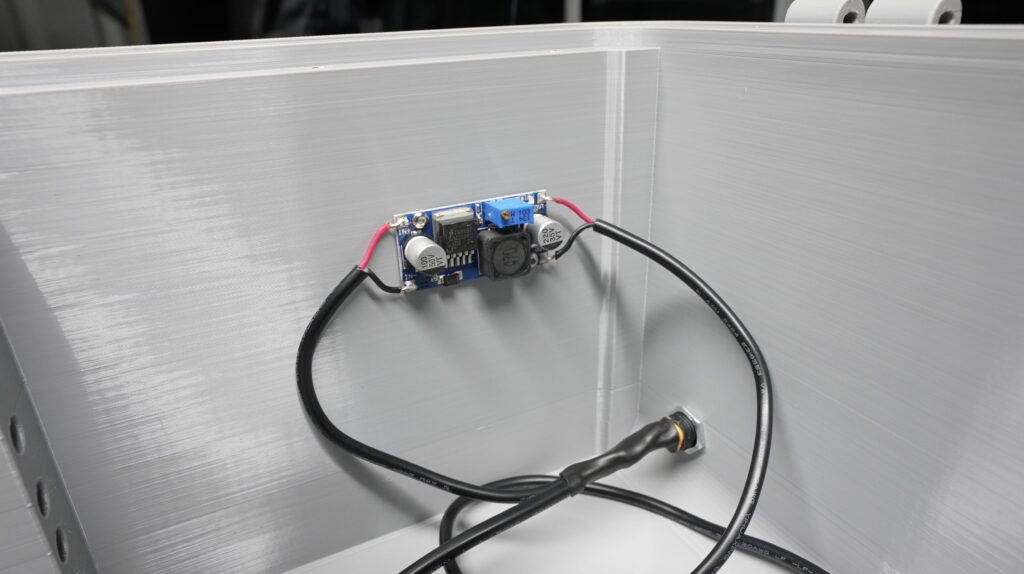
This directly powers the SER 9 and on the side I’ve got a buck converter which steps the 19 volts down to 12 volts for the network switch.
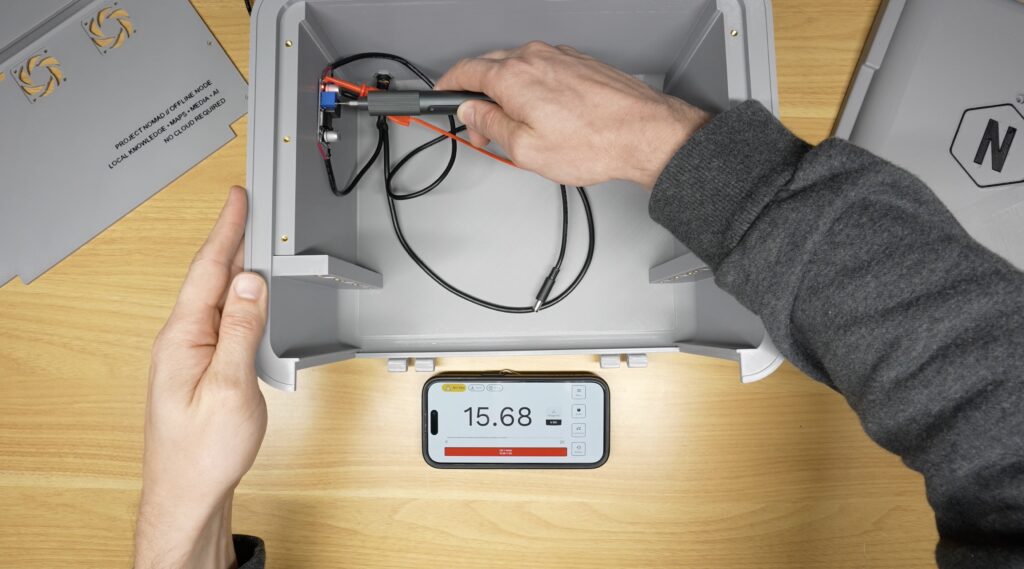
The Slate 7 is powered over USB-C PD from the Beelink mini PC.
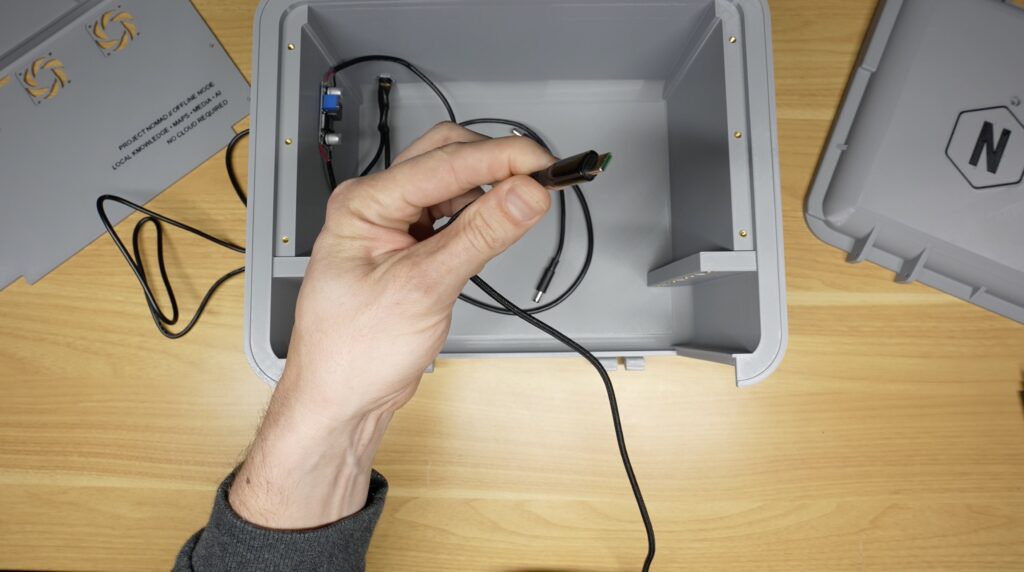
So from the outside, I only need to plug in a single barrel connector.
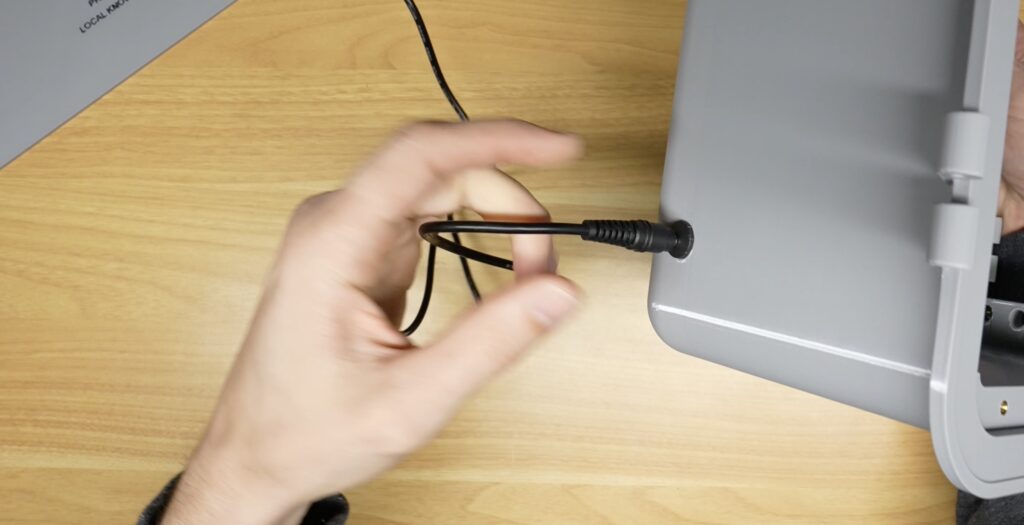
It’s worth mentioning that this isn’t battery powered. It’s portable in the sense that it’s a self-contained system you can carry somewhere and set up, but it still needs a suitable mains power source, although you could obviously run it from a portable power station if you wanted a genuinely off-grid setup.
The 3U Rack Assembly
Next, moving on to the rack assembly, I’ve designed custom rack mounts for each component. I’ve also added things like keystone jacks so I can bring the connections I actually need out to the front of the rack.
So I’ve got Ethernet and HDMI connections easily accessible on the Mini PC and the two Ethernet ports accessible on the router without needing to open the case or reach around behind the equipment.
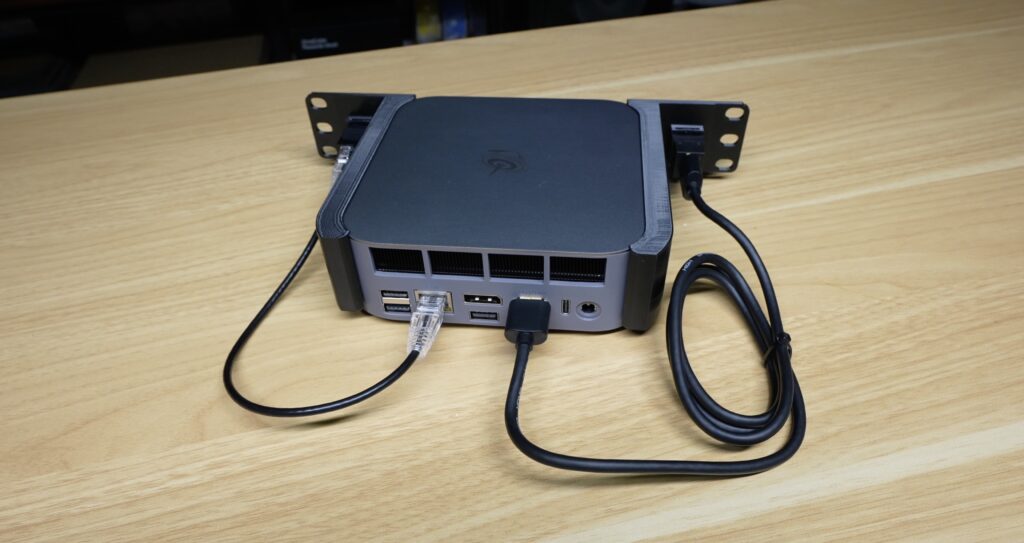
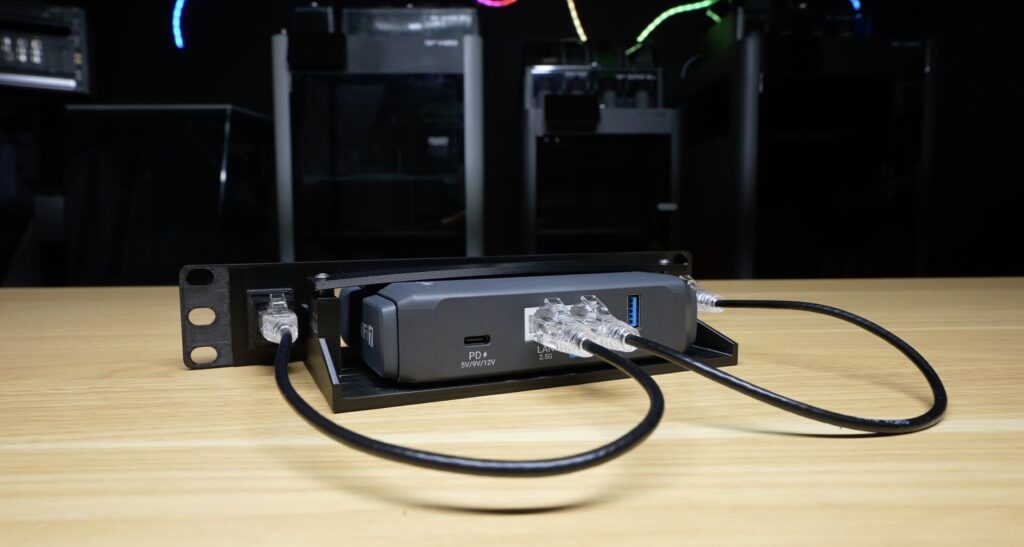
The Beelink SER9 MAX sits at the bottom, above that is the QNAP switch, and the Slate 7 sits at the top.
Adding The Case Components
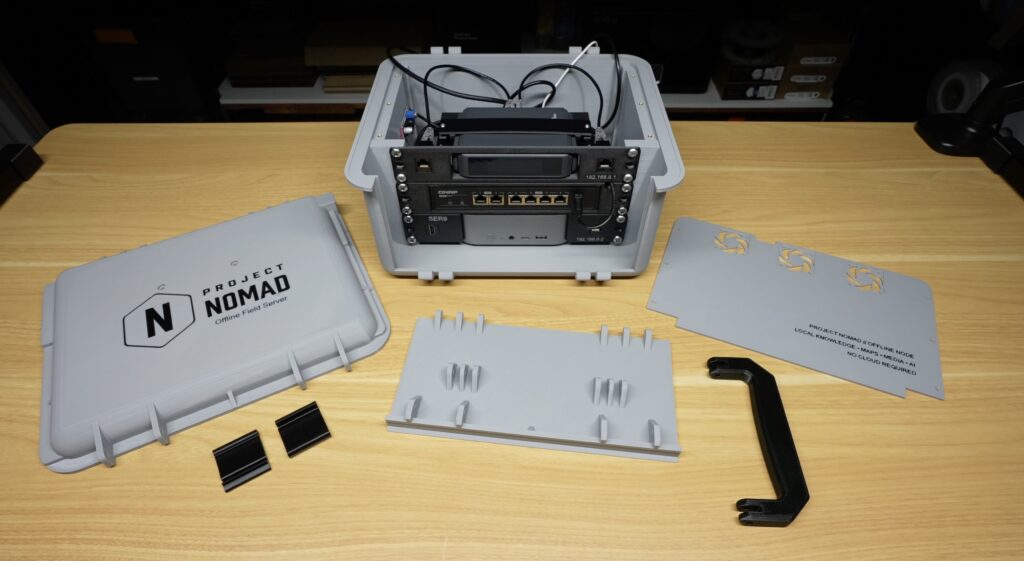
The case itself is quite easy to assemble because it consists of a small number of large printed parts.
The hinges, front panel, bottom section and latches are assembled using eight M4 x 50mm button head.
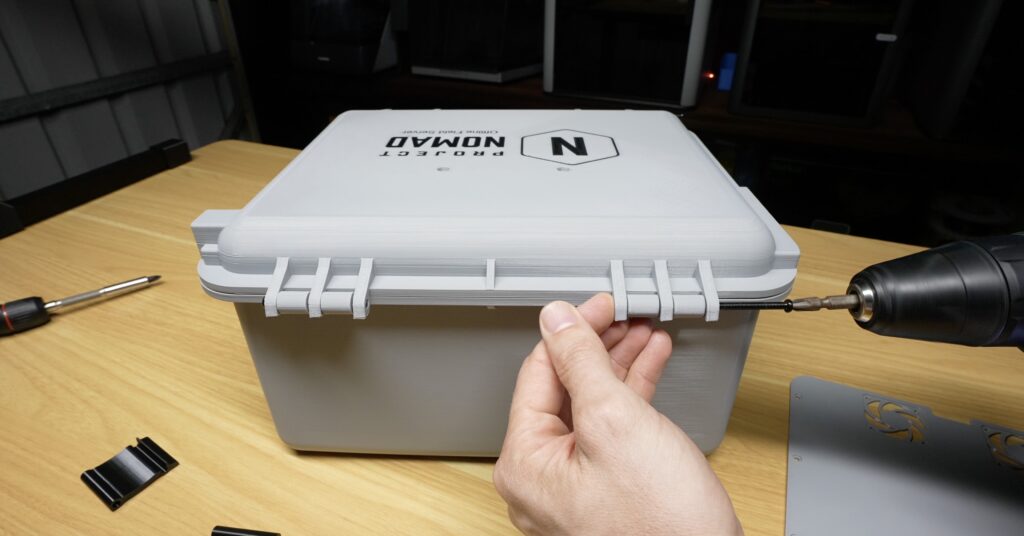
The handle uses another two M4 x 30mm button screws.
Cooling And Cover Panel
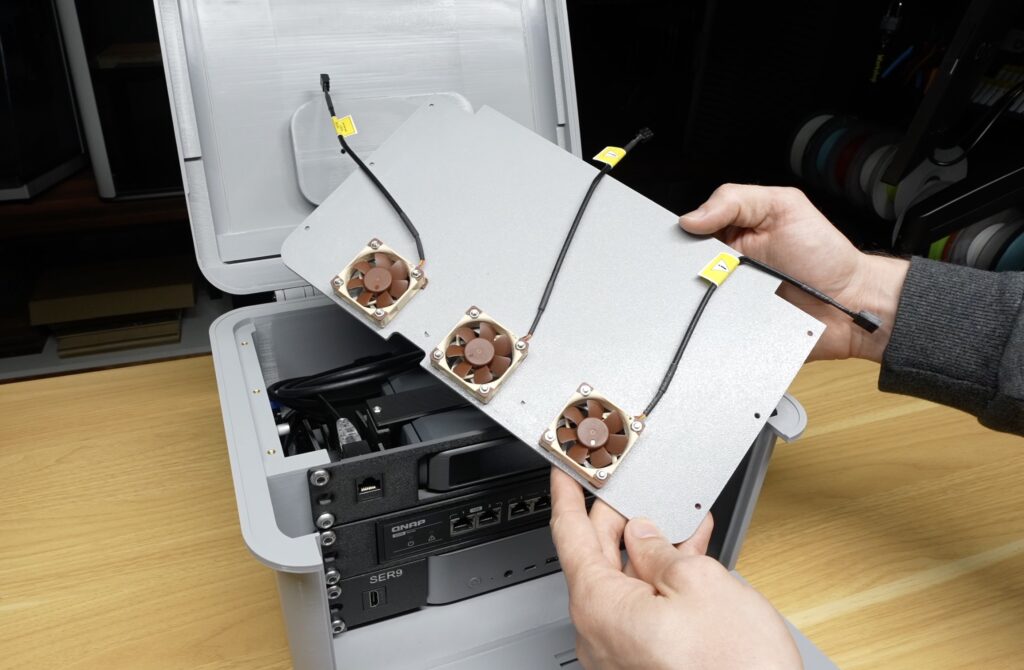
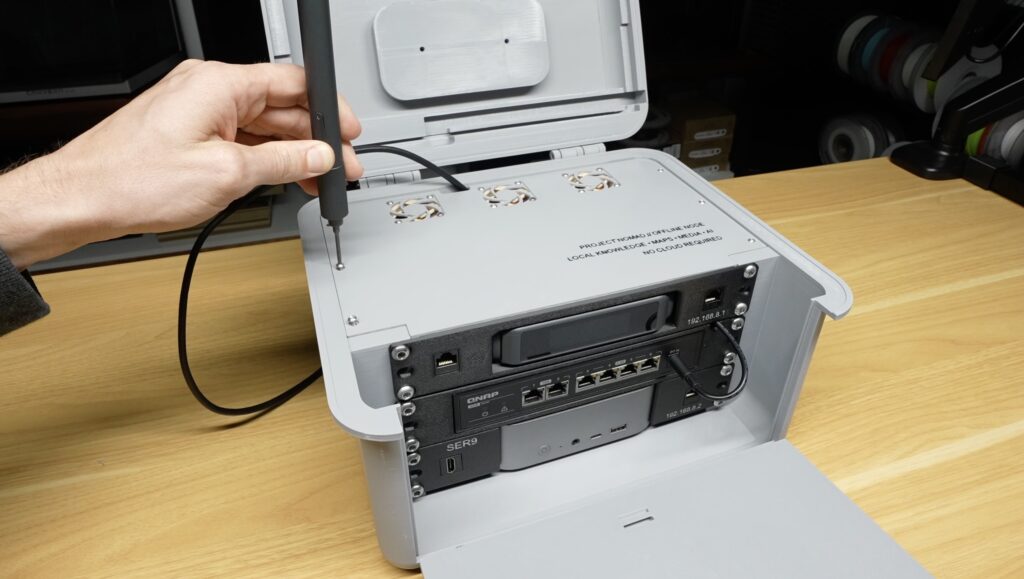
With all of the rack hardware installed, I’ve then got this cover panel over the top. This separates the rack hardware from the upper part of the case and makes the lower section feel much more finished.
I’ve integrated three 40 Noctua millimetre fans into the panel for cooling. These are USB powered and help move air through the enclosure when the PC, switch and router are all running.
The cover plate is secured with 6 M3 x 8mm button head screws.
Fold-Down Keyboard
At the front of the case, I’ve designed another hinged panel.
When the case is closed, this covers and protects the front of the rack, and when I open it, it folds down and becomes the keyboard tray.
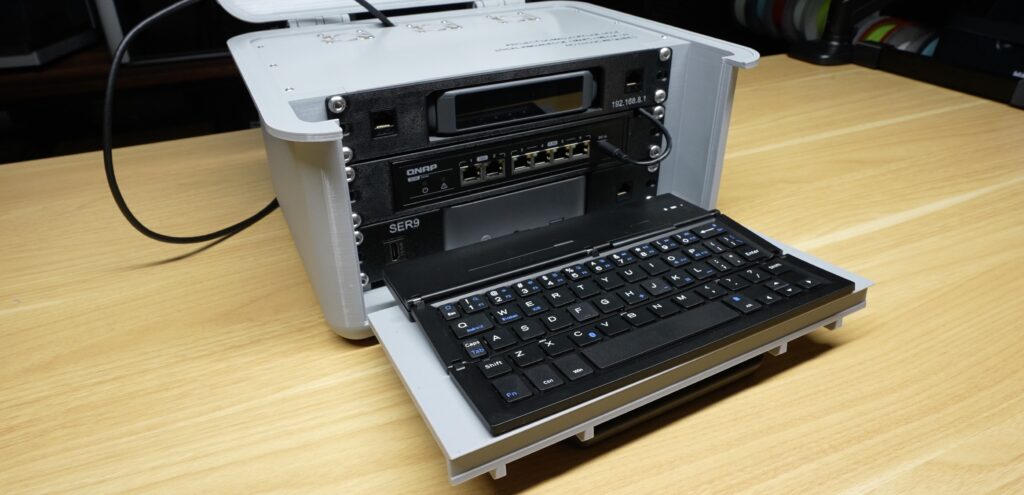
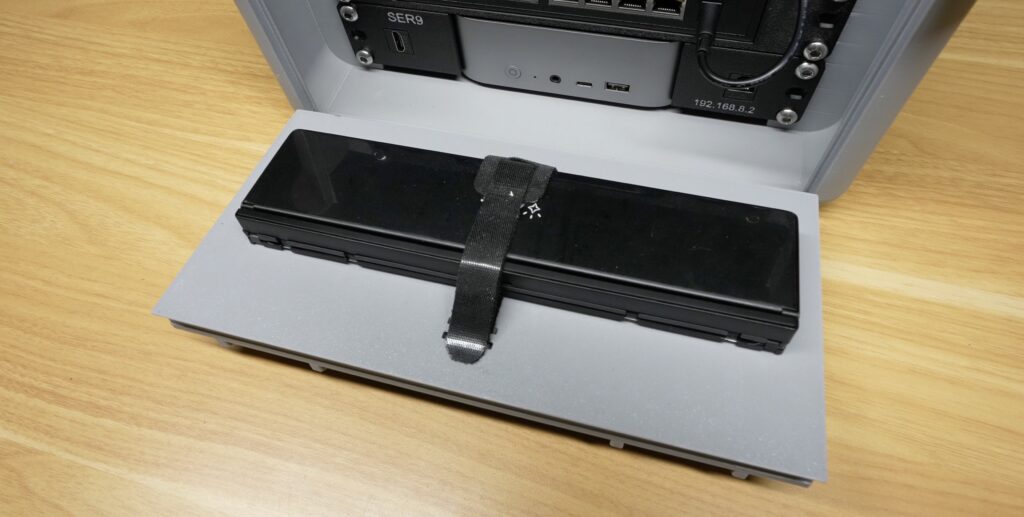
The keyboard itself is stored on the panel with a hook and loop tie.
UPERFECT 3K OLED Display
Then we’ve got the part that really makes the whole system look like a sort of oversized cyberdeck. The display.
UPERFECT provided this 14-inch 3K OLED portable touchscreen for the build. It’s a 120 hertz OLED panel, so you get the contrast and deep blacks you’d expect from OLED, along with the really sharp 3K resolution and great refresh rate.
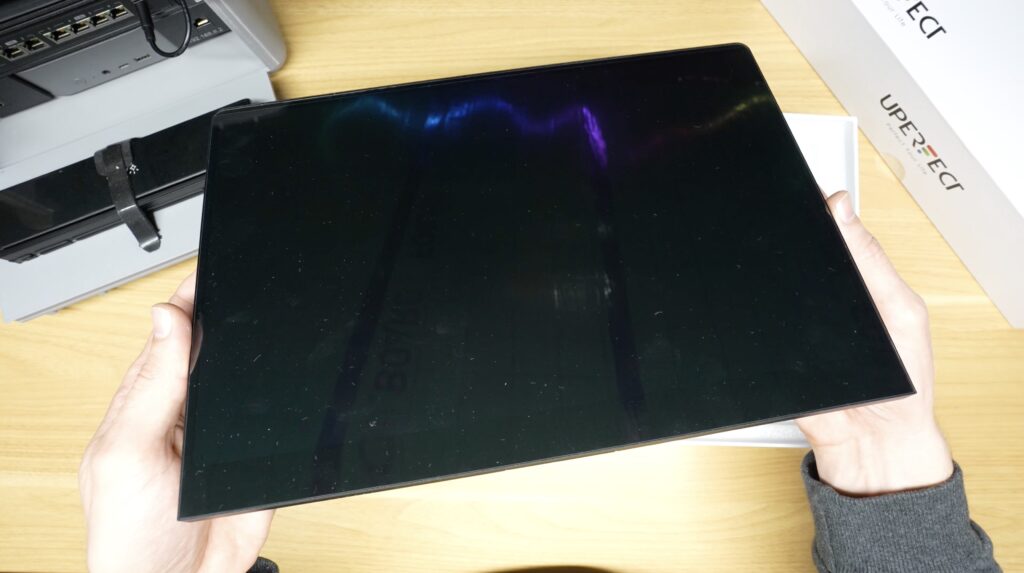
Because it’s a touchscreen, I can use Project Nomad directly without necessarily needing the mouse and keyboard.
A single USB-C cable runs from the display to the mini PC and handles the DisplayPort video connection, touch interface and power. So again, I’m keeping the wiring inside the case as simple as possible.
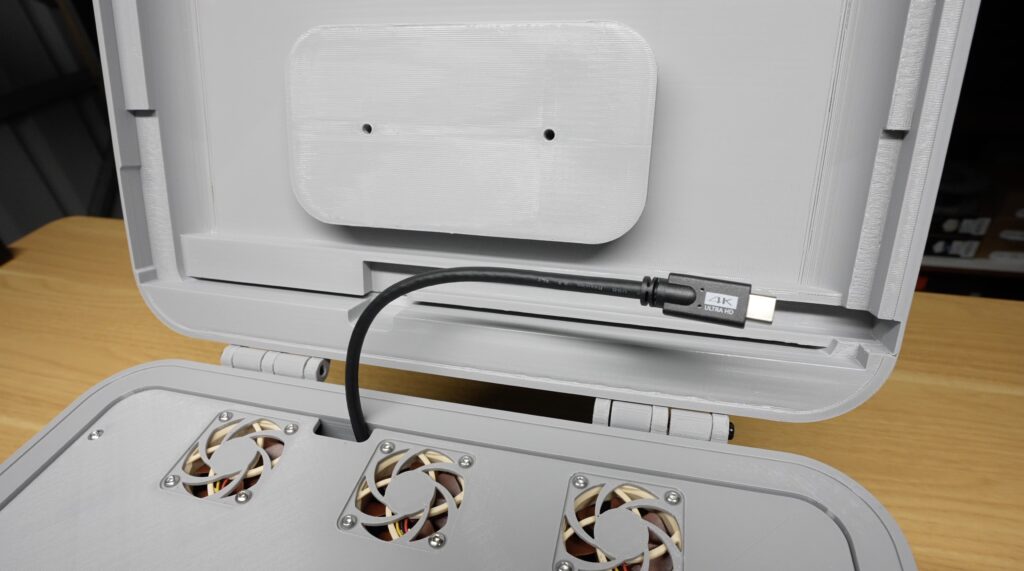
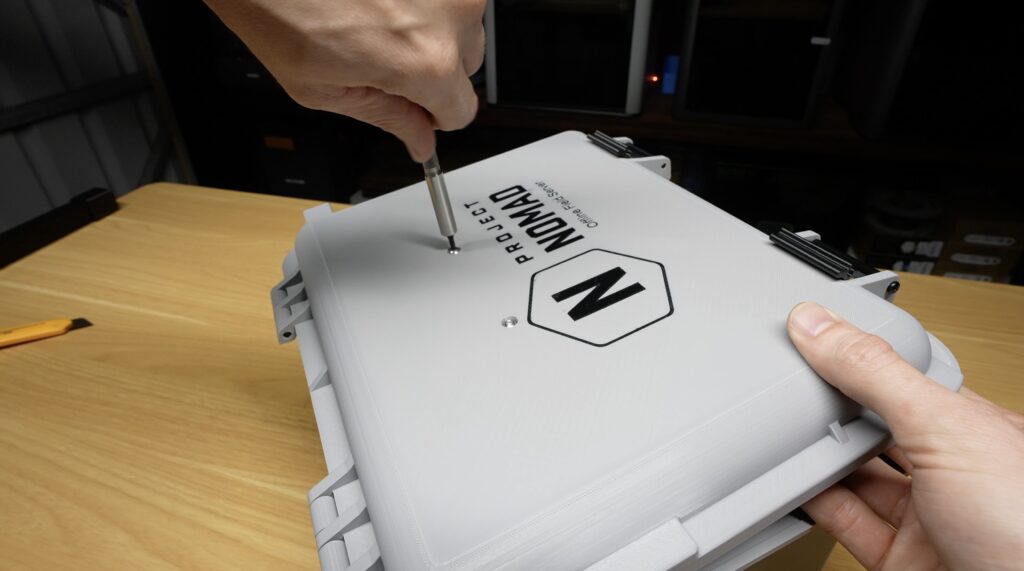
I’ve designed the screen into the lid itself and it screws into place using two M4 x 16mm button-head screws, which keeps the outside of the lid relatively clean.
The low profile of this portable monitor makes it possible to integrate into the top of the case in a size that’s still printable as a single piece on my 3D printer, even if I only had a millimetre to spare.
That’s the hardware side of this project complete. I’ve now got a portable 3U homelab in a case along with a keyboard and monitor with touch display.
Booting Project Nomad
To boot it up, we just need to plug in the single power connector. The router and network switch come on automatically and we need to press the power button on the PC.
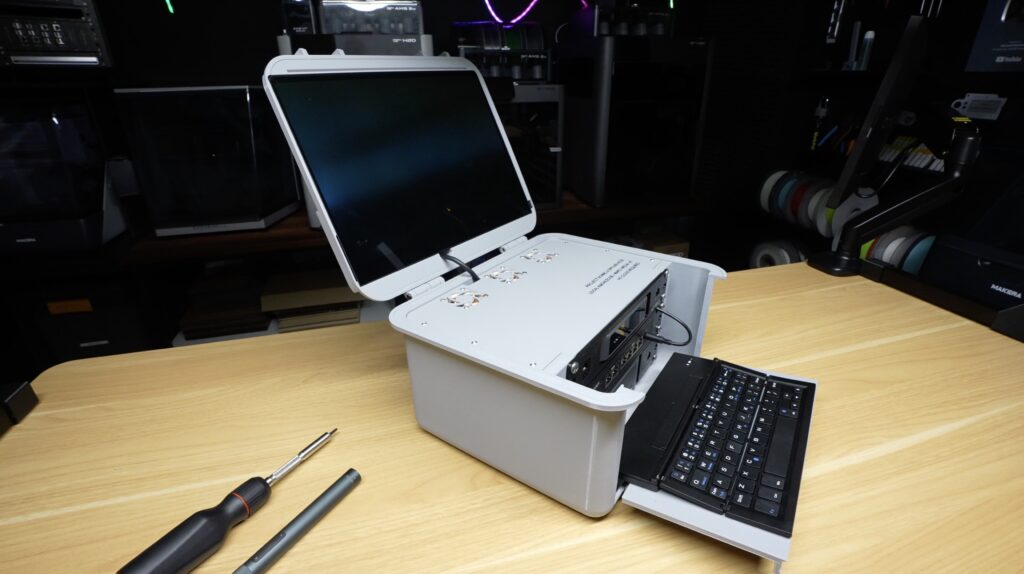
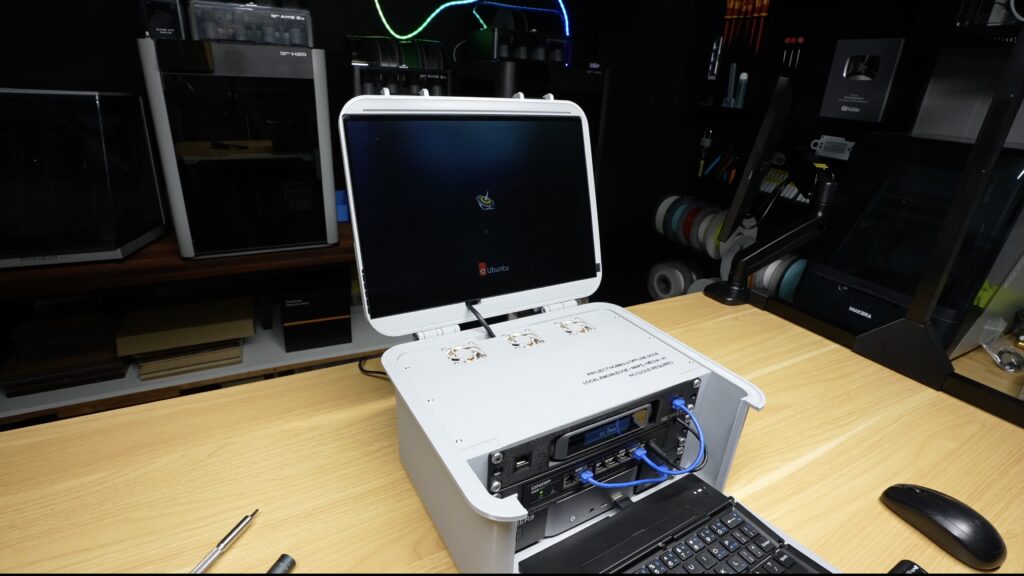
The mini PC is running Ubuntu, so when I boot it up, it can be used like a normal computer.
I can use a browser, office applications, file management or anything else I’d normally use an Ubuntu PC for.
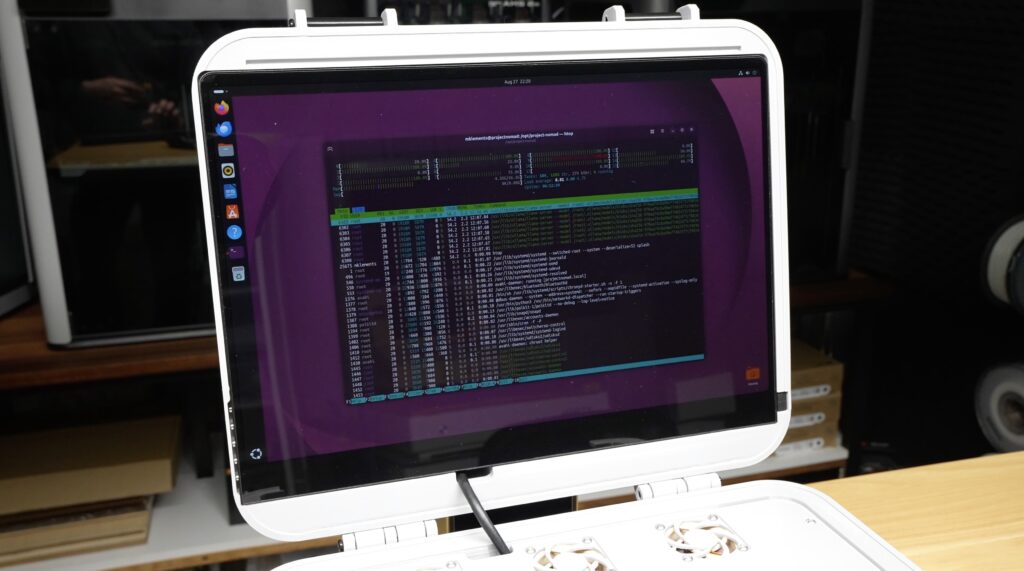
Project Nomad runs through a web interface and starts automatically when the computer boots up. So if I open up the browser, we can go to the Project Nomad dashboard.
So let’s disconnect the internet connection and you can see how the system runs.
Offline Maps Demo
Let’s start with maps.
For my system, I’ve downloaded the complete map of Australia. You could actually download the entire world if you have enough storage, but Australia is obviously considerably smaller and makes more sense for what I’m going to use this for.
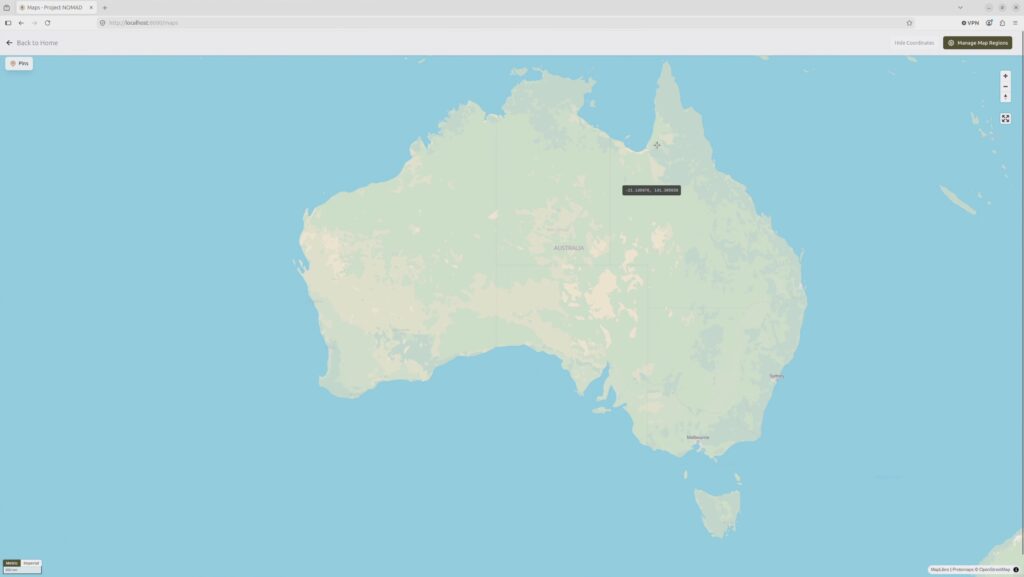
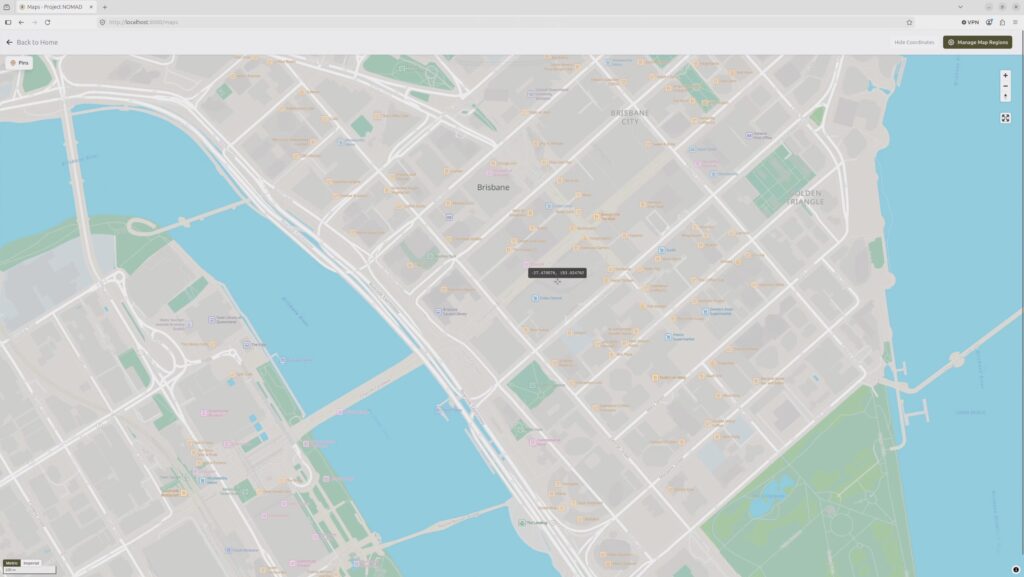
I can move around the map, zoom in and even search for locations. This is really useful if you’re travelling through remote areas where mobile coverage is unreliable.
Because it’s being hosted as a web service, I don’t have to use it on here. I can pull out my phone, connect it to the Project Nomad Wi-Fi network and open the same map.
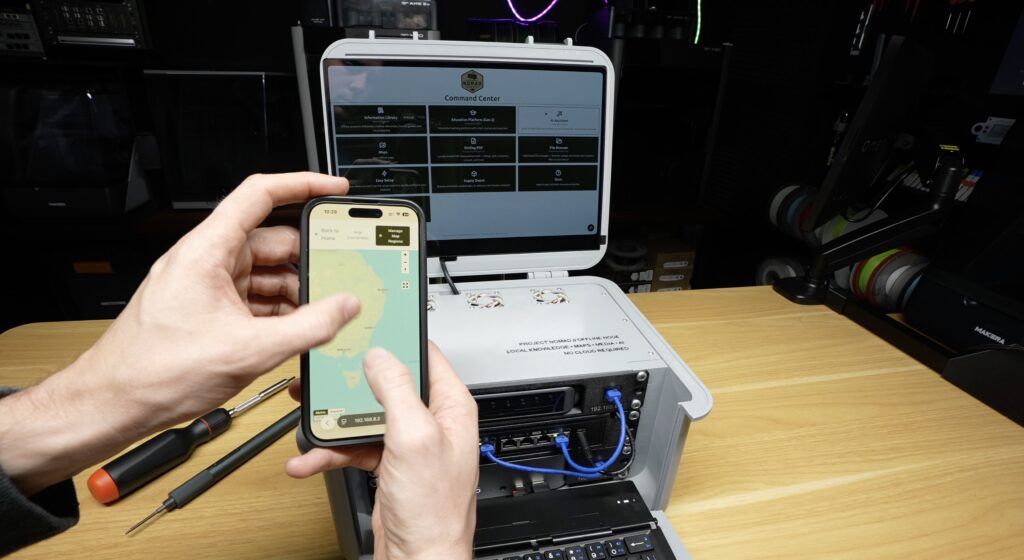
So I’ve got an offline map server available to everybody connected to the network.
Offline Wikipedia Demo
The same applies to Wikipedia.
I’ve downloaded the complete version of Wikipedia including images locally, so I can search for a topic, open an article and follow links between pages.
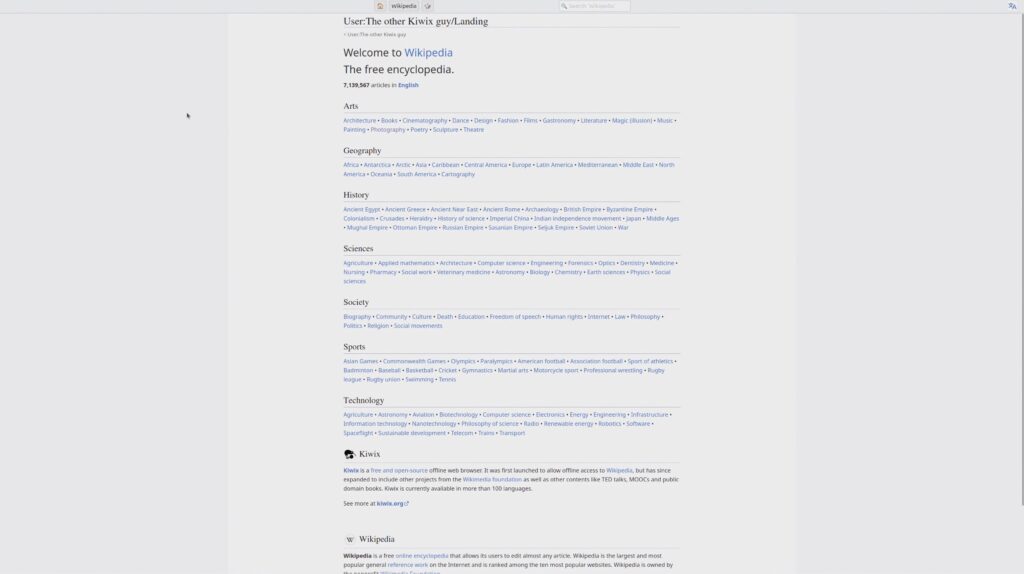
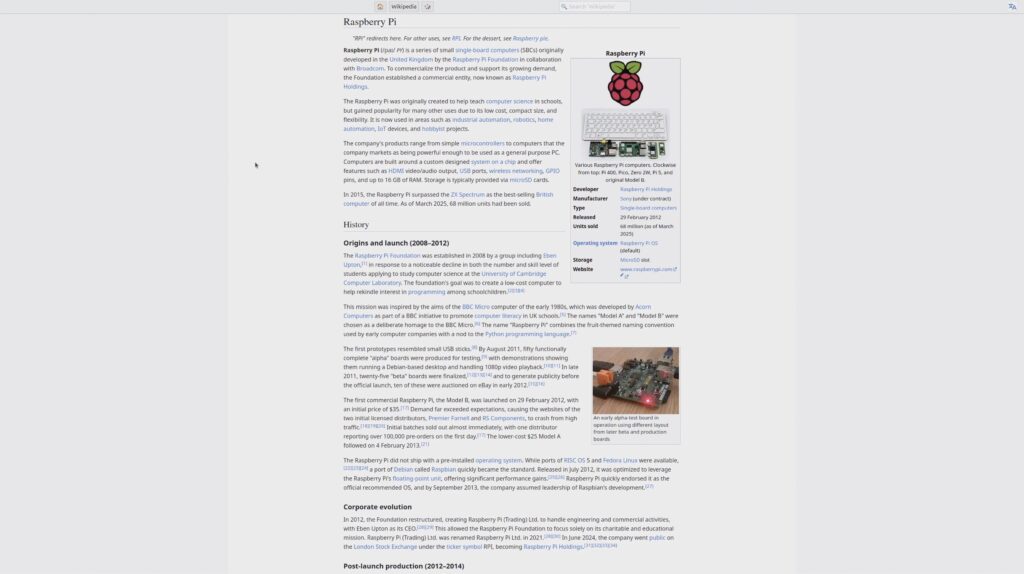
It’s quite cool having this much accumulated knowledge in a portable box.
Local AI Assistant
Next is my favourite part of this Project Nomad build, the AI assistant.
I’ve got three models installed locally, Llama 3.1 and 3.2 and DeepSeek R1.
When I ask it a question, the prompt doesn’t leave this computer. There isn’t an API call going out to a cloud service, the model itself is stored on the SSD and the inference is being done locally by the mini PC’s GPU.
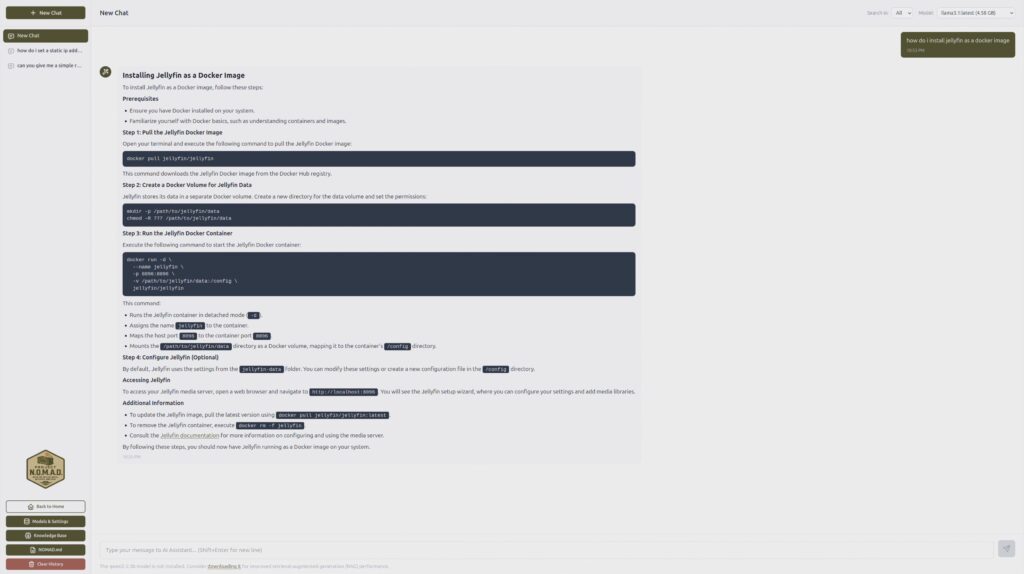
So even with the internet completely disconnected, I still have a general-purpose AI assistant.
And this is where having the more powerful hardware pays off. You can see in my video that the output is actually running at a useful speed. We don’t have to wait minutes for each response to be generated.
Again this is great for offline use, you have access to so much knowledge in a portable package.
Other Offline Services
Project Nomad also includes more than just the three services I’ve focused on. There are a few other applications that can be configured depending on what you want the system to do.
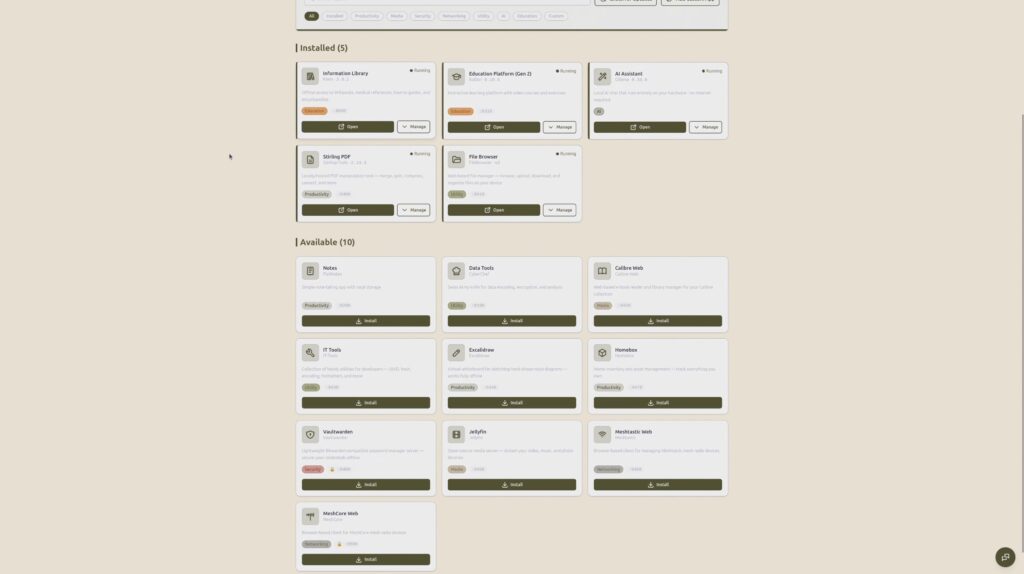
Things like Vaultwarden, IT tools, data tools, MeshCore-related services and a range of other self-hosted applications.
Because this is ultimately an Ubuntu server, there’s also nothing stopping you from adding your own services. You can store a couple of terabytes of movies and TV shows for your own Jellyfin server, add a file server and even host technical manuals or equipment documentation.
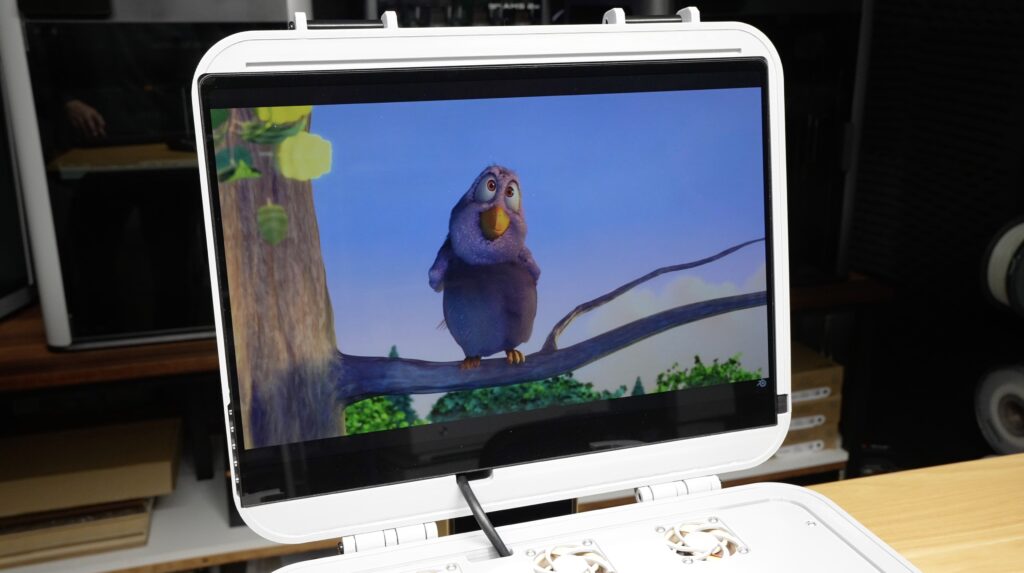
The UPerfect OLED display on here is actually really good for watching movies and series too.
Real-World Use Cases
It’s obviously easy to frame this as a doomsday-prepper computer. And sure, if the internet suddenly disappeared, having maps, Wikipedia and an AI model in a box would probably be quite useful. But you don’t need an apocalypse for offline infrastructure to be useful.
Imagine a remote farm where the internet connection is unreliable. You could have locally hosted equipment manuals, maps, documentation and AI tools that remain accessible around the property regardless of the outside connection.
For field work, you could load it with project documentation, drawings, procedures and reference material.
If you’re travelling, camping or on a boat off-shore, you’ve got maps, reference information and entertainment without relying on mobile reception.
Final Thoughts On My Internet In A Box Build
So that’s my complete offline internet built into a portable case.
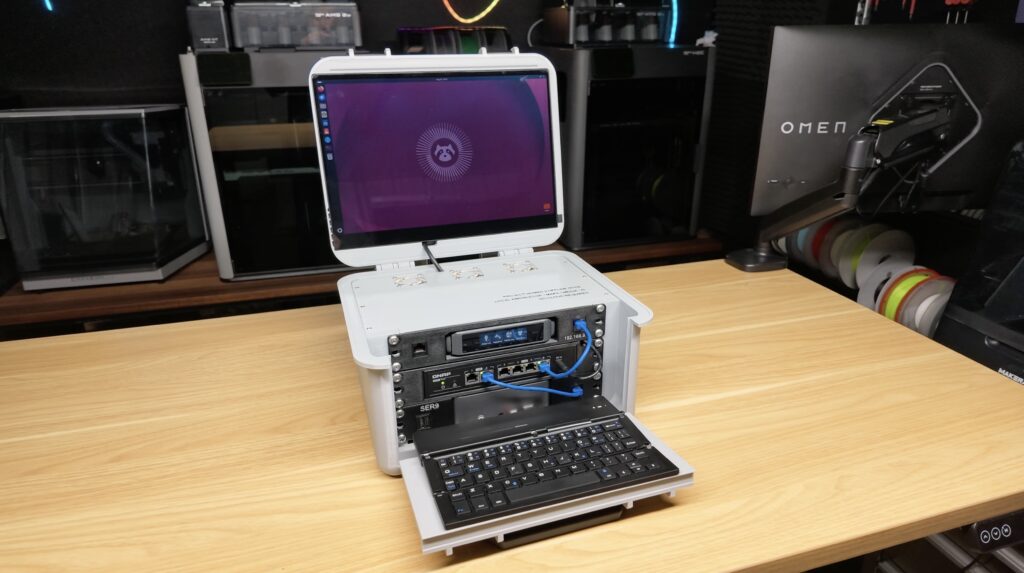
We’ve got the SER9 MAX providing the compute power and 10-gigabit networking, the Slate 7 creating the portable network, the QNAP switch giving us high-speed wired connectivity, and the UPERFECT 3K OLED display turning the whole thing into a self-contained workstation.
What I like most about this project is the idea of taking services that we’ve become completely dependent on having an internet connection for, like maps, information, AI, media and useful tools, and bringing them back onto hardware that you actually control.
Let me know what you’d use a device like this for in the comments section below.
Hello! I love this project and have been trying to find the 3D print files for the case, but I have had no luck. Are they still hosted anywhere?
Where can I find the custom rack mount for the SER9? I was unable to find it on your makerworld page.
It’s on his MakerWorld page: https://makerworld.com/en/models/3247062-portable-offline-internet-3u-homelab-in-a-case#profileId-3679511
The black 10″ rack mounts are not included in this link.
Would be most grateful for a reference/location of the rack stl files.
Currently printing the case components and building this awesome project.
Thanks!
location of the rack mount for the SER9?
The IT Crowd S03E04! 😂
Where the file for the 3U racks?
Howdy,
Has anyone other than Michael built this awesome project?
Couple items that are challenging my build:
1. Rack files not included in the 3D print package. Need reference or resource for those will be appreciated.
2. Lid – Screen USB C cable rectangular notch not deep enough for cable shown in the picture when used with a USB C right angle adapter to make required bend. Perhaps a picture of the original build fitment would help. I ordered a corded right angle USB C cable to ease the bend clearance. Will advise if successful.
3. Lid – Countersunk screen mounting holes to shallow to allow screws included with screen to reach back of screen and engage threads. Perhaps a longer screen mounting screw could be recommended.
All help and advice most appreciated.
Thanks,
Shelby
Hi Shelby,
To answer some of your questions as best I can:
1. They’re also on my Makerworld profile, just listed as other models.
2. My screen came with a few adaptors (I assumed this was standard), one of these is a 180 degree U bracket which brings the USB C cable out to the back like I’ve used.
3. I didn’t use the displays screws, I used button head hex screws to fit with the look of the others. These are likely M4 x 20mm.