Home Blog Page 61

Secure A Loose Shower Head, An Easy Fix

Often pipes and shower heads which run through walls or tiles are installed incorrectly or eventually work themselves loose. The hole drilled for them to run through is too big and they continually vibrate due to the water running through them. This is an easy way to secure the pipe or shower head and keep it from moving. The expansion foam is also flexible so it allows some movement of the pipe due to thermal expansion.

If your shower head is starting to look old or dated, you may want to consider replacing it, follow our easy guide to replacing a shower head.

If your shower door is leaking or leaving puddles on your bathroom floor, have a look at this guide on how to replace your shower door seals.

What You Will Need To Secure The Shower Head or Pipe

When buying the expansion foam for this repair, buy the smallest one possible. This job doesn’t require much foam and the left over foam doesn’t keep well. Also make sure that you get one with a small length of pipe after the nozzle, this is used to direct the foam into the joint.

How To Secure The Loose Shower Head

foam around pipe

Pull the trim ring away from the wall, you may need to use pliers or a screwdriver to loosen it. The shower head  or pipe should now be protruding through a hole in the wall. Often this hole is cut too big or has become too big through the movement of the shower head. Apply some masking tape to the wall around the hole to catch any excess expansion foam. Insert the expansion foam pipe into the hole around the pipe and squirt so that a ring of expansion foam forms around the pipe. The ring should surround the pipe entirely and should protrude a bit from the wall to provide additional support.

Wait for the expansion foam to cure before trimming the excess away. Only trim away what is necessary to fit the trim ring back on, the more foam you leave behind, the better the support will be. Push the trim ring back into place and the pipe or shower head should now be secure and movement free.

Was this helpful? Have you used any other method to secure a loose pipe or shower head? Let us know in the comments section below.

10 Essential Tools For Beginner DIY’ers

Cordless Impact Drill

dewalt cordless impact drill

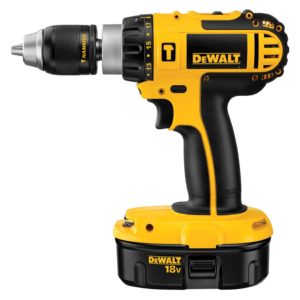
A cordless drill is a versatile tool that is designed for drilling holes and driving screws however with its key-less three jaw chuck it can also be used to drive a rotary sander, wire brush, hole saw and some grinding attachments. They also generally come with a torque limiting clutch which allows you to accurately control the torque applied to screws.

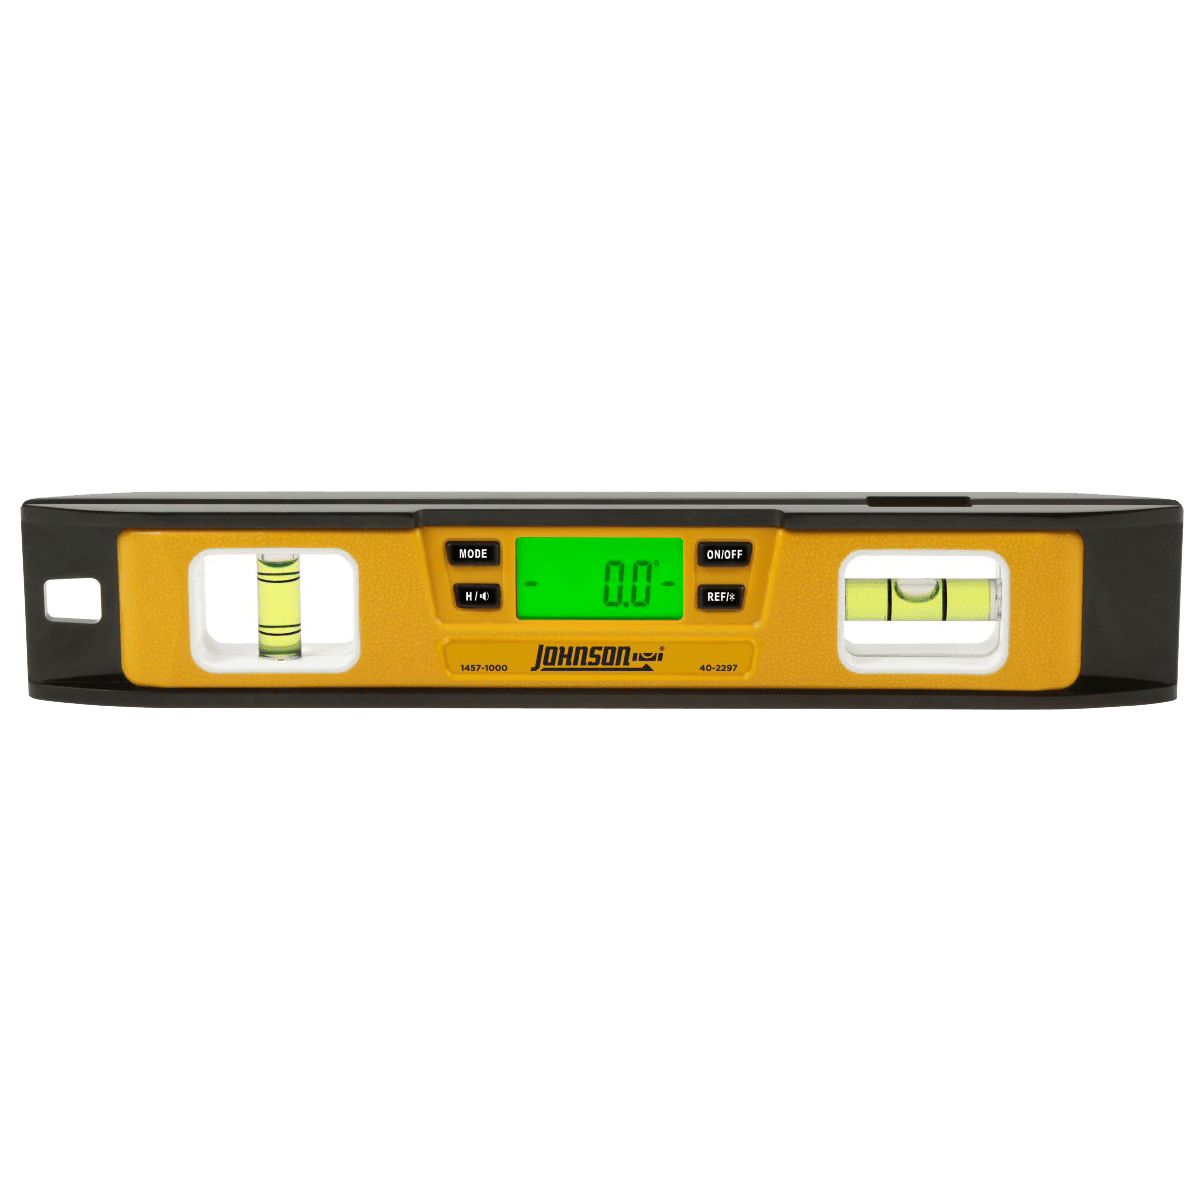
Digital or Spirit Level

digital level

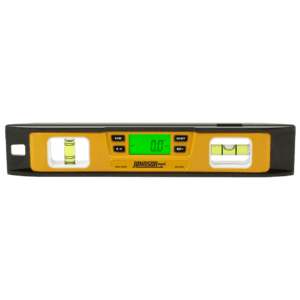
A level is essential for hanging pictures or mirrors, painting straight lines, leveling slabs and decks as well as correcting drainage problems. A digital level usually has a display which reads out an angular measurement and is far more accurate than a spirit level’s bubble position.
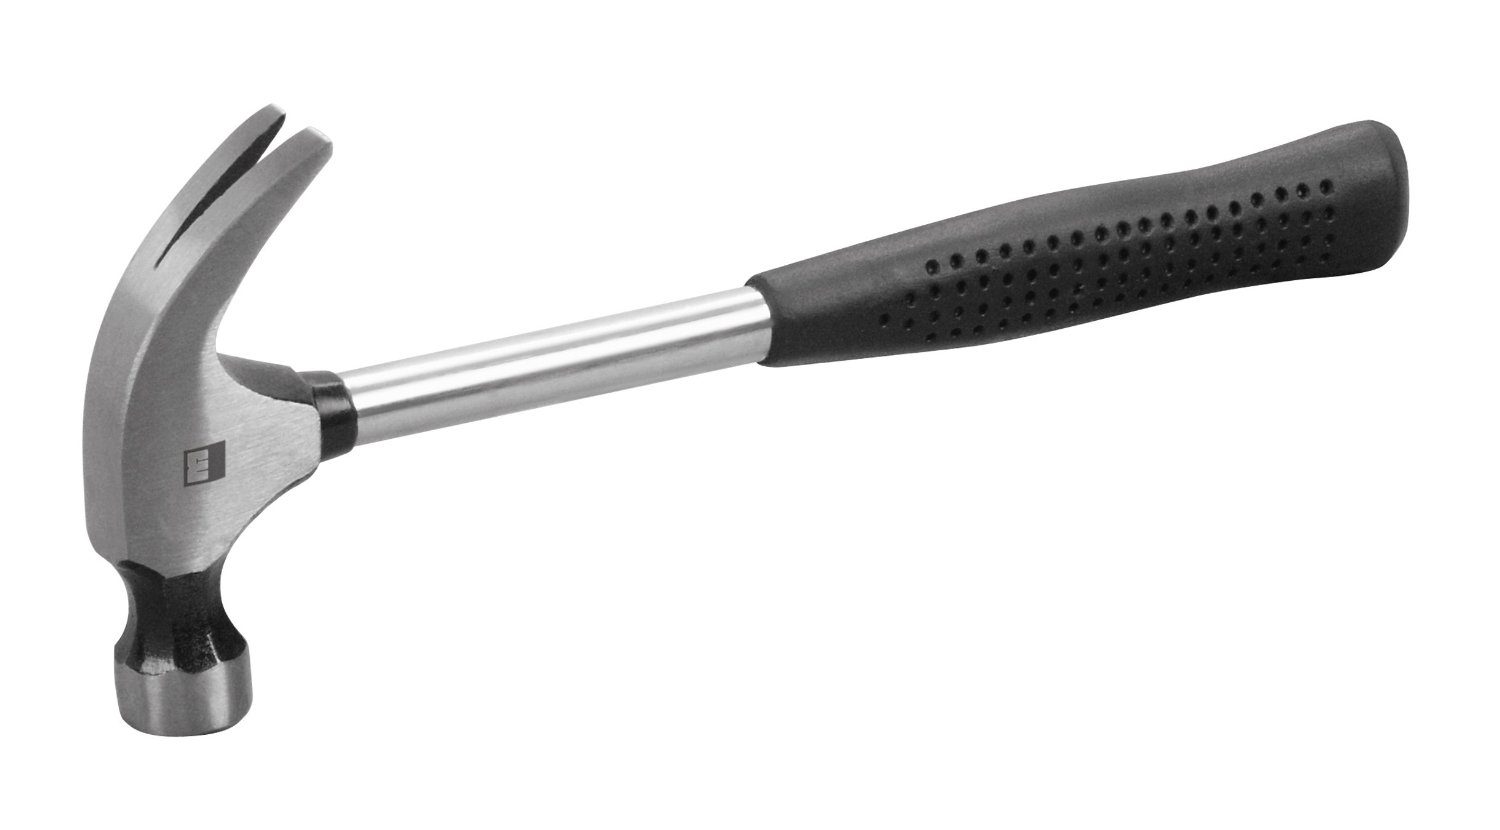
Hammer

claw hammer

A claw hammer is useful not only for hammering nails into wood, walls or concrete but also for chipping or chiseling, tapping out hinge pins and removing unwanted nails.
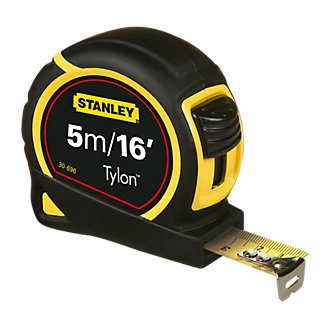
Measuring Tape

measuring tape

A good quality measuring tape is an inexpensive tool which will save you hours of frustration on your DIY projects. Look for one which is at least 5m (16’) and has a multi-purpose end catch which is suitable for hooking over wall and counter ends as well as nail and screw heads.

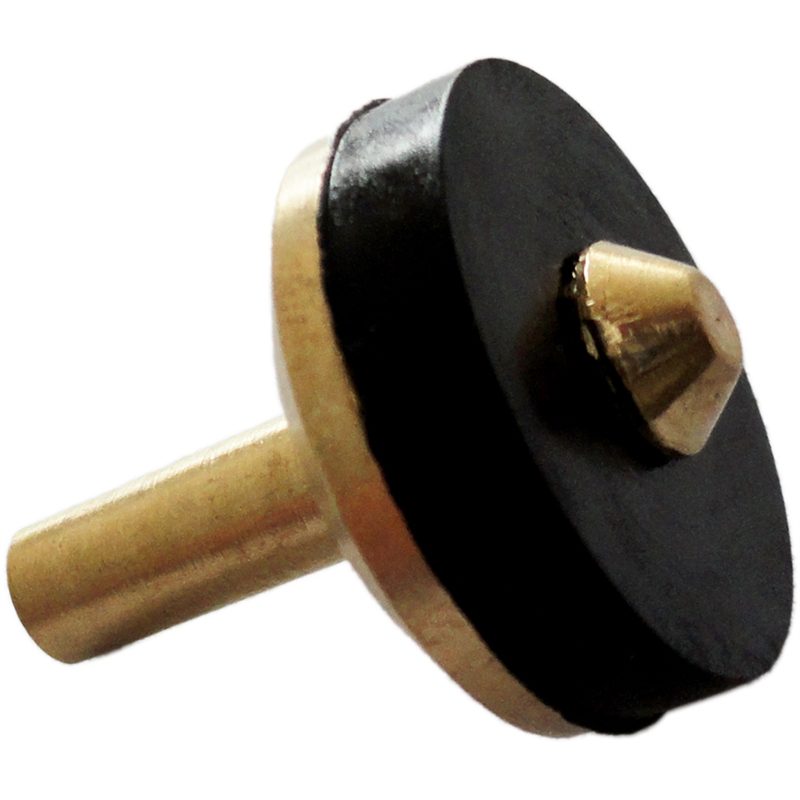
Hilti Picture Hanger

hilti picture hanging tool

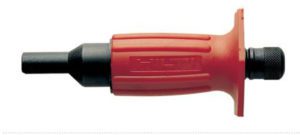
Anyone who has tried hammering a nail into a brick or plaster wall knows that it is easier said than done. A Hilti hanging tool grips the nail firmly, keeps it straight and gives you a much larger surface to aim for which helps keep your walls from being damaged and saves your fingers.

Dremel Rotary Tool

dremel rotary tool

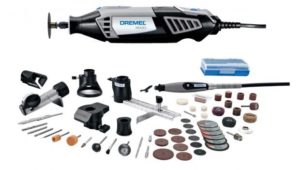
A Dremel rotary tool is the most versatile tool you will use. A quick look at one of their stands at a hardware store reveals the multitude of attachments and accessories they supply. Some of its uses include sanding, grinding, engraving, etching, cutting, polishing, brushing, sharpening blades, removing grout etc. There are also a range of attachments useful for turning your tool into a drill press, grinder or plunge router.
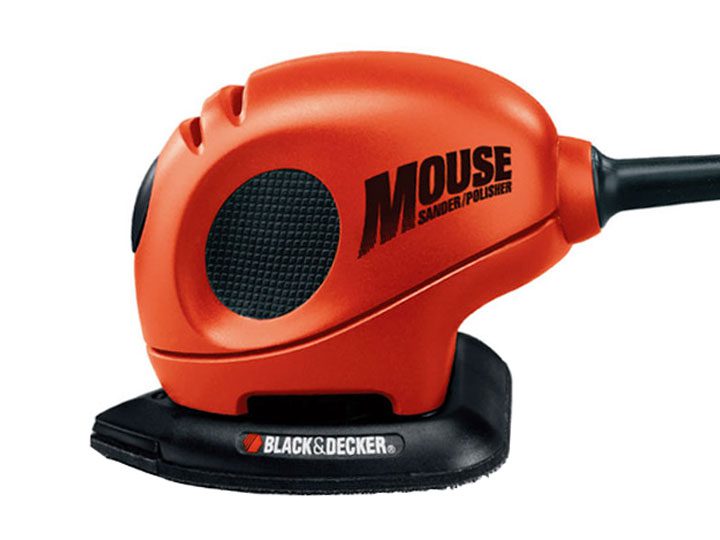
Orbital Sander

orbital sander

Sanding anything larger than an A4 page by hand is extremely labour intensive. An orbital sander removes the hard work involved in refurbishing old furniture, doing preparation work for painting and for wood work. Look for one with hook and loop sand paper attachments as this makes switching between different grits and replacing worn out paper quick and easy.

Miter Box

mitre box

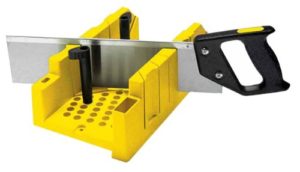
Save piles of wasted scrap wood and hours of measuring with a good quality miter box and hand saw. A miter box comes with pre-made slots in which the saw fits in order to quickly cut off planks of wood at 90°, 45° and often 22.5° as well.

Screw Driver Set

screw driver set

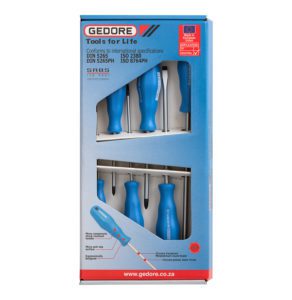
Screw drivers are essential for taking things apart, assembling kit furniture as well as hanging up pictures, shelves and accessories. Sacrifice quantity for quality and rather purchase a smaller set of 4 to 6 good quality screw drivers instead of a set of 20 or more cheap ones. Good quality screw drivers are made of a high quality tool steel with hardened tips to prolong the life of the tool. Most top brands offer a lifetime guarantee on their screw drivers.

Staple Gun

staple gun

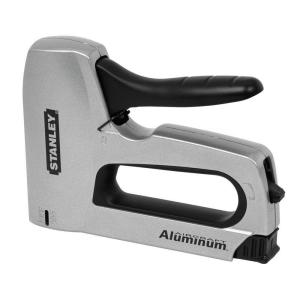
An industrial stapler is a must have for any upholstery job. You’ll be surprised at how easy it is to re-cover a bar stool or an ottoman with just a pair of scissors and a staple gun. Hidden staples are also useful when gluing furniture or frames together to hold the wood until the glue dries. Additionally round staples can be used to neatly fix electric cables to skirting boards or dry wall.

Homemade Gnocchi

This Gnocchi recipe is really quick to make for a family of four and doesn’t take the whole day to prepare. This recipe also keeps well in the freezer for up to four months.

Makes about 4 servings. Preparation time 25-35mins, Cooking time 5mins.

You Will Need:

  • 1 Cup of Mashed Potato (2 Medium Potatoes)
  • 2 Cups of Wheat Flour
  • 1 Large Egg
  • Pinch of Salt

Peel and chop the potatoes into quarters. Cover in boiling water and boil over a high heat for 10-15 minutes until they are soft. Drain the water and mash with a potato masher or electric beater for a creamier consistency. Make sure there are no lumps in the mashed potato.

flour and egg mixture

Measure one cup of mashed potato and add this to the flour, salt and egg in a mixing bowl. Combine the ingredients and knead into a firm ball of dough. Divide the dough into 6 smaller portions. Roll each portion out into long rolls on a floured surface.

dough roll

Cut the roll into equal portions, round the edges and gently press a fork onto the gnocchi surface. The groove pattern allows the gnocchi to hold the sauce better.

gnocchi pieces

The gnocchi can be frozen for three to four months or kept in the refrigerator for a week before cooking. Be sure to flour the individual pieces well before freezing so that they do not stick together.

completed gnocchi

To cook the gnocchi, bring a large pot of water to the boil and add a teaspoon of salt. Drop the gnocchi into the water about a cup at a time. They float to the surface when they are cooked so collect them from the surface of the water with a slotted spoon and drain in a colander.

Serve with a tomato and basil, Gorgonzola cheese, basil pesto or Bolognese pasta sauce. Here is a quick recipe for a tomato and basil pasta sauce.

Adjusting Cabinet Hinges

If your cabinets have adjustable concealed hinges, you may need to adjust them every now and again to keep the doors in line and opening and closing freely. Luckily this can be done quickly and easily if you know which screws to turn. Take your time and make small adjustments, checking the correction each time until the doors are in line and closing snugly.

adjust a cabinet hinge

As per the image above, first adjust the hinges vertically. You will need to do this by loosening all of the hinges on the door at once. Loosen the top and bottom vertical adjustment screws one or two turns so that you can move the door in small increments with some force otherwise the whole door may come loose and you will have to recruit someone to hold the door in place while you screw it back on. When the door is in the correct position, tighten all of the screws in the slotted holes.

Next adjust the hinges inwards or outwards. If the door fouls the cabinet side when closing or there is a large gap between the door and the cabinet side when closed then adjust the hinge outwards or inwards respectively to correct for this.

Finally you straighten the door. This is done with the screw on the front of the hinge. This will need to be done in conjunction with the other hinges on the door so make small adjustments to each until the door is straight. If the top edge of the door is too high, you will need to adjust the top hinge outwards (screw clockwise) and the bottom hinge inwards (screw anti-clockwise). If the top edge of the door is too low, you will need to adjust the bottom hinge outwards (screw clockwise) and the top hinge inwards (screw anti-clockwise).

Doors before:

skew doors

Doors after:

straight doors

10 Minute Tomato & Basil Pasta Sauce

This amazingly easy pasta sauce recipe can be made in under ten minutes, tastes much better than store bought tomato pasta sauce and keeps very well in the freezer for up to three months. It’s perfect for a last minute meal or make extra and freeze portions for those evenings when you don’t feel like cooking.

Makes about 4 servings. Preparation time 5mins, cooking time 5mins.

What You Need To Make Your 10 Minute Tomato & Basil Pasta Sauce

  • 1 Medium Onion, Peeled and Finely Chopped
  • 1 Tin Chopped Tomatoes or Whole Peeled Tomatoes
  • 1 Tbsp Olive Oil or Vegetable Oil
  • 1 Tsp Crushed Garlic
  • ½ Tsp Course Ground Black Pepper
  • 1 Tsp Salt
  • 1 Tsp Sugar
  • 1 Tbsp Dried Chopped Basil or ¼ Cup Fresh Basil Finely Chopped
  • Optional Parmesan Cheese for Garnishing

How To Make The Tomato & Basil Pasta Sauce

Heat up the olive oil over a high heat then fry the chopped onion and garlic until golden brown. Add the remaining ingredients and simmer over a medium heat for 5 minutes. Puree the sauce in a blender or if you used chopped tomatoes the sauce can be served chunky. Serve over freshly cooked spaghetti, fettuccine, linguine or gnocchi.

For a richer taste, allow the sauce to simmer over a low heat for half an hour, add a quarter cup of water to prevent it from drying out. The sauce keeps well in the freezer and can be defrosted and reheated in the microwave when required.

This pasta sauce goes really well with homemade gnocchi, although this takes a lot longer than 10 minutes to make but it really is worth the effort. You’ll also have something to brag about when your friends and family come over.

If you’re looking for a slightly richer sauce, here’s a recipe for a creamy gorgonzola cheese sauce, also easy to make and tastes great.

Organise Under Your Kitchen Sink

The area under our kitchen sink is usually reserved for piling up cleaning materials and supplies. The drain, disposal and plumbing get in the way of shelving and the sink takes up most of the upper cupboard space. Here’s a small project to take on to organise and tidy up your cleaning supplies so that everything is ready and easy to find when you tackle cleaning up the rest of your home.

empty kitchen sink cupboard

First empty out the whole cupboard. This sounds straight forward but there is usually years of sticky dust, cleaning material spills and caked up dirt on the cupboard surfaces. Tackle the clean up with some hot soapy water. If you use cleaning products which often leak or spill, consider putting down a rubber mat or removable plastic sheet which can be thrown away or cleaned up somewhere convenient every few months.

cleaning products

Now have a look at the cleaning materials which you do have. Start with the cleaning products, throw away any expired products or products you haven’t used in the last year. If your haven’t used them in the past four seasons then its unlikely you’ll use them again. Consider replacing any broken bottles and sprayers which still contain usable products. Definitely get rid of or re-bottle any leaking products, the ones making the rings and the sticky mess.

organising

Next decide on how you’re going to pack everything back into the cupboard. You could put all of the cloths into a container, sponges and scrubbies into another container and finally the cleaning products into a last container or onto a shelf.

organising 2

Alternately you can separate them by room; bathroom, kitchen, lounge etc or by use; dusting, wiping, disinfecting etc.

hanging bar

Take extra advantage of the wall of the cupboard by installing hooks to hang cloths, gloves, sponges etc and consider installing a rail just underneath the sink on which to hang your spray bottles and make use of the wasted vertical space. You could also hang a rack or shelf on the door of the cupboard to provide extra shelf space or put up hooks on which to hanging dish towels or cloths.

storage trays

If you have some experience working with wood, you could also build pull-able storage trays.

If you really have a small area under your kitchen sink then only put the cleaning materials you use most often there. Find a shelf or cupboard in the garage or passage to put the rest of your cleaning supplies. The area under your kitchen sink is quick and convenient to get to your common cleaning items but it wont be if everything is piled up and difficult to find.  Try cleaning out this area every two months so that it doesn’t become cluttered with expired products and full of sticky spill rings.

8 DIY Projects To Increase Your Home’s Value

Your home is often the single biggest investment you will make in your life. The trick is to find a balance between maximising the return on your investment and your monthly budget. There are a lot of things which can be done to increase the value of your home without breaking the bank. With some research and hard work, you can DIY your way to a more valuable home. Some of these ideas are perfect to do just before you sell your home to squeeze some extra value out of a potential buyer.

What You Can Do To Increase Your Home’s Value

Install Wood Or Laminate Flooring

laminate flooring to increase home's value

Installing hardwood wood or laminate flooring is an easy and inexpensive way to increase the value of your home. Wood adds an element of luxury and warmth to your living spaces and bedrooms.

Install A Closet To Add A Bedroom

install a closet

An additional bedroom instantly adds significant value to your home. By law a bedroom has to have a window and a closet. Simply add a closet to your den or office to add another bedroom.

Add Some Feature Lighting

chandelier lighting

Lighting can be made into an effective decorative feature. Large chandeliers are expensive however installing one or two in key rooms in your house creates the perception of expensive lighting. Down lights and mood lights installed in the right places also assist in subtly highlighting your homes features.

Install Crown Molding

crown molding

Crown molding provides an elegant transition between the colour of the walls and the white ceiling. It is really easy to install your own crown molding as it is made from polystyrene and can be stuck up with glue or builders acrylic.

Paint Your Kitchen Cabinets

painted cabinets

Your kitchen contributes significantly to your homes value and is usually the first room people notice when looking at your home. A coat of paint on your cabinets makes them look more modern and creates the impression that the kitchen has recently been re-done.

Give Your Bathrooms A Makeover

bathroom makeover

Adding some colour in the form of new blinds or curtains, towels, a rug and some decor can go a long way towards making your bathroom look more modern without costing a fortune. Cleaning and polishing the taps and fittings also make them look new and improve the appearance of the bathroom.

If you are feeling really adventurous, you could try tiling over the existing bathroom tiles to give the floor or wall a modern update. It is really easy to do and eliminates the mess associated with chipping away all of the old tiles.

Upgrade Your Front Door

faux panel door

Your front door is the first feature of your home people are introduced to when they arrive. Upscale your door and entrance area by adding decor or re-furbishing your door. Adding pine trim can transform your door from old to new and make it look like an expensive moulded door.

Install Baseboards

baseboards

Like crown moulding, baseboards instantly add a colour contrast and elegance to your walls and provide a transition between the colour of the walls and the flooring. As an alternative, for tiled floors, consider adding quarter width tiles around the edge of the room instead of baseboards.

Do you have any tips and tricks for increasing your homes value?  We have written a few more ideas for weekend projects which are sure to increase your home’s value, be sure to check them out.

Faux Panel Door Update, Modernise Your Home’s Entrance

Update your flat panel door with trim and a coat of paint to make it look like an expensive moulded panel door. A plain flat panel door is not exactly an attractive feature in any room. A coat of paint usually helps bring the door back to life but it still tends to blend in with the walls and furniture. A moulded panel door in a contrasting colour really stands out and becomes a feature as a front door or in a living space.

finished door

This is a relatively easy project to do and wont take more than about three hours excluding time for the paint and glue to dry. Buy a little extra trim as well to allow for cutting mistakes.

What You Need For A Faux Panel Door Update

  • Pine Trim Moulding – About 6m (20ft) Per Side
  • Nail/Staple Gun or Wood Glue
  • Enamel Paint 500ml (16 fl oz)
  • Sand Paper – 120 and 240 grit
  • Builders Acrylic or Wood Putty

How To Update Your Door

First mark on the door where you need the trim to go. Mark the outside edge of the trim as this is the length of trim you will need to cut before cutting the edges to 45 degrees. Be sure to get equal spacing around all of the outside edges. Use a square to ensure that the lines are truly perpendicular where they should be.

Next cut your trim. I would suggest buying pine trim if you intend to paint over it. Pine is a lot cheaper than oak and also much easier to work with. Only buy oak trim if you wish to clear varnish it to match the door’s wood. Cut the trim to the length of the marked outline. You then need to cut the inside edge of the trim to 45 degrees such that a perfect 90 degree corner is formed when two perpendicular pieces are placed together. A regular miter box makes this step a lot easier and start with the longest lengths, that way if you make an incorrect cut you can re-use the piece for one of the shorter lengths.

Now you need to attach the trim. A nail or staple gun works easier with pine trim. Use the thinnest nail which will fully penetrate the trim and the door panel. You want the head of the nail to be flush or slightly below the surface of the trim. If any nail heads protrude, give them a few taps with a small hammer until they are flush. Alternately you can use a strong wood glue to attach the trim but this is messy and requires patience while the glue dries.

Use wood putty or builders acrylic to fill in any gaps between the moulding or sunken nail heads. Let it dry and then sand it smooth so that the trim flows continuously around all of the corners. If you have used wood glue to attach the trim then its a good idea to leave it to dry overnight before painting.

numbers

The door can finally be painted. Paint the trim first and then the surrounding panel. It will usually require two or three coats if you are going from a dark wood to white or a light paint colour. Be patient and allow the paint adequate time to dry between coats to get the best finish. The paint may highlight any high or rough spots in your work, allow the paint to dry in these areas and then re-sand them before painting again to get the best finish.

door handles

Black numbers or text on a white door (or visa versa) look more elegant and provide a nice contrast. Plastic or metal numbers can easily be spray painted to a new colour. New door handles and locks also go a long way to making your door look more modern and elegant.

Do you have an old steel door which is not holding its paintwork? Here’s a guide to give a steel door a fresh start.

If you enjoyed this project, have a look at these 8 DIY projects to seriously add value to your home.

Have you given your door an update? Let us know in the comments section below, we would love to include your pictures.

14 Less Common Uses For Baking Soda

Baking soda is an extremely useful ingredient to keep around the house. From baking to cooking, cleaning to spa products, it has a broad range of uses. Here are some of the less common but very useful ways in which it can be used around the house.

Here Are Some Things You Can Do With Baking Soda

  1. Unclog your drain by mixing it with vinegar. Mix equal parts in  a cup and quickly pour the foaming liquid down the drain to unclog and clean.
  2. Exfoliate by using a paste made with coconut oil. Mix 2tbsp of baking soda with 1/2tsp of coconut oil. Scrub the area to be exfoliated with the paste for 3 minutes before rinsing with cold water.
  3. Clean your stove with baking soda and vinegar. Sprinkle your stove top with baking soda, then spray vinegar over the fine powder. The mixture will fizz and lift the grease off of the stove.
  4. Easily clean up a burnt pot or pan using baking soda as the cleaning agent.
  5. Keep your fridge, shoes or cupboard smelling fresh. Place a cup or old tin full of it in your refrigerator and cupboard to keep them smelling fresh. Alternately sprinkle some in your shoes before putting them back in your cupboard to deodorise them.
  6. Make homemade bath fizz balls. Combine it with cream of tartar and some herbs and oils to create homemade bath bombs without any harsh chemicals.
  7. Relax with a face mask made using 1/2 tsp of baking soda, 1/2 tsp of lemon juice and 1 tbsp of honey. Mix into a paste and then spread onto the skin and allow it to stand for 15 minutes before rinsing off with cold water.
  8. Make a re-mineralising toothpaste using 1/2 cup of coconut oil, 3 tbsp of baking soda, 1 tbsp xylitol and 10 drops of peppermint oil. Mix together into a thick paste and use in place of normal toothpaste.
  9. Make boiled eggs easier to peel by adding a teaspoon of it to the water when boiling.
  10. Sweeten your home grown veggies by adding a teaspoon of it to the water once a week. They will naturally get a deeper colour and taste sweeter.
  11. Renew your car’s headlights by lightly polishing them with a mixture of equal parts of baking soda and toothpaste. A quick polish will leave your headlights looking years newer.
  12. Refresh your mattress by sprinkling baking soda over it, allowing it to stand for an hour or two and finally vacuuming it up with a brush attachment.
  13. Clean your jewelry by mixing some with dish soap and hot water. No hard work and intensive scrubbing required.
  14. Remove yellow shirt stains. Allow baking soda to do the hard work in removing yellow stains cause by sweat and deodorant on your white shirts.

Share This Tip

Over ten amazing uses for baking soda around the house

Shared Image: BakingSoda by kafka4prez modified and used under CC BY 2.0

Beer Bread

This simple bread has an amazing yeasty beer flavour and it’s best served warm with a fresh crispy crust as a side for a hearty stew or potjie. The actual recipe is extremely easy, all you do is mix beer, flour and some sugar and then bake it in an oven for an hour. The beer gives the bread it’s flavour and assists with the rising of the flour while the sugar brings in some sweetness to contrast the bitter hops flavour in the beer. The choice of beer drastically affect the final product, you can go for a lager if you would like a bitter malt taste or for a more hoppy bread try an IPA or blonde.

What you’ll need:

  • 330ml (11fl oz)  Bottle of Beer
  • 400g (14oz)  Self Raising Flour
  • 50g (1 3/4 oz) Sugar

To really activate the yeast and get the bread to rise well, you need to warm the beer up. This is best done by pouring it into a saucepan and warming it over the stove, you’ll want to warm it to bath water temperature, it mustn’t boil. Next mix in the flour and sugar until a thick dough is formed. Pour it into a bread tin and bake it in the oven at 180°C (360°F) for 50 minutes or until golden brown.

To try something different, pour melted butter over the bread before baking, add wholegrain mustard to the batter or sprinkle some Cheddar or Gouda cheese over the top.