Home Blog Page 37

iPhone 6 Volume & Mute Button Replacement Guide

Here’s a complete guide to replacing the volume and mute button assembly on an iPhone 6. The repair fixes any problems you may have with the buttons sticking, not clicking or registering at all and problems with the phone not going into mute mode or switching rapidly between mute and normal mode. The repair is quite easy to do however it does take quite long as you need to remove both the screen assembly and the battery in order to get to the volume and mute button assembly. It is well worth it though as the replacement parts can cost as little as $3, far cheaper than taking your phone in for repairs.

Although this repair video is done on an iPhone 6, the process is fairly similar for the 6 plus.

If you’ve shattered or cracked your screen, we also a have a guide to replace your iPhone 6 screen.

What You Need To Replace Your iPhone 6 Volume & Mute Button Assembly

  • iPhone Toolkit – Buy Here
  • iPhone 6 Volume & Mute Button Assembly – Buy Here

The iPhone 6 plus is very similar internally to the iPhone 6 and this guide can be used for both models.

  • iPhone 6 Plus Volume & Mute Button Assembly – Buy Here

How To Replace Your iPhone Volume & Mute Button Assembly

Start out by finding yourself a nice well lit work surface on which to work. You’ll need a bit of space to lay out the components as you remove them and the screws are really small and easy to lose.

Make sure that you keep track of each component and its screws as you take them out, the screws are different lengths and you don’t want to damage components by putting the screws into the wrong places.  It helps to draw a small sketch of the components and place each screw on the sketch as you remove them, this way you’ll always remember which one goes where.

One area which is particularly difficult is getting the battery out of the compartment. It is stuck into place with really strong adhesive tape. Gently heating up the back of the iPhone case with a hair dryer or heater softens the adhesive a bit and makes it easier to remove. Be careful not to damage any of the ribbon cables for the side buttons near the top of the phone when you are prying underneath the battery.

For more information on removing the battery, have a look at our guide to the iPhone 6 battery replacement.

Good luck and enjoy the repair. If you found this video helpful, please like it and subscribe to my channel for more tech videos.

Top Landscaping Ideas for 2018

Every household should tell a story. Exterior space is just as important as interior in this regard, and gardens are by far the best outlet for creative expression. One can easily experiment with its appearance because the changes are not as lasting compared to the ones you can make on the very structure of your house. New trends always bring some new aesthetic ideas to the table, and checking them out is a good opportunity to light a spark of creativity. With that in mind, if you are in the mood for a garden makeover, here are top landscaping ideas for 2018.

Beach Landscaping

Beach landscaping

Do you ache for a house at the beachfront? Do you feel a tad bitter because you live in the harbor city, yet your lot is far removed from the sandy coastline? Well, you can easily “trick” your eye by opting for the beach landscaping style in your yard. This design choice has become very popular among people who live in continental areas and yet yearn for the “summer beach” feeling. The trick to this landscaping idea is all about rocks – this is why it is one of the most DIY friendly projects. Simply, start off by creating winding paths with gray-white gravel, but make sure the rocks are of similar sizes for the most aesthetically pleasing visual effect. Line your trails with bigger rocks, preferably the ones collected at the beach area. When it comes to plant life, you can go wild with a variety of tropical grass, agaves, Mediterranean shrubbery – essentially, anything that typically grows near the sandy beaches. Don’t pay too much attention to rows and lines when it comes to plant life; the more messy it appears, the more genuine it will look.

Japanese Garden

Japanese Garden

Traditional gardens from different corners of the world are always a good source of inspiration, and it appears Japanese ideas are about to blow up once more. It’s hard to deny the soft and graceful allure of such setup. Above all else, there is a sense of organic flow to Japanese gardens that are coupled perfectly with orderly appearance. Waterfalls, charming bridges and streams are the crucial elements that define this design choice, but you don’t have to waste money and clean water to get such appearance. You can fill the streams with sand instead. However, grovel is a better choice if you have a sizeable yard and you live at the location where winds tend to be strong. Pine trees, bamboos, and a variety of mosses are good starting choices when it comes to plant life, as well as the mini-trees, shrubbery, and succulents. Line your garden paths and corners with larger rocks pulled out of streams and faster rivers – the ones with a plate-like shape.

Modern Formalism

Modern formalism

As a stylistic trend, minimalism simply refuses to leave the spotlight due to a very obvious reason. It is one of the most elegant and simple solutions that compliment every space, and especially lend itself perfectly to the idea of making smaller environments feel larger. Therefore, turning your backyard garden into a formal oasis with clear outlines and a simple approach to design is always a good choice. However, opting for this style will definitely require some help from experienced landscaping professionals because it is much more sophisticated than it initially appears. In design, there is a saying: the simpler something truly elegant appears, the more effort went into it. Such design choice will definitely pay off in the long run as your garden will always look modern.

Open Air Rooms

Open air rooms

We have discussed types of garden landscaping, but what about the complimentary spaces like decks and porches? Well, in 2018, it’s all about going large, and open air rooms are the best way to truly indulge in your impeccable garden while still enjoying the comfort usually reserved for interior. In fact, you can create an open air living room in your backyard and take out the comfy couch, pillows, and coffee tables. It can be the largest room of your home.

Landscaping is a good outlet to test your creative limits and draw out the true you when it comes to aesthetics. Following contemporary trends, as well as looking backwards, can prove to be very helpful when it comes to defining your own idiosyncratic idea of a garden. This organic approach to landscaping is viable as long as you do not do it too often. Whenever you do something new and daring, wait a few years, and you’ll have enough overgrown material to serve as the new blank canvass.

If you enjoyed this article, have a look at these creative ways to use pebbles to upscale your garden or decorate your garden by turning an old tyre into an amazing pond.

iPhone Storage Full, Here’s What To Remove To Free Up The Most Space

If there’s one thing that is particularly frustrating when you own an iPhone, it’s trying to record a video or download an app only to be told that your iPhone’s storage space is full. If you’ve had your phone for a while, you’ve probably built up an awesome collection of photos, videos, messages, emails and apps and it can be quite a task to decide which to get rid of in order to free up some space.

Here’s a guide to help you find out which apps and files are taking up the most storage space and how you can make use of cloud storage or external devices so that you don’t have to lose your information permanently.

While you’re here, check out these 5 Secret iPhone Codes You Didn’t Know About.

Check Your iPhone Storage Details

To start with, you’ve need to find out what your biggest storage consumers are, you can bring up a quick list of the guilty parties by going to Settings > General > Usage. You’ll see a list of apps followed by how much storage space each is using.

iPhone storage usage

Now that you’ve got a list, here’s how to decide what to remove in order to free up some space.

Videos

Video files are usually one of the biggest storage users on your phone, especially HD video. In general, 1080 HD video uses up around 130MB of storage space per minute of video. this goes up to around 500MB per minute for 4K HD video.

If you use your phone for recording video, you should consider getting an external drive to store your video on or upload it to a cloud based platform as soon as you’re done. It won’t be long before 3-4 GB of space is used up when you’re filming.

Here are some of our favorite external drives which plug directly into you iPhone’s lightning port and provide user friendly apps to copy your content across. You can also save your videos, pictures and music to your drive and play them on your phone when you need to.

Sandisk 32GB iXpand Drive

SanDisk 32GB iXpand Flash Drive – Buy Here

iPhone Lightning Flash Drive 64GB

iPhone Lightning Flash Drive 64GB – Buy Here

Photos

One of the next biggest users of your storage space is likely to be your photos. Camera’s have become an integral part of our smartphones and our lives, we love taking and sharing pictures. A photo takes up anything from 3-8MB depending on the model of your phone and the camera settings.

The best thing to do is to delete your unused or unnecessary photos as you take them. I’m sure you don’t need fourteen pictures of your healthy lunch you had on Tuesday or the eleven pictures of your dog sleeping. Upload the ones you like and delete the duplicates.

Better yet, make use of Apple’s online photo storage facility by automatically uploading your photos to iCloud. This way you can delete them form your phone but have them always available online when you need them.

Apps

Most apps don’t take up that much space but it adds up quickly if you’re one who has an app for everything.

iOS provides a nice feature to “Offload Unused Apps”. This is also accessible in the storage view as done above.

Offload Unused Apps

Offloading unused apps essentially means that your app data and settings are retained but the actual application is removed from your phone for older apps which you haven’t used in a while. If you do decide to use the app again, you simply download it and it will install along with the data and settings which you had previously set up.

Music

Each song on your phone takes up around 3-10MB and storing music on your phone is not really neccissary anymore with services like Apple Music, Spotify, Amazon Music and Sound Cloud to name a few.

Keep a few songs or albums you enjoy on your phone and leave the rest to the online services.

This sums up our list of things to delete in order to free up some space on your iPhone. If you’re still having storage problems then you’ll probably need to consider getting a slightly larger phone on your next upgrade.

Are there any tips and tricks which we missed? Let us know how you keep your iPhone storage free in the comments section below.

Are you charging your iPhone battery correctly? Here’s a guide to charging your iPhone battery the right way.

Dog and Cat Hair, How To Keep Your Home Hair Free With a Shedding Pet

We all love our furry friends and most of us consider them to be a part of the family, but if you own a short hair breed of dog or cat then you’ll know the continuous struggle involved in keeping your home free of pet hair. Fortunately, there are a number of ways you can manage your pet’s shedding and control the amount of hair lying around your home and we’d like to share them with you.

Brush Every Day (Or At Least Every Second Day)

It may sound a bit excessive but this is perhaps the most effective way of managing your furry friends shedding. Giving  your dog or cat a quick one minute brush every day will save you hours dusting, sweeping and vacuuming, it will really be worth your while. Try and get into a habit or brushing your pet at the same time every day, perhaps before dinner or before their afternoon walk, habits make daily tasks seem more routine and less of a chore.

Try the Furminator, it is an all in one pet de-shedding tool which really works wonders in removing all of your furry friends loose hair, you’ll really notice the difference around your home if you use one of these once a day. For large dogs buy here, for smaller dogs or cats buy here.

Use Blankets, Throws Or Covers On Your Furniture

Think about what’s easier, getting the vacuum out and giving your sofa, couch, bed or ottoman a brush down and good vacuum or simply rolling up the blanket or throw and throwing it into the washing machine? It’s a lot easier to simply throw something into the wash, especially since all of the covers can be done at once.

Keep two sets so that you can wash and dry one while the other is in use. When you have guests, simply pull the covers off and your furniture will look clean and fresh.

When washing the blankets, throws and covers, remember to use a warm wash of at least 55 degrees Celsius (130  degrees Fahrenheit) to kill of bacteria and other allergens. Don’t mix these covers with your clothes or bedding, always wash them separately.

While you’re cleaning the throws, blankets and covers, have a look at these Things You Should Be Cleaning But Probably Don’t.

Cover Your Car Seat

Following on from the previous tip, if you take your pet in the car often then your car is probably also covered in pet hair. Get a pet car seat cover like the one below to keep the pet hair in one place. It not only protects your seats from their sharp nails but is also easily removable to brush off, vacuum or wash, keeping the rest of your car clean.

Barksbar Pet Car Seat CoverBuy Here

Dress You Furry Friend

This tip ins’t for everyone, or every breed of dog, but it certainly goes a long way towards keeping the hair off the ground. Dressing your pet up in a well fitted pet jersey or t-shirt keeps the hair in the clothes and off of your floor and furniture.

Dog Sweater And Track SuiteBuy Here

Vacuum Regularly

A lot of the hair that lands up on your clothes and on your furniture has been carried there from the floor and other furniture. Vacuuming your home regularly picks up all of the hair on the floor and removes the chance of it being re-distributed around your home.

Get a good quality vacuum with a water filter or HEPA filter, one which has been specifically designed to suck up and filter out pet hair and dander.

Here are our top recommendations:

BISSELL Big Green Complete Home-Cleaning SystemBuy Here

Eureka Mighty Mite Pet Lover Bagged Canister Vacuum CleanerBuy Here

Ovente Bagless Canister Cyclonic Vacuum – HEPA FilterBuy Here

Use A Rough Blanket In Your Pets Bed

If your pet has a tendency to lounge around in their favorite spot for most of the day, try using a rougher blanket in that spot or in their bed. A rough blanket helps to “brush” the hair off of them while they sleep or roll around in it. The blanket traps the hair and you can simply wash the collected hair out once a week.

Clean Your Air Conditioning System Filters

If you’ve got pets, especially dogs, cats and birds, you’ll be surprised how much pet dander lands up in the AC filters. Be sure to check, clean or change your AC filters every month or two to prevent a build up. Pet dander can quickly clog up these filters and may land up damaging your AC system.

Cleaning Products To Help You Around The House

Now that you’ve implemented the above tips to keep your home hair free, you’ll likely have a lot less hair lying around.

For those bits that still make it through, here are some of our favorite products we use to keep our home, furniture and clothes hair free:

Swiffer Spray Mop Cleaner Starter Kit – This all in one mop kit is perfect for giving your tiles or hard wood floors a quick clean up. Run it over the floor and use the built in spray bottle to attract and keep pet hair stuck in one place to collect and throw away. Buy Here

Lint Roller – Going out with pet hair all over your clothing doesn’t look good or give a good impression of your home’s cleanliness. Get a good quality lint roller to quickly go over your clothing before you leave and remove any excess pet hair. Buy Here

Pet Grooming Glove – If you pet is not a fan of being brushed then consider getting a grooming glove. It is much softer on your pet and also allows you to hold them firmly while the glove removes loose hair. Buy Here

Now that you’ve got rid of the pet hair in your home, have a look at these 5 Cleaning Tips To Rid Your Home Of Dust.

Top Backyard Hashtag Trends This Summer: Instagram Upgrades for Your Outdoors

Having a backyard is a fantastic perk, and it is no wonder that people like to brag about it on social media and beyond. Whether you like taking pictures where your backyard is the primary object of interest or you want it to be a background for portraits, you probably want them to be seen and appreciated by other people. You know what helps your photos be seen? That’s right: hashtags. And behind every hashtag, there is a backyard trend that will make your outdoor space look even more astonishing. Here are the hottest current trends to watch this summer.

#stringlights

Backyard lighting is vital if you want to use your backyard after the sun is down. While you have a wide range of backyard lighting options, including lanterns, candles, solar lamps, and chandeliers, there is nothing more romantic and whimsical than illuminating your patio with bistro lights. Besides giving the exterior an unparalleled charm, string lights also serve as a great portrait (selfie) backdrop, because they can produce excellent Bokeh effect.

#fire

fire instagram hashtag

Fire is a great backyard hashtag that can get you seen over time. It is mostly manifested through fireplaces and fire pits. Fire pits are especially popular because they are easy to make or affordable to buy. They can serve as centerpieces of the seating area or a “wow” factor incorporated into the pool. You can build it in or above ground, use concrete, iron, or bricks, etc.

#palletfurniture

Even though 2018 was marked as the year when we leave the DIY behind and move on to craftsmanship and artisan pieces, this trend still hasn’t reached our backyards. Pallet backyard furniture is still all the rage, regardless of whether we are talking about benches, sectionals, club tables, dining tables, lounges, shelves or stools.

#shade

shade instagram hashtag

A backyard without proper shade is impossible to use, especially during hot summer days. However, that doesn’t mean pergolas and other solutions are there only because of their function. The offer of custom Shade Sails Online is extensive, and they can fit into every outdoor space. Besides sheltering you from the sun when taking selfies (good lighting is the key for a perfect selfie), these installations also make great landscape photo stars, if you catch them at the right angle.

#pool

Nothing beats having your own pool in the backyard. While this is hardly a new trend, it is essential to stress that it is not going anywhere. In fact, it is being updated more and more with creative ideas such as a hot tub, waterfalls, fountains, lighting solutions, plants, and an inviting poolside.

#flamingofloat

flamingo float instagram hashtag

Another pool accessory that has taken the world (especially Instagram) by storm comes in the form of an extravagant inflatable toy – a pink flamingo float. Celebs like Taylor Swift have shown us how to strike a pose on floats, and you can rock this trend too. Besides flamingos, there are more elegant floats, such as giant swans, or downright silly ones, like a pizza slice or watermelon.

#japanesemaple

This plant is in demand these days, especially in urban gardens, because it grows slowly, and it can be kept in a container for several years. As an interesting combination of green, pink, and red, Japanese maple can bring in liveliness into every garden.

#alfresco

It is a common idea that outdoor dining spaces should be located just off the house. While it is convenient to have them near the kitchen, it also doesn’t allow you to immerse yourself in the magic of the garden fully. Alfresco allows a luxurious experience which includes special furniture, lighting, and flooring. It is tailored for a group photo with your friends.

#greengarden

greengarden instagram hashtag

Green is always in, and particularly when it comes to gardens. It is nature’s most beloved color easily evoked through the lush lawn, bushes, shrubs, ferns, creeper plants, trees, herbs, and flowers. All of these elements together make an ideal canvas for out-of-this-world Instagram photos.

#petfriendly

An outdoor space your pets love has multiple benefits. It makes them happier and more playful. It gives you the chance to take a pic of them playing in their intimate surrounding. If your pets are happy, you are happy. A pet-friendly garden is accomplished with a good fence for safety, fresh water, pet-friendly plants, running tracks, shelter, and playing area.

These were the top ten Instagram hashtag trends that can guide your way through backyard upgrading. The result will be a gorgeous outdoor space and stunning photo sessions.

Now that you’ve got the right hashtag, why not try out these 10 Easy DIY Upgrades To Do This Weekend To Increase Your Home’s Value.

How To Save Thousands When Decorating This Year

Regardless of whether you are a professional interior designer working on a large project or just want to redesign your kitchen, it always pays to know the best ways to save as much money as possible. Decorating your home is rarely a cheap thing to do and usually comes with stress, hassle and a lot of mess. Even the smaller tasks are never as easy or as quick as you think. Keeping that in mind, we’ve made sure that the tips chosen in this guide will save you time, hassle and of course, money.

Saving money when decorating is always important as the budget of decorating can often determine the style we decide to go for. For example, you may wish to turn your room from modern and minimal to retro chic and to do this you will need wooden type furniture, bespoke features and vintage lighting. All of these things are usually every expensive, but with these tips you can achieve this look and have money to spare. In this guide we are going to show you the top 20 tips on how to save the most money when decorating this year.

If you’ve interested in saving money, have a look at these 40 Frugal Tips To Save Money On Living Expenses.

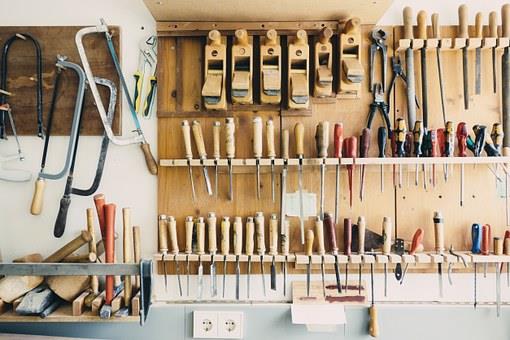
Tip 1 – Find free materials around you

By this we don’t mean rummaging through bins of course. You will be surprised to find out how many things you can actually get for free! Many people will want to just get rid of items they don’t want anymore because they are moving and can’t be bothered to try and sell them. This is where you can get some amazing bargains. From small table lamps to large tables and chairs, people will often happily give you these things for free if you are able to pick them up.

Tip 2 – Improve your existing furniture

Before you start throwing out all of the furniture in the room it might be worth considering if it can be updated or improved. One of the biggest trends right now in interior design is re-purposed and reupholstered furniture, especially with wooden furniture. As the vintage look has never been more popular, we are seeing a huge rise in people re-purposing old tables and chairs, bringing new life to something that was once nearly thrown away.

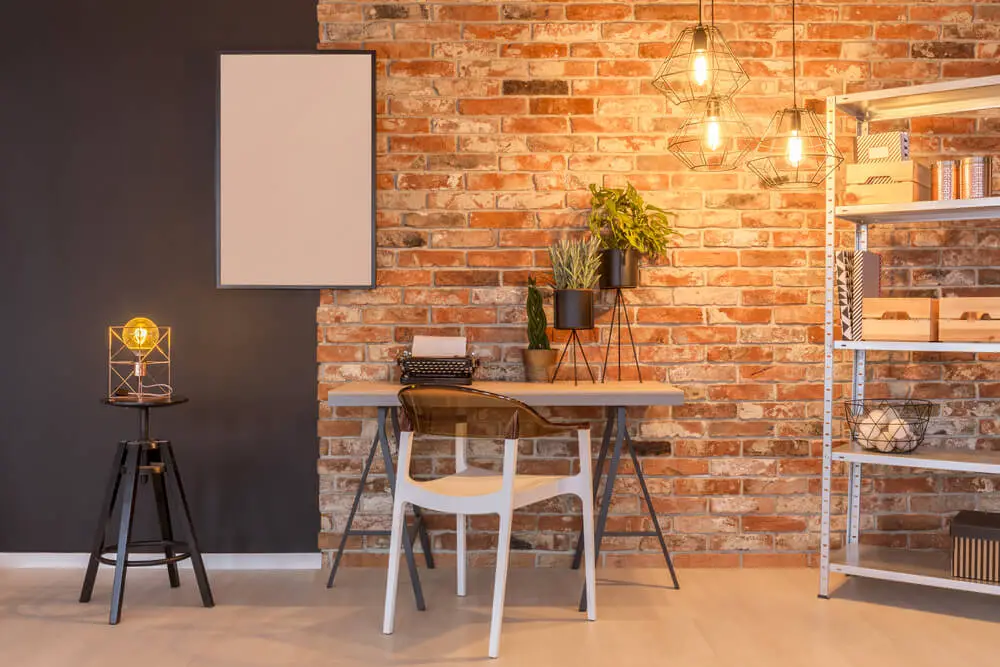
Tip 3 – Feature wall

Feature Wall

One of the simplest ways of adding a fresh and new feel to a room is through painting or wallpapering the walls. Paint and wallpaper vary in price, but one thing that is consistent with this is the amount of time it takes. Updating the walls in your home is a long process and one that needs care and attention if it is to look right. However, to save money and time you can simply just update one wall; the feature wall. You might be surprised at how much a feature wall can change a room’s dynamic. It draws the eye as soon as you enter and instantly sets the tone for the rest of the space.

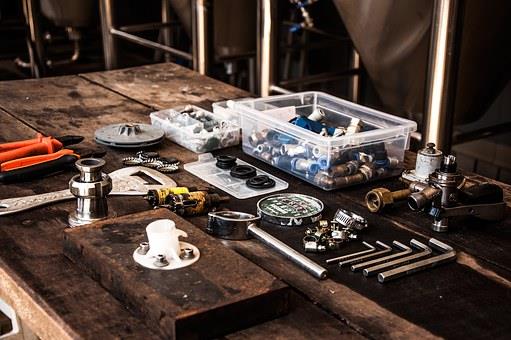
Tip 4 – Update the plumbing fixtures

Your bathroom and kitchen plumbing fixtures are often untapped resources when it comes to adding a new design feature to the room. By simply changing the usual metal finish to copper, brushed chrome or brushed bronze you can quickly update the style without having to purchase a new sink or bathtub.

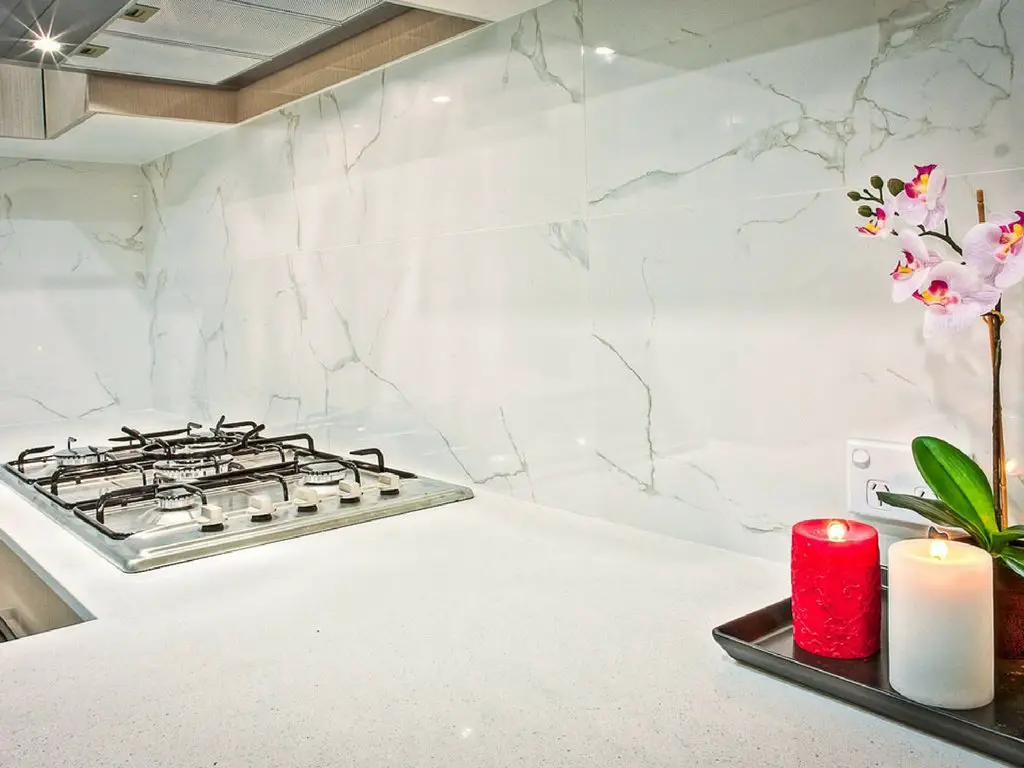
Tip 5 – Laminate worktops

Replacing your kitchen or bathroom worktop is usually a very expensive thing to do, but also one of the best ways to redecorate a room. It instantly breathes new life into the space whilst setting the tone and creating a brand new feature that is guaranteed to impress. This can cost anywhere from hundreds to thousands of pounds. This is because people will usually prefer the feel and style of natural wood or stone for their worktop. Well, the good news is that you can now have this natural style without having to pay out big thanks to modern laminate worktops. Recent technological advancements has meant that laminate sheets now look identical to the real thing and even have the same texture. They come in a vast selection of styles/colours and if you wanted to know more about this then please find here an ultimate laminate sheet guide.

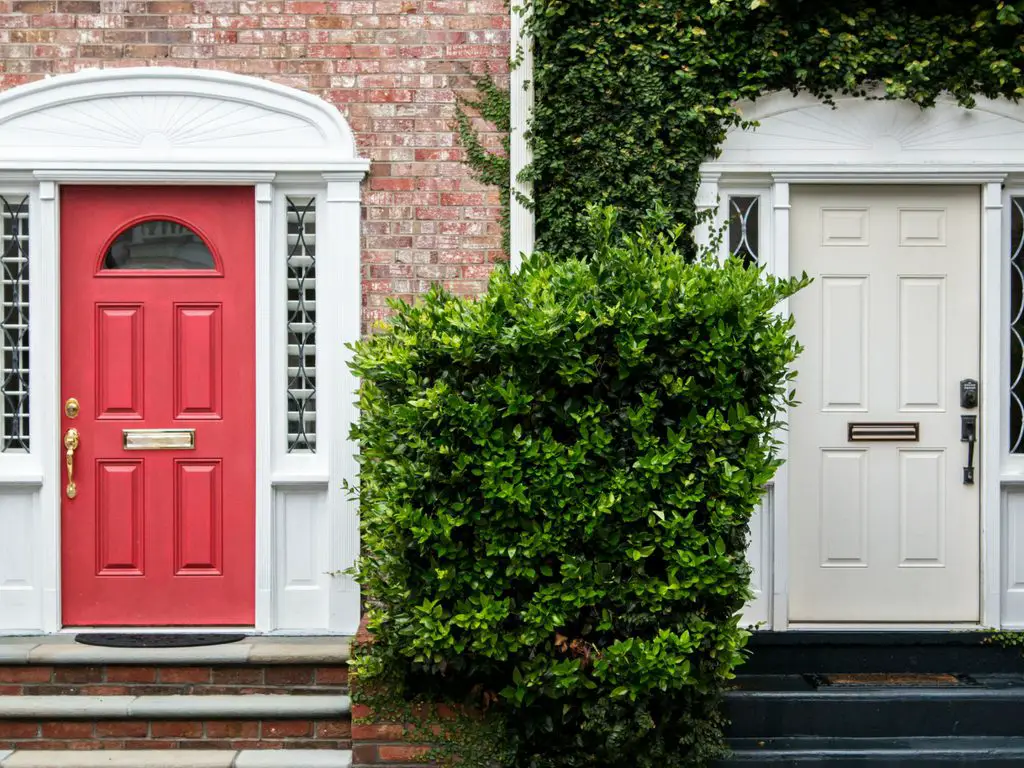
Tip 6 – Door handles

Changing your door handles is a very quick, easy and cheap way of creating a new design style. Although small, the right colour door handle can have a surprising effect on a rooms look. Research what material and colour goes with what colour and type of home to ensure it doesn’t look out of place.

Tip 7 – Never underestimate the power of a mirror

never underestimate the power of a mirror

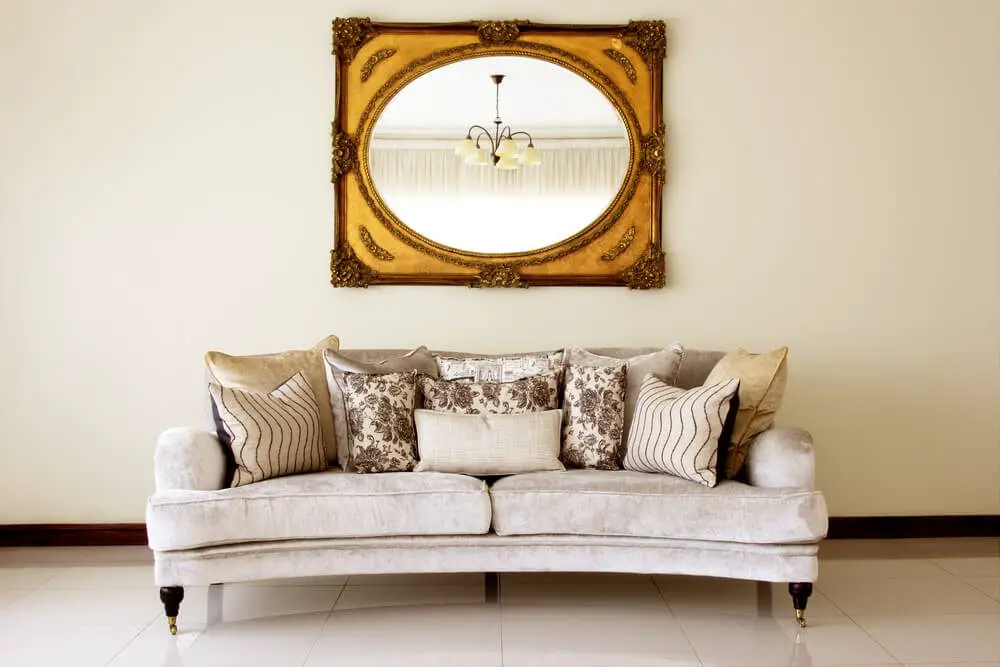
Mirrors do so much more than you might think. They can add light to a room, increase the size and add seamless flow. However, many of us are guilty of not making the most out of the mirrors we already have. Before you go out and invest in new ones, look at the ones you have already and see how they can be improved. Maybe it would look better in a different room or nearer natural light.

Tip 8 – Bring the outdoors inside

The past few years has seen a surge in popularity with indoor plants being used to create a new type of bohemian style. Often in vintage looking pots and hanging from the ceiling, these indoor plants are relatively cheap and a great way of updating your interior design.

Tip 9 – Shop second hand

This may seem like a more obvious one, but shopping through second-hand stores, thrift stores, markets and car boot sales can result in finding fantastic furniture for incredible prices. Some designers make a great living this way so it’s definitely worth checking out your local area for bargains.

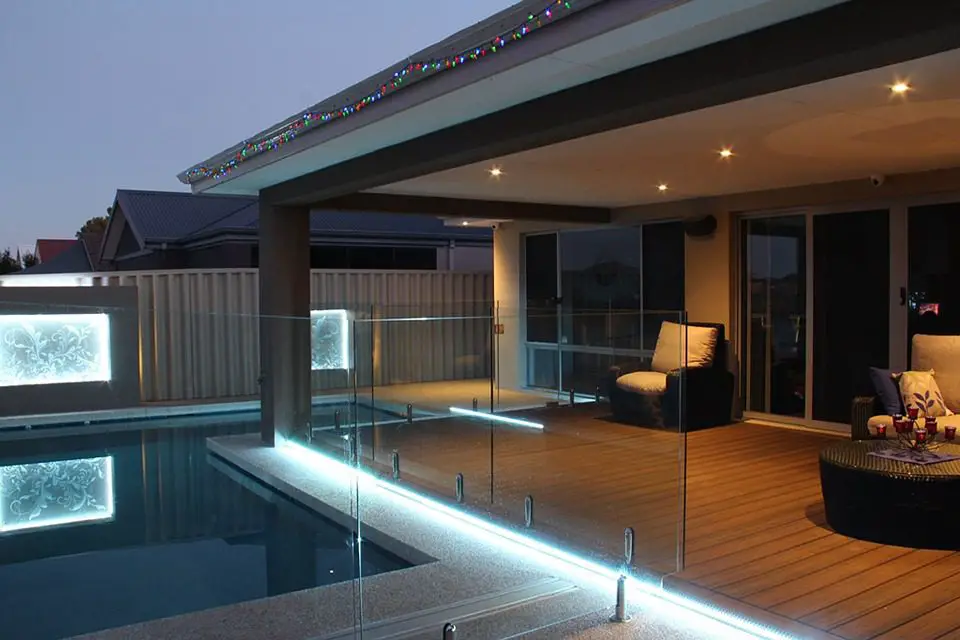
Tip 10 – Use lighting

use lighting

Lighting has the power to create a mood and even add size to a room. If used right, lighting can completely change how a room feels and looks. Whether you make use of the natural light more or invest in some new lamps or lampshades, lighting is an interior designers best friend. To save money, look at simply changing the lampshades, bulbs or position of where these are and see how different your room can look.

Tip 11 – Rearrange the furniture

Sometimes the best way to change the dynamic of a room is to simply rearrange the furniture. For a calm and serene environment try looking into how to implement Hygge and Feng Shui into your home.

Tip 12 – Decorating with paint

If you feel like your home needs redecorating but would like to keep it as cheap as possible then sometimes all you need is paint. A new lick of paint on the walls can totally revamp your room without having to change anything else. If your home has a shed or garage where you keep old tins of paint then check these first before buying new ones. If there isn’t much in some of them then you could mix these to make a bespoke colour and add a touch of your own personality to your home.

Tip 13 – Use fabric

Whether it’s sheets draped over lights or a throw on your sofa, fabric has the potential to turn your room into something completely different. By using them over lamps you can create a soft and subtle ambience that’s much cheaper than purchasing a brand new light.

Tip 14 – Don’t forget about the details

don't forget about the details

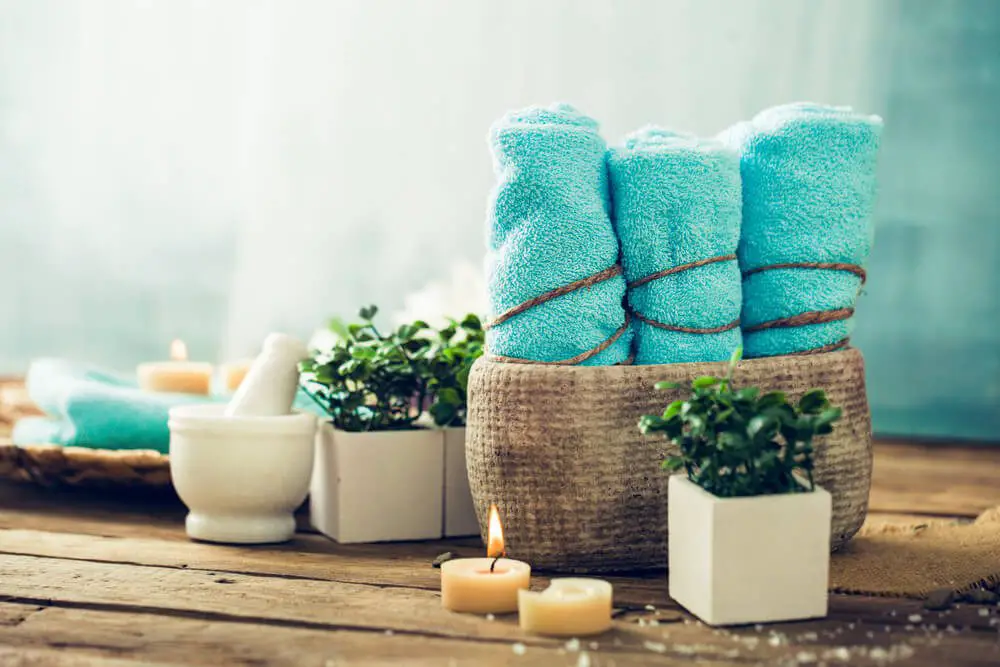
Sometimes the smaller things have the larger impact, so if you’re looking to spruce up your home but don’t want to pay big prices for big pieces of furniture then have a look at tweaking the smaller things. This could be anything from new cushions on the sofa to new towels in the bathroom, anything that can inject colour into a room can change the interior style.

Tip 15 – Declutter

Decluttering your home is sometimes all you need to do to revamp a room. If you think you need to redecorate then always declutter first as you may be surprised to find that this is actually all it needed!

Tip 16 – Layer rugs

Carpet or hardwood flooring can be pricey, but a fantastic way of updating your floor without having to break the bank is to simply layer rugs together. You haven’t got to use expensive rugs for this because you are layering them together. Get creative with it and enjoy making your own bespoke design feature.

Tip 17 – Group similar items together

group similar items together

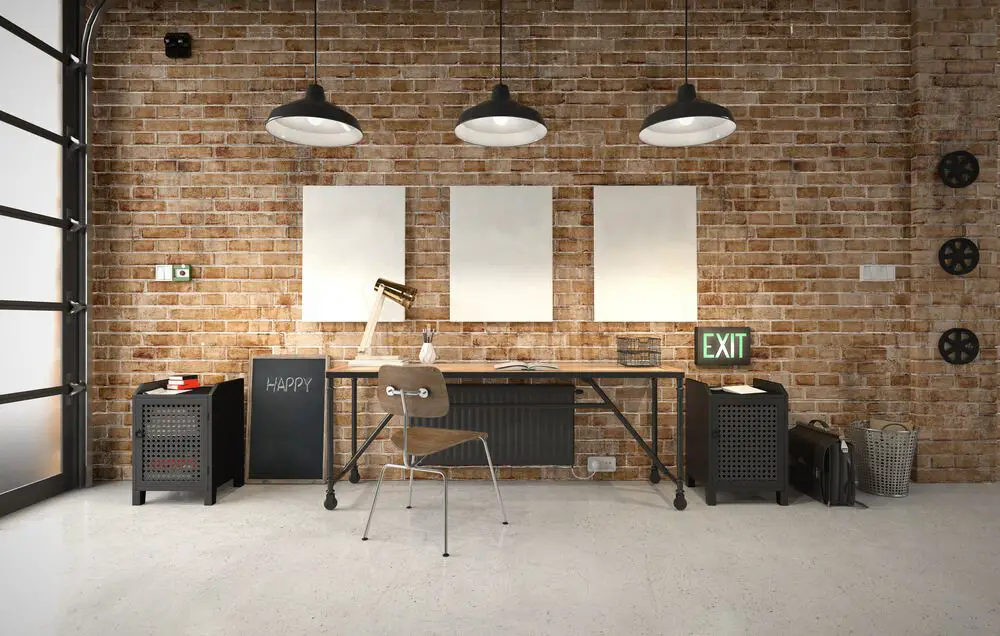
If your home has large walls then this can sometimes cause a problem when decorating within a smaller budget. Trying to fill a large space can get expensive if you are looking at buying large items, such as a full length mirror. However, if you group smaller, cheaper items together then you can fill this gap, save money and add a whole new dynamic design feature to the room.

Tip 18 – Wallpaper offcuts

Do you have any wallpaper offcuts at home? If you do then you can still put these to good use by adding them to staircases or wall borders. They can add a boost of colour to any room whilst also creating a beautifully bespoke design feature. You can find some great examples on Pinterest here.

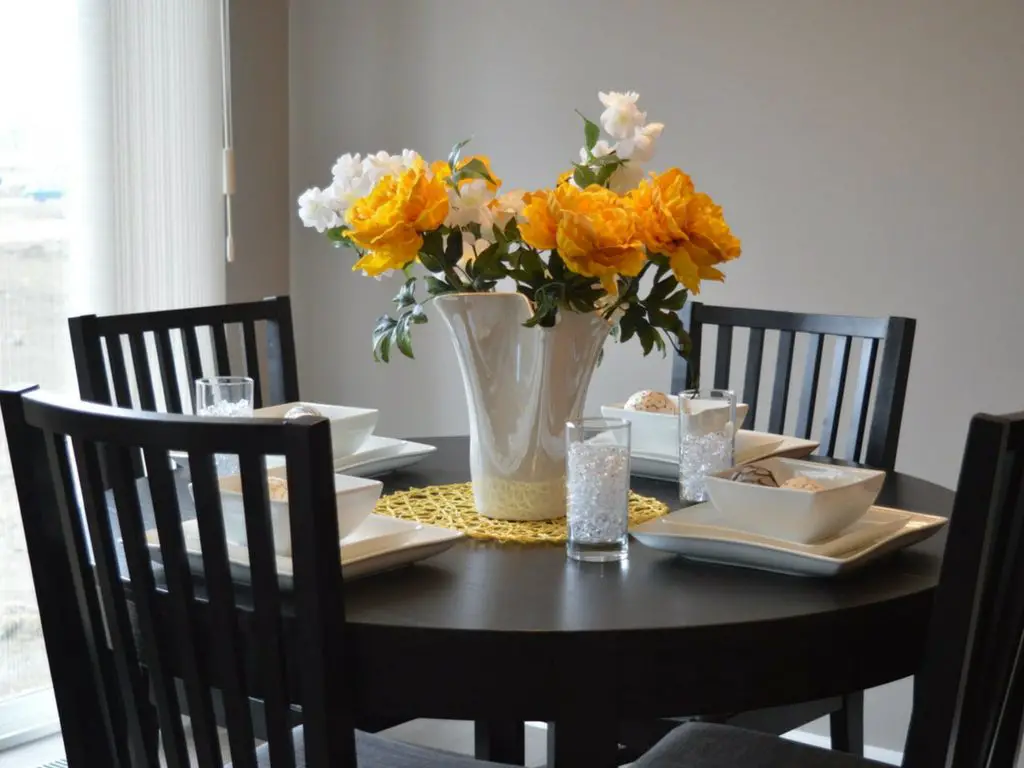
Tip 19 – Mix and match

It’s almost too easy to go over budget when decorating your home as there is just so much to choose from. Sometimes it really pays to compromise, only on the items themselves, not the style. Mixing different types of furniture is a great way of adding a modern style to any room. For example, a dining room chair isn’t too expensive for one, but if you need 6 then this really adds up. So, instead of this you can simply get two for the ends of the table and then cheaper chairs for the middle. It can still look fantastic and save you money.

Tip 20 – Swap party

Swap parties have become much more popular recently thanks to the fantastic bargains you can get! We all have different tastes so these parties are a wonderfully collective mix of furniture and furnishings. Get swapping with friends and family and have a great time whilst doing it.

Now that you’ve read our 20 tips to save thousands when decorating this year, have a look at How To Use Design Principles To Decorate Your Home.

How To Connect An ADXL345 3 Axis Accelerometer To An Arduino

In this guide, I’ll show you how to connect the ADXL345 3 axis accelerometer to an Arduino using the I2C communication protocol. The ADXL345 is a powerful accelerometer board which provides high resolution (13 bit) measurements up to +/- 16g. The data output is digital and can be accessed through either a 4 wire SPI or I2C digital interface. We will go through the basic connections as well as some of the core functions of the board in order to get your first accelerometer project up and running.

The ADXL345 supports both SPI and I2C communication, however, we are going to be using the I2C communicaiton protocol for two reasons; the first is that it leaves all of your analogue and digital pins open. I2C communication uses the SCL and SDA pins which are separate to your analogue and digital IO pins, unlike SPI communication which requires 4 IO pins. This leaves all of your IO pins available for your project. The second is that you need a 3.5V logic level converter if you are using a 5V Arduino (which are more common) with SPI communication as the accelerometer’s pins are only rated for 3.5V and not the 5V that the Arduino outputs.

This project assumes that you know the basics of Arduino programming, otherwise follow our guide on getting started with Arduino.

What You Need For Your ADXL345 Accelerometer Connection

Breadboard Connection

Prototype Shield Connection

  • An Arduino (Uno Used In This Guide) – Buy Here
  • ADXL345 Accelerometer Board – Buy Here
  • Arduino Prototyping Shield – Buy Here
  • 8 Pin Male Header Strip – Buy Here
  • 8 Pin Female Header Strip – Buy Here
  • Shield Male Header Strip Kit – If Not Included On Shield
  • Thin Insulated Wire – Buy Here

How To Connect The Accelerometer To Your Arduino

Before we start with the physical connections to your Arduino, lets have a look at the pins available on the ADXL345 board and their functionality.

ADXL345 3 Axis Accelerometer

The board has 8 pins with the following functions:

  • GND – Ground
  • VCC – Supply Voltage
  • CS – Chip Select
  • INT1 – Interrupt 1 Output
  • INT2 – Interrupt 2 Output
  • SDO – Serial Data Output (SPI) / I2C Address Select
  • SDA – Serial Data Input (SPI) / I2C Serial Data
  • SCL – Serial Communications Clock

Regardless of whether you are using a breadboard or assembling your board onto a prototyping shield, you’ll need to solder an 8 pin male header strip onto the terminals of your accelerometer board. You then use this strip to plug directly into a breadboard or you can plug it into an 8 pin female header strip which you’ll solder onto your prototyping shield.

I2C Connection Circuit Diagram

Now that you understand what each pin is being used for and you’ve soldered an 8 pin male header strip onto your accelerometer board, lets have a look at the I2C connection circuit diagram.

ADXL345 Connection Diagram

It is important to note that the Vcc pin is connected to the Arduino’s 3.3V supply and not the 5V supply, if you connect this incorrectly you may permanently damage your accelerometer board.

You’ll also notice that this connection method leaves all of your IO pins available for your project requirements.

Assemble The Components Onto A Breadboard

The breadboard assembly of this circuit is a really easy way to test the board, it does however have some limitations as this board relies on a good connection to the Arudino to transfer data and you’ll obviously need to move the accelerometer board around a bit to test that it is working. This may cause intermittent communication problems.

Plug the accelerometer board into your breadboard and connect the jumpers across to your Arduino. The final connection should look as follows.

ADXL345 Breadboard Connection 1

ADXL345 Breadboard Connection 2

Assemble The Components Onto A Prototyping Shield

Assembly onto a prototyping shield provides a more reliable connection to the accelerometer although it does require a bit more effort. Solder a 8 pin female header onto the shield for the accelerometer and make the connections to the required pins using some thin insulated wire on the underside of the board. Ensure that you choose a position on the prototyping shield which does not interfere with the components on the Arduino when plugged in.

Prototyping Shield Components

I have added a few more components to the prototyping shield in order to drive two servos and provide a few LEDs for indication.

Prototyping Shield Complete

All of the wiring connections have been made on the underside of the prototyping board to keep them protected.

Prototyping Shield Back Side Connections

The accelerometer board can then be plugged into the prototyping shield.

Prototyping Shield Complete - ADXL345 Mounted

Double check that all of your connections are correct and your board will then be ready to be tested with the sketch.

Upload The Sketch

The sketch is based on the Adafruit Sensor Library and the ADXL345 library, click on the links provided to download the libraries and install them into your Arduino IDE.

Once you have these two libraries installed, you can load the following sketch and upload it to your Arduino. You’ll need to open your Serial monitor to see the results coming from your board.

The sketch is built into the Adafruit library and can be accessed by clicking on File > Examples > Adafruit_ADXL345 > sensortest

#include <Wire.h>
#include <Adafruit_Sensor.h>
#include <Adafruit_ADXL345_U.h>

/* Assign a unique ID to this sensor at the same time */
Adafruit_ADXL345_Unified accel = Adafruit_ADXL345_Unified(12345);

void displaySensorDetails(void)
{
  sensor_t sensor;
  accel.getSensor(&sensor);
  Serial.println("------------------------------------");
  Serial.print  ("Sensor:       "); Serial.println(sensor.name);
  Serial.print  ("Driver Ver:   "); Serial.println(sensor.version);
  Serial.print  ("Unique ID:    "); Serial.println(sensor.sensor_id);
  Serial.print  ("Max Value:    "); Serial.print(sensor.max_value); Serial.println(" m/s^2");
  Serial.print  ("Min Value:    "); Serial.print(sensor.min_value); Serial.println(" m/s^2");
  Serial.print  ("Resolution:   "); Serial.print(sensor.resolution); Serial.println(" m/s^2");  
  Serial.println("------------------------------------");
  Serial.println("");
  delay(500);
}

void displayDataRate(void)
{
  Serial.print  ("Data Rate:    "); 
  
  switch(accel.getDataRate())
  {
    case ADXL345_DATARATE_3200_HZ:
      Serial.print  ("3200 "); 
      break;
    case ADXL345_DATARATE_1600_HZ:
      Serial.print  ("1600 "); 
      break;
    case ADXL345_DATARATE_800_HZ:
      Serial.print  ("800 "); 
      break;
    case ADXL345_DATARATE_400_HZ:
      Serial.print  ("400 "); 
      break;
    case ADXL345_DATARATE_200_HZ:
      Serial.print  ("200 "); 
      break;
    case ADXL345_DATARATE_100_HZ:
      Serial.print  ("100 "); 
      break;
    case ADXL345_DATARATE_50_HZ:
      Serial.print  ("50 "); 
      break;
    case ADXL345_DATARATE_25_HZ:
      Serial.print  ("25 "); 
      break;
    case ADXL345_DATARATE_12_5_HZ:
      Serial.print  ("12.5 "); 
      break;
    case ADXL345_DATARATE_6_25HZ:
      Serial.print  ("6.25 "); 
      break;
    case ADXL345_DATARATE_3_13_HZ:
      Serial.print  ("3.13 "); 
      break;
    case ADXL345_DATARATE_1_56_HZ:
      Serial.print  ("1.56 "); 
      break;
    case ADXL345_DATARATE_0_78_HZ:
      Serial.print  ("0.78 "); 
      break;
    case ADXL345_DATARATE_0_39_HZ:
      Serial.print  ("0.39 "); 
      break;
    case ADXL345_DATARATE_0_20_HZ:
      Serial.print  ("0.20 "); 
      break;
    case ADXL345_DATARATE_0_10_HZ:
      Serial.print  ("0.10 "); 
      break;
    default:
      Serial.print  ("???? "); 
      break;
  }  
  Serial.println(" Hz");  
}

void displayRange(void)
{
  Serial.print  ("Range:         +/- "); 
  
  switch(accel.getRange())
  {
    case ADXL345_RANGE_16_G:
      Serial.print  ("16 "); 
      break;
    case ADXL345_RANGE_8_G:
      Serial.print  ("8 "); 
      break;
    case ADXL345_RANGE_4_G:
      Serial.print  ("4 "); 
      break;
    case ADXL345_RANGE_2_G:
      Serial.print  ("2 "); 
      break;
    default:
      Serial.print  ("?? "); 
      break;
  }  
  Serial.println(" g");  
}

void setup(void) 
{
#ifndef ESP8266
  while (!Serial); // for Leonardo/Micro/Zero
#endif
  Serial.begin(9600);
  Serial.println("Accelerometer Test"); Serial.println("");
  
  /* Initialise the sensor */
  if(!accel.begin())
  {
    /* There was a problem detecting the ADXL345 ... check your connections */
    Serial.println("Ooops, no ADXL345 detected ... Check your wiring!");
    while(1);
  }

  /* Set the range to whatever is appropriate for your project */
  accel.setRange(ADXL345_RANGE_16_G);
  // displaySetRange(ADXL345_RANGE_8_G);
  // displaySetRange(ADXL345_RANGE_4_G);
  // displaySetRange(ADXL345_RANGE_2_G);
  
  /* Display some basic information on this sensor */
  displaySensorDetails();
  
  /* Display additional settings (outside the scope of sensor_t) */
  displayDataRate();
  displayRange();
  Serial.println("");
}

void loop(void) 
{
  /* Get a new sensor event */ 
  sensors_event_t event; 
  accel.getEvent(&event);
 
  /* Display the results (acceleration is measured in m/s^2) */
  Serial.print("X: "); Serial.print(event.acceleration.x); Serial.print("  ");
  Serial.print("Y: "); Serial.print(event.acceleration.y); Serial.print("  ");
  Serial.print("Z: "); Serial.print(event.acceleration.z); Serial.print("  ");Serial.println("m/s^2 ");
  delay(500);
}

You’ll need to remove the if statement in lines 112 to 114 if you’re using an Arduino Uno else you’ll get a compiler error.

In the serial monitor, you’ll get a read out of the initialisation data followed by a periodic reading of the X, Y and Z axis acceleration data. If you move the sensor around a bit, you’ll see these values changing.

You should now have enough information to take pieces from the code and use them to build your next accelerometer project.

You may be interested in building a balancing robot using one of these sensors, you could try giving it the ability to avoid obstacles with an ultrasonic sensor, have a look at our guide on Connecting An Ultrasonic Sensor To An Arduino.

Open House DIY Tips: How to Increase the Value of Your Property

Hosting an open house is a great opportunity to appeal to prospective buyers and create a positive first impression. However, it’s important that you enchant them on this occasion in order to ensure a great sale price. From minor repairs to simple decorating changes, there’s plenty of ways to style up your home and increase its value. Not only will you attract top buyers, but you’ll actually be able to get a high return on investment.

While you’re at it, have a look at these 10 Easy DIY Upgrades To Do This Weekend To Increase Your Home’s Value.

Enhance the Curb Appeal

You may not want to judge a book by its covers, but potential buyers will definitely judge your home by its exterior. The curb appeal of your property is the first thing buyers will notice, so make sure to style it up.

You don’t have to go with major remodelling projects, but with simple, impactful changes. From pulling out weeds, mowing the lawn and trimming the bushes to sweeping the driveway and lining the pathway with colourful flowers or painted stones, there’s plenty of DIY ideas that can enhance your home’s curb appeal and wow prospective buyers to increase it’s value.

Make the Entrance Stand Out

Make Your Entrance Stand Out

The front door is the focal point of your home’s exterior that needs to stand out. Furthermore, a worn-out entry door can lower your home’s value – nobody wants a door with cracks or paint peeling off. Thus, you should make sure that your front door stands out in a good light.

You can paint it in a different, but complementary hue or change the doorknob and add a house number. If it’s in a great condition, you can place potted flowers on both sides or fix the broken lanterns. These small changes can give your entrance a new look that will let it truly shine.

Grab a Bucket of Paint

Painting your walls is quite simple – it requires little effort, but it can completely transform your space. You don’t even have to repaint all the walls, but simply paint a single one in a different hue and transform it into an accent detail.

If you decide to paint the interior entirely, you should opt for a soft, neutral palette that will create an ambiance of comfort and appeal to most buyers. However, a single wall painted in a bold shade can enhance a certain feature, such as a lovely fireplace or a beautiful window with a view. Nonetheless, the accent colour should still fit into the general scheme and create a harmonious look.

Clean and Freshen Up

Clean And Freshen Up

No matter how stylish your home might be, buyers won’t even notice it if it’s cluttered and messy. Therefore, you need to make sure that your home is spotless and clutter-free. Not only will this make it more pleasant, but it will also make it seem more spacious and open.

Apart from dusting, vacuuming and cleaning the carpets and rugs, you should also create an airy atmosphere. This is particularly important if you’re hosting an open house during summer, which isn’t the peak selling season. Thus, you should add the best air purifier you can find to increase your indoor air quality and create a breezy atmosphere. Not only will the fresh air create a healthy atmosphere, but it will also make your home more pleasant and inviting.

Let the Sunlight In

Buyers love homes bathed in natural light, so make sure to let the sunshine in. Remove heavy drapes and place light curtains that will allow natural light to permeate your home. Your windows should be spotless, so don’t forget to clean possible stains or smudges.

However, if your home doesn’t get enough natural light, you should consider installing LED lights. These emit a bright glow similar to sunlight, so your home will appear brighter. Another solution entails introducing plenty of mirrors that will reflect the sunlight throughout your home. In addition, mirrors can elevate your home décor, too.

Create a Homely Atmosphere

Create A Homely Atmosphere

Although you should remove your personal and family belongings, your home shouldn’t look as if nobody lived there. It should still have a warm, welcoming appeal that will enable potential buyers to imagine themselves living with their families there.

Thus, you should make sure that your space has certain homey comforts, such as soft pillows, blankets and rugs. Introducing soft materials will help you create a cosy look. Furthermore, lighting can also make your home seem warm and inviting, so make sure to install several layers of light, including general, task and accent lights.

Decorate with Style

Decorations will add the finishing touch to your home, but you should avoid building up clutter. Instead, choose just a few impactful pieces that will give personality to your space. Several paintings, stylish groupings, fresh flowers and greenery are always a great way to create a complete, classic look that will add value and appeal to everyone.

There’s no need to give your home a complete makeover to increase its value. With these simple steps and easy changes, you can easily style it up for the open house day.

If you enjoyed this article, have a look at these 8 DIY Projects To Increase Your Home’s Value.

12 Tips for Organizing Your Closet

Most of us had some sort of experience as a kid being told to clean up our room or organize our closet. Some of us were lucky enough for that advice to stick, but for the rest of us – the people reading this article, I’d imagine – we haven’t had the time or dedication to develop our closet cleaning skills. Or maybe you’re just looking for some extra ideas that can help you turn your closet into an organized work of art. Or you just have OCD.

Whatever the reason you’re here, we’re going to give you something to take away. Today we’re going to outline the 12 coolest tips that you can use to help keep your closet organized.

If your home is feeling cluttered, here are 24 Tips On Becoming A Minimalist, Start Living The Simple Life.

1. Consider expanding

The closet doesn’t have to be the only storage room in your house. This can be one of the main reasons that leads to people developing some seriously overstuffed closets. If you’ve got extra room in your house, you should consider expanding your closet to encompass some of that space.

If you don’t have extra space, you can make some – you can just stick some wall racks or hangers up in your bedroom or in a hallway or in your bathroom. It’s impressive how much space you can create out of nothing.

2. Organize by height

One cool tip to help keep things easily accessible is to arrange your closet in accordance to what you wear the most and what you wear the least. You can store the things that you use all the time at eye level or body-height so they’re easily accessible, and stash things that you don’t wear very often below or above them.

You can put things you hardly wear, like celebratory shoes, on a rack at the very top. This area can house things that you’ll only need for specific occasions.

3. Get rid of some clutter

Unless you’re a meticulous closet-keeper, chances are there are some things in your closet that you don’t use. Heck, even people who keep their closet clean all the times are sometimes just reorganizing garments that they never use anymore.

Look at everything you haven’t worn in a few months. Chances are it’ll be hard to toss these things if they have sentimental memories attached to them, but the reality is is that if you haven’t worn it in a few months, the only time you ever think about it is when you see it in your closet. You won’t miss it once it’s gone.

4. Coordinate your hangers

You can coordinate your hangers so you can see what sort of items you’re looking through in any area. You can do this by colour coding them or getting a certain type of hanger for dresses, one type for jeans, one type for shirts, etc. This will also help your closet look fantastic in addition to making it easier for you to access things.

5. Use containers

Storage containers can go a long way, and you can use them to help organize your closet so you don’t just have things hanging. Many storage containers come with multiple levels so you can keep all sorts of different things organized without having to rifle through a single storage box.

Hanging organizers can also be utilized to provide an attractive, easily accessed storage area that allows you to use space that would have otherwise just been occupied by air.

6. Get some dividers or labels

Dividers are a great way to turn your bigger, bulkier shelves into more organized compartments. Dividers allow you to split up folded clothes from towels or other accessories while still allowing you to conserve as much space as possible.

Another way is by using printable labels for organizing stuff in your closet. You can grab some labels from your local craft store or create your own custom labels.

7. Make sure your closet is well-lit

You’ve probably had at least one experience where you’re looking for something and once you find it you realize that you must have glanced over it two or three times before you actually realized where it was.

This can be caused by improper lighting. Lighting a closet might not seem like the most immediate need but it will save you a lot of time and energy to get a light that actually illuminates all corners of your closet.

8. Replace your doors

We all know how much space a door can take up if it swings out. It can make it virtually impossible to access a certain area of your closet, or it can at least make it extremely inconvenient for you to do it because you’ll have to dance around the door while you close it in order to access whatever it’s blocking off.

You can replace it with a curtain or some sort of screen if you want to save the space that the door occupies when it swings open.

9. Use stackables

There are a lot of stackable containers that you can use to store things that will easily fit into each other when they’re not in use. This will allow you to only use storage as you need it and can also encourage you to keep getting rid of things that you don’t need anymore.

Laundry baskets and totes can fit into each other and can even hold items in them while they’re being stacked on top of each other.

10. Get some hooks

If you have empty wall space in your closet, think about all the stuff you could fit in your closet if you turned that wall space into storage space!

All you need to do is get some coat hooks. Coat hooks aren’t just for coats – you can hang shirts, dresses, hats, and all manner of things on a coat hook. This will allow you to clear up some space for your clothes hangers that you can put other garments on.

11. Colour code

One of the coolest things you can do with your closet is color code things. Colour code the different sections – you can colour code the things hanging on hooks and hangers, colour code your shoes and socks, colour code your pants.

Not only does this have a tremendous impact on how easy it is to find things in your closet, it also makes your closet look like a work of art. Instead of walking into an unorganized mess of hanging clothes, you’ll be walking into your own personal feng shui domain – and it’ll all be feng shui that you can wear. This also makes it a lot easier for you to pick the clothes you want to wear for the day.

12. Get some out-of-closet storage

Things like suitcases or boxes can be used to keep items that you only use in certain seasons out of your closet to clear up space for other things. Wool blankets and things of that nature can be stored in nice-looking containers in other areas of your house so they’ll double as decorations and also free up space in your closet.

If you enjoyed this post, why not try to Organise Under Your Kitchen Sink.

How To Modify A Servo For Continuous Rotation

Modifying a servo for continuous rotation opens up a number of possibilities for new Arduino projects, the modified servos essentially function as a PWM variable speed and direction motor which can easily be controlled by an Arduino or similar micro controller. This is a fairly simple modification to do and the process will be similar for many different servo models and sizes.

Do you have an old servo with stripped gears? Here’s a guide to repairing your stripped servo gears for under a dollar.

What You Need To Modify A Servo For Continuous Rotation

  • Analogue Servo – Turnigy TG9e Used Here
  • Precision Screwdriver Set – Buy Here
  • Side Cutters – Buy Here
  • Small Drill Bit Set – Buy Here
  • Electric Drill – Buy Here
  • Needle Nose Pliers – Buy Here
  • Electrical Insulation Tape – Buy Here

How To Modify The Servo For Continuous Rotation

The video below takes you through the step by step process to modify your servo for continuous rotation. A list of steps has also been provided after the video.

Steps To Modify Your Servo

  1. Remove the servo arm.
  2. Use a philips screwdriver to remove the four screws at the bottom of the servo.
  3. Remove the top gear cover.
  4. Remove the first, largest gear. The one which on which the servo arm is mounted.
  5. If you turn this gear over, you’ll see a stopper which mechanically limits the rotation of this gear. This stopper runs into the  adjacent gear when the arm reaches its travel limit. Use the side cutter to remove this stopper as close as possible to the gear.
  6. Next you’ll need to drill the hole in this gear slightly larger so that the gear turns freely on the potentiometer arm/shaft without being too loose. Some gears, like the one in this video, actually have a flat landing which locates the gear on the potentiometer arm for position control. This needs to be removed by drilling right through the gear.
  7. Replace the large gear onto the potentiometer shaft.
  8. Replace the top gear cover.
  9. Remove the stickers on the side of the servo which also hold the bottom cover in place.
  10. Remove the bottom cover and then move the small circuit board out of the housing and away from the potentiometer.
  11. Use a screwdriver to remove the small plastic cover which protects the potentiometer terminals.
  12. Now use your needle nose pliers to remove the three wires from the potentiometer terminals.
  13. Stripe the insulation off of the three wires and twist them together to make a secure connection.
  14. Cover the joint with insulation tape to prevent a short circuit on the circuit board.
  15. Flatten the potentiometer terminals to make place for the insulated joint.
  16. Push the plastic cover back into place.
  17. Replace the circuit board.
  18. Replace the bottom cover.
  19. Replace the four screws and tighten them to secure the top and bottom covers.
  20. Your servo has now been modified for continuous rotation. Your servo will now run continuously in each direction and will be speed controllable around the mid point of the PWM signal.

Have you got a good idea for a servo based Arduino project? Try building your own servo controlling xduino board.

Have you modified one of your servos for continuous rotation? Let us know in the comments section below.