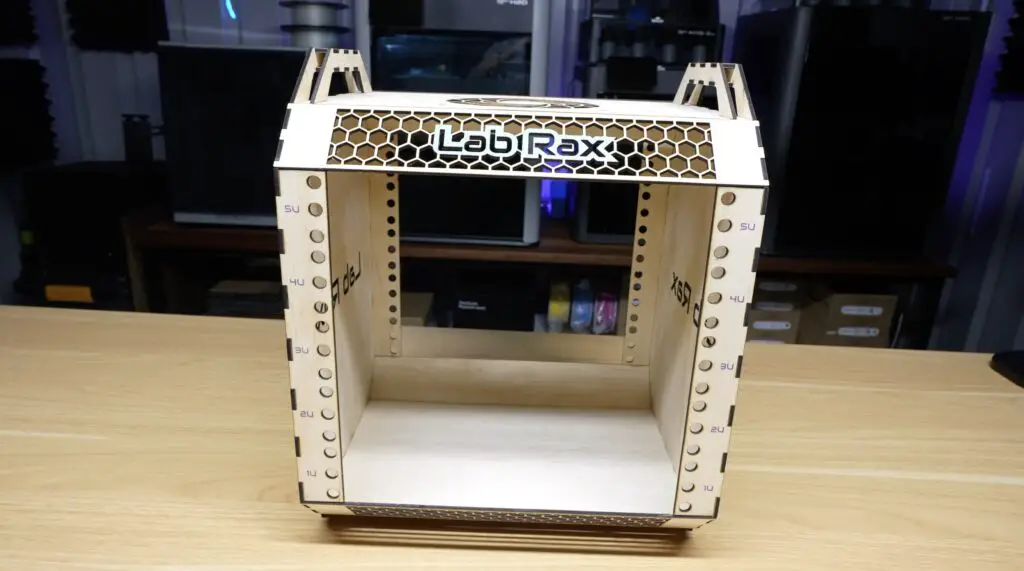
This entire homelab rack took less time to cut than a set of these Lab Rax corner pieces take to 3D print. Today, we’re going to find out whether laser cutting is a good alternative to 3D printing for a Lab Rax homelab.
Lab Rax is a 3D printable 10” homelab system, and over the last year, it’s become one of the most popular projects on my channel. During my recent move to a new workshop, I found myself staring at a stack of plywood sheets that I uncovered and wondered if there was another way to build one.
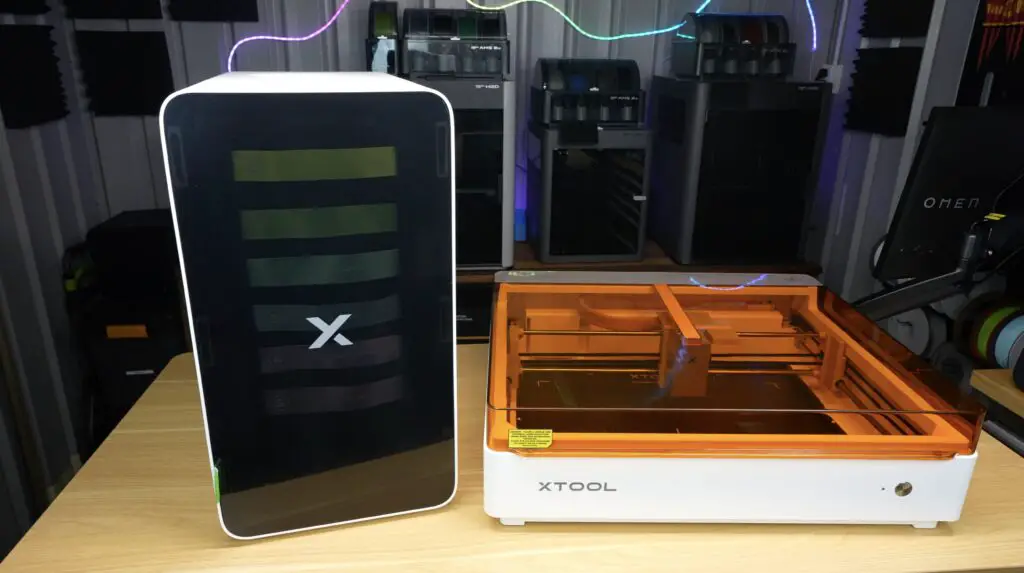
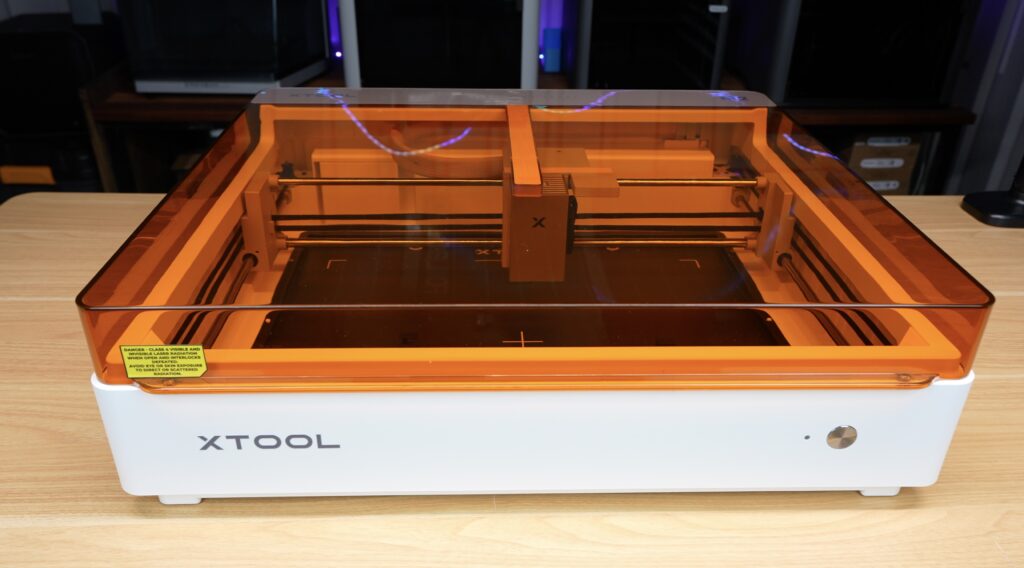
Laser cutters are incredibly fast compared to 3D printing. They’re great for producing flat-pack components, and the new M2 that xTool sent over for a project can not only cut the parts out, but it can actually print directly onto them too.
So I’m going to try to convert the Lab Rax design into a laser-cut wooden homelab system while still keeping parts compatible with the original 3D printed version.
Here’s my video of the build, read on for the write-up:
What You Need To Build Your Own Wooden Lab Rax Homelab
- 3mm Plywood Sheets – Buy Here
- GMKtec Nucbox K10 – Buy Here
- TPLink TL-SG105-M2 Switch – Buy Here
- LincStation N1 NAS – Buy Here
- Raspberry Pi 5 – Buy Here
- Raspberry Pi 4 – Buy Here
- Pi 5 Active Cooler – Buy Here
- 32GB Sandisk MicroSD Card – Buy Here
- 120mm 12V Fan – Buy Here
- M6x12mm Button Head Screws – Buy Here
- M6 Nuts – Buy Here
- M3x8mm Button Head Screws – Buy Here
Tools & Equipment Used:
- xTool M2 Laser Cutter & Engraver – Buy Here
- xTool CMYK Inkjet Printing Module – Buy Here
- xTool SafetyPro AP2 Air Purifier – Buy Here
- Gorilla Wood Glue – Buy Here
- USB C Pencil Screwdriver – Buy Here
Designing the Wooden Version
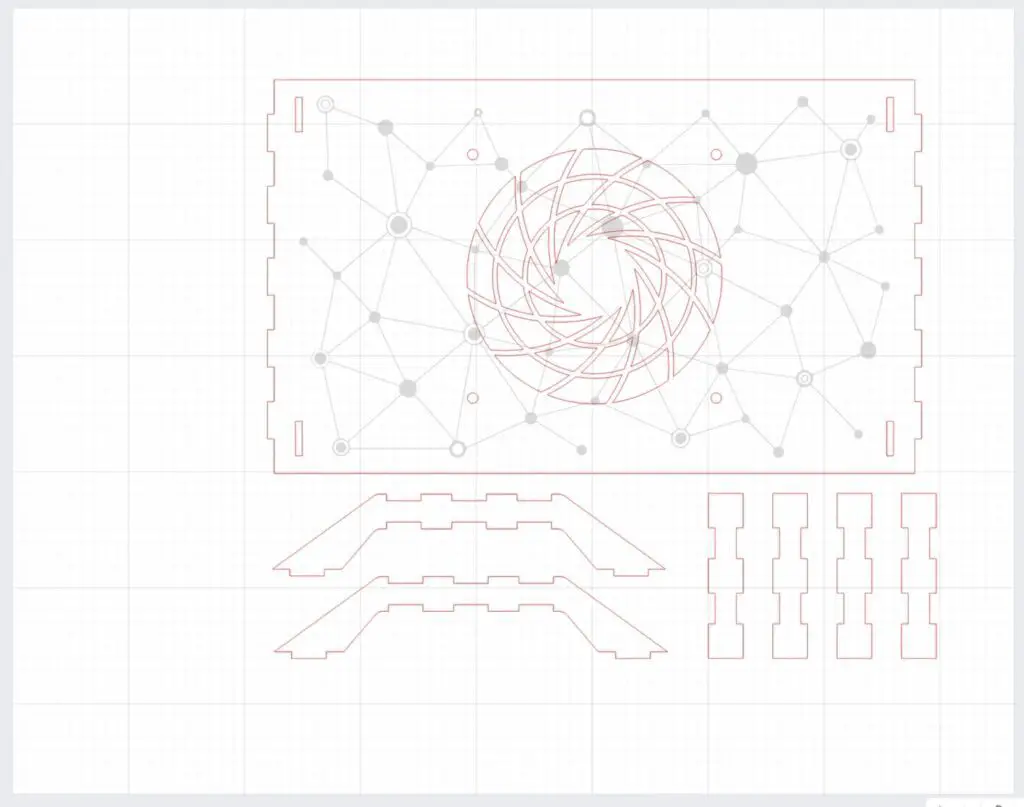
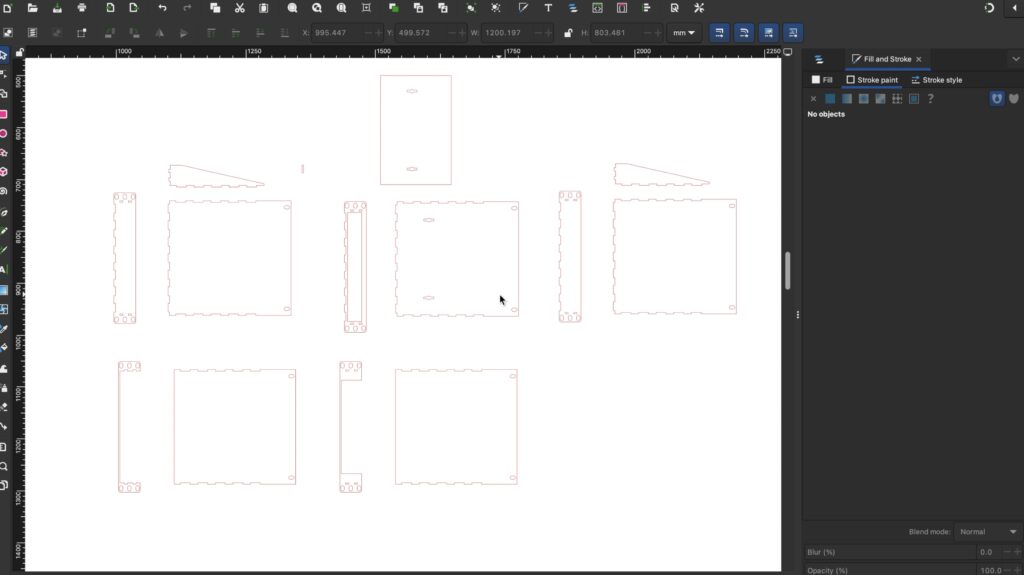
The first step was converting Lab Rax from a 3D printable design into something that could be laser cut from flat sheets of material. Rather than redesigning it from scratch, I wanted this version to look as close as possible to the original Lab Rax design, so the overall dimensions, shape and styling are all based on the existing design. I also wanted the racks to remain cross-compatible with the 3D printed components.
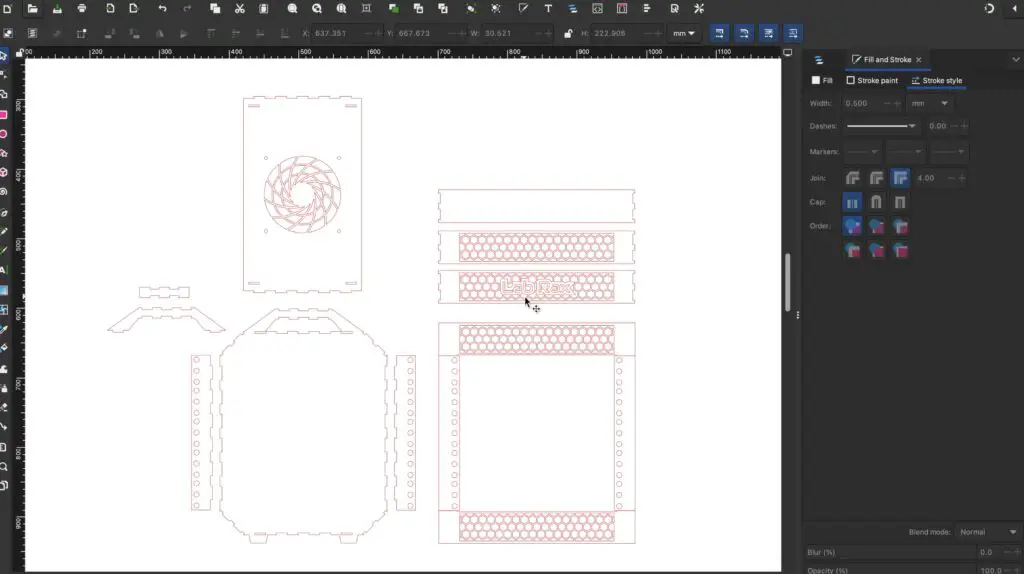
To do that, I started out by creating a flat pattern in Inkscape. Every panel, slot and mounting feature had to be laid out as a 2D profile that could be cut from 3mm plywood.
One neat feature of laser cutting is that you can create strong structures using interlocking tabs and slots. So, instead of relying on screws or printed brackets, many of the joints are designed to interlock before being glued together.
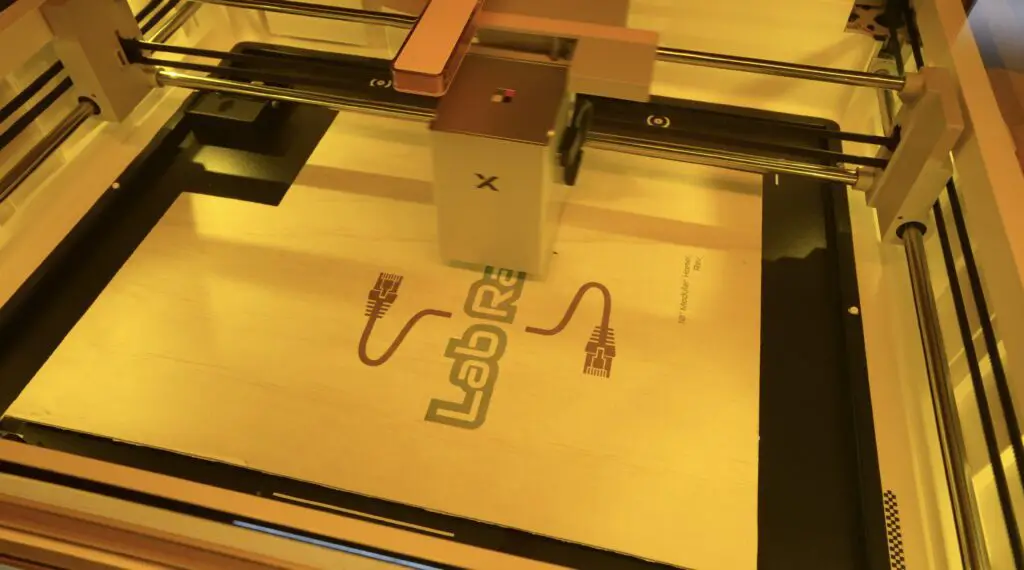
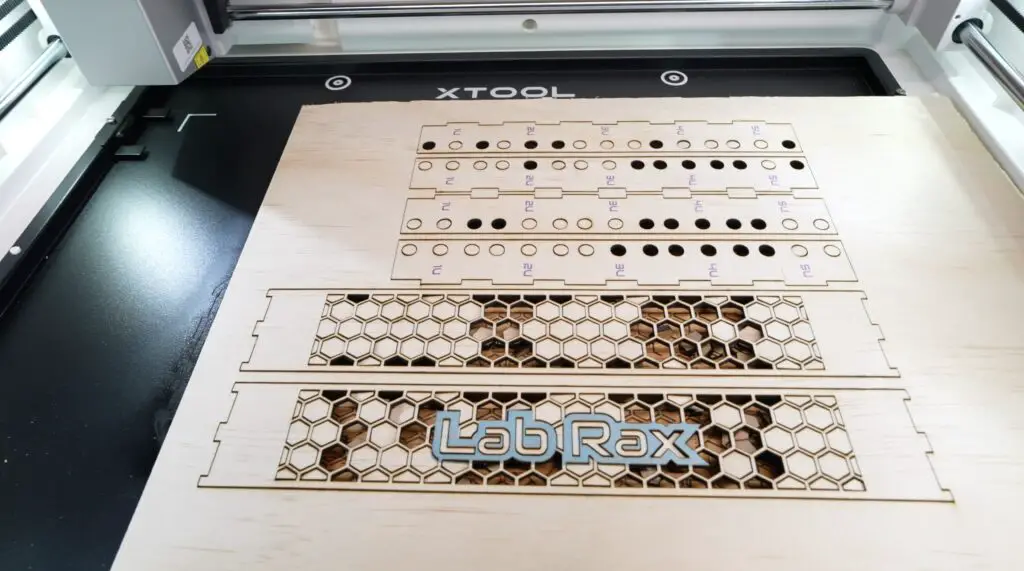
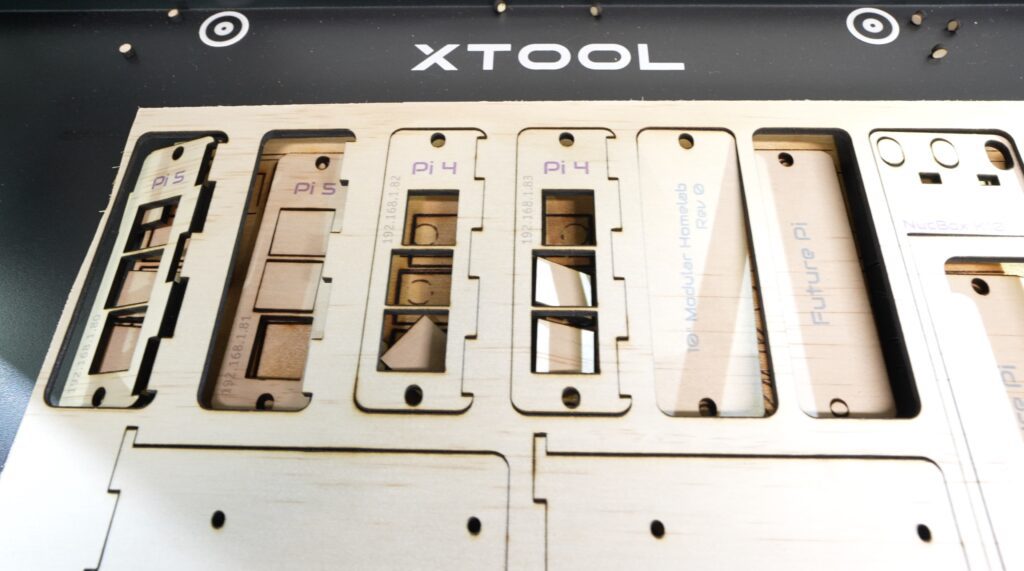
After an hour or two of design editing, I had a complete set of panels ready for cutting. Before we cut them out, I want to add a little bit of Lab Rax branding.
Printing and Cutting the Homelab Parts With The xTool M2
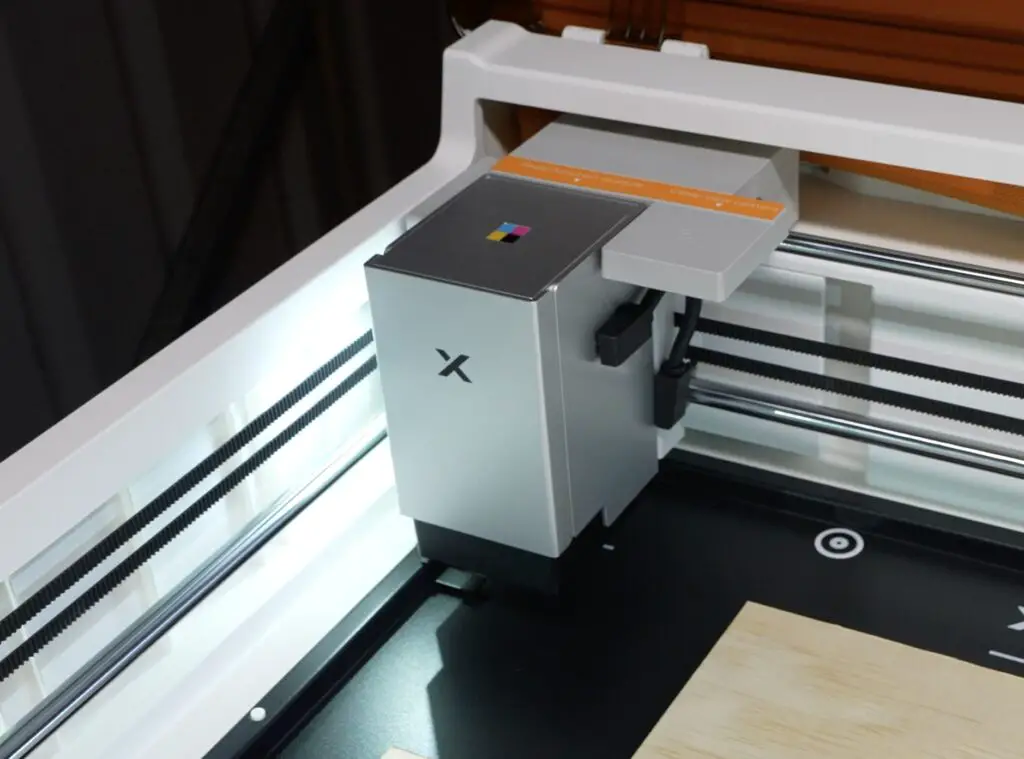
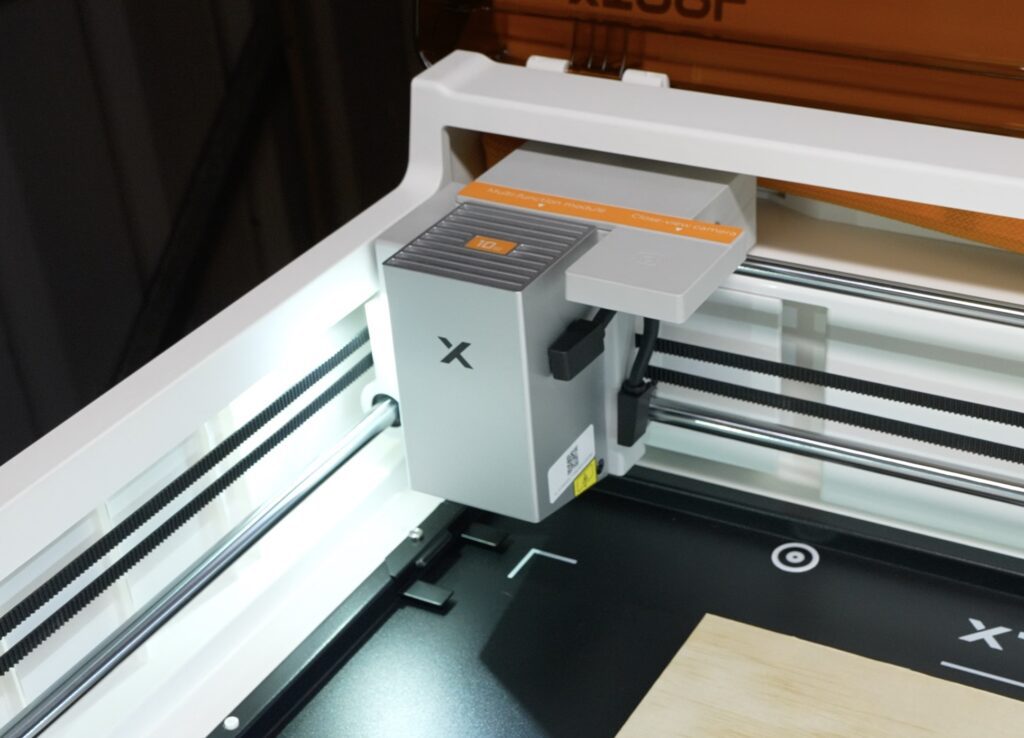
This is where the xTool M2 really allows you to build interesting projects. Unlike a traditional laser cutter, the M2 combines printing, laser cutting and engraving into a single machine.
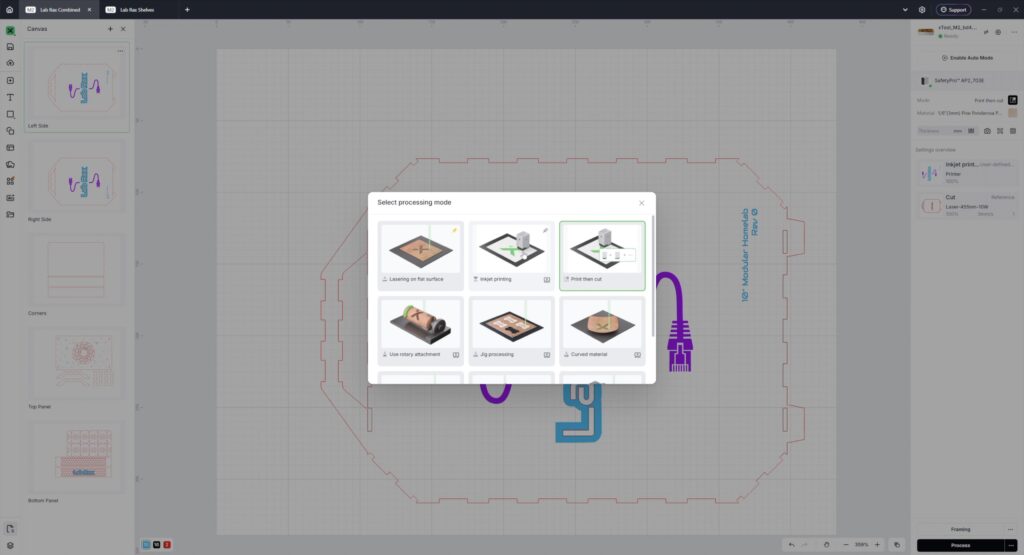
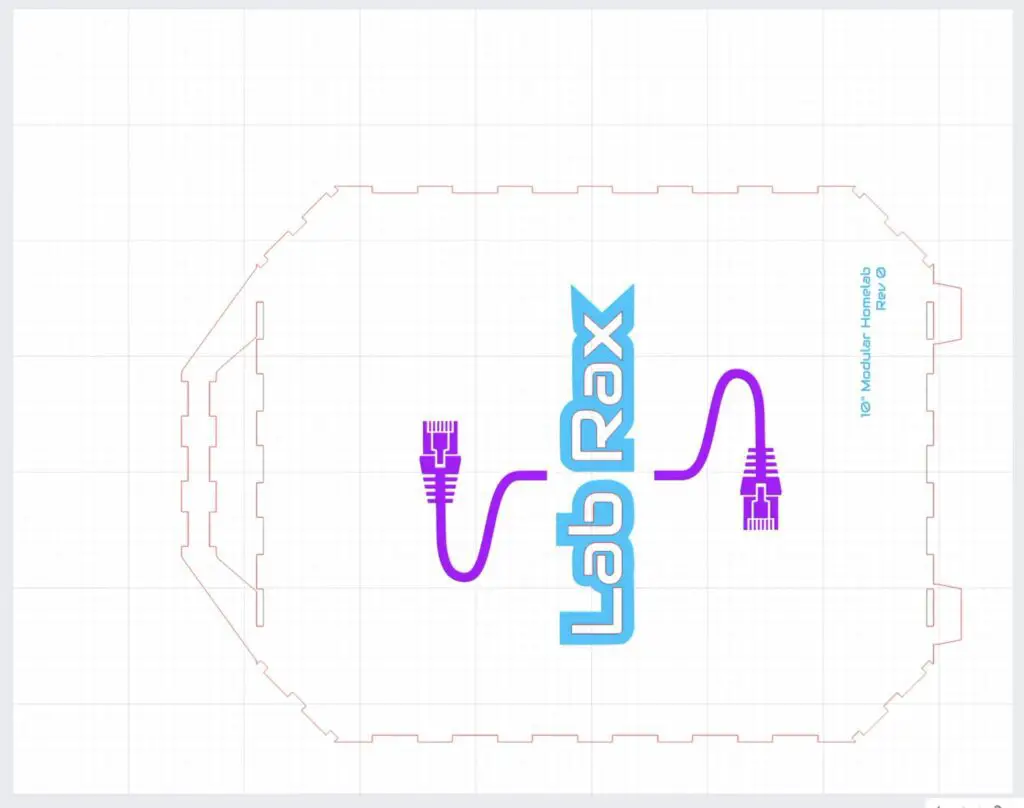
For this project, I’m using xTool’s print-and-cut workflow. The process starts by swapping to the printing module and printing the graphics directly onto the plywood surface.
I created some Lab Rax branding and decorative elements that would normally require stickers, decals or paint masks. Being able to print them directly onto the material makes the finished build look much more polished.
The M2 has a pretty clever head design. Rather than fiddling around with screws and cables, each module is held in place magnetically and just requires a single usb c cable to connect it, so swapping between modules takes a couple of seconds.
Now let’s get the first panel printed. I found that light colours tend to work better on plywood than darker ones and black. The colour on these runs in the wood grain.
Once the printing is finished, it’s simply a matter of swapping over to the laser module and running the cut job to cut the profiles out.
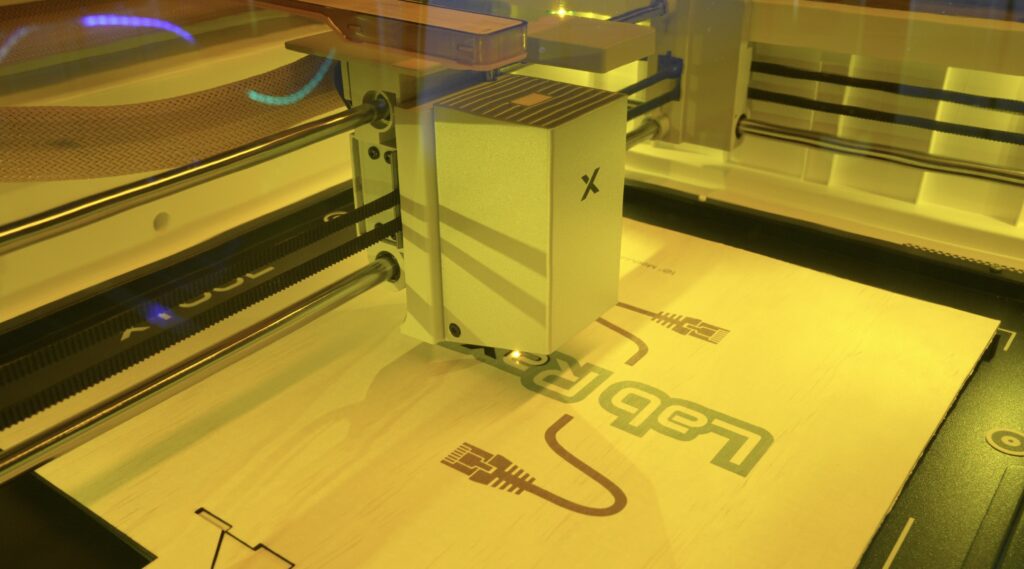
The machine I’m using has the 10-watt laser module installed, but xTool also offers a more powerful 20-watt module as well as a 3-watt infrared laser. All of them are designed to swap onto the same gantry system.
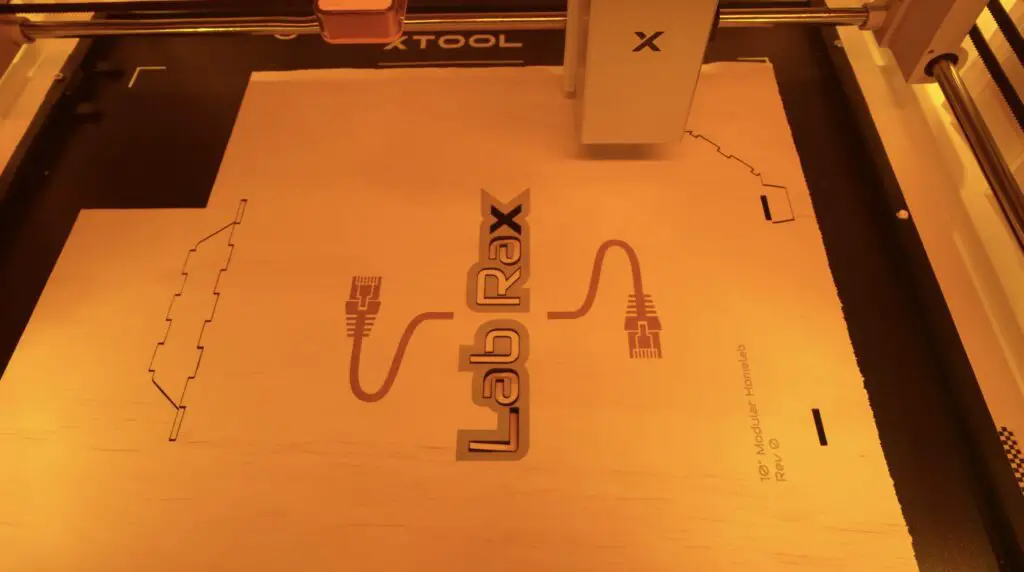
Now let’s get the rest of the rack parts made up.
The working area is the M2 is impressive for its overall size. It’s 610 by 569 millimetres, which is a huge step up from the original M1 that I used previously. It gives you a lot more flexibility when working with larger panels and project parts like these.
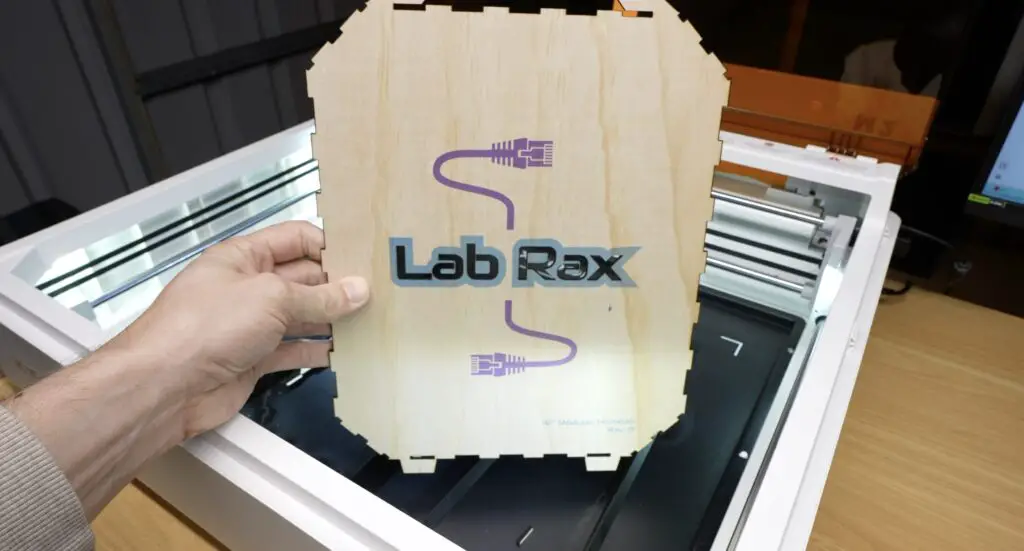
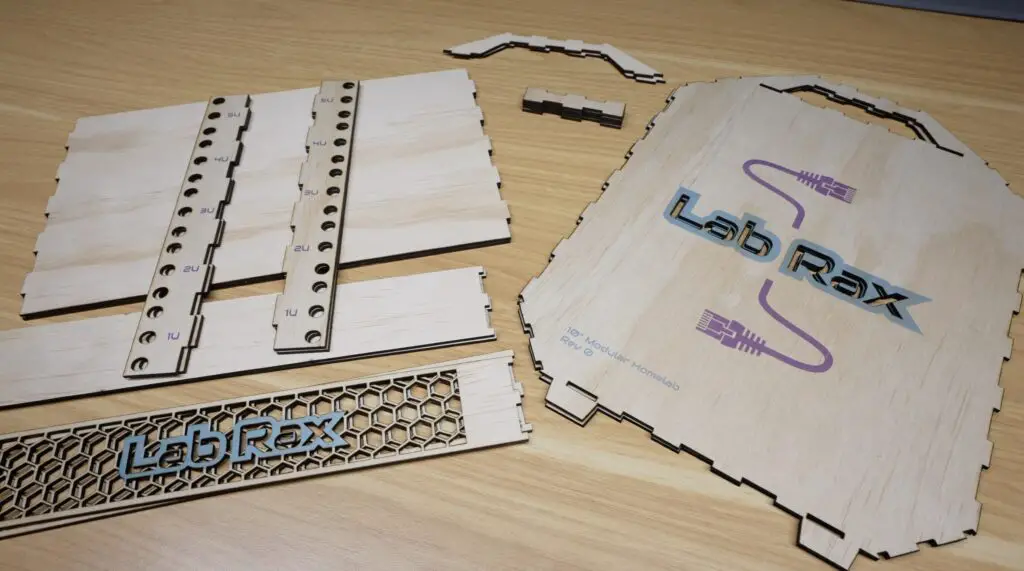
After about an hour, the M2 had produced a complete set of Lab Rax parts ready for assembly.
Smoke Management and the SafetyPro AP2 Air Purifier
One thing that anyone who’s used a laser cutter knows is that cutting plywood sheets like this creates a lot of smoke. This is something that xTool have put a lot of effort into addressing.
The M2 is fully enclosed and can either be vented outside through a window or connected to xTool’s new SafetyPro AP2 Air Purifier.
The SafetyPro AP2 is impressive. The filtration process starts with a layer containing 36 cyclones that separate larger visible particles before the airflow passes through five additional replaceable filter stages.
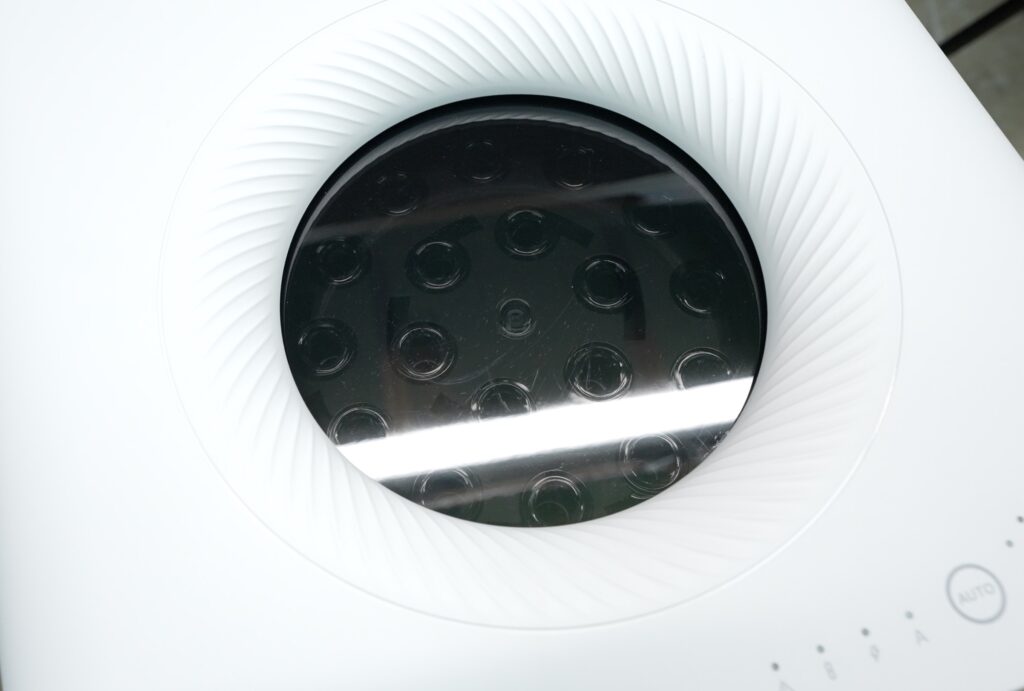
The final stage is a HEPA filter capable of removing 99.97% of particles.

What makes it even more convenient is that it connects to the M2 over Bluetooth, and the purifier can automatically start and stop with the machine. xTool’s Creative Space software automatically adjusts the extraction settings based on the material you’ve selected.
It’s a really neat setup that makes running a laser cutter indoors much more practical. I’ve cut all of these parts in a small workshop, and the area is still completely usable. An air quality monitor didn’t register any significant change over an evening of cutting.
Assembling The Laser Cut Lab Rax Homelab
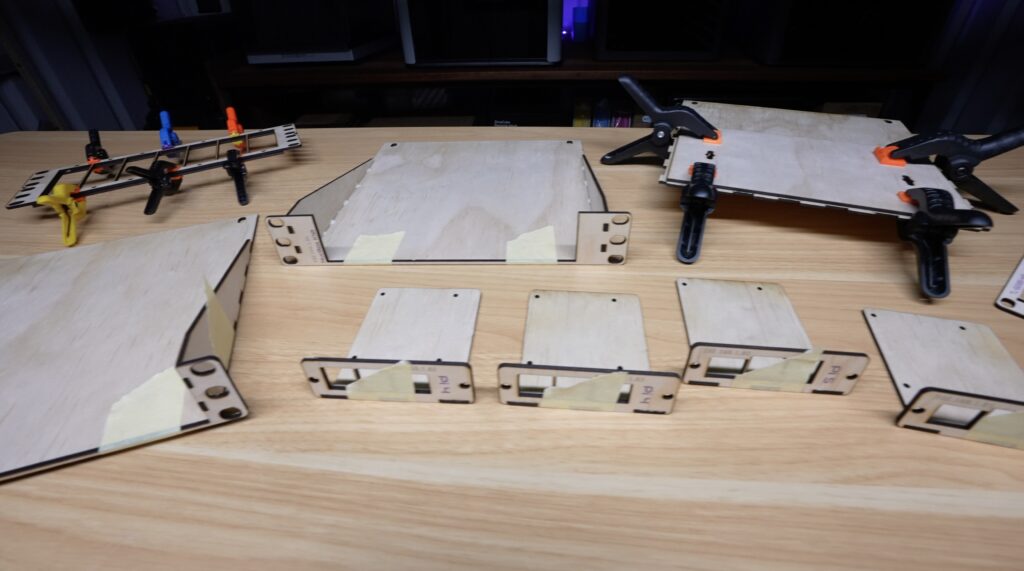
With all of the parts cut, it’s time to find out whether this design actually goes together as intended. Unlike a 3D model, these flat designs are a bit more difficult to visualise how they will fit together once complete, so there’s more room for error.
Assembly is pretty straightforward.
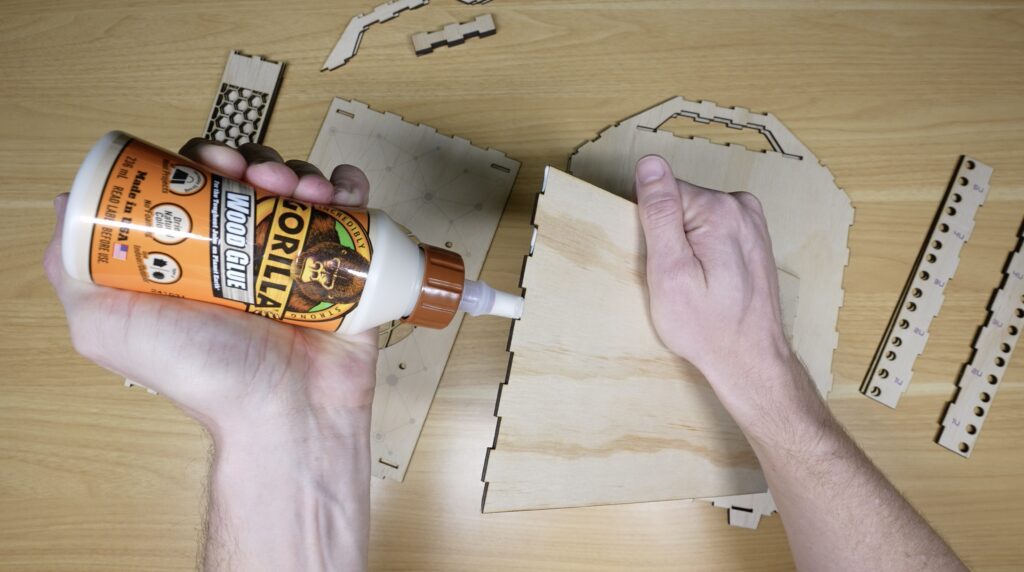
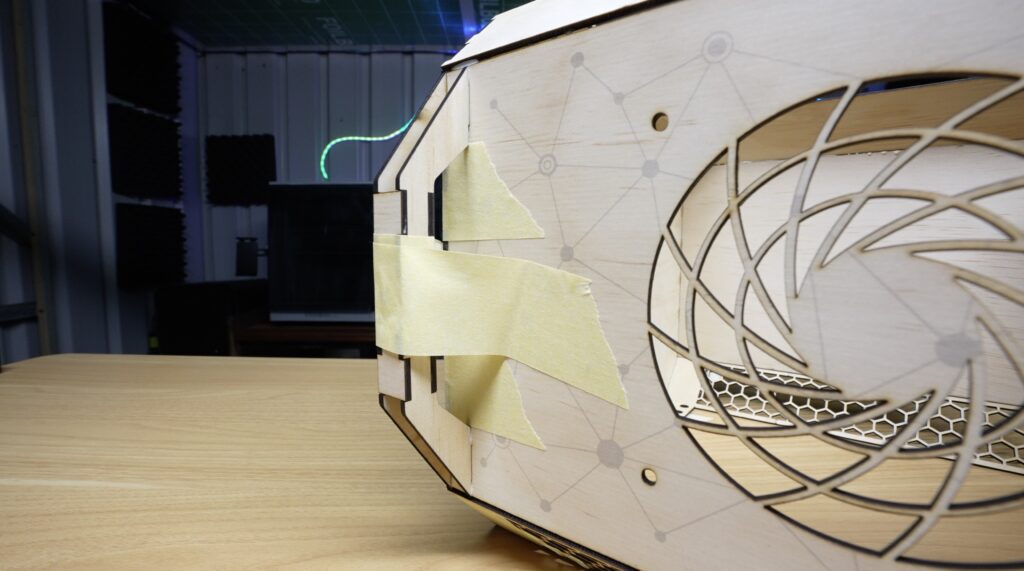
I’m just using some basic wood glue to hold the pieces together. I started with the two main side panels and then slotted the top and bottom sections into place. The laser-cut tabs help align everything, while a small amount of wood glue holds the joints together. I used masking tape to hold the pieces in place while the glue dries.

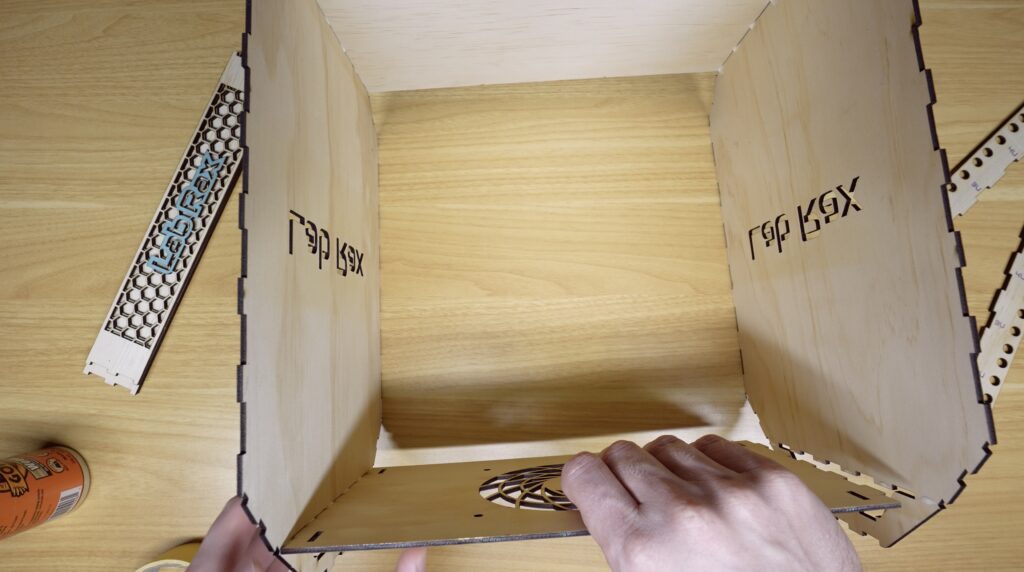
Once the main outer frame was assembled, I added the vertical rack posts. These contain all of the rack mounting holes and are what make the system compatible with the existing Lab Rax ecosystem.
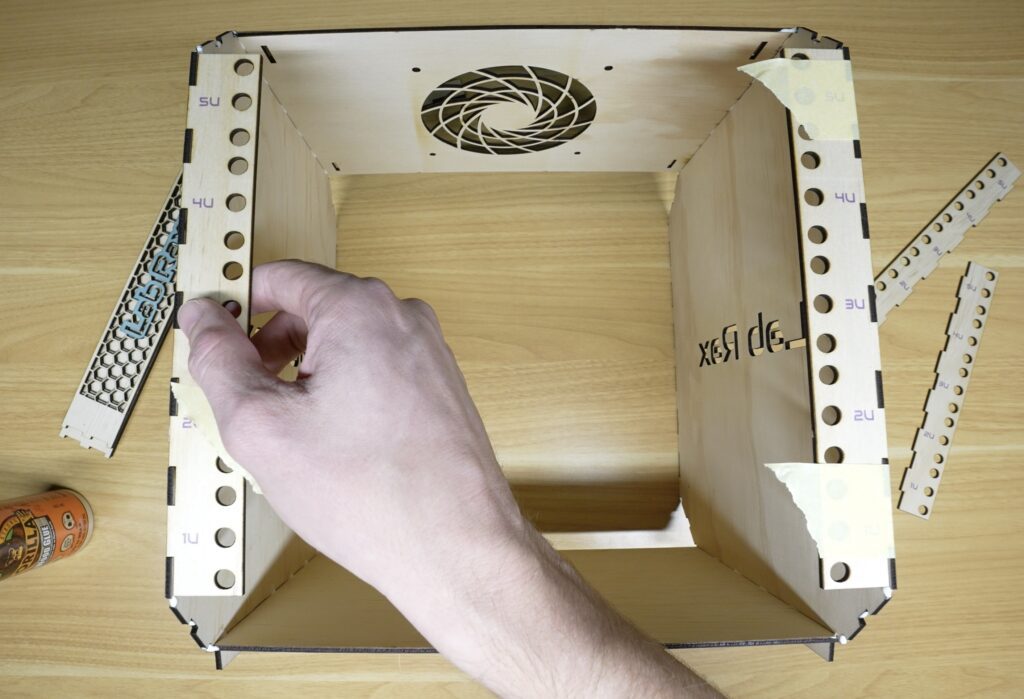
Finally, I installed the corner pieces that give the rack its distinctive Lab Rax appearance, these also help square all of the parts up.
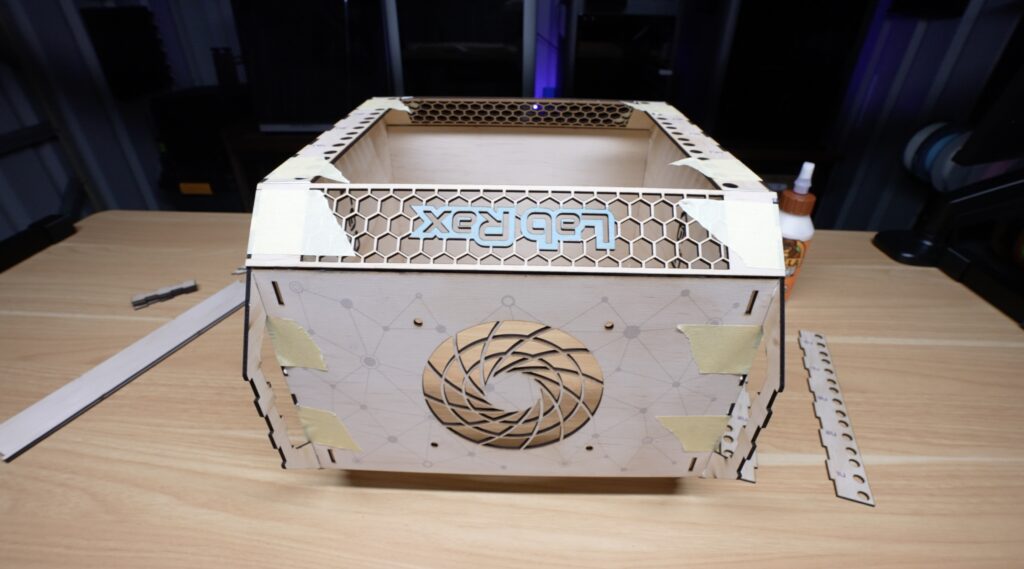
I then flipped the rack over to do the other side.
At this point, it was already looking really similar to the original 3D printed version.
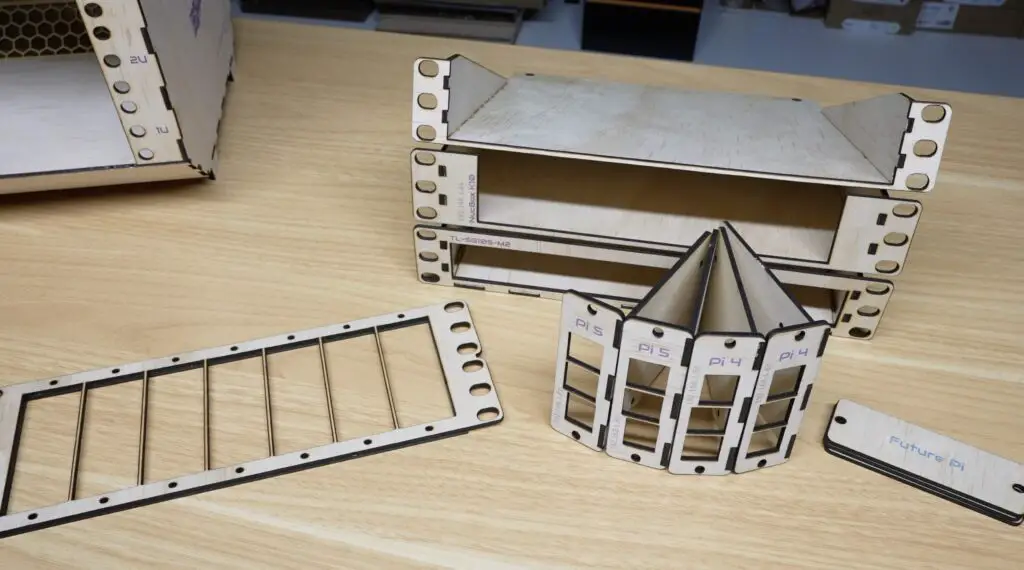
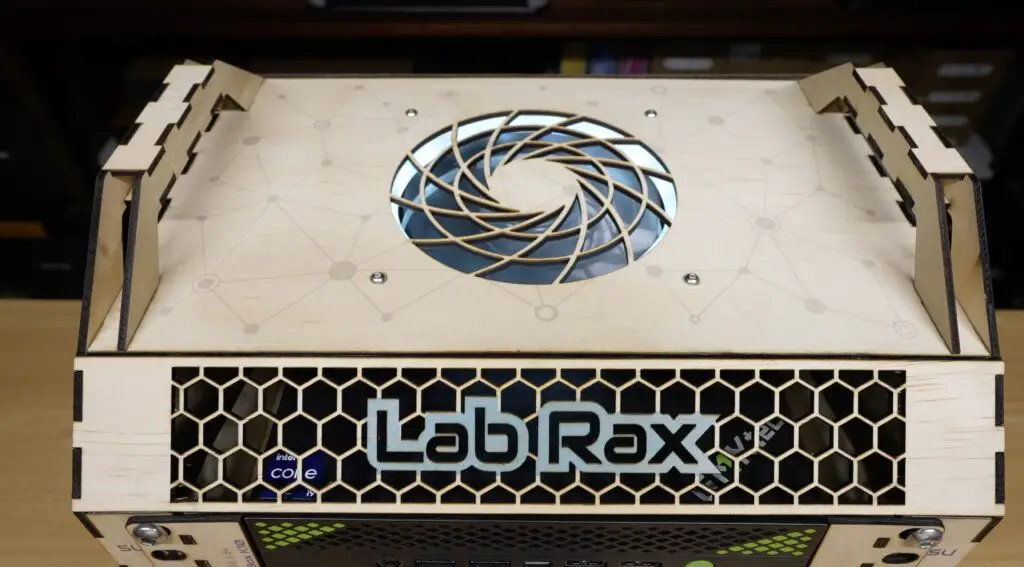
The last addition is the laser-cut handle reinforcements. These strengthen the handles and make them a bit more comfortable to carry when the rack is fully loaded.
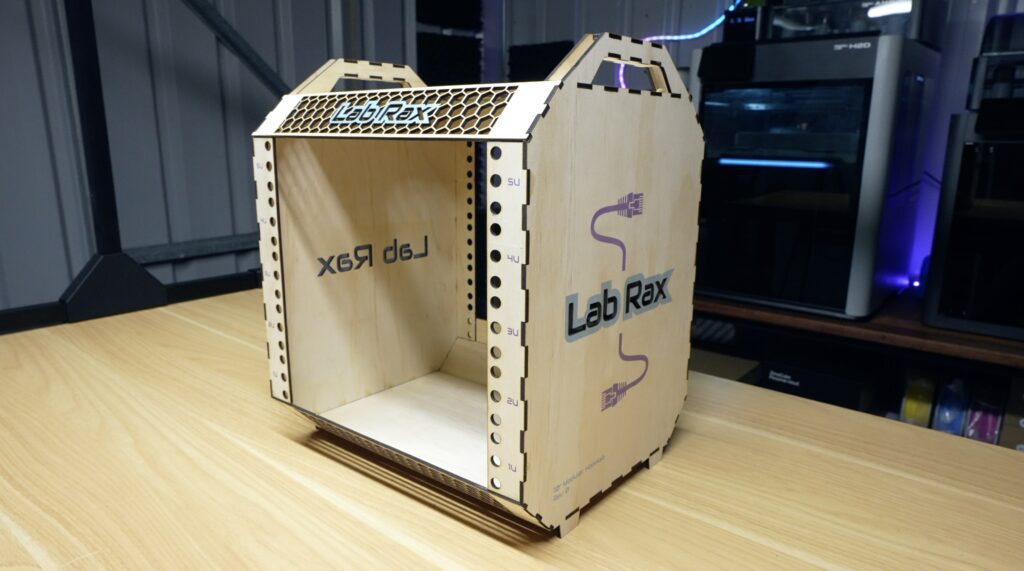
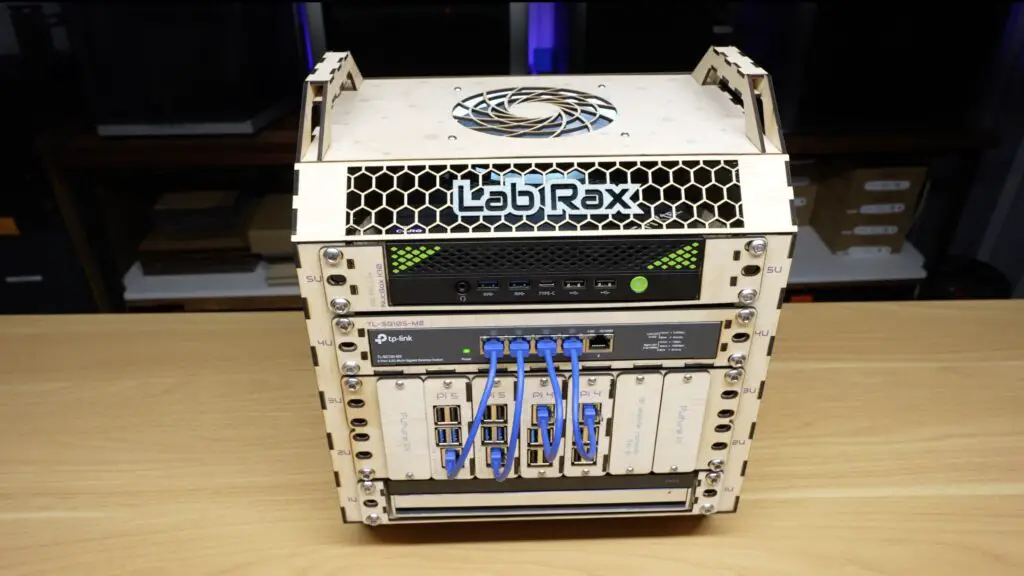
And that’s the plywood Lab Rax 10″ home lab rack complete and reayd to install hardware into:
Making Up The Hardware Trays
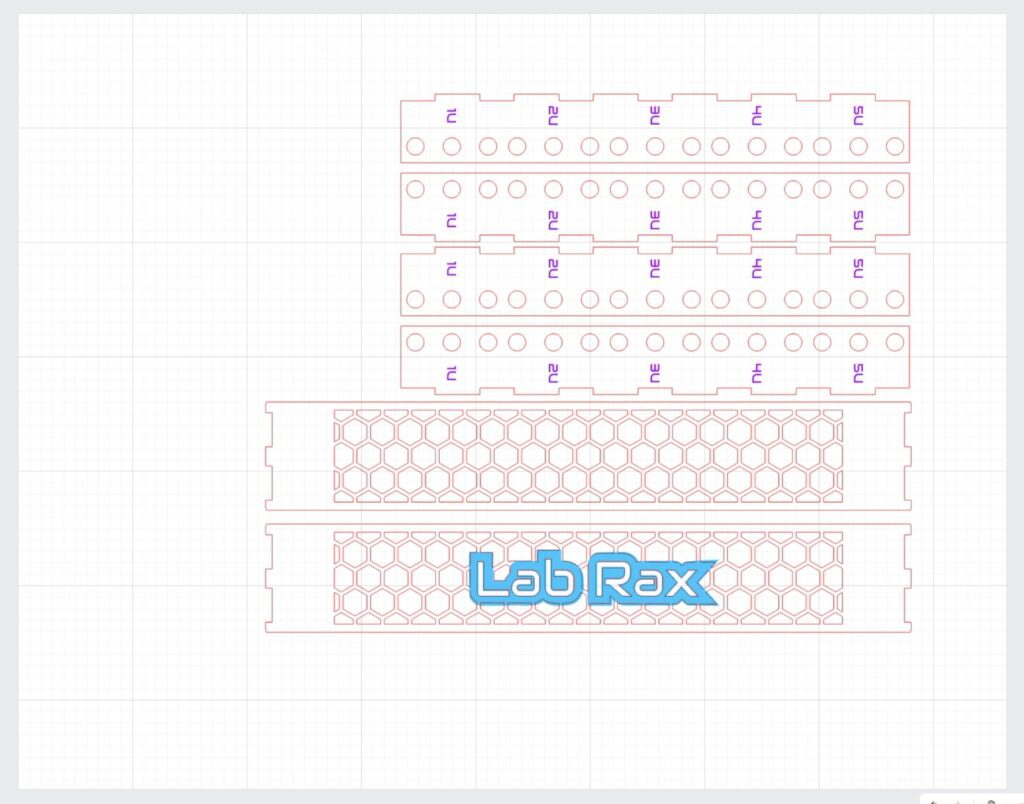
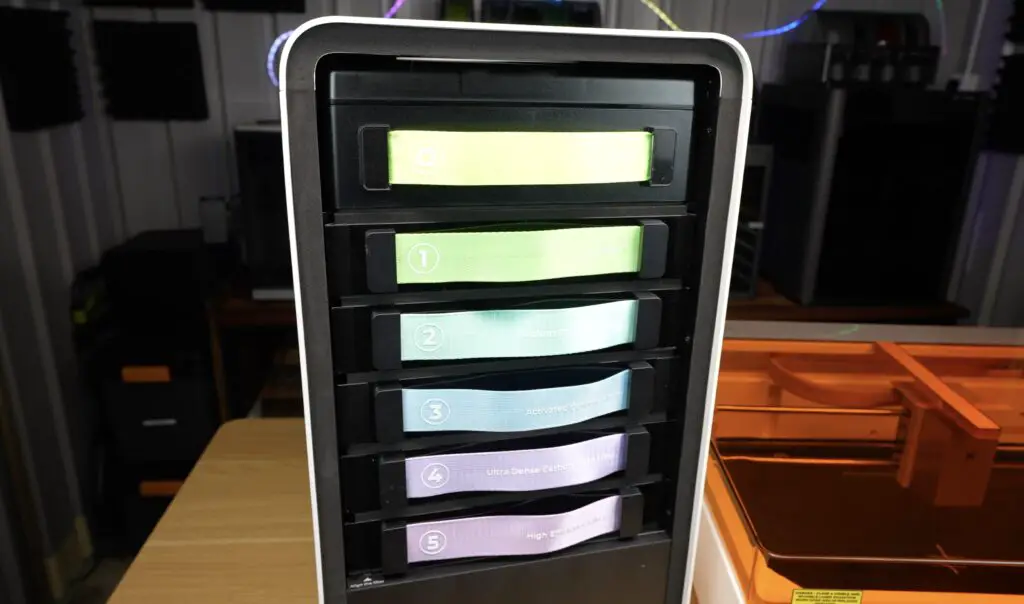
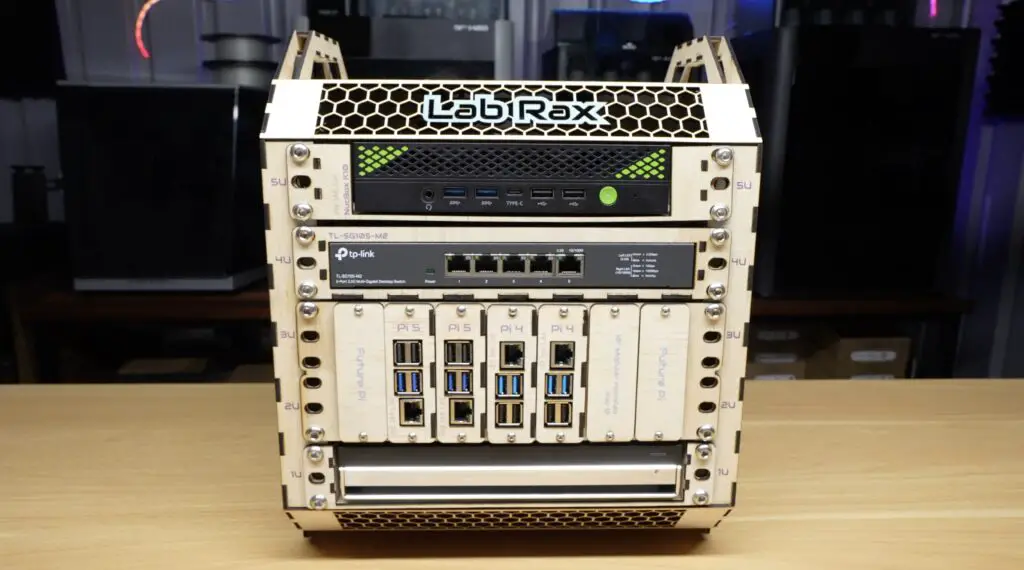
With the main rack complete, it was time to cut and assemble the rack trays for the homelab equipment. For this first test setup, I’m using a fairly typical home lab configuration from my first Lab Rax build.
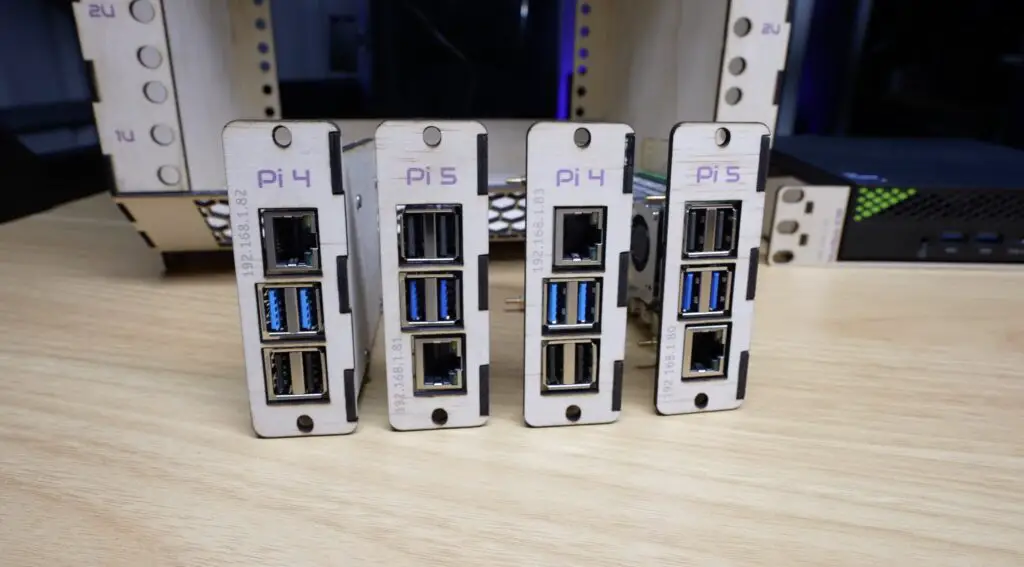
At the top is a mini PC, below that is a TP-Link network switch, underneath the switch is an SBC shelf with four Raspberry Pi’s installed in it, and finally, at the bottom, is a slim NAS.
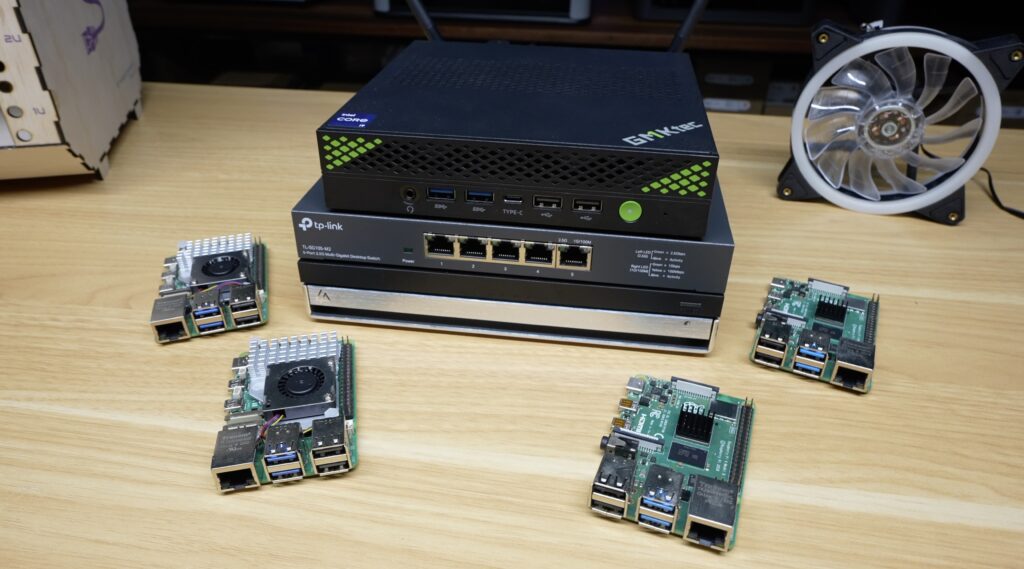
I’ve also got a large 120mm fan to install at the top to provide some cooling to the rack.
Just like the rack itself, these trays are adapted from the original 3D printable versions, so they are all cross-compatible. The designs were modified to suit laser-cut construction while still maintaining the same overall dimensions and functionality.
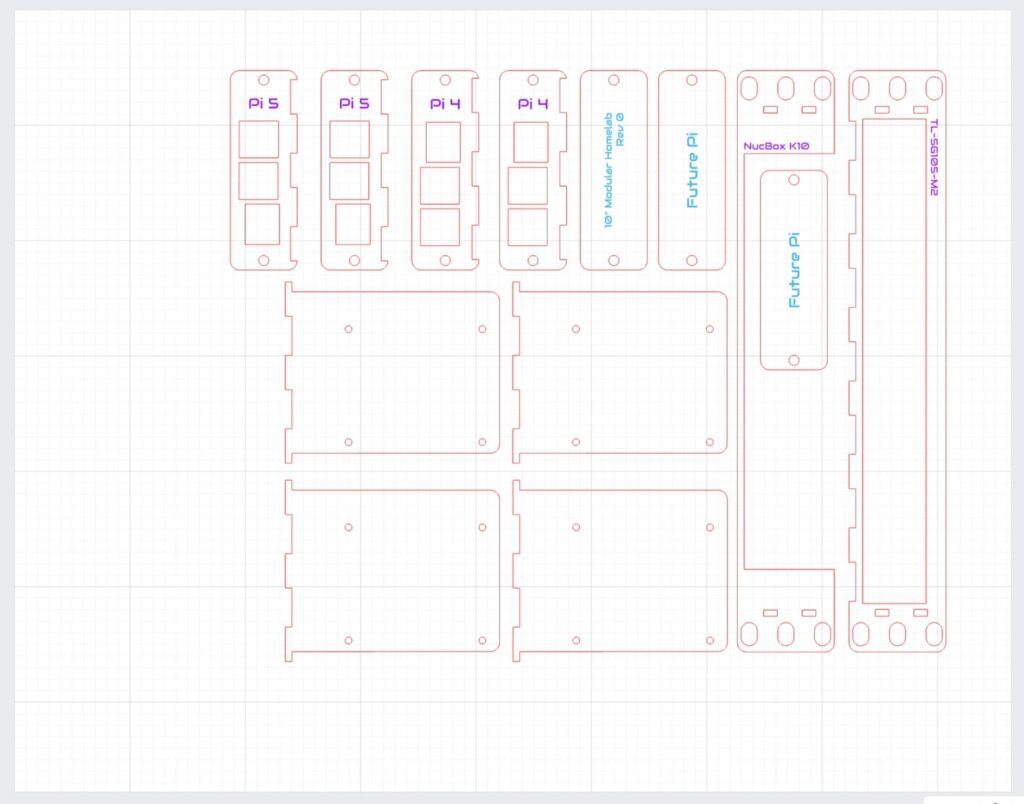
The print-and-cut workflow on the xTool M2 came in handy again here because I could add labels and graphics directly onto the trays before cutting them out.
These then glue together much the same way as the main rack.
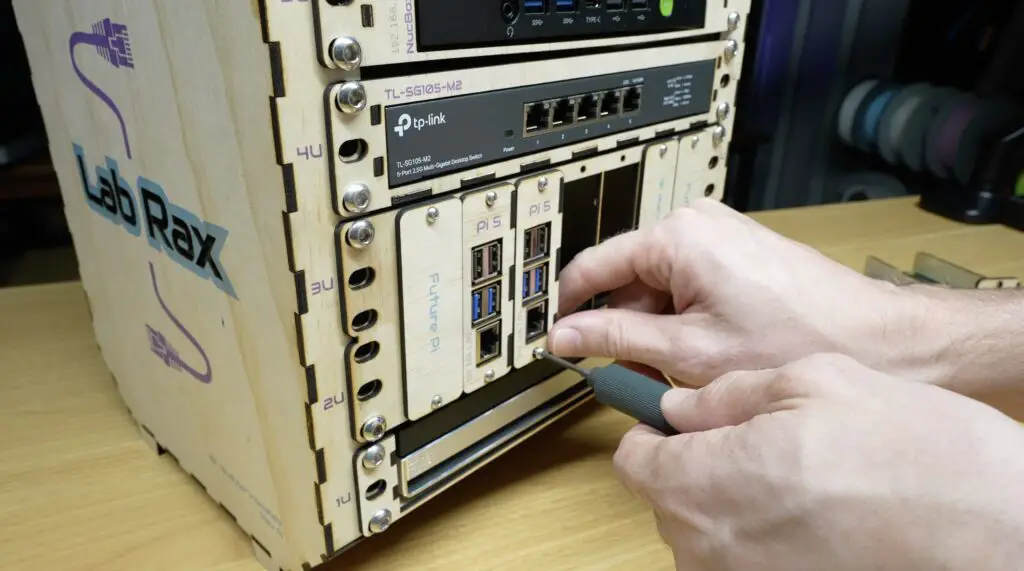
Now, let’s get the hardware installed into the trays and then get them into the homelab.
Completed Wooden Lab Rax Homelab
With all of the equipment installed, the wooden Lab Rax homelab is now complete.


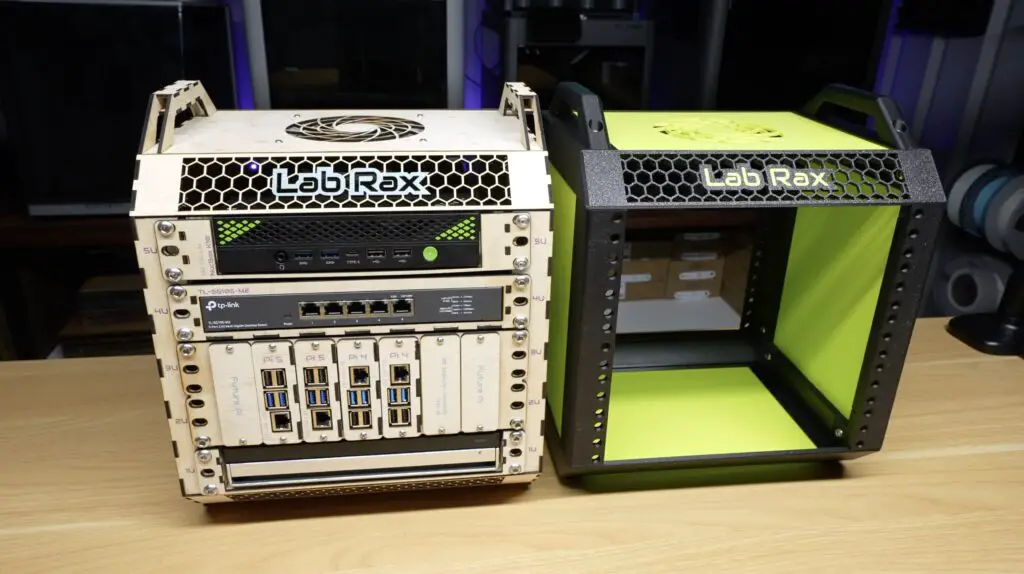
I wasn’t sure how this project was going to turn out when I started, but I wanted to see whether a system originally designed for 3D printing could be successfully laser cut, and it has come out better than I expected. I actually quite like the light wood look.
It’s recognisably a Lab Rax homelab, it’s compatible with most of the existing components, and the opposite is true too, you can install 3D printed gear into this wooden version. Best of all, it can be produced much faster than waiting for 3D printed parts.
The only thing that’s a bit fiddly is installing the screws because you can’t use brass inserts like on my printed racks, but it could easily be adapted to use square nuts or rack studs for mounting.
I’m interested to hear what you think of it. Would you build a laser-cut version like this, or do you still prefer the original 3D printed design?
Let me know in the comments section below.
Final Thoughts
A big thank you to xTool for sending over the new M2 to make this project possible.
If you’d like to learn more about the M2 or the SafetyPro AP2, take a look at the product pages below:
If you enjoyed this project, follow my blog or subscribe to my YouTube channel for more tech and electronics projects, tutorials and reviews.