I’ve built a lot of Raspberry Pi and Mini PC setups in my Lab Rax system, but they all hit the same limitation, no real computing expandability.
So today I’m fixing that by mounting a full Mini ITX PC inside a 10” rack. This gives you access to features like full-size PCIe ports to add functionality to your home lab, like a GPU for AI or Plex transcoding, or 10 gig networking. They also generally have additional SATA ports that you can make use of for storage drives for a NAS, or even just to give you the flexibility to use an older platform that allows you to use DDR4 RAM, so that you don’t have to sell your house to build it.
Here’s my video of the build, read on for the write-up:
What You Need To Build Your Own Mini ITX PC Rack Shelf
- AMD Ryzen 5 5500 – Buy Here
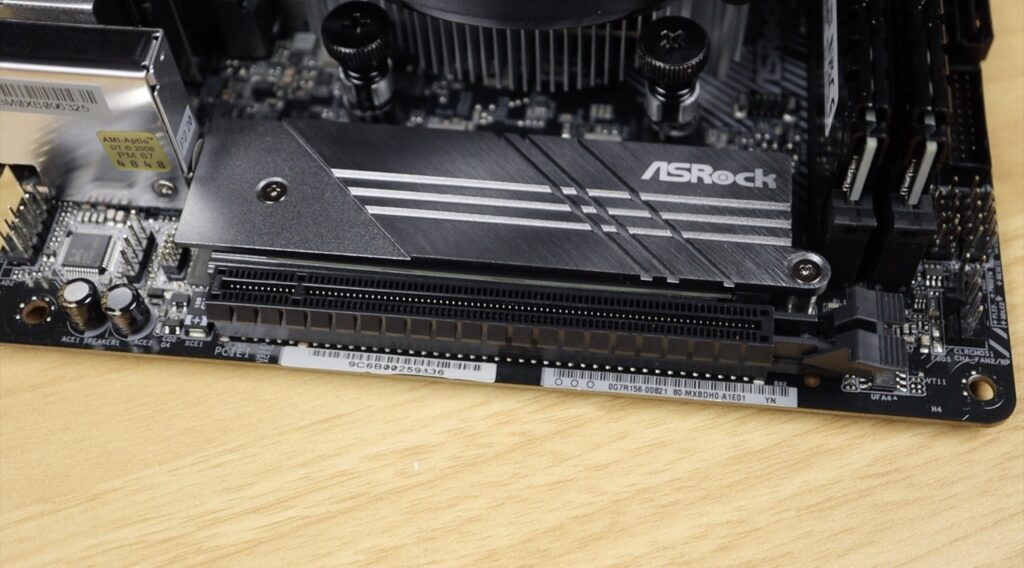
- ASRock B550M-ITX – Buy Here
- Crucial 1TB P3 Plus – Buy Here
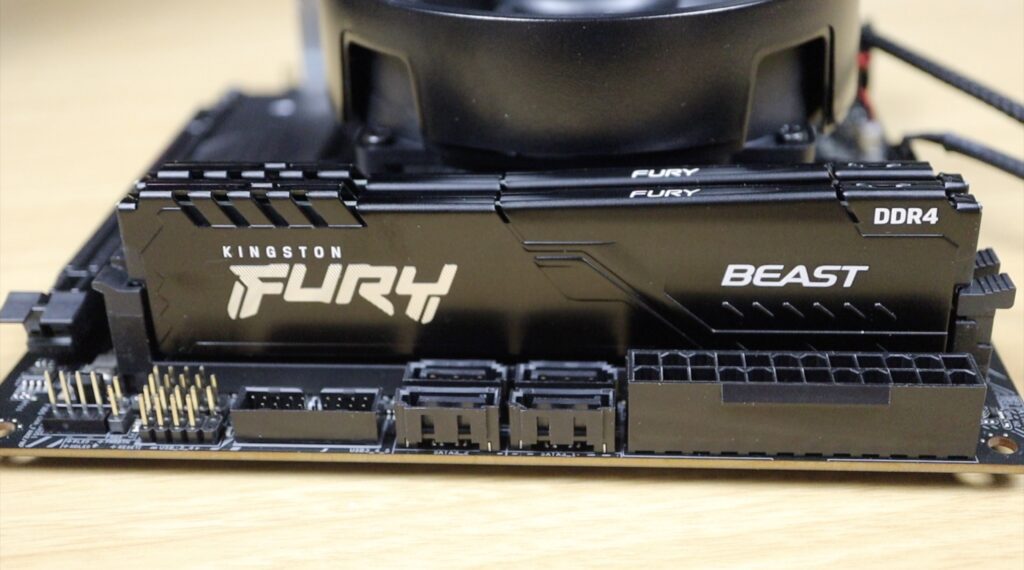
- Kingston Fury Beast Black 16GB – Buy Here
- HD Plex Power Supply – Buy Here
- PicoPSU Power Supply – Buy Here
- 12mm Pushbutton – Buy Here
- M3 Nylon Standoffs – Buy Here
- M6x10mm Button Head Screws – Buy Here
- M3x16mm Screws – Buy Here
- M3x4mm Screws – Buy Here
- M3 Nuts – Buy Here
Tools & Equipment Used:
Some of the above parts are affiliate links. By purchasing products through the above links, you’ll be supporting my projects, at no additional cost to you.
Designing & Printing The Mini ITX Shelf
I wanted to come up with a way to mount a Mini ITX motherboard into a 10” rack. It has to be Mini ITX as micro ATX or ATX boards are just too big, but there are some really powerful Mini ITX options available.
Because of the height of the IO shield and the CPU cooler, we need to use two rack units. That also gives us a fair amount of headroom around the motherboard for ventilation.

The tricky part here is fitting a full PC into just 2U of space without killing airflow, so here’s how I approached the design.
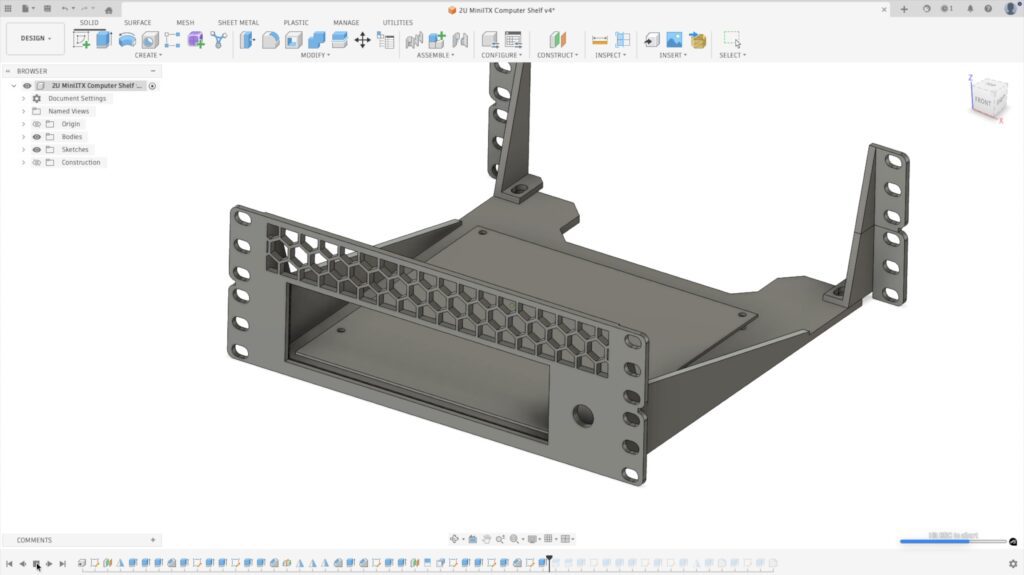
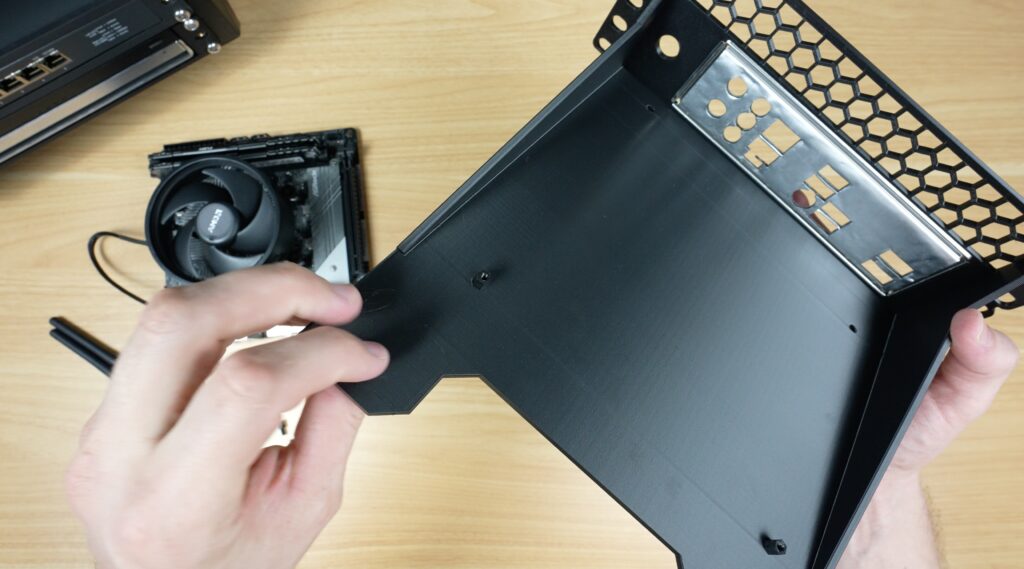
I started out with a simple shelf in Fusion360, and I then added the motherboard footprint, a cutout for the IO shield, a recess at the back for cable management and a hole for the power button.
It’s quite a simple design, but I think it fits the aesthetic of my home lab quite well.
Download the Mini ITX Shelf 3D Print files (Ports Forward)
Download the Mini ITX Shelf 3D Print files (Ports Reversed)
So next, let’s get it printed out. Because it’s holding heat-producing components, it’s best to print it out from PETG.
Assembling The Mini ITX PC Shelf
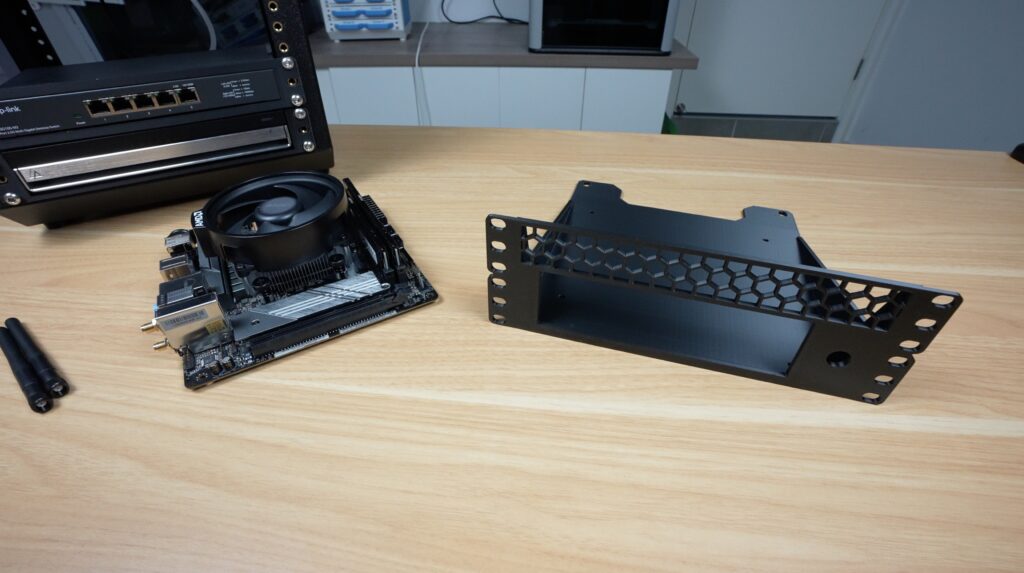
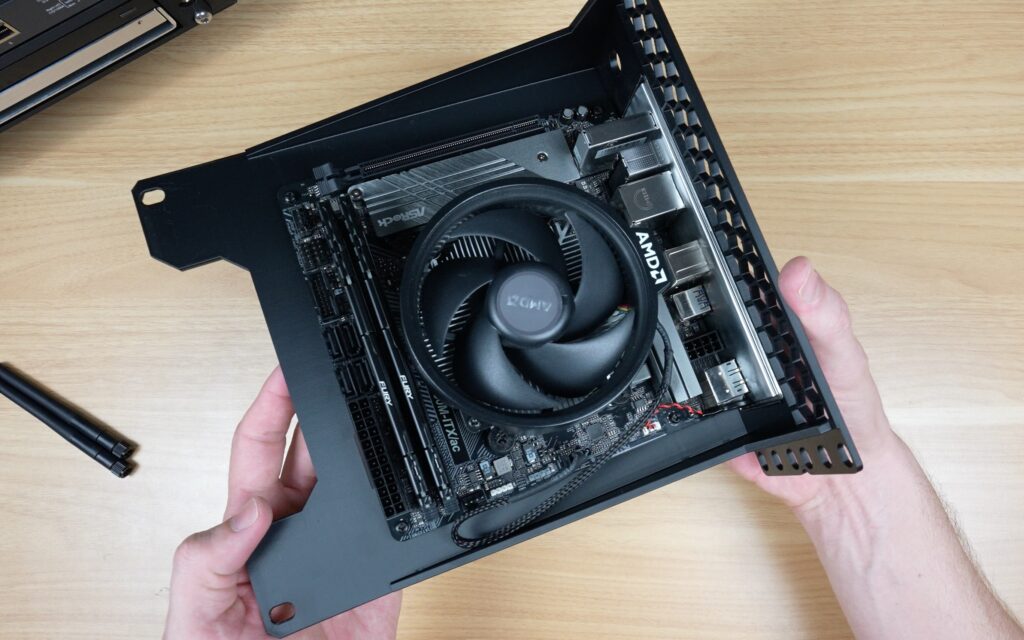
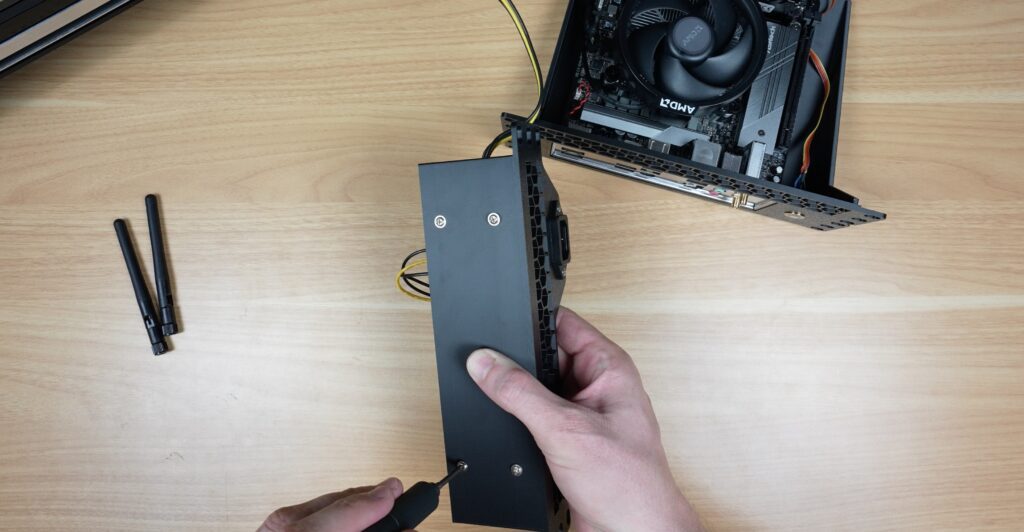
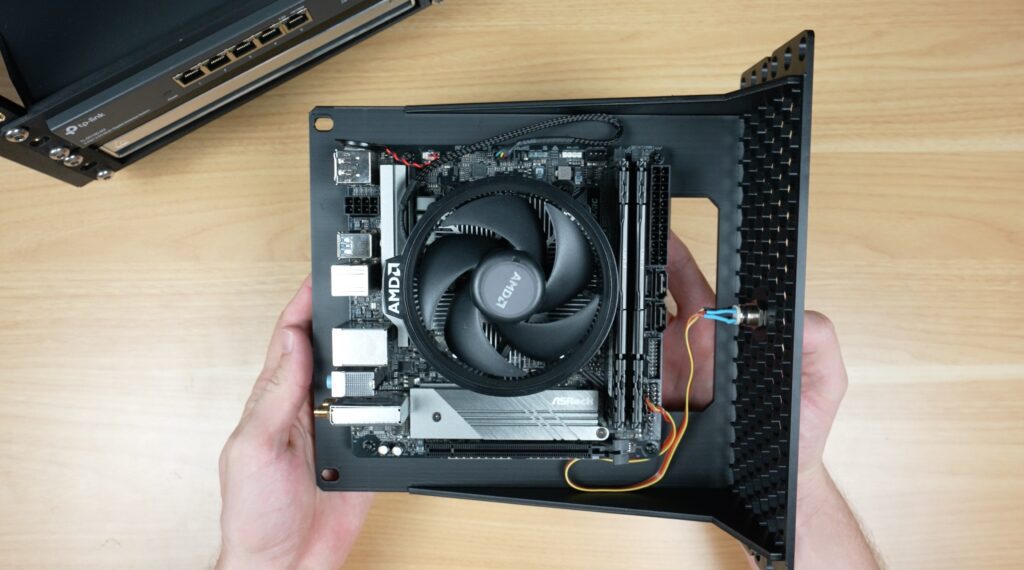
With the shelf complete, we can get the Mini ITX motherboard installed on it. If you haven’t already, make sure that all of your components (CPU, cooler, RAM and NVMe drive) are installed on the board.

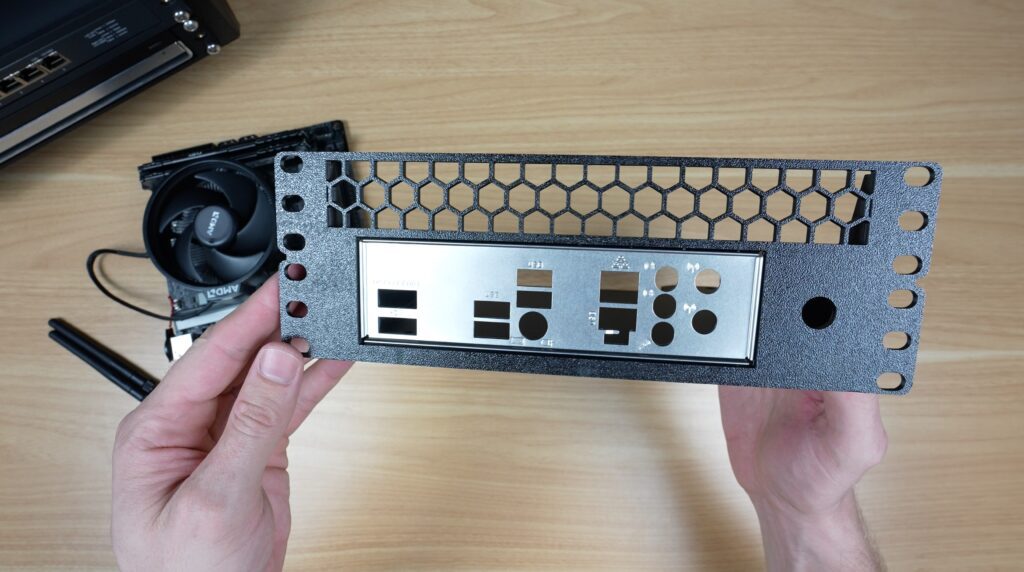
First, lets press the IO shield into place, making sure that it’s the right way around. There’s a small retaining lip in the print that holds it in place, so it doesn’t require any screws. The IO shield is pressed into place from the back of the cutout (from the motherboard side).
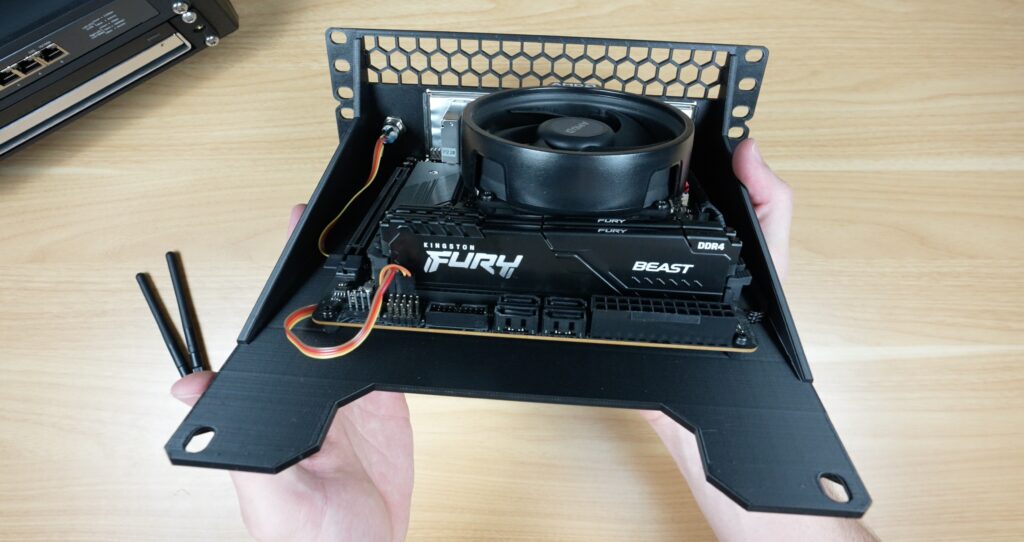
Next, add M3x6mm nylon standoffs, each secured with an M3 nut on the back. We can then mount the board with M3 screws. You don’t have to use nylon/plastic hardware for these, you can use brass standoffs and metals screws if you’d like to, but the nylon ones provide an extra layer of protection against short circuits and damage to the surface mount components.
Now we can add the power button to the front. I’ve added a hole which will fit 12mm push buttons. These are quite commonly available online, and they work well with this style of build. Some of them, like the one that I’ve used, even have an integrated ring LED around the button that you can use for power indication.
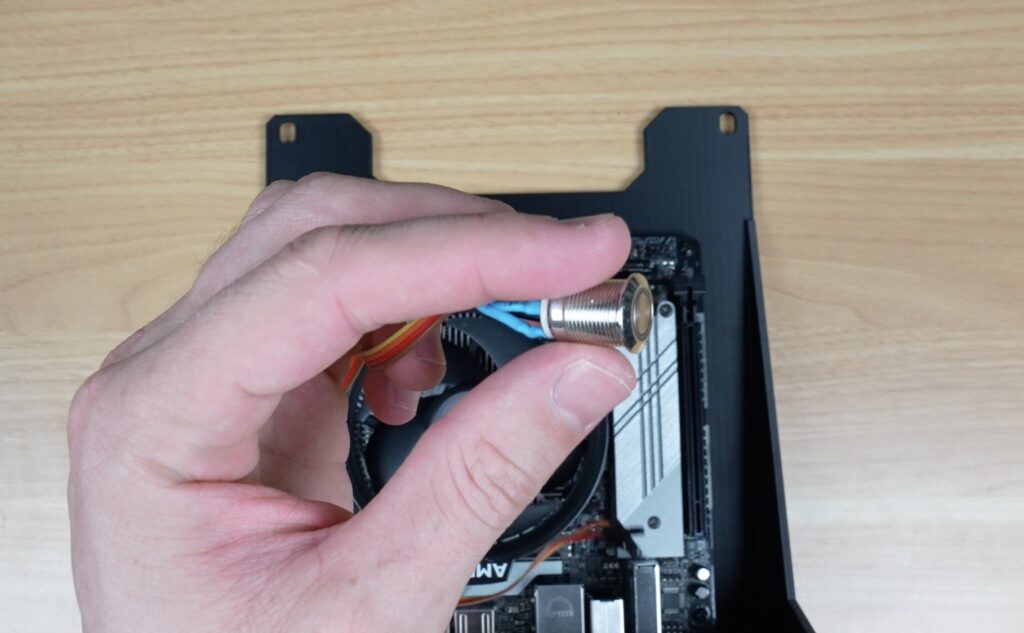
Just feed the cable and button through the hole and secure it with the nut on the back.
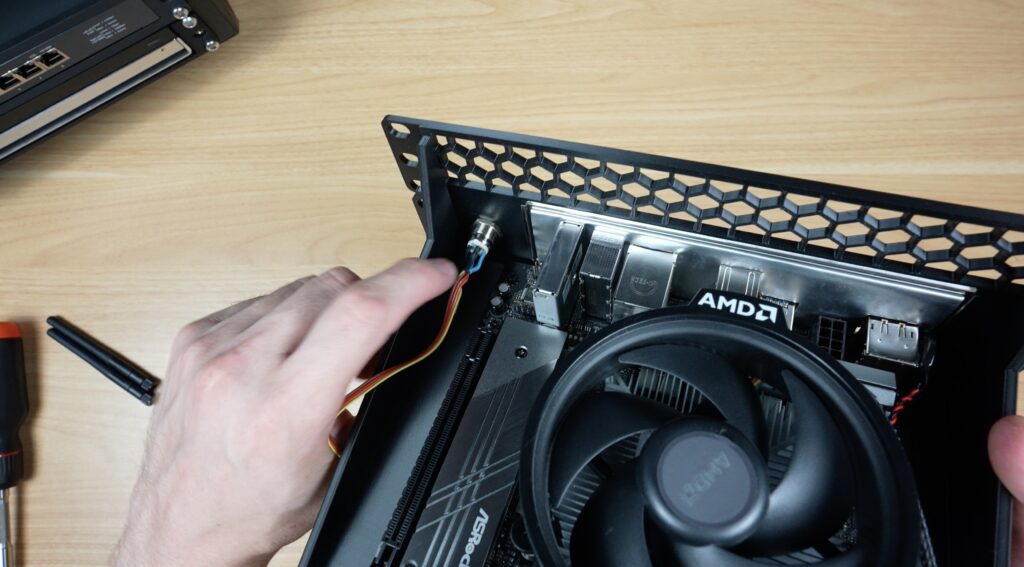
Then plug the button and LED into the correct pins on your board. Your motherboard should have a front panel pinout in the user manual. Depending on where you get the button from, you might need to solder these leads onto your button, but that’s quite easy to do.
Power Supply Options For A Homelab PC
There is one last thing that we need, and that’s a power supply. We have quite a few options here, depending on what devices you’re adding and what CPU you’re running.
If you have a very lightweight system with a low-power CPU then you can use one of these PicoPSUs. These usually come in an 80W and 160W version. This is by far the most compact option and doesn’t require anything more than a 12V supply through a barrel jack to get you up and running.
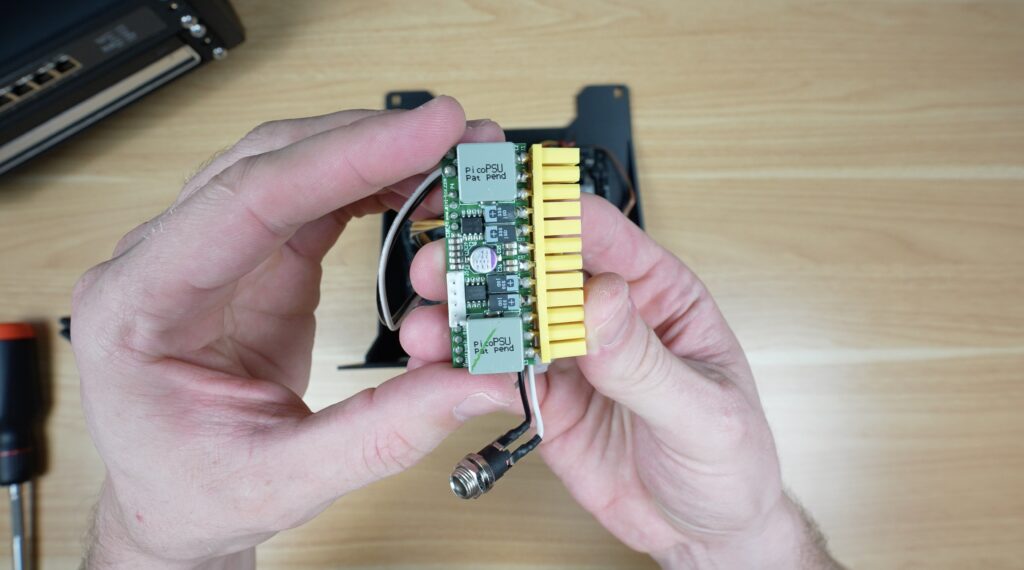
If that’s not enough power, then my go-to for this size build is one of these HDPlex power supplies. They make two options, a 250W version and then this 500W version that I’ve used. This gives you quite a lot of capacity if you’re planning on adding drives for a NAS build or a small GPU for encoding or AI tasks.
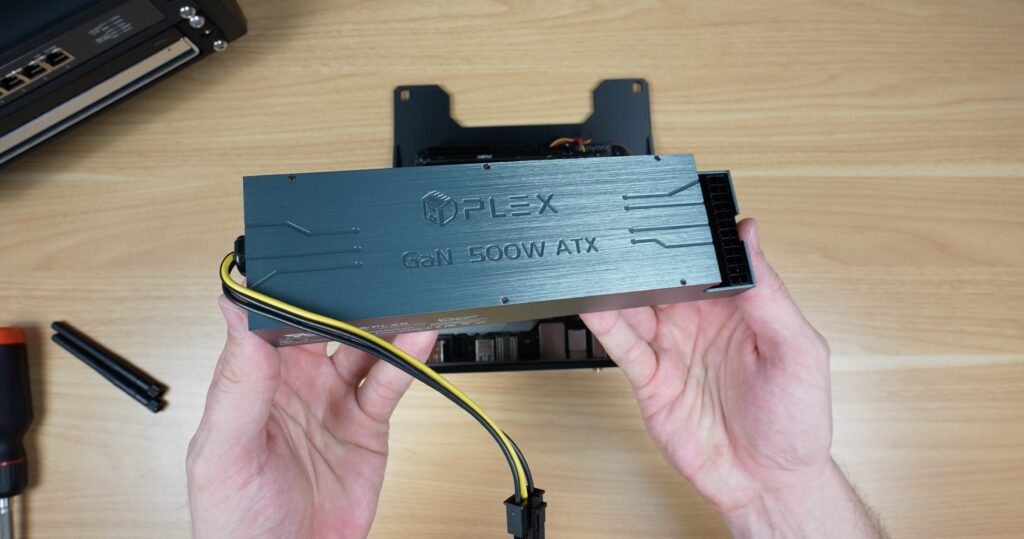
If you outgrow the 500W, you can also sync two or more together with a short jumper and then use multiple supplies to power more peripherals or even additional computers and network switches in your home lab.
It’s also compact, completely modular on the cable side, so you just plug in the cables that you actually need, and probably the best part is that’s it’s very nearly silent. It’s got a tiny low-speed fan near the back that only turns on when necessary. So it makes very little noise.
To mount this, I again wanted to keep things simple so that it is compatible with a range of hardware options. So I designed a small shelf that goes at the back of the home lab. This fits in above the rear shelf supports in the second unit of space that the PC tray occupies, so it doesn’t need a separate rack unit.
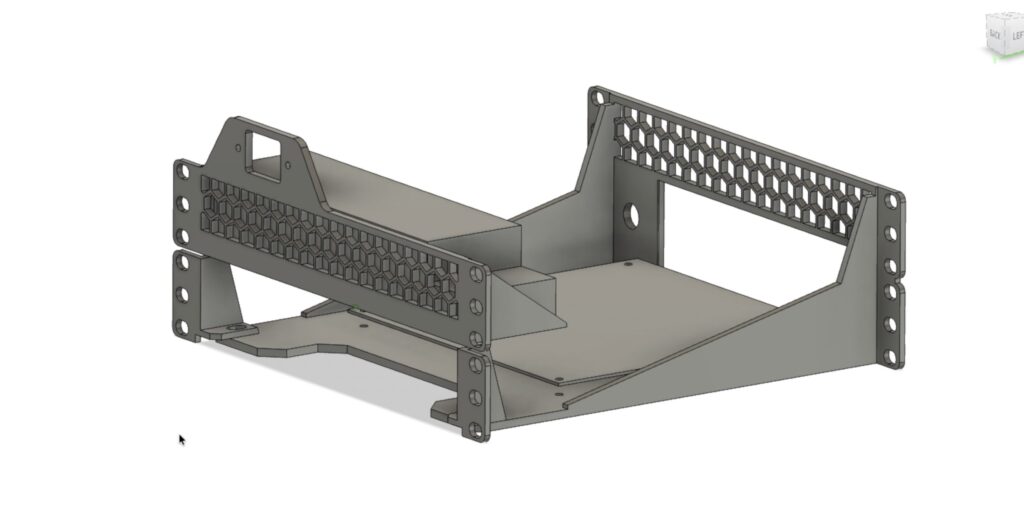
Because of the way it’s designed, you also have two options to install it. You can use it as I’ve drawn in the CAD model with the power port above it, or you can flip the shelf over and install the power supply the other way around so that the port is at the bottom, which is probably what I’m going to do for my build.
Download the HD Plex Power Supply Shelf
With the shelf printed out, the plug mounts onto it with two M3x16mm screws and M3 nuts on the back and then the power supply fits in underneath it. That’s held in place with four M3x4mm screws – the same type used to secure storage or optical drives.
And this small power unit is now ready to install. We just need two power cables between the power supply and the motherboard for my basic build. Let’s start by plugging one end into the motherboard before installing it.
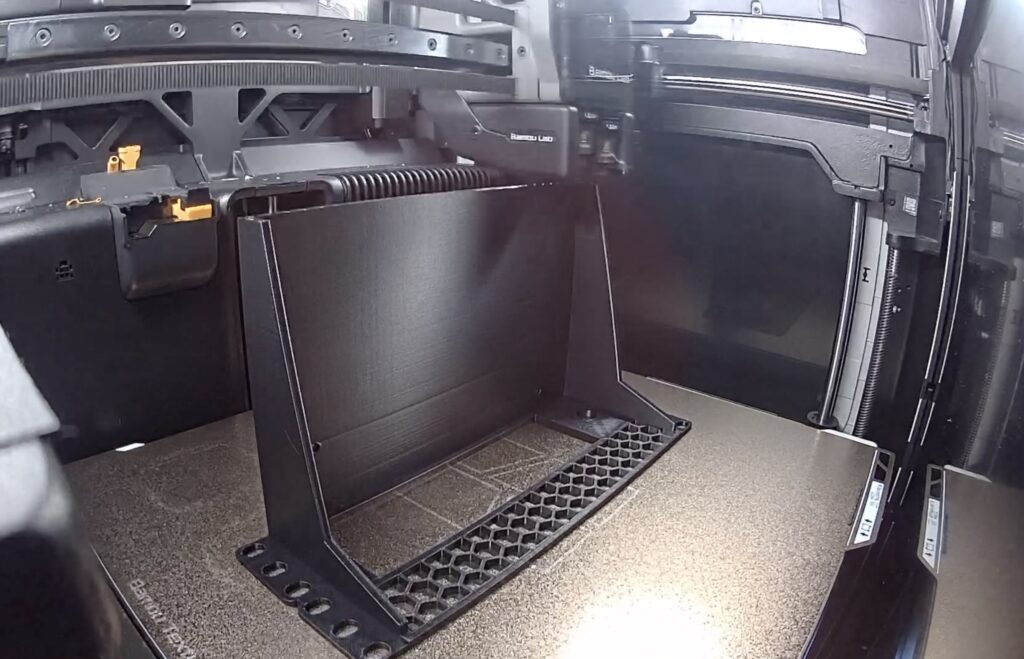
We can then install the PC tray in our rack. I’m just using four M6 screws, one in each corner to hold it in place. You could add another two M6 screws in the middle to make it more secure or rigid for a heavier PC build.

Then, flipping the rack around, we can install the power supply on the back.
First, plug in the cables from the motherboard and then mount the power supply in the rack. As I mentioned earlier, because I’ve got a MiniPC tray above it, I need to install the power supply inverted so that the power input is at the bottom. Again, it’s held in place with four M6 screws.

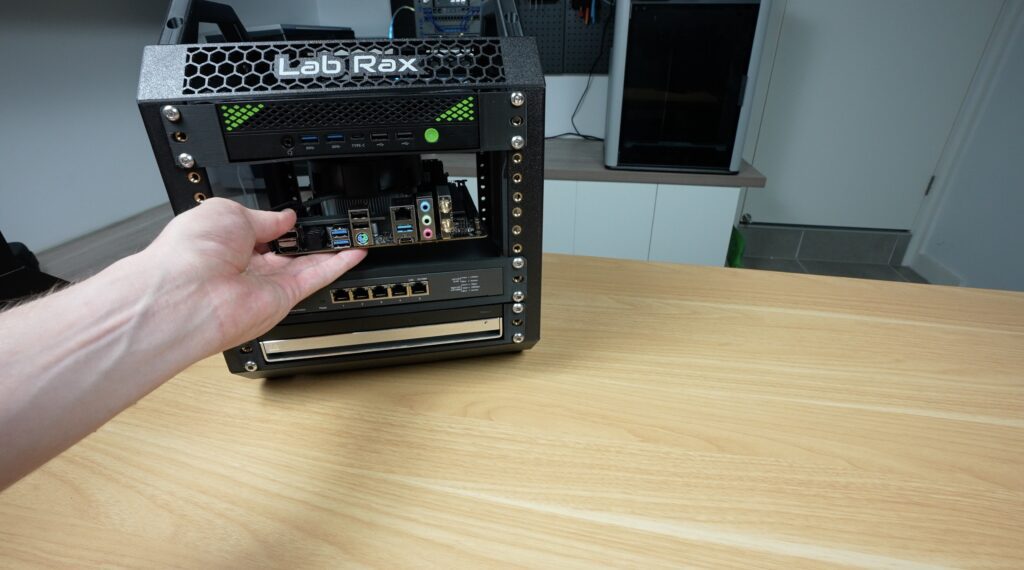
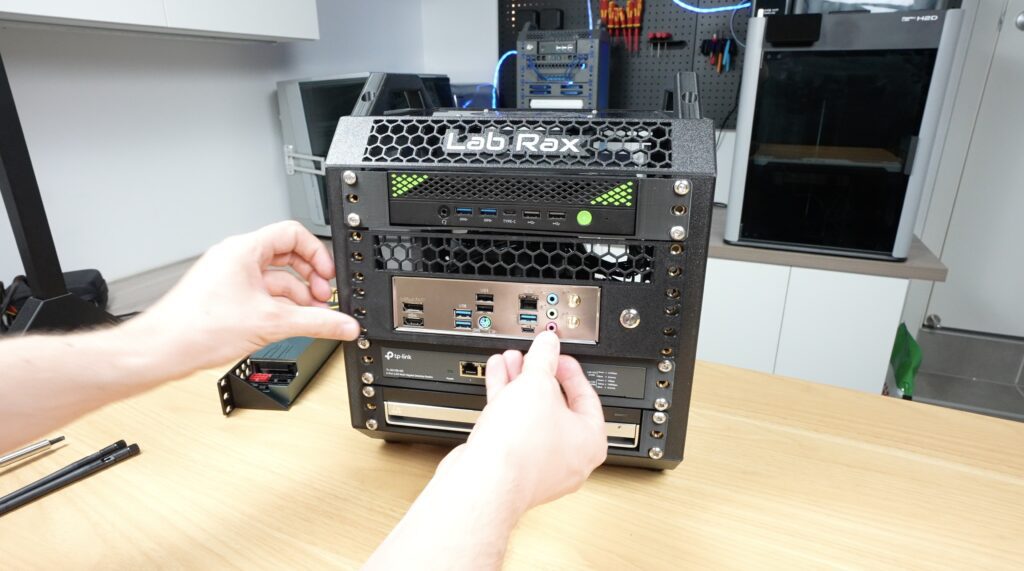
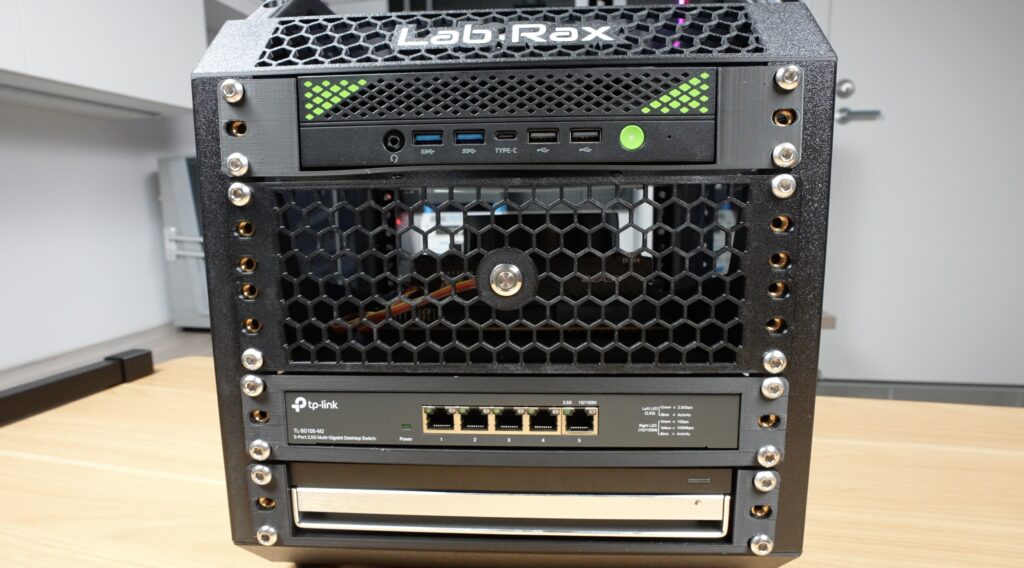
And that’s the build complete and ready to boot up by pressing the power button on the front.

Other Mini ITX PC Mounting Options
This basically turns your Lab Rax system into a proper home server platform, and not just a Pi cluster.
At a total cost of just 240g of filament, which is less than $4, this is also a considerably cheaper option than a commercial rack-mounted PC case, even once you add in the power button and some screws.
I like how it’s turned out, but the IO shield is a bit glaring in silver. I’ll probably paint that black to match the rest of the rack.
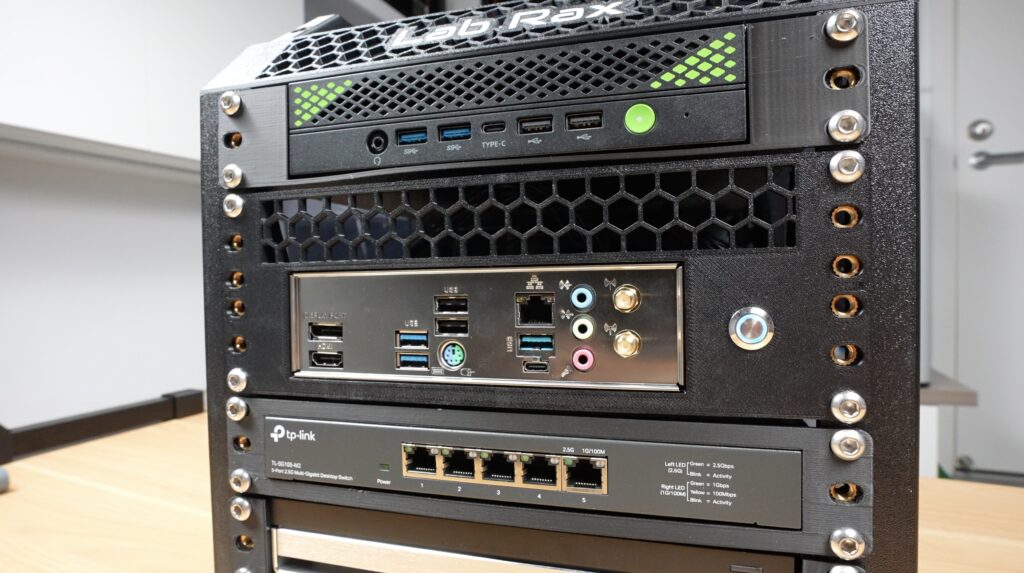
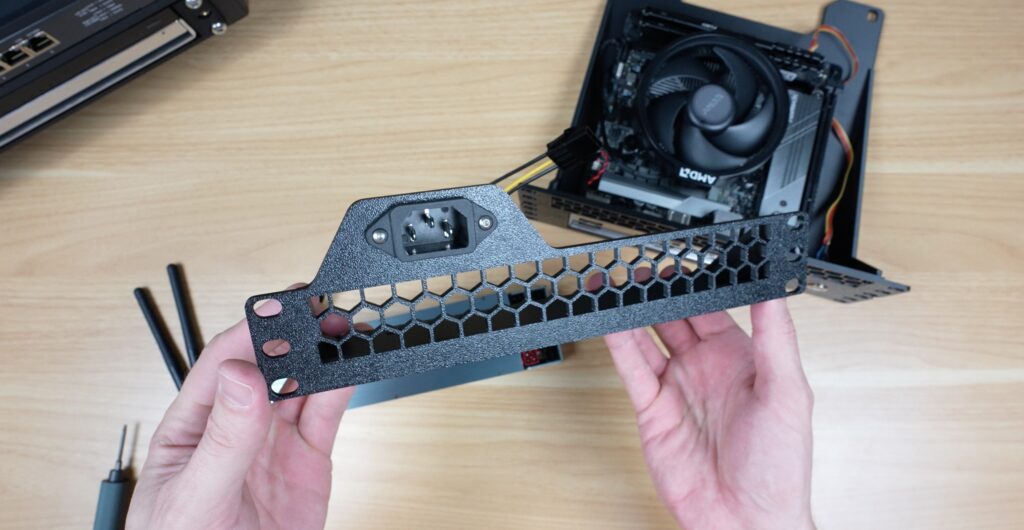
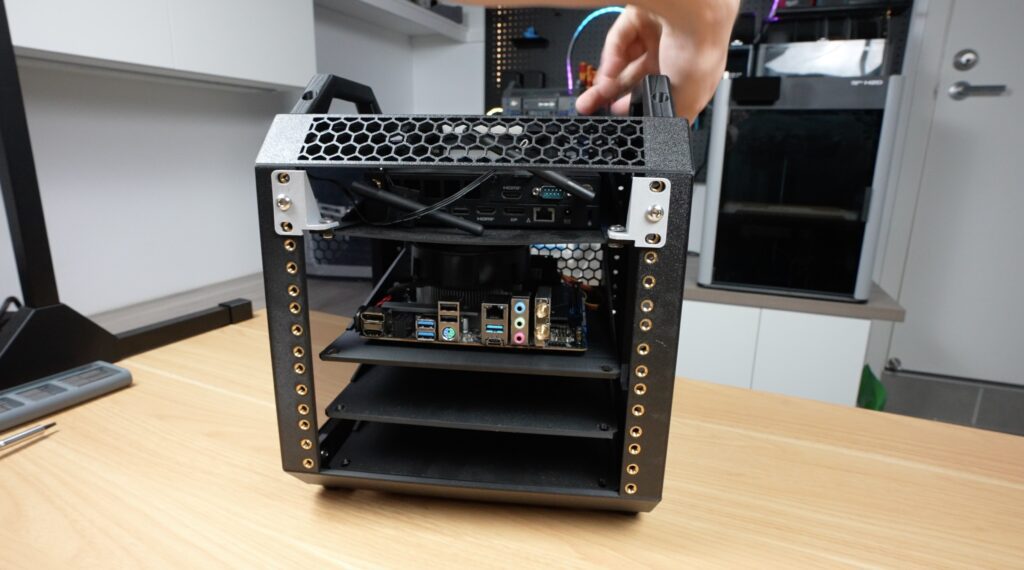
After building this, I realised not everyone will want front-facing IO, so I designed a second version. This has a ventilation grill and power button on the front and then flips the motherboard around so that the ports all face the back of the rack.
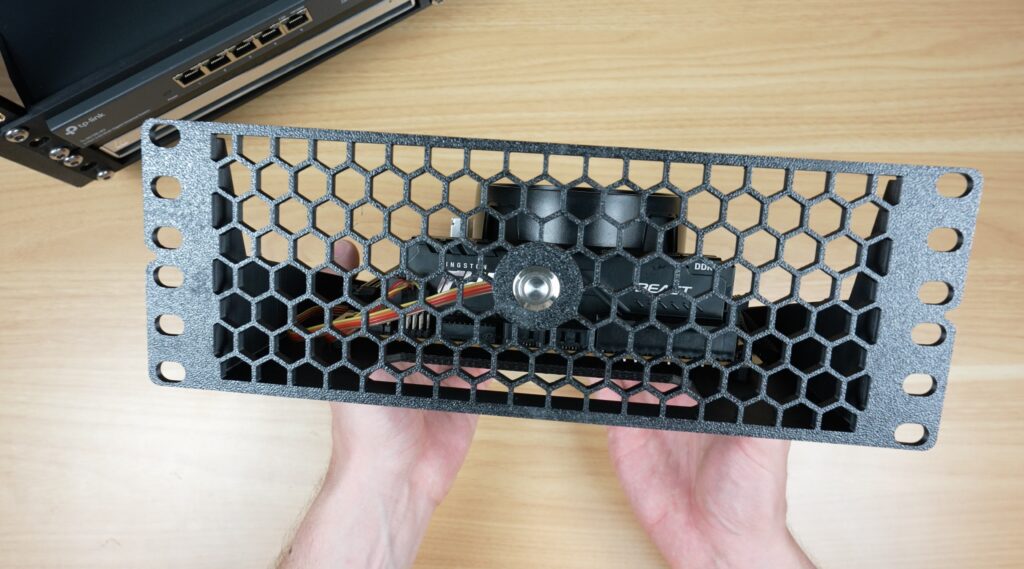
This arrangement makes powering the board a little more difficult as the power supply can’t block off the ports, which are now at the back. It can, however, be mounted in a free unit above or below the PC, and there’s a gap near the front of the shelf for cable routing.
Let me know what you’d like to see added to or changed on this build, and if you’ve got any ideas for future additions to the Lab Rax system. As with my other Lab Rax designs, these models are all available on Makerworld for you to print out to add to your homelab.
Download the Mini ITX Shelf 3D Print files (Ports Forward)