Today I’m going to show you how to block ads and trackers, not just at home, but on every network you connect to. We’ll do this for the once-off cost of a Raspberry Pi Zero, which costs about the same as a takeaway meal and has no ongoing subscription fees.
This is done by running Pi-hole on a Raspberry Pi Zero and pairing it with Tailscale. Your phone, your laptop, your tablet, whether you’re at home, at work, in a coffee shop, or using your mobile data, all your traffic is still filtered through your own Pi-hole.
Here’s my video tutorial, read on for the written version;
What You Need To Build Your Own Pi-hole Global Ad Blocker
- Raspberry Pi Zero W – Buy Here
- Aluminium Heatsink – Buy Here
- MicroSD Card – Buy Here
- USB Power Supply – Buy Here
- Or Get A Complete Pi Zero W Kit – Buy Here
Quick Explanation On How Pi-hole Works (Quick Explanation)
A popular question on my last Pi-hole project was “How can a Pi Zero handle all of your web traffic?” “Isn’t it slow?”. So to clear that up, Pi-hole doesn’t inspect or handle all of your web traffic, and that’s why even a Raspberry Pi Zero can handle it.
When you visit a website, you type in a name like google.com, but computers don’t actually use names, they use IP addresses. The job of the DNS server is to translate the name into an IP address that your computer can connect to.
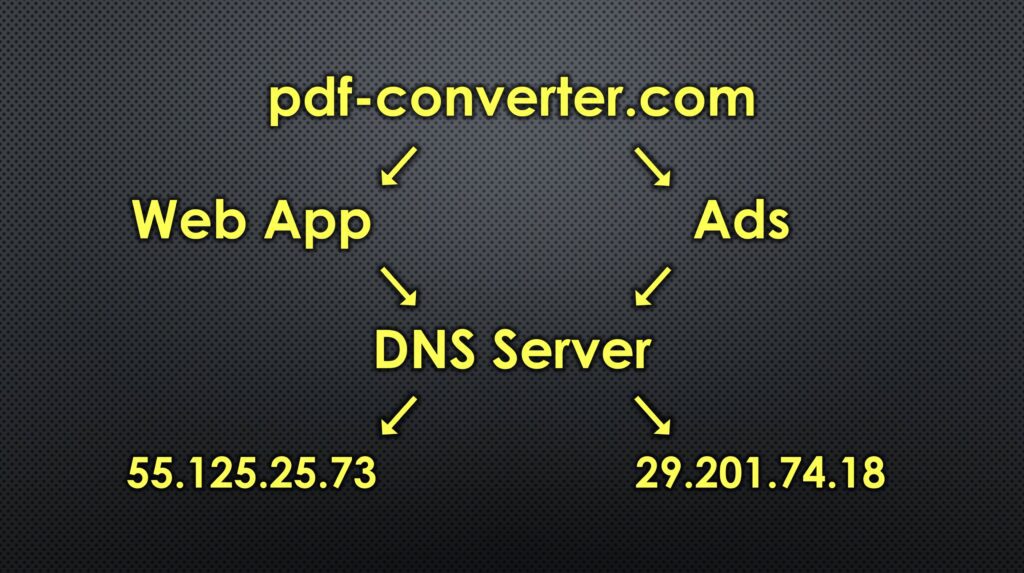
Most websites don’t come from just one place. The main content might come from one server and the ads from a different server. So when your computer asks where the website is, and where the ads and trackers are, Pi-hole responds by saying the website is here, but there’s no address for that ad server.
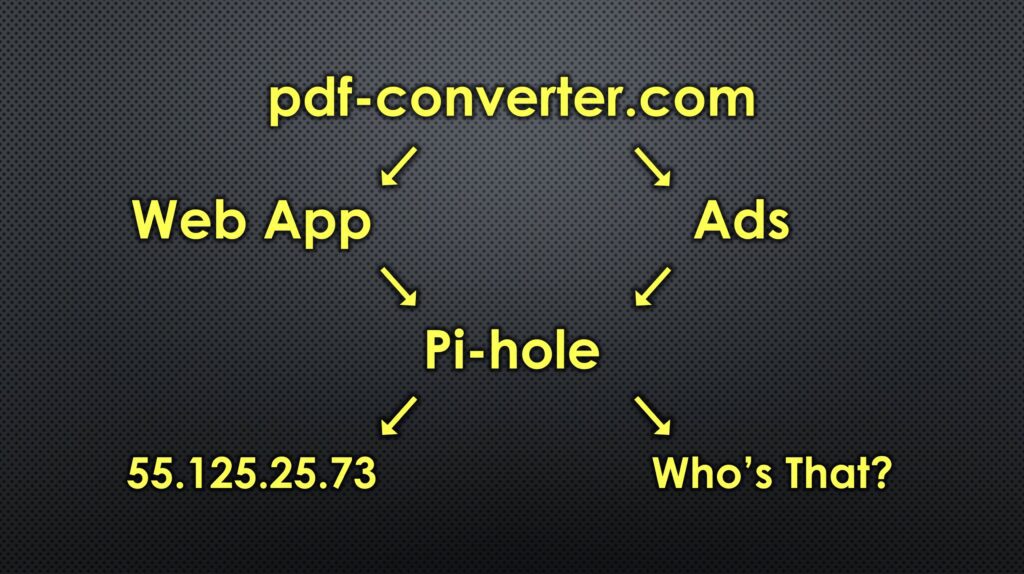
So your computer can load the website, but it can’t load the ads or trackers because it never gets their address.
Assemble Your Ad Blocker Hardware
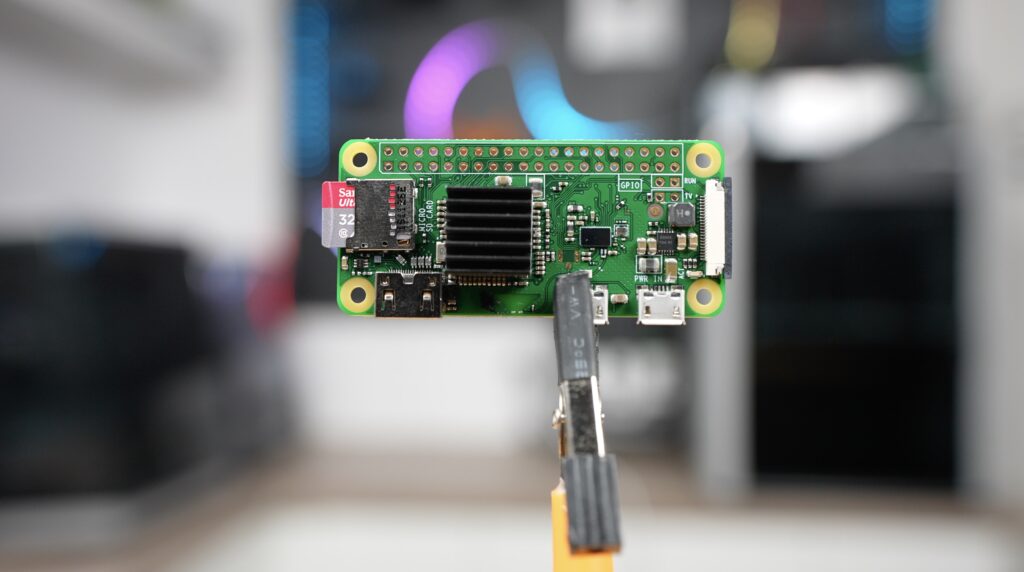
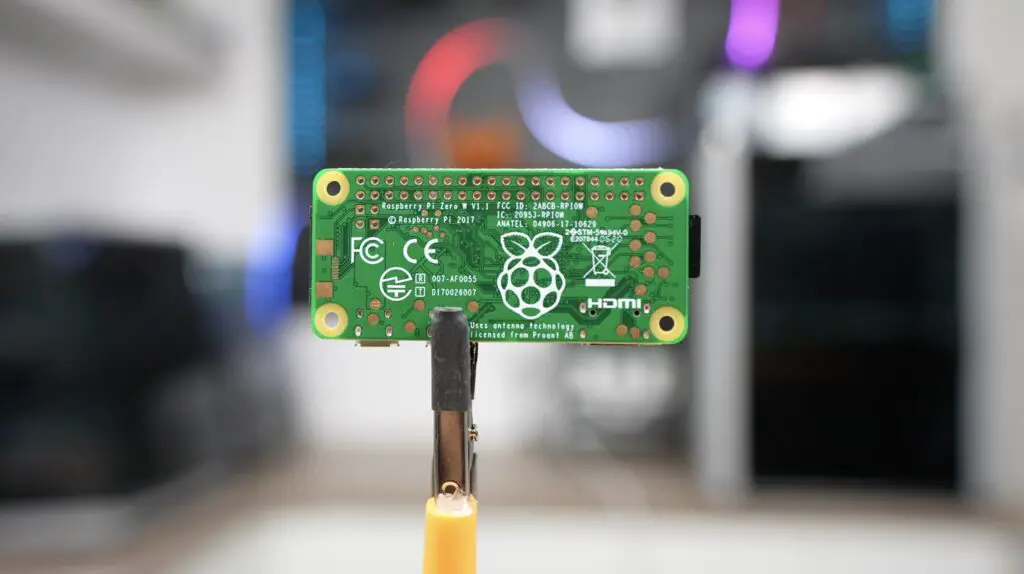
To build the Pi-hole Ad Blocker, you’ll need a few basic components. We’ll start with a Raspberry Pi Zero, which is one of the cheapest Pi’s you can buy at only $10. It’s important that you get the W version with Wifi. If you use a standard Zero, then you’ll need to add a USB network adaptor or wifi adaptor to it, which adds to the cost.
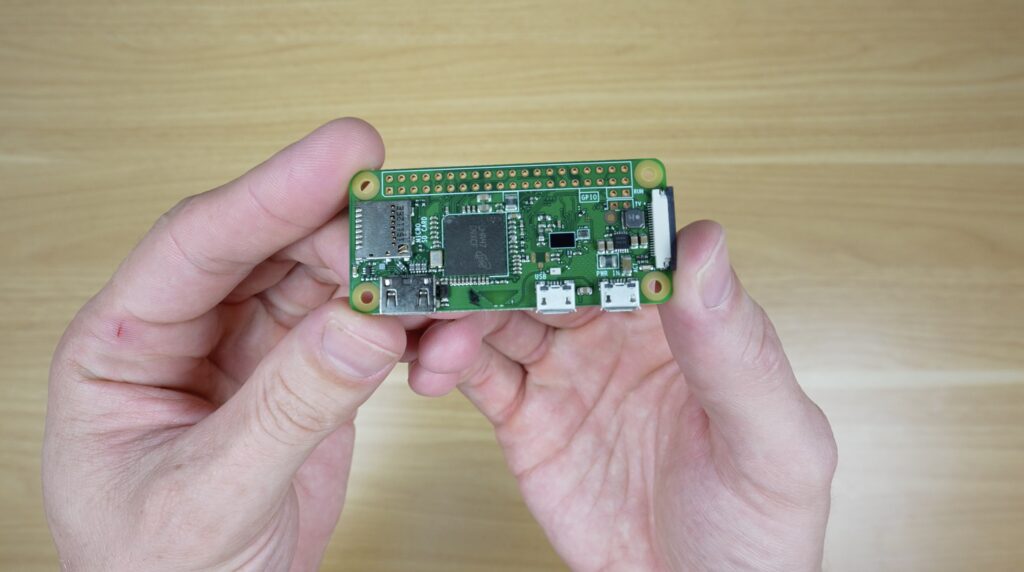
You can also use another model Pi, but they’re going to be overkill for this project, so save some money and go with a Zero. You also don’t need the increased processing power of a Zero 2 W, the original Zero W works perfectly for this project.
In addition to the Pi you need a heat sink. I’m just using a small passive aluminium heat sink. You’ll also need a MicroSD card for the operating system. Get a good quality card as it’s going to be running 24/7.
Lastly, you need a power supply to power it. The Zero is powered through a microUSB port, and you’ll need one that can do 5V and up to 3A. Most good quality USB power supplies will be able to power it.
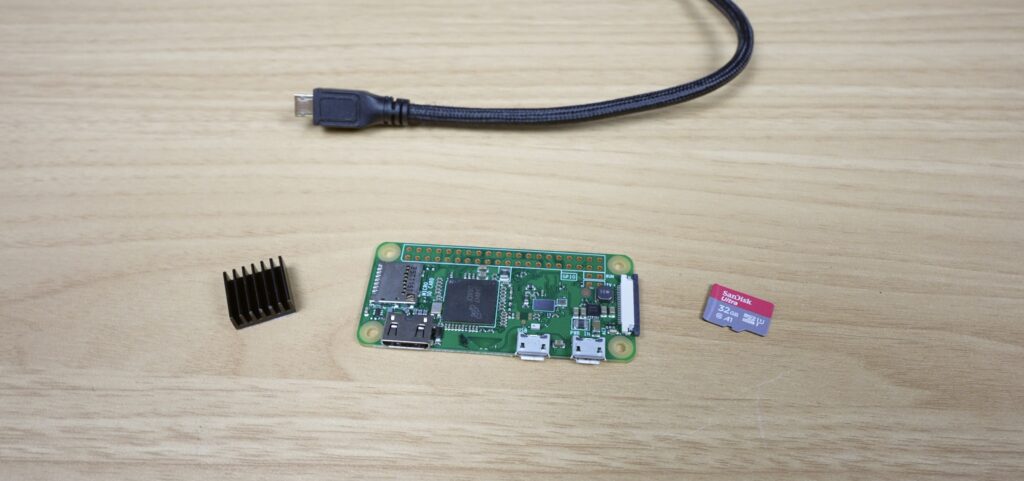
That’s it for the hardware. The heat sink goes onto the Pi’s CPU and then we can move on to flashing the operating system to the microSD card.
All up, this costs around $15-20, depending on where you get the parts.
Flashing Raspberry Pi OS Lite
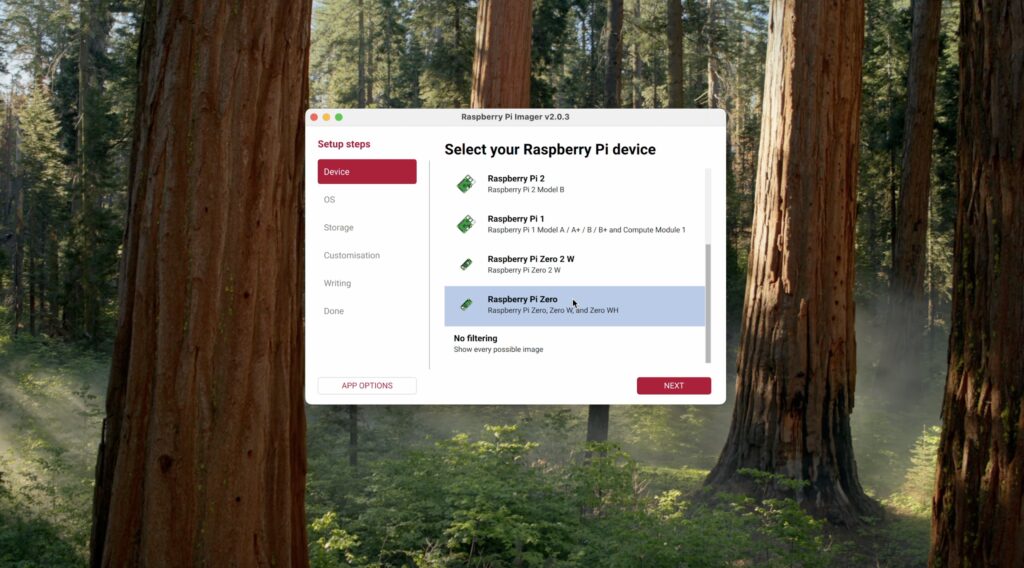
We will use Raspberry Pi Imager. Since we’re not going to have a monitor hooked up to the Pi, it’s quite important to get the setup right here. So don’t skip any of these steps.
First, we need to select our device as a Pi Zero W.
Then for the operating system, we’re going to go to Other and then choose the legacy Bookworm version of Pi OS Lite. This works more reliably than the newer Trixie version for the time being.
Then select your microSD card as the storage device.
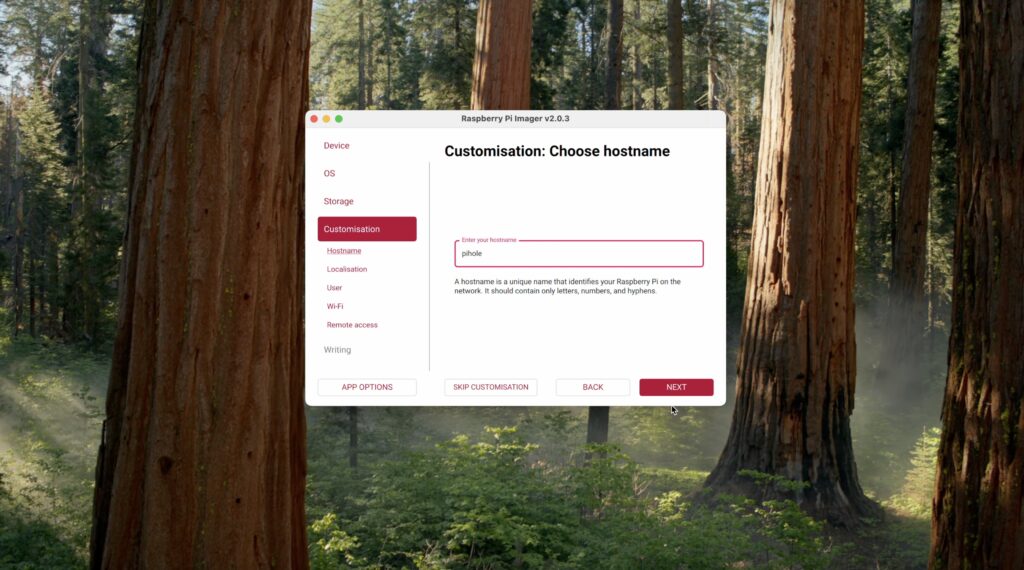
Under customisation, give your Pi a name. I’m calling it pihole so that it’s easily identifiable on my network.
Select your localisation settings to match your location.
Set a username and password, which you should take note of.
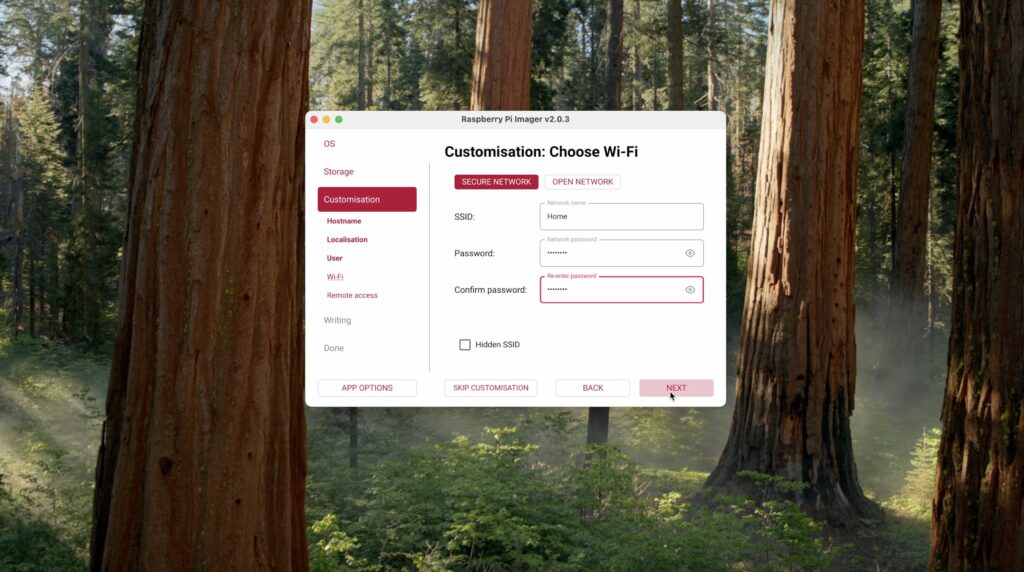
Then you need to enter your WiFi network name and password. It’s very important that you get this right. If your Pi can’t connect to your WiFi, then it’s not going to show up when you power it up, and you’ll need to then either hook it up to a monitor, mouse and keyboard or reflash the card.
It’s also important that you enable SSH, or you won’t be able to log into your Pi remotely.
Now leave Pi Imager to finish writing and checking the card.
Booting the Pi
Insert the microSD card into the Pi, then plug in the power adaptor. You’ll then need to wait 5 minutes for it to boot up. The first boot takes a bit longer, and the Pi Zero is not particularly fast, so be patient with it.
Find the Pi’s IP Address & Set A Static IP
After 5 minutes, we then need to find the Pi’s IP address on our network. To do this, you can use a utility like AngryIP Scanner, or the easiest way is to log in to your router and look for the Pi in your list of online devices or DHCP table.
This is a bit different on each router, but to start, your routers default login details are typically on the bottom or back of the router. You then usually go to the router’s IP address and then use the provided login details to access it’s settings. Finally, look for something called online devices, clients or DCHP.
Here, you’re looking for a device that recently joined the network, and it should be given the name that you set up when flashing the microSD card.
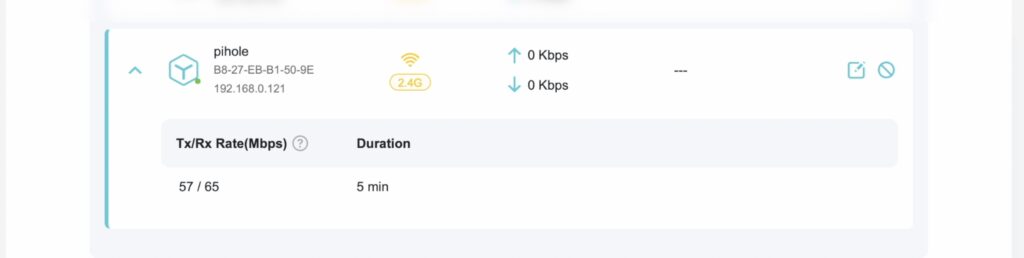
We need this IP address to log in to the Pi to continue setting up Pi-hole and subsequently to maintain it, so write it down somewhere.
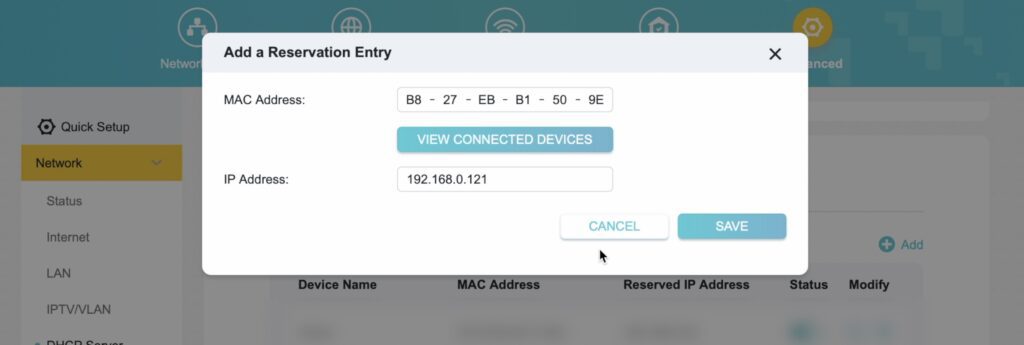
While you’re logged in, we also don’t want this address to change if the Pi or router is rebooted. So we need to set it as a static IP. If you choose change it, reboot the Pi so that the new IP address is assigned to it.
Install Pi-hole
Now that we have the Pi’s IP address, we can log in to it through ssh. This can be done in the terminal on another computer or through a utility like Putty. You’ll need to log in to the Pi using the credentials you set up when flashing the microSD card.
Next we can install Pi-hole, which is the software that’s actually going to be doing the ad blocking on the Pi. To do that, we just run this single line.
curl -sSL https://install.pi-hole.net | bash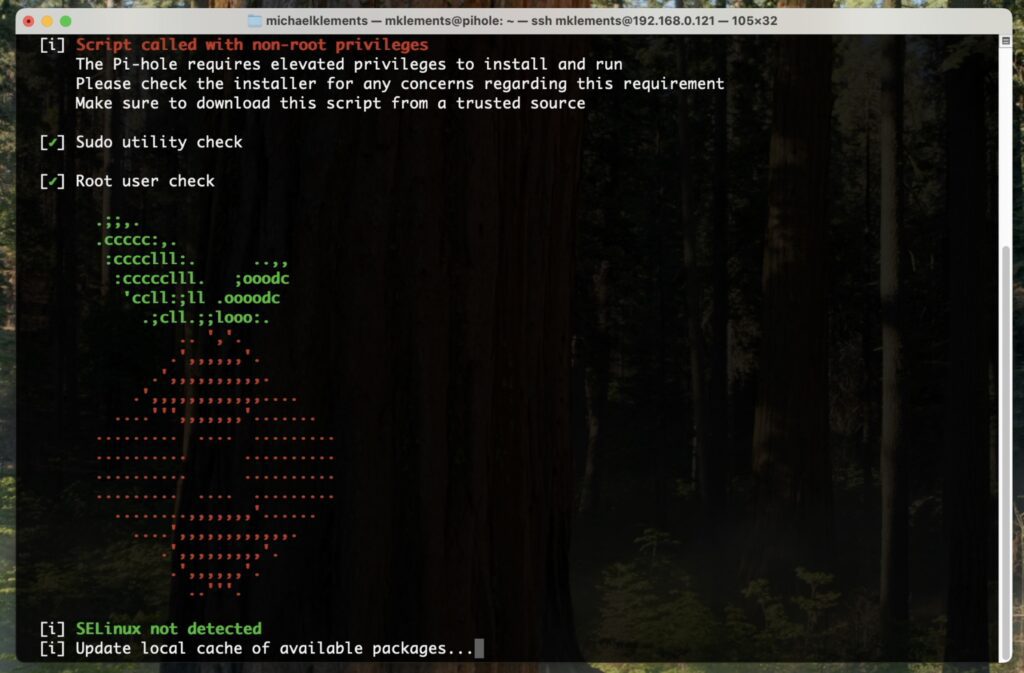
Accept all default options during installation.
You’ll then land up with an installation complete dialogue that has some information on it. The most important bit of information that you need from this page is the password that has been generated. You’ll need this to log in to the Pi-hole dashboard.

Access the Pi-hole Dashboard
In your browser, go to:
http://<Pi-IP-address>:80/adminHere you can enter the password that was given to you to log in.
You will now see the Pi-hole dashboard.
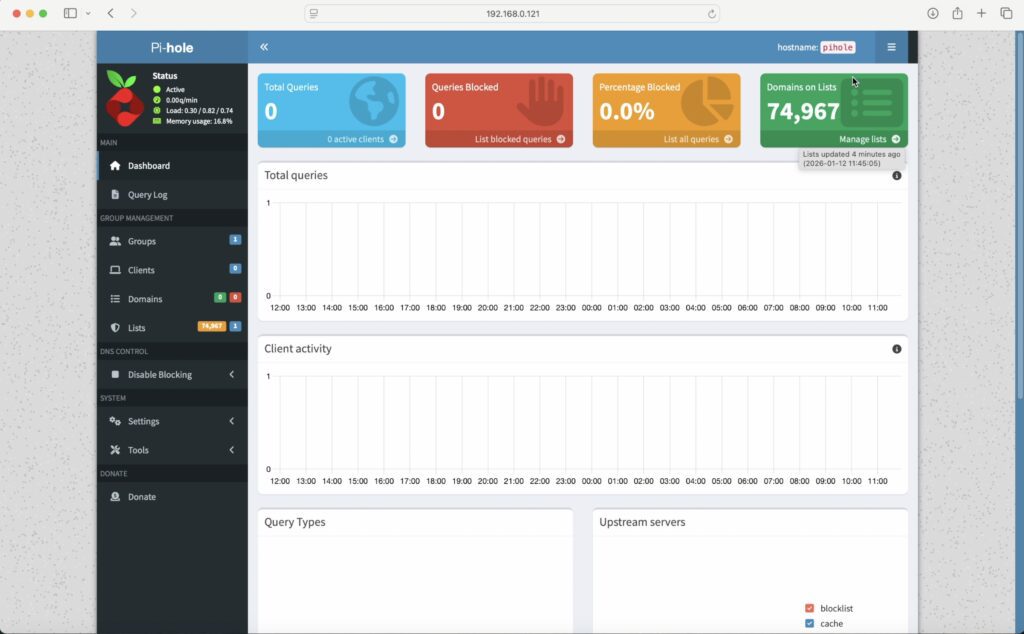
Now you should see your Pi-hole dashboard, which gives you stats like the number of queries blocked, the top sites and devices blocked and how many domains you’re blocking. You’ll notice that most of these are zero at the moment, and that’s because we haven’t told our router to use the Pi-hole as our DNS server, so let’s do that next.
Configure Your Router to Use Pi-hole as DNS
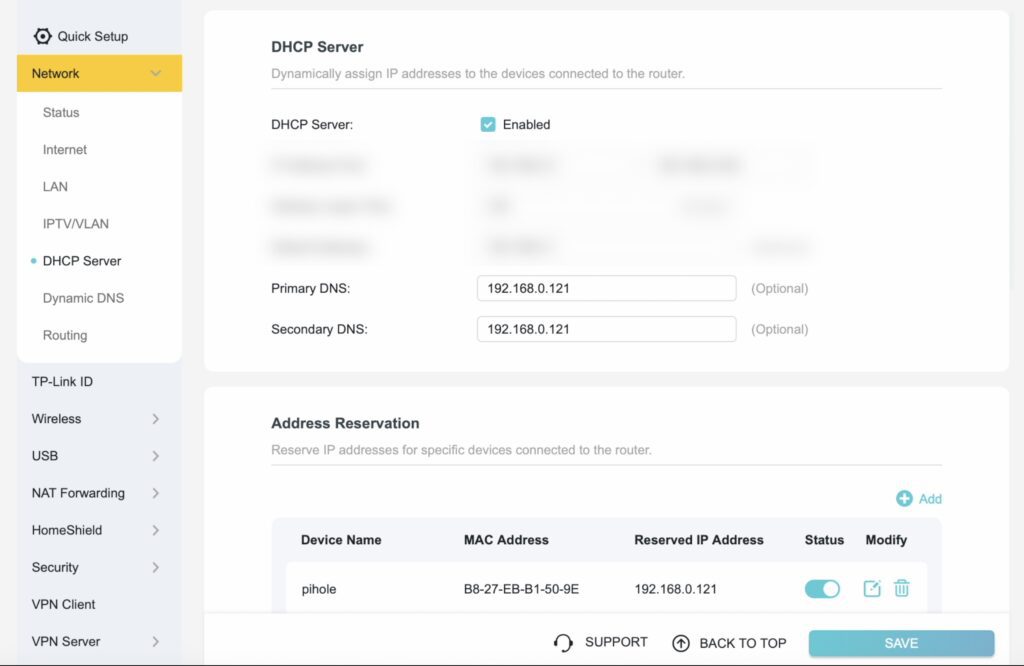
This step again depends a bit on the router you’re using, but you typically need to log in to your router again and then find a page or setting called DNS. This page should have the options to set a primary and secondary DNS server. Set these both to your Pi’s IP address. Some routers have weird rules guiding when they use the primary and secondary servers, so it’s most reliable to just set both of them to the Pis.
And that’s the basic setup complete, and your ad blocker should now be working.
Verify That Pi-hole Is Working
To check that your Pi-hole is working, visit a website that normally displays ads. Firstly, and obviously, you should not see any ads on the page. As a secondary check, go to your Pi-hole dashboard and check that the counters are increasing.


We’ve had 733 requests, 214 blocks and that means over a quarter of all requests are being blocked, mostly because I’m intentionally going to a site that I know serves ads.

If we temporarily turn the blocklist off, you can see we now have ads on the same page that we visited earlier.
So now we’ve got an ad blocker working for all devices on our home network.
But as soon as I take my phone or laptop away from home, I’ll start seeing ads again. So that’s where Tailscale comes in. Tailscale provides a way for your devices to access your Pi-Hole remotely, so all of your DNS queries from your devices will still be sent through your Pi-Hole even when you’re not at home.
Install Tailscale on the Pi
To install Tailscale on your Pi, loging through SSH and run these two commands:
curl -fsSL https://tailscale.com/install.sh | shWait for the setup process to complete, then run;
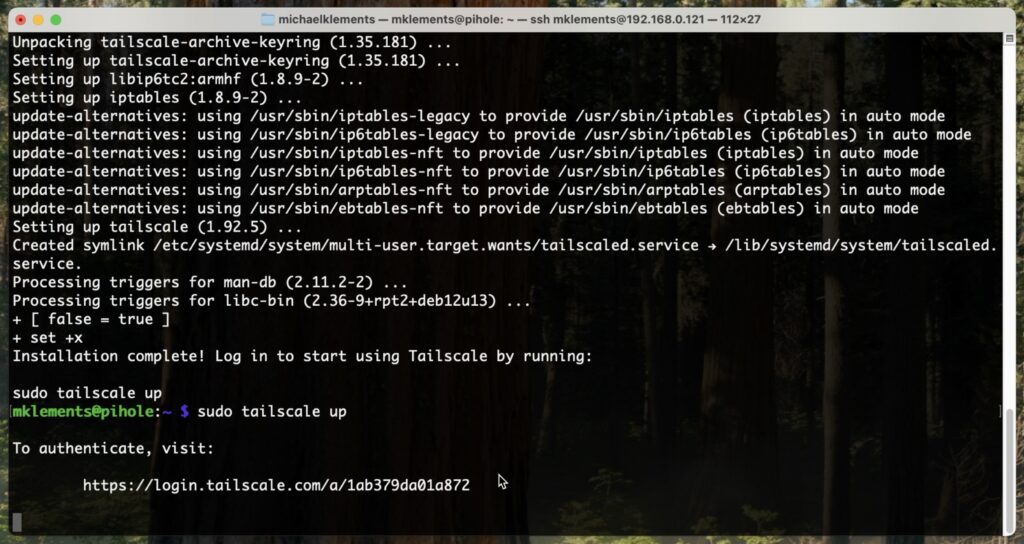
sudo tailscale up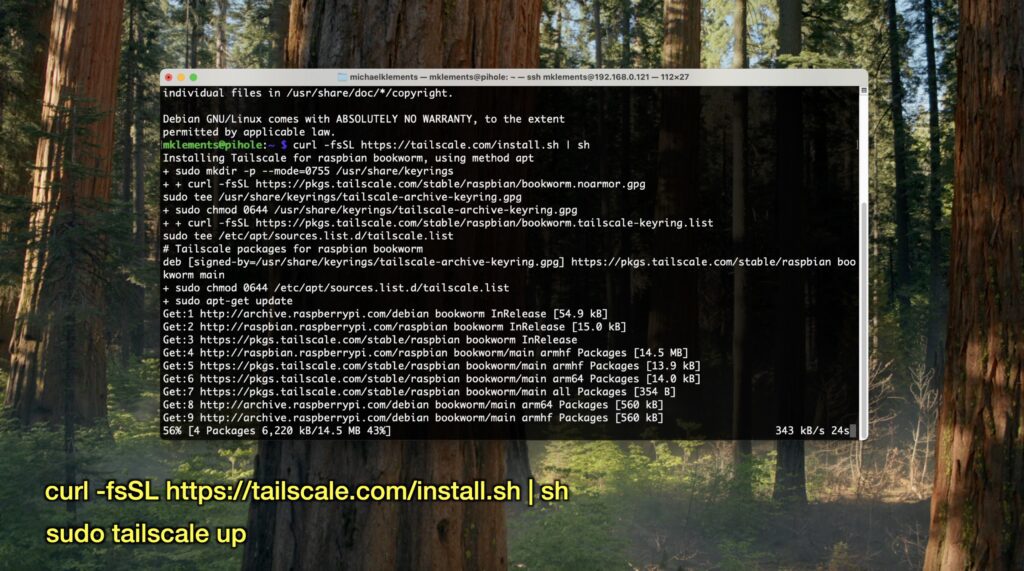
Once complete, it’ll tell you to go to an address to register the device to your Tailscale account. If you don’t have an account, you’ll need to create one.
Configure Your Pi & Tailscale
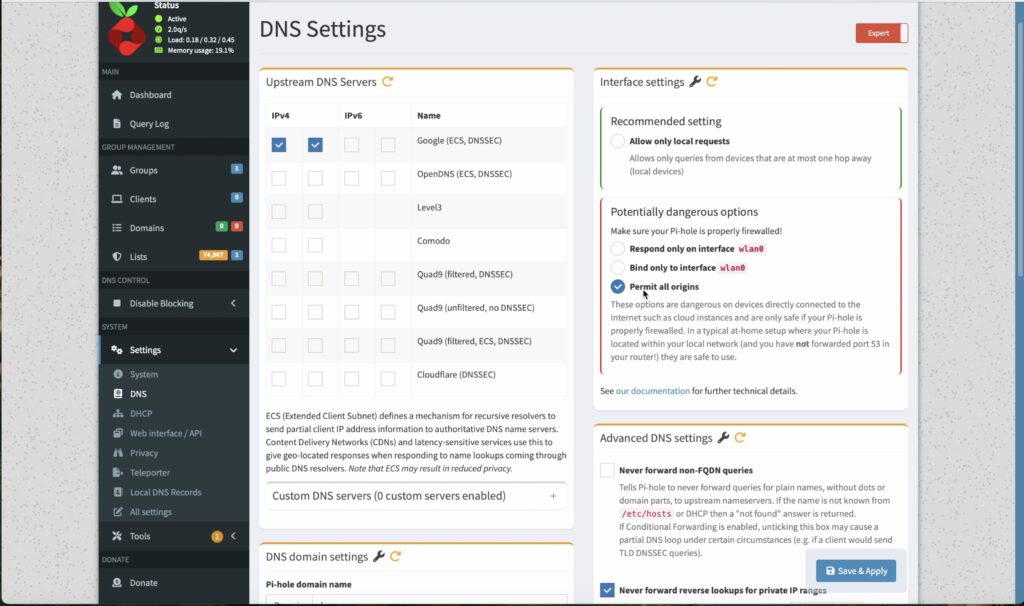
Once your Pi-hole is added to your Tailscale network, we need to tell Pi-hole to listen on Tailscale.
Open up your Pihole dashboard and go to Settings, then DNS. You might need to enable or disable Expert mode to see the right bar.
Check Permit All Origins and then Save/Apply
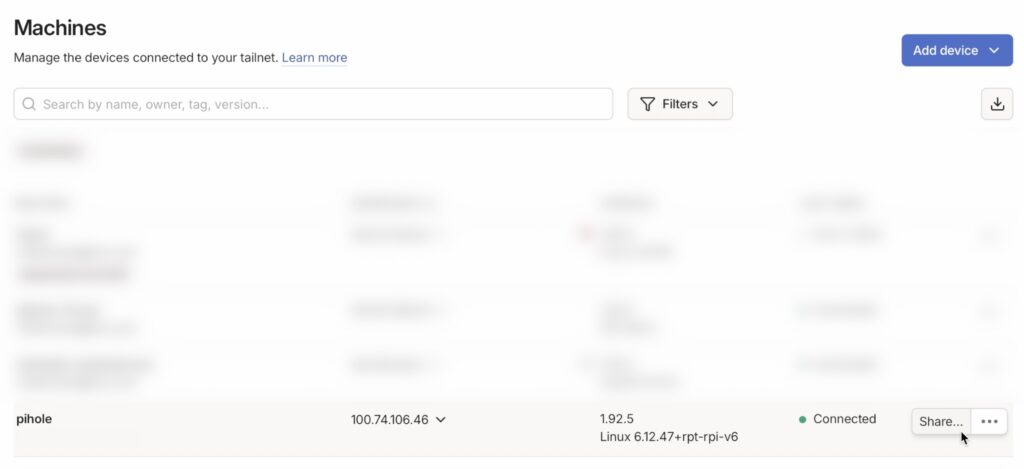
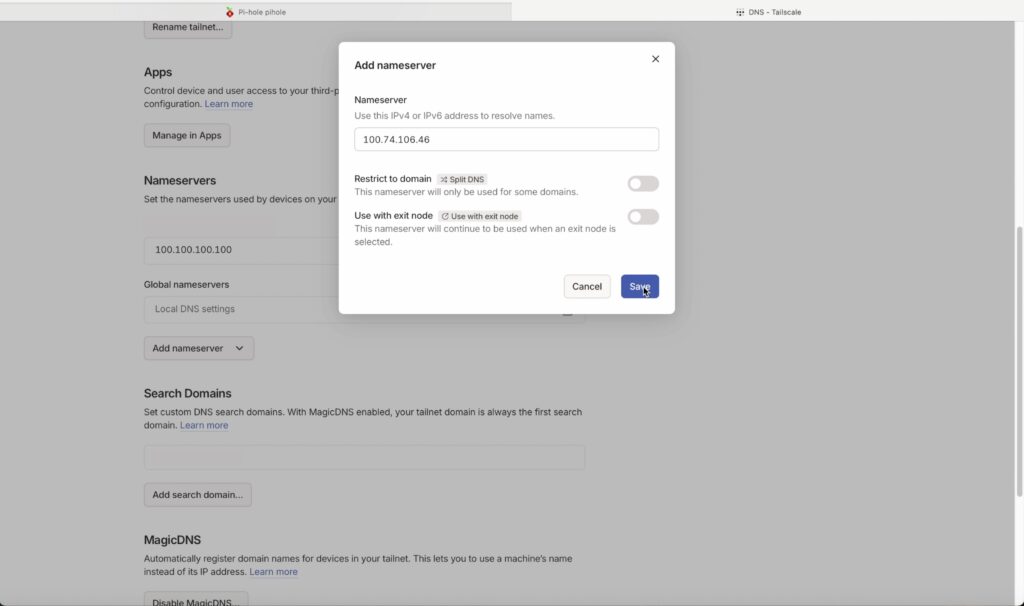
Then head back over to Tailscale and note your Pi-Hole’s Tailscale address.
Then go to the DNS tab.
Scroll down to nameservers and click add name server. Enter your Pi-hole’s Tailscale address and leave the default selections. Click save. Then enable Override DNS servers, and also make sure that MagicDNS below is enabled.
And that’s it as far as setup goes.
Now all of your devices connected to your Tailscale network will have their ads blocked, wherever they are. With it set up on my iPhone. If I’m on my home network, then ads are blocked, and if I turn off WiFi as if I’m away from home, ads are still blocked, now through Tailscale.

Setting a device up on Tailscale depends on the device, but is usually as simple as downloading an app from the device’s App Store, logging in and following a couple of prompts.
You Now Have A Global Ad Blocker
You now have a fully self-hosted, global ad blocker running on a tiny Raspberry Pi Zero W.
It protects you whether you’re at home or on the move, filtering ads and trackers on any device you connect to your Tailscale network, from phones and tablets to laptops and desktops. Best of all, you’re in complete control of the entire setup. There are no subscriptions, no third-party services deciding what gets blocked, and no limits on how far you can customise it.
You can tweak blocklists, monitor traffic, add new devices, and expand the system as your needs change, all while knowing exactly where your data is going and how it’s being handled.
If you found this tutorial helpful, please consider sharing it with others who might benefit from it, and feel free to leave any follow-up questions, feedback, or suggestions in the comments below.