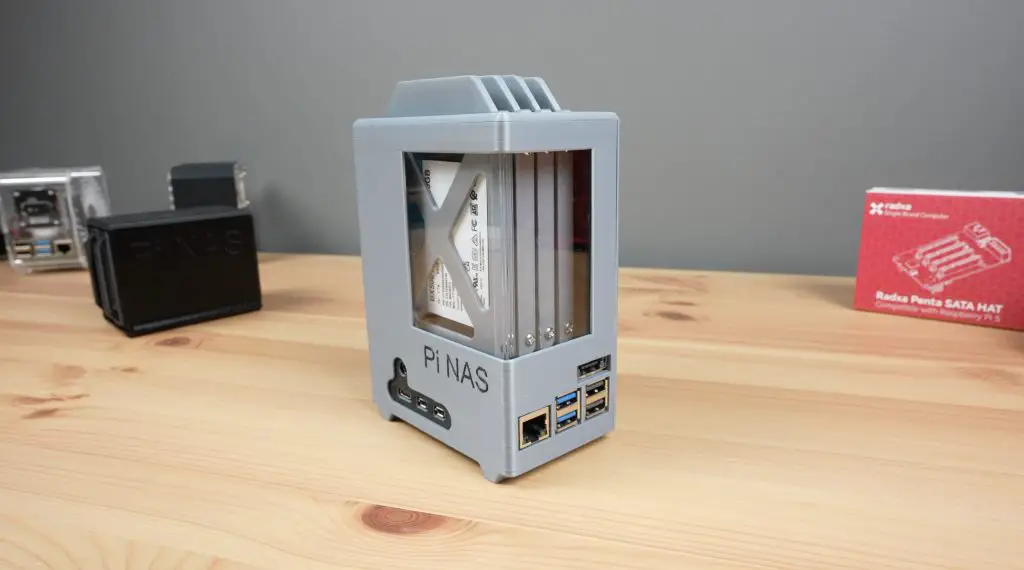
A few months ago I built an all-SSD NAS using a Raspberry Pi 5 and a quad-SATA hat from Radxa. By adding a 2.5Gb Ethernet adapter, I managed to get pretty good transfer speeds out of it. I got about 260MB/s writing files to the NAS and 200MB/s reading files from the NAS.
Following that video, TerraMaster reached out about a new all-SSD NAS that they’re launching this week. This is the new F8 SSD Plus. It’s their first NAS that is designed to be used with SSDs only and internally it’s got space for 8 M.2 NVMe drives.
There are two versions of this NAS. I am testing the higher-end F8 SSD Plus, which has an i3 processor and 16GB of RAM and will retail for $800. They also have a lower-spec F8 SSD with an N95 processor and 8GB of RAM for $600.
Here’s my video review and testing of the F8 SSD Plus, read on for my write-up;
Where To Get The F8 SSD Plus?
Tool & Equipment Used
Some of the above parts are affiliate links. By purchasing products through the above links, you’ll be supporting this channel, at no additional cost to you.
Unboxing & First Look At The F8 SSD Plus
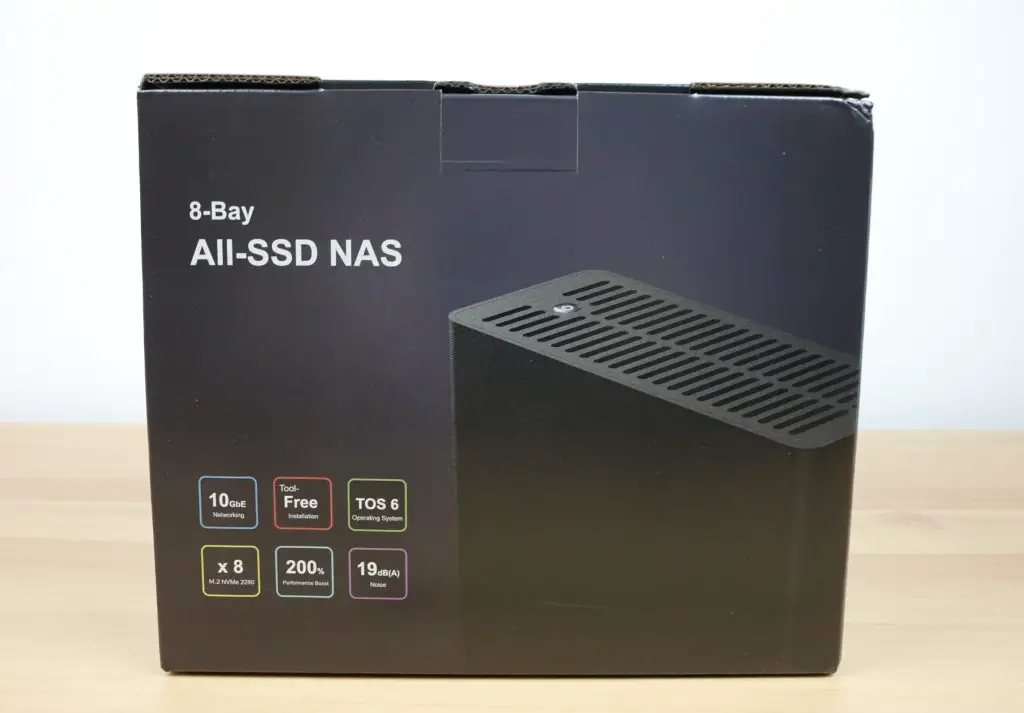
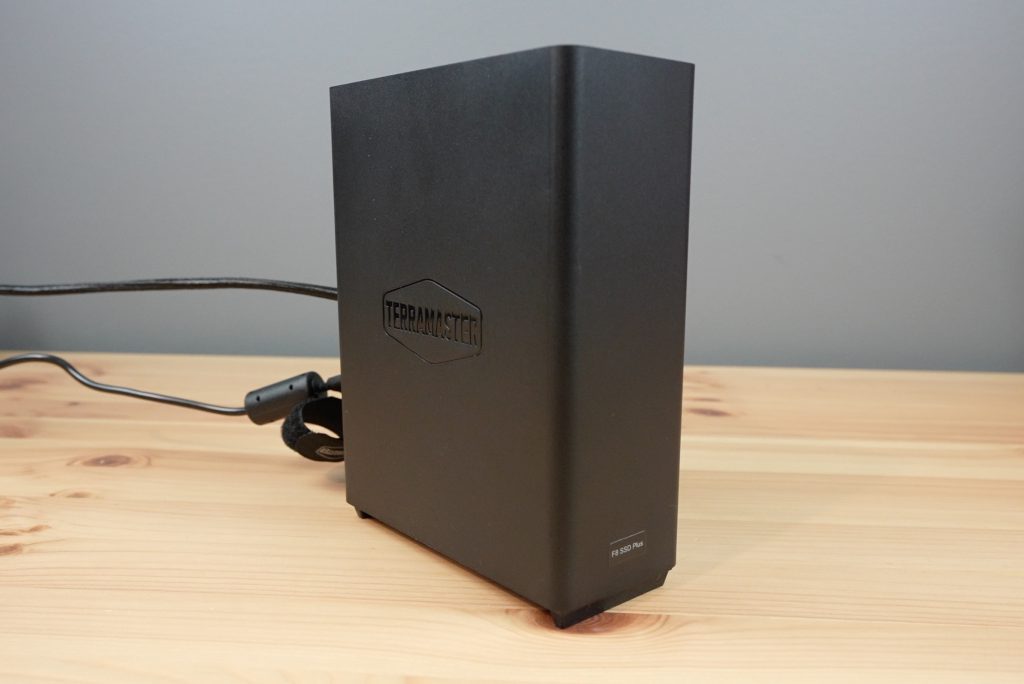
The F8 SSD Plus comes in a black branded box that already gives you the impression that this NAS is much smaller than a traditional NAS that takes physical drives.

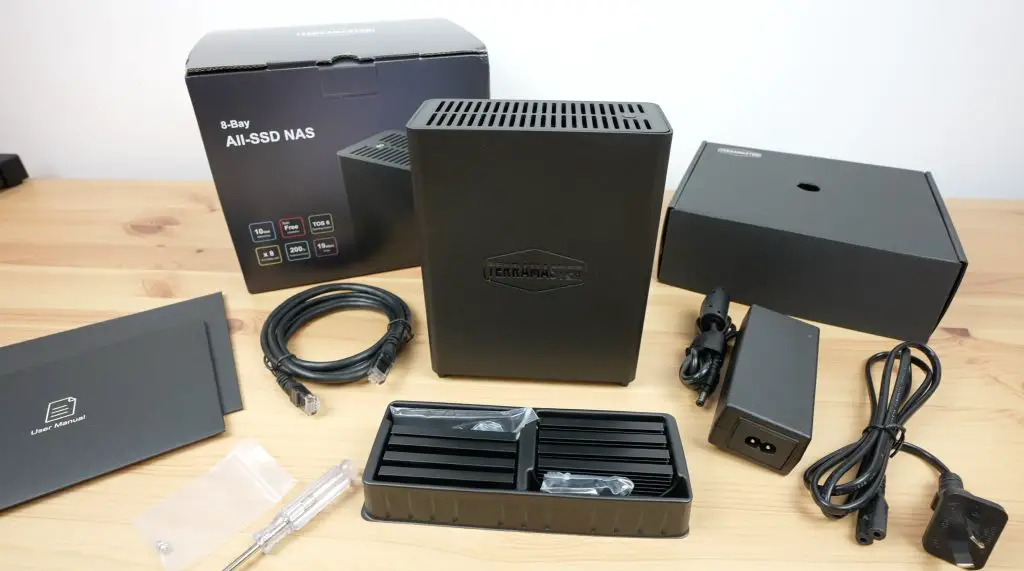
Included in the box is the F8 SSD Plus along with a Cat6e Ethernet cable, although not a particularly long one, a power cable for the power supply, a screwdriver and screws for installing the NVMe drives, the power supply and a set of 8 heat sinks for the drives. This is quite a nice inclusion which I wasn’t expecting to see.
First up, this NAS is quite small. It’s not much bigger than a single physical 3.5” drive that a traditional NAS would use.
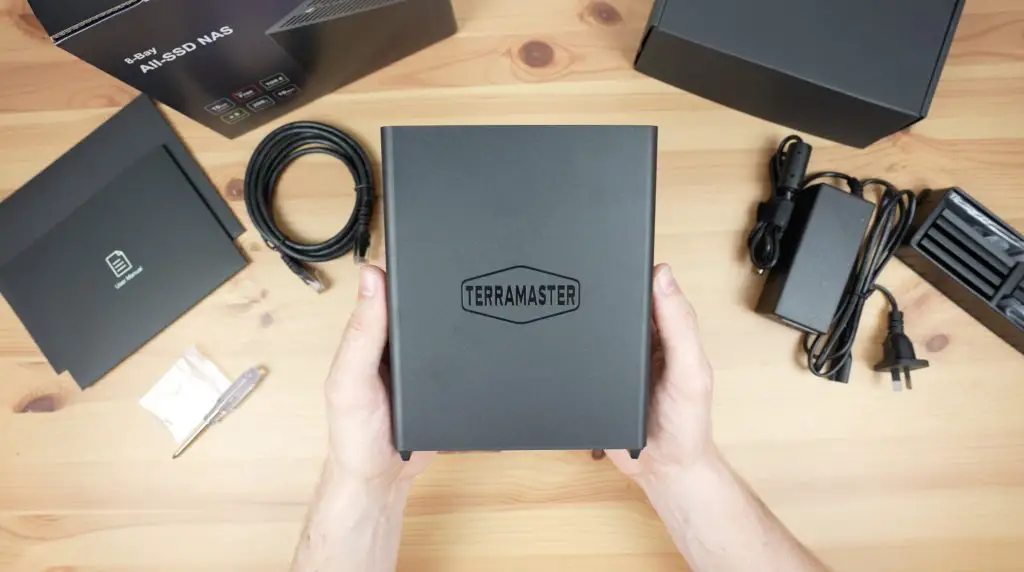
It’s a minimalistic design, which I quite like. There is nothing on the front and the two sides bear the TerraMaster logo.
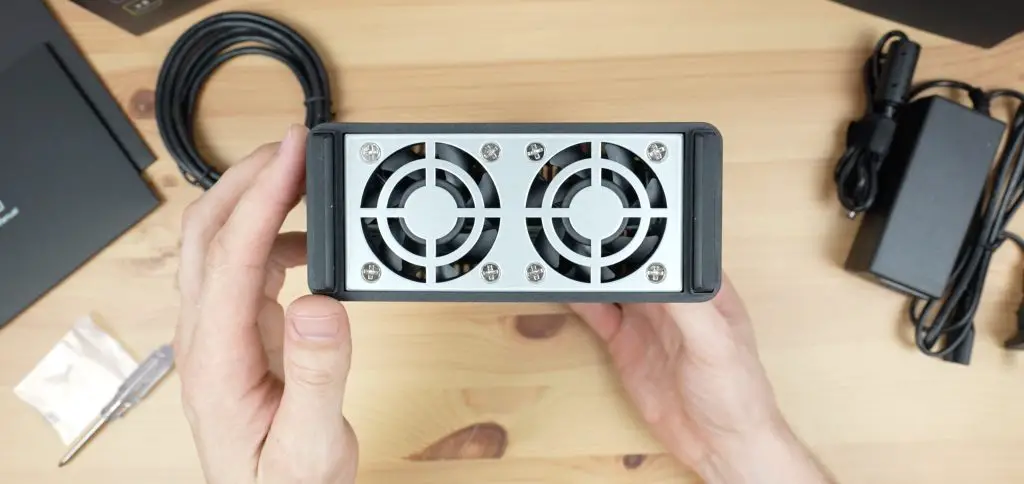
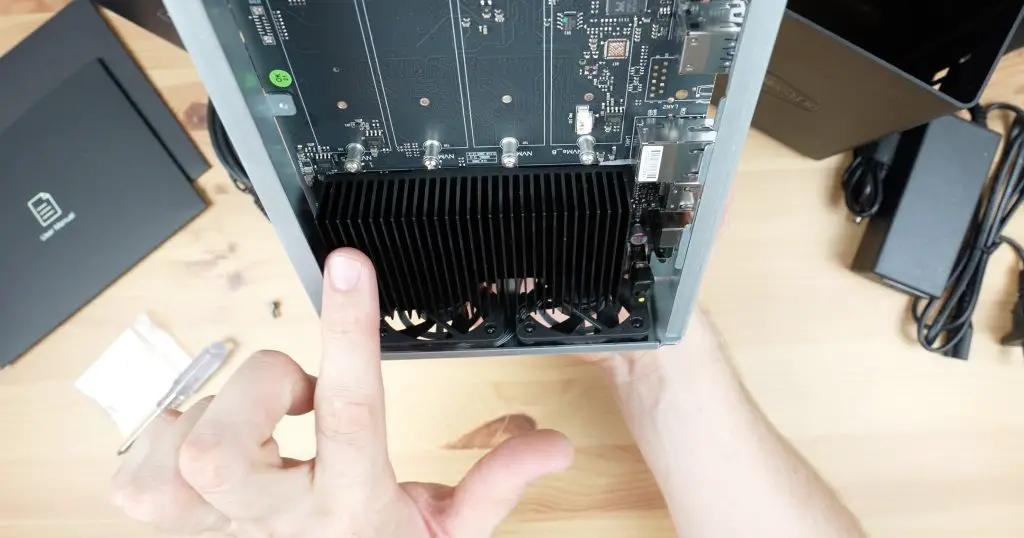
On the bottom, we’ve got two 50mm PWM fans which draw air in through the bottom and exhaust out of the top of the NAS.
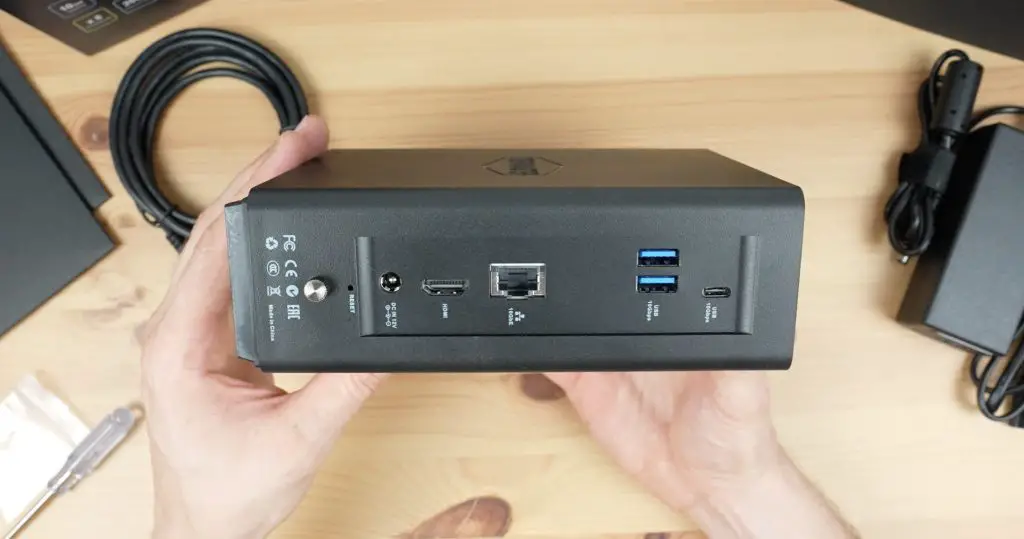
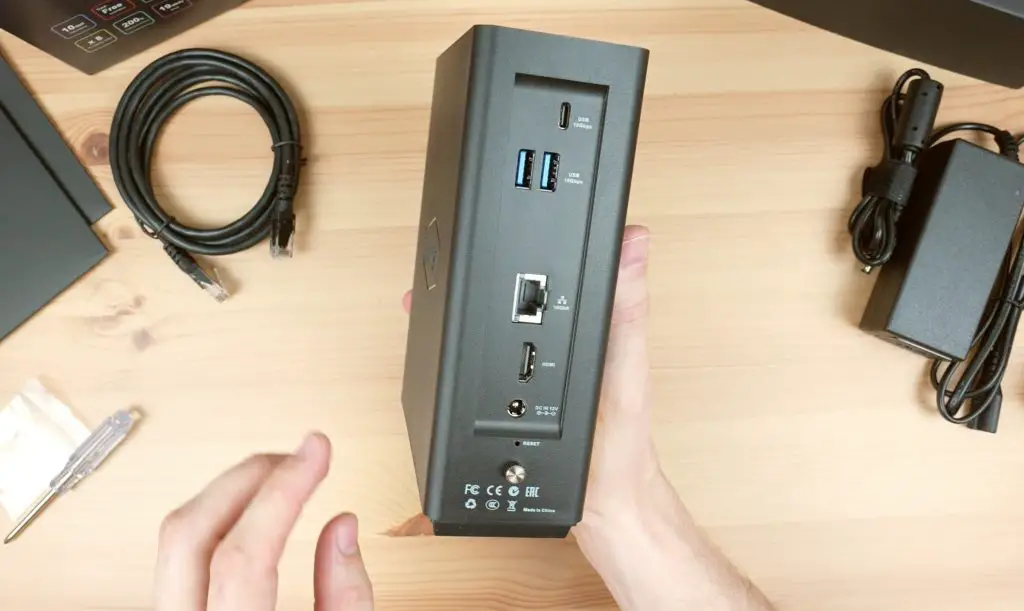
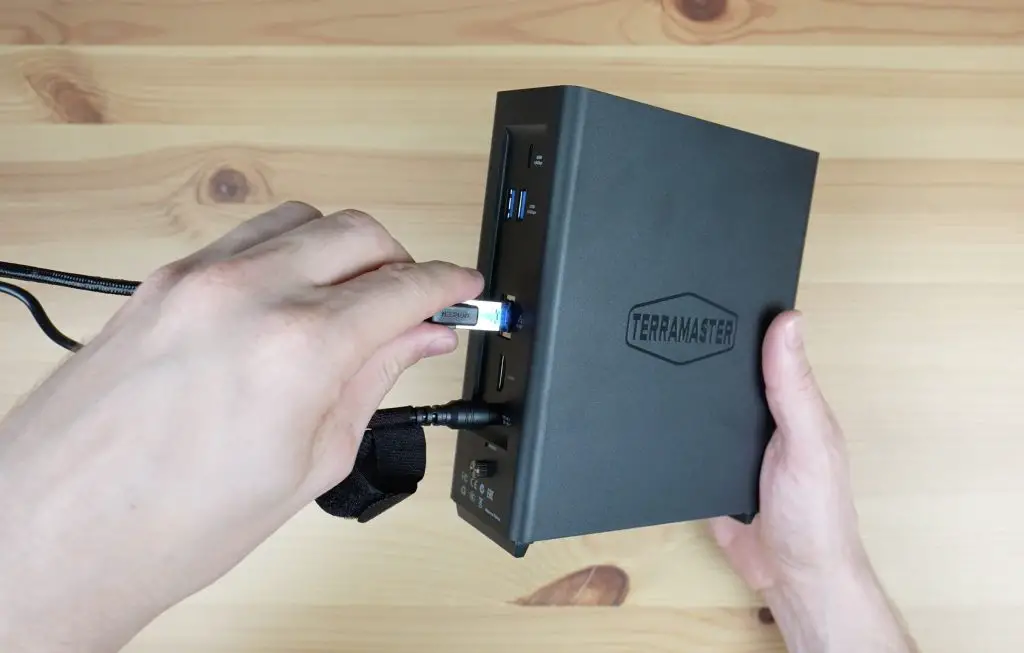
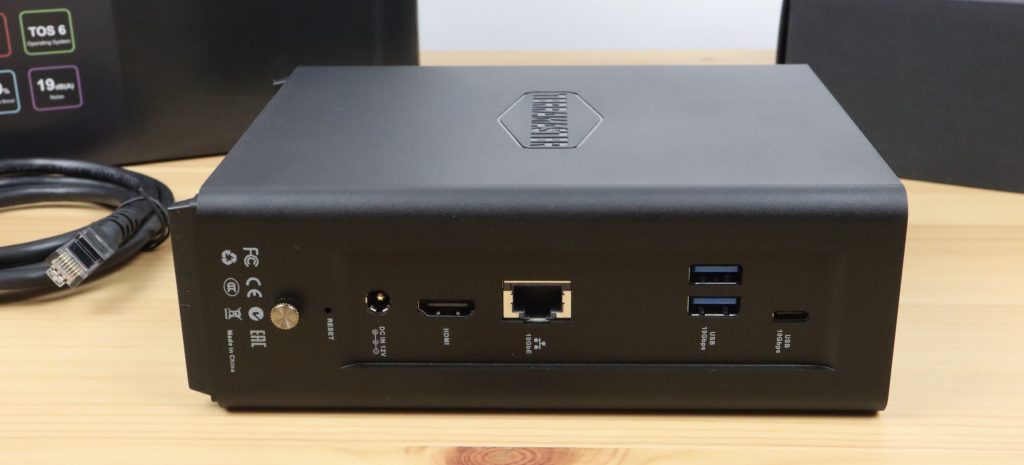
On the back, we’ve got the barrel jack power input, an HDMI 2.1 port, a 10Gb Ethernet port, two USB 3.2 ports and a USB type C port.
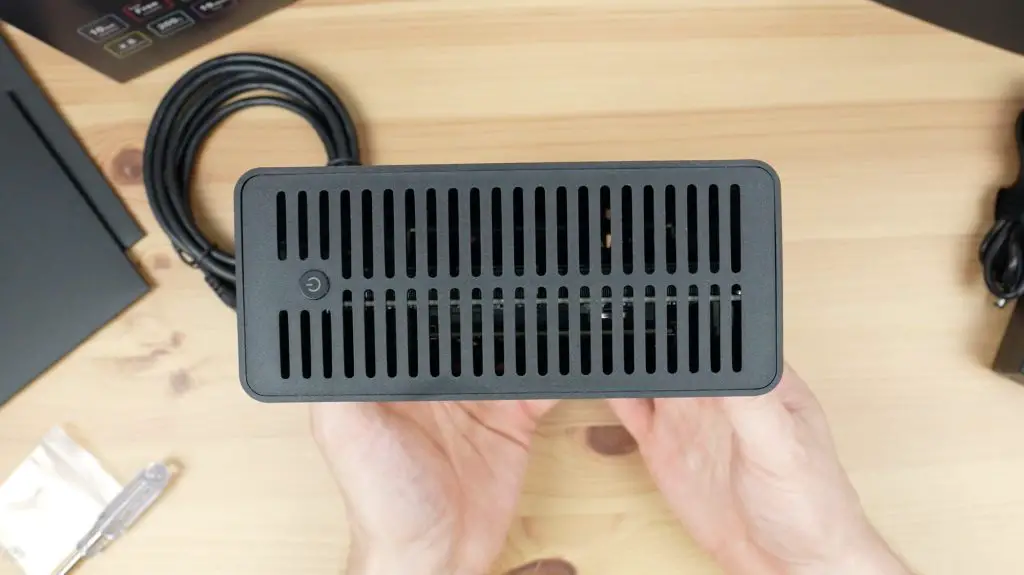
On the top, we’ve got some ventilation holes and the power button.
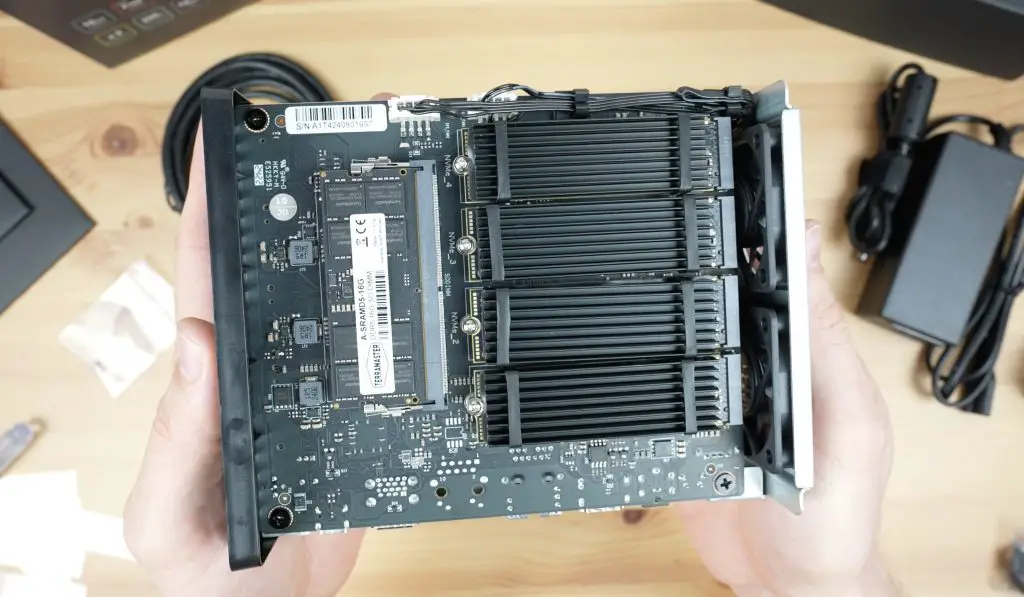
They say that this is a toolless design and it certainly is to open it up, we’ve just got a single thumb screw at the back. This allows the internal chassis to slide out to access the board and drives. I wasn’t sure whether the board slides out of the top or down and out from the bottom, but out from the top is the answer.
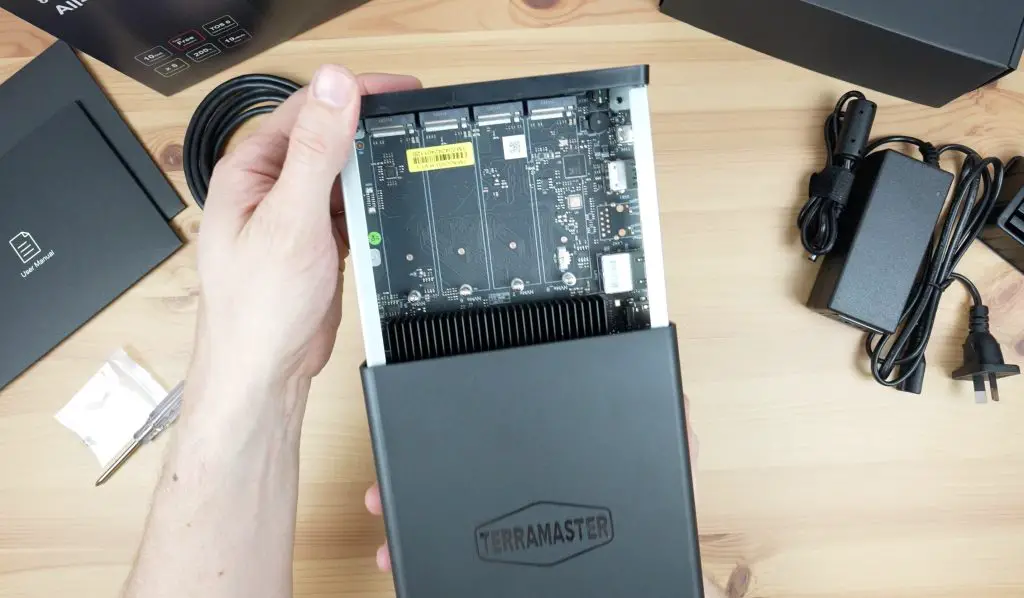
I think calling it a toolless design is a bit of a stretch as you need to secure your storage drives with a screw and they include a screwdriver for that. There are some ways they could have made it truly toolless but this is nitpicking, it’s not difficult to install the drives.
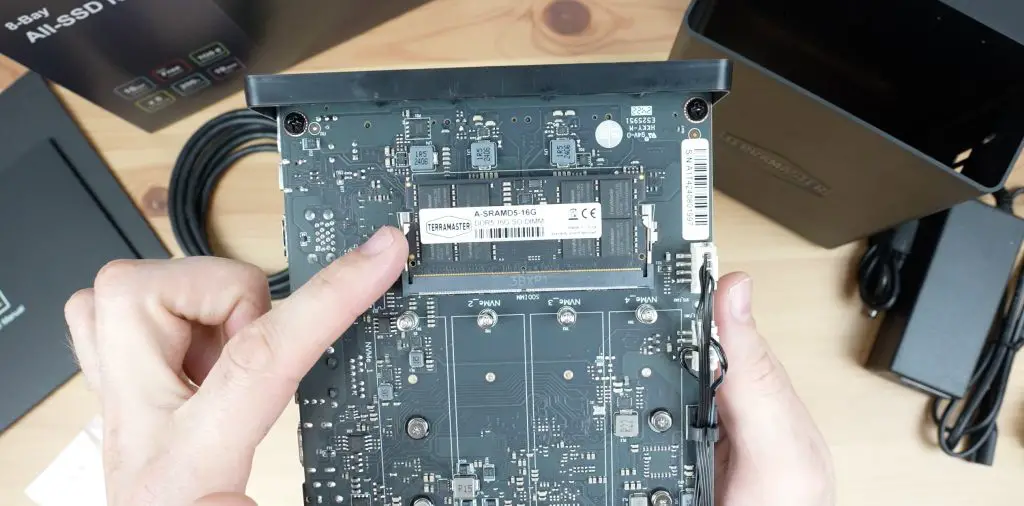
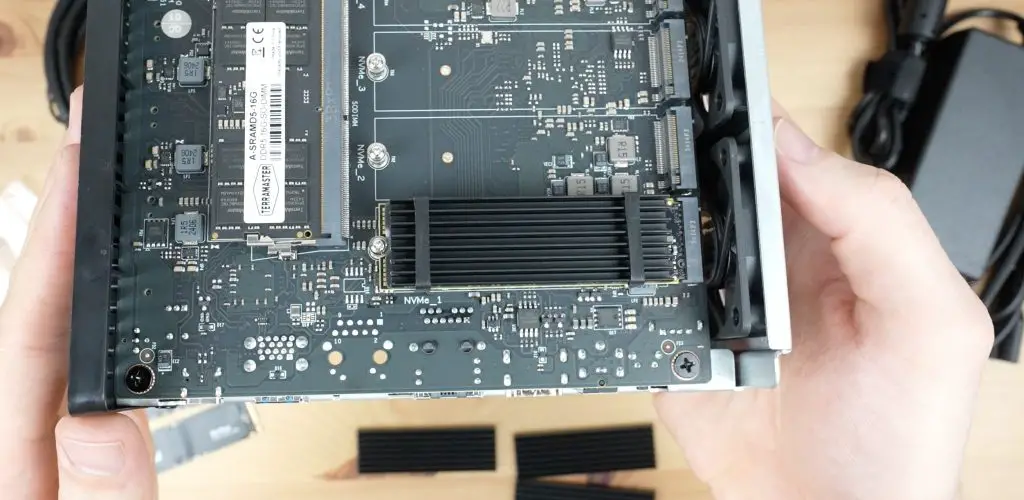
Internally we’ve got a single 16GB stick of DDR5 RAM running at 4800MHz. You can upgrade this to 32GB.
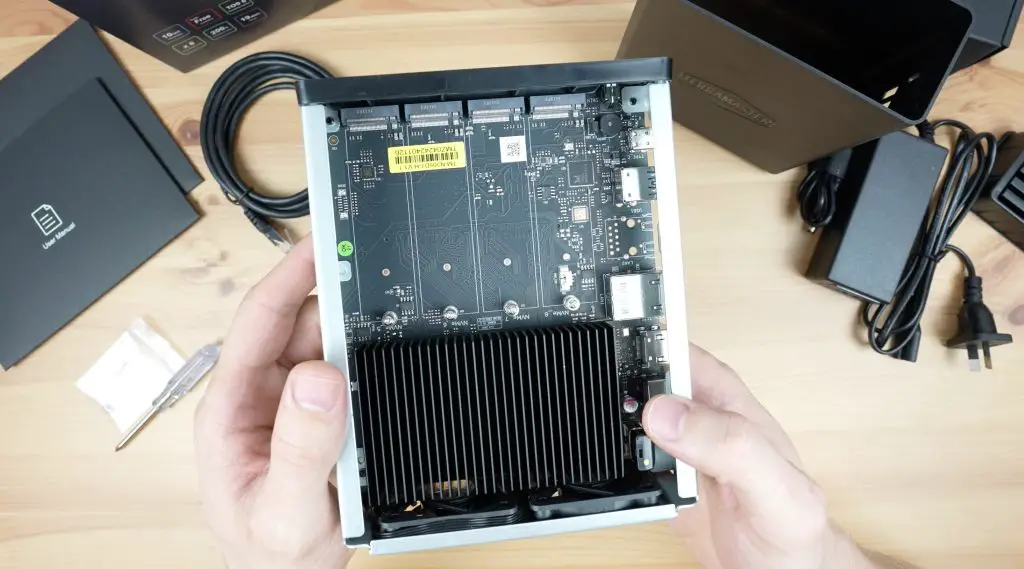
The CPU is under a large black heatsink at the bottom, directly above the fans. The F8 SSD Plus has an 8-core Intel i3 N305 processor with a maximum frequency of 3.8GHz. This is a 2023 chip which has got 6MB of cache and a TDP of 15W.
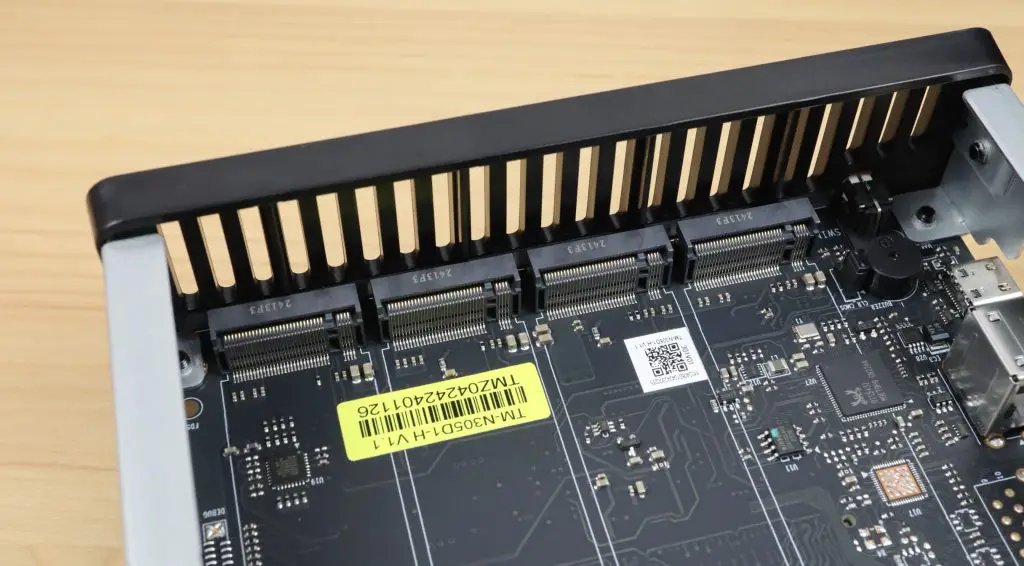
Then we’ve got our 8 M.2 NVMe ports. These are all PCIe gen 3 x 1 ports. This may sound disappointing at first glance, but each of these ports are individually capable of saturating the 10Gb network connection, so there shouldn’t be any issues with this speed. Through these 8 ports, we can connect up to 64TB of storage.
Installing NVMe Drives In The NAS
Now that we’ve taken a look at the internals, let’s get the drives installed.
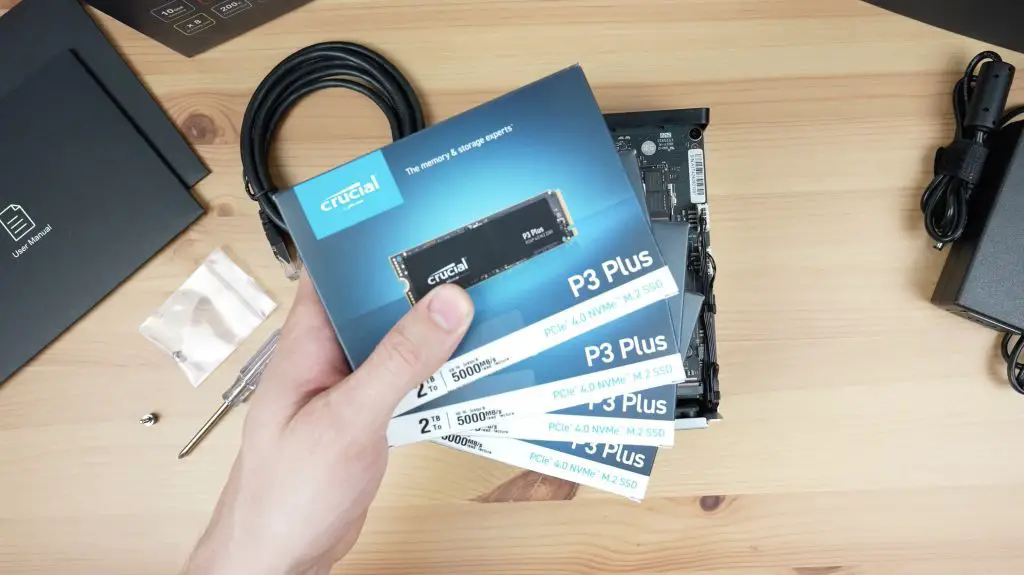
I’m using four Crucial P3 Plus drives. These are just for testing, if you’re going to be using drives in a NAS long term then you should get NAS-grade drives that have better endurance.
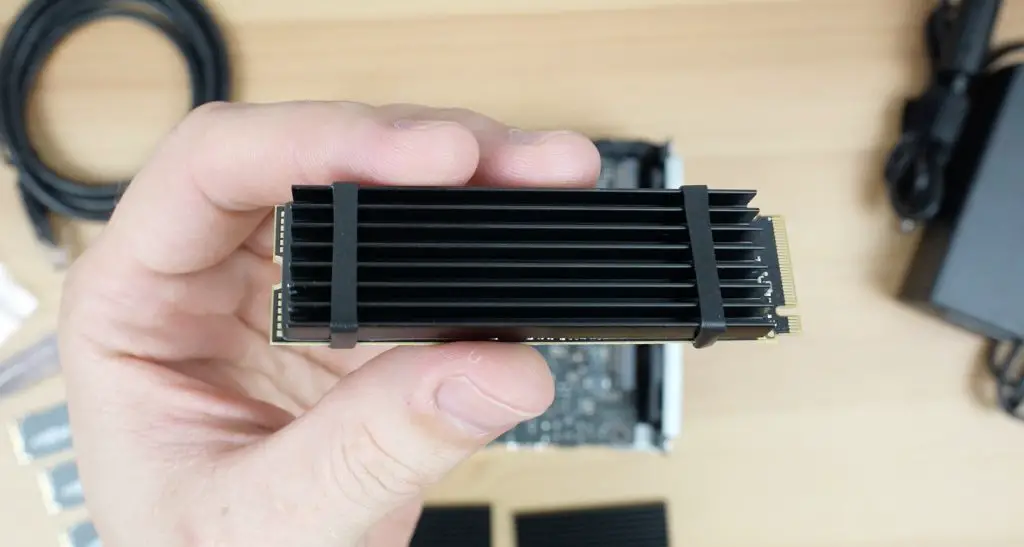
First, we need to fit a heatsink to each drive. They’re held in place with an included band on each end. I don’t particularly like this solution as I’m not sure how long these bands will last, but I do like that they’re fitted directly to the drive and the heatsinks look like they’re good quality.
Installing the drives is easy, they plug into the M.2 port and a single screw holds each drive in place.
With all four drives installed, we can slide the board back into the enclosure, plug in our power and network cable and boot it up.
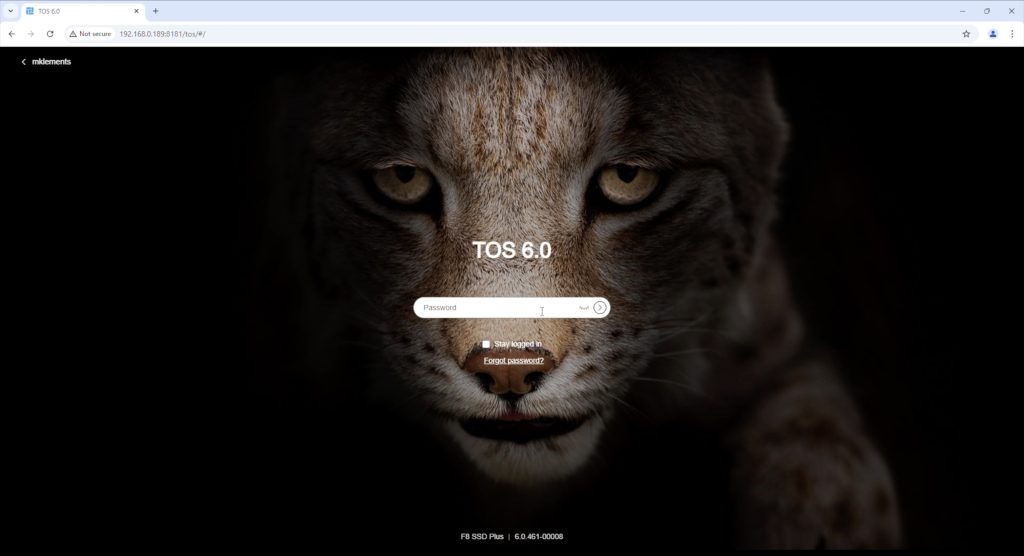
TerraMaster’s Lastest Operating System TOS 6
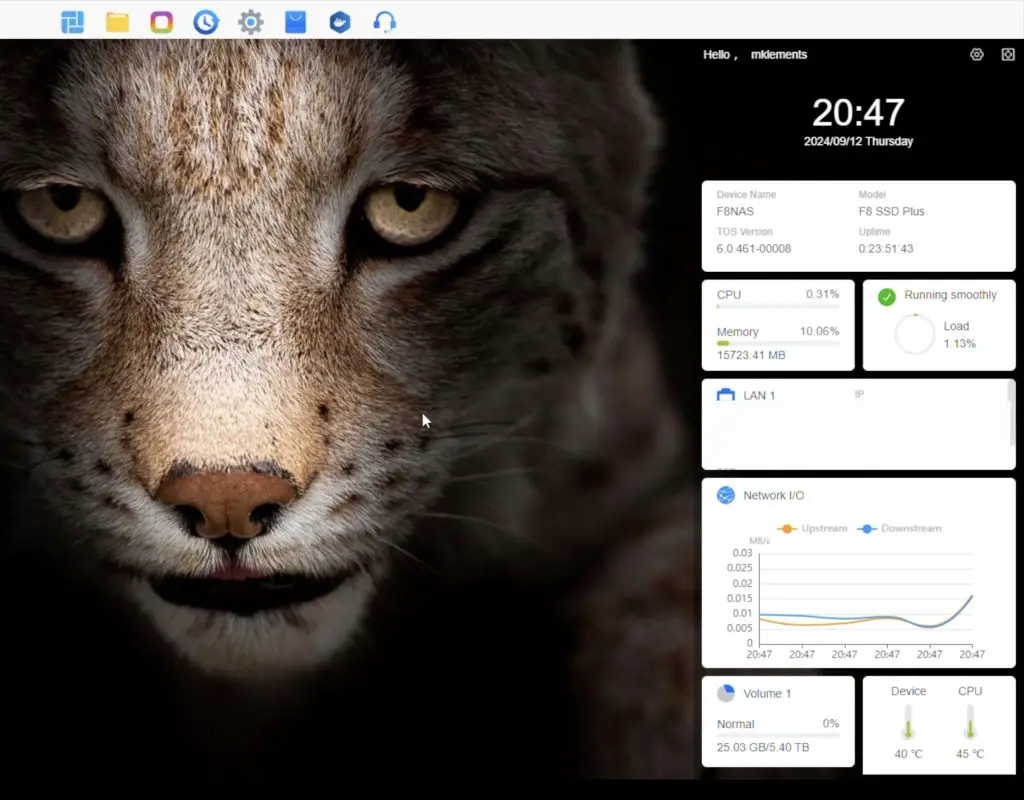
By default, the F8 SSD Plus is set up to install and run Terramaster’s latest operating system called TOS 6. It’s based on Linux but they’ve given the web interface a Windows 11 look and feel.
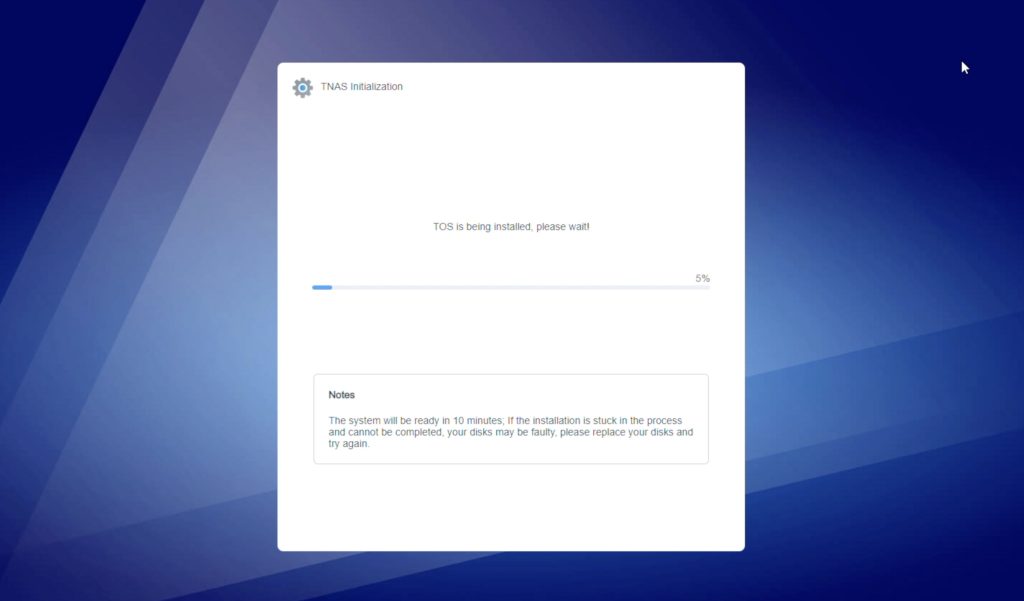
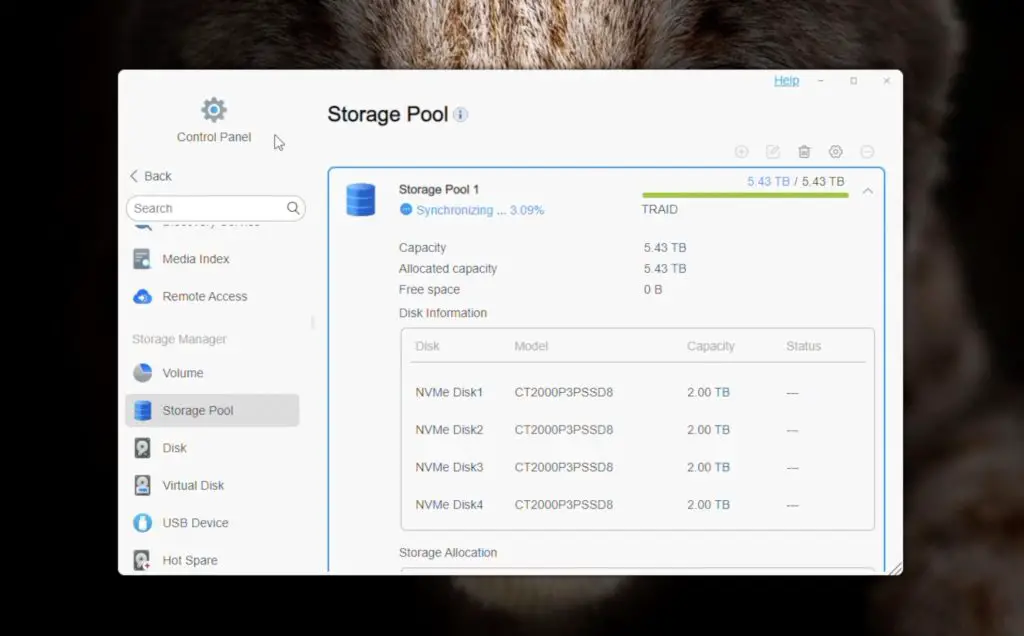
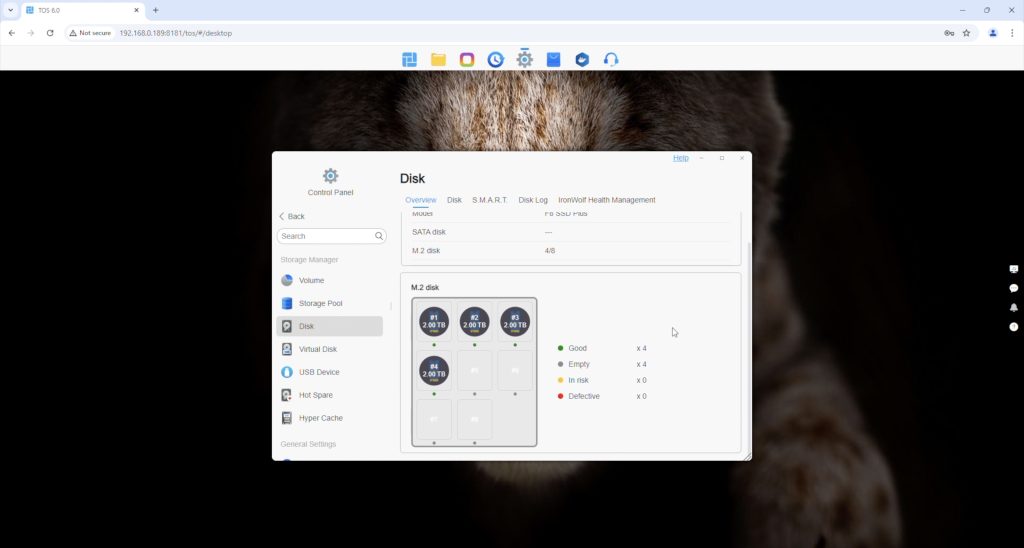
On the first boot, you’ll be guided through a setup process that will set up a drive pool and install TOS 6 onto the available drives. The drives are set up using their TRAID system. There is a bit to go through in understanding how this works but it’s essentially quite similar to RAID 5, providing a good balance of redundancy and storage capacity but it also allows for the flexibility to use different capacity drives within the array.
TOS has done away with a traditional dashboard-style layout with desktop icons and have instead added a taskbar along the top with little tooltips that come up to guide you around.

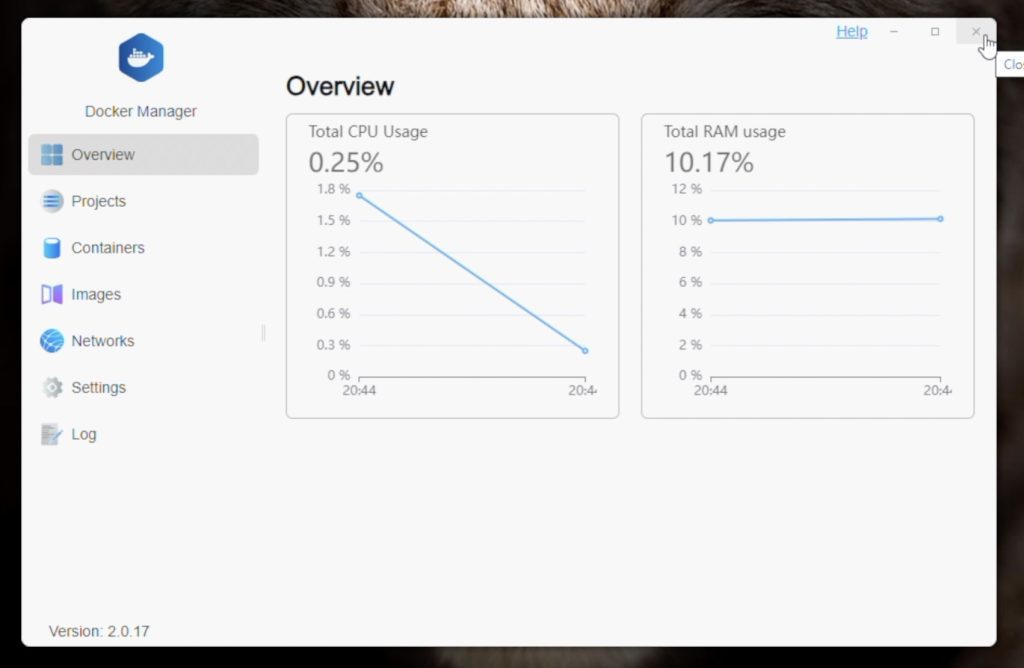
It feels fairly intuitive to use. It’s even got a sidebar to monitor system stats, which can be modified by dragging and dropping modules, and it includes a notification bar.
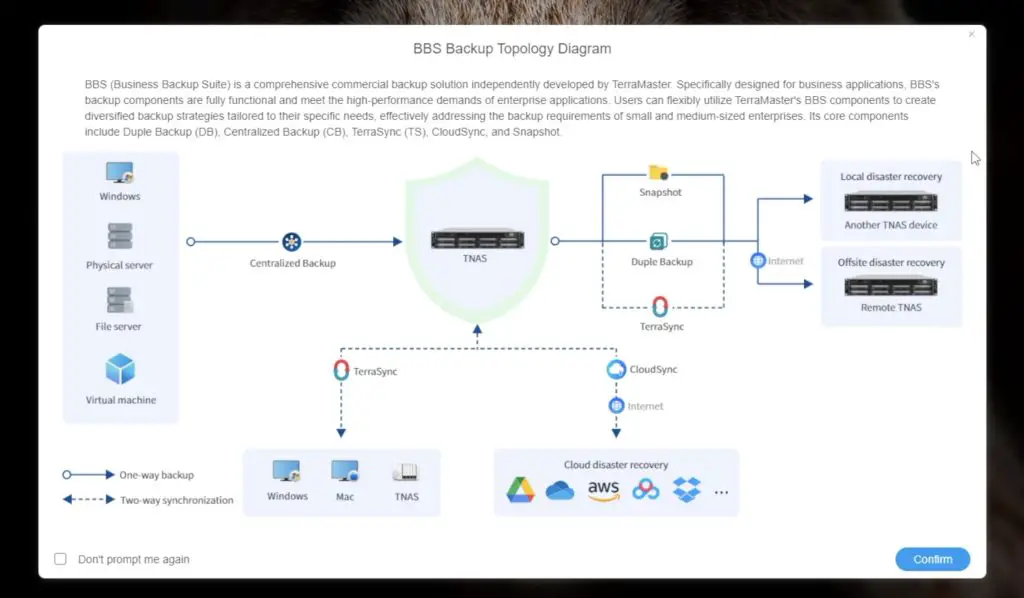
I really like their drive management and backup options. You have a lot of options for local and cloud backup. You can also set up an email address to automatically send notifications to if errors with drives or processes are detected.
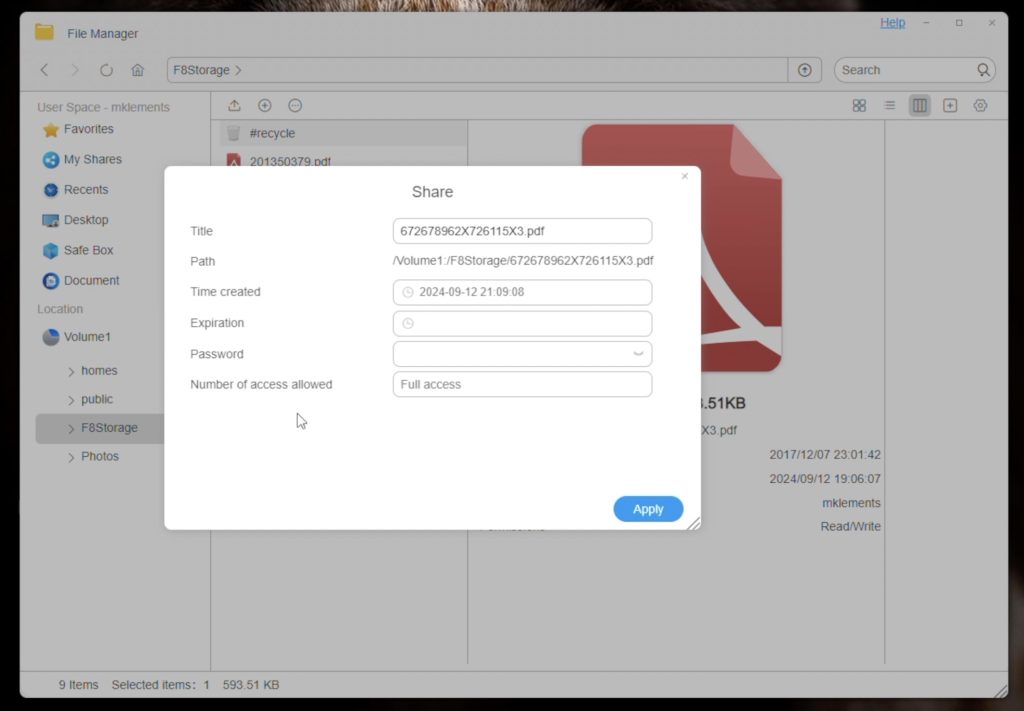
I also like their file management windows. Again, this interface has a Windows 11 look and feel, but that makes it intuitive. You’ve got right-click options for files and folders, you can create shares directly from this interface.
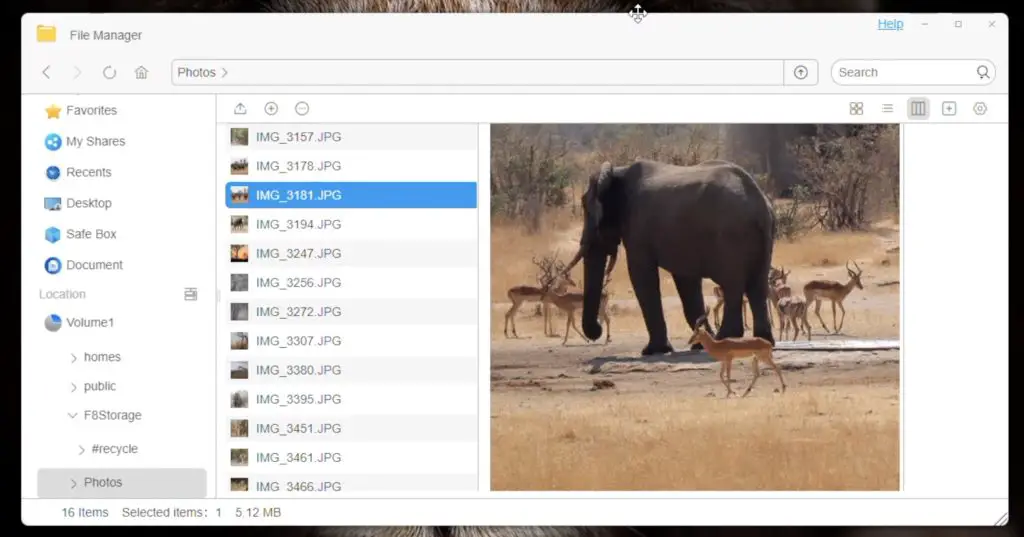
You can even preview some files like photos directly from the file management window.
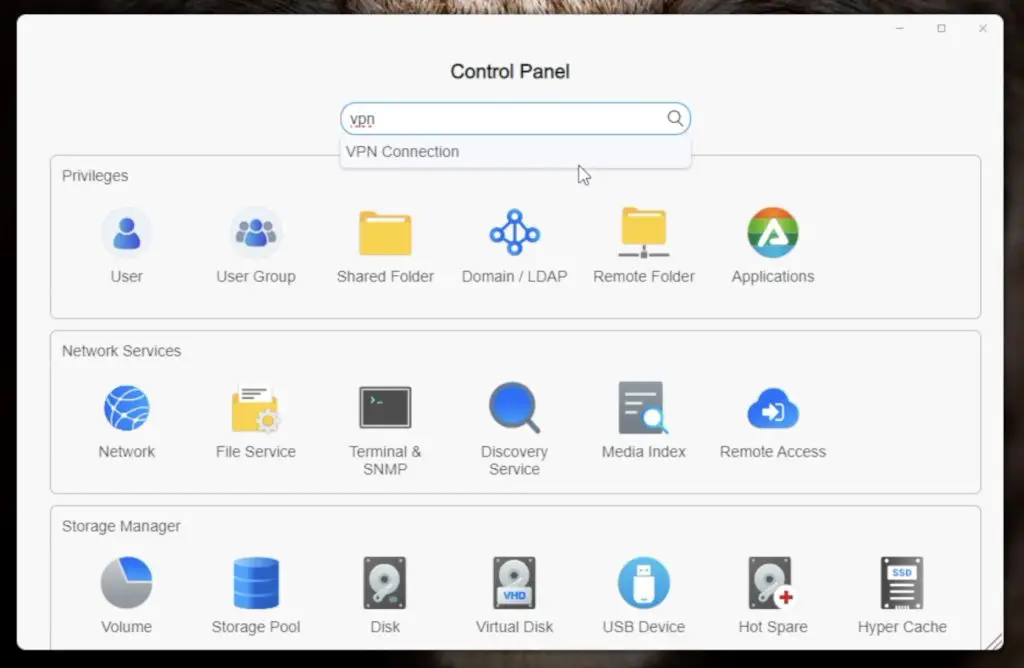
You can quickly search for settings or features from the settings window, so you don’t have to waste time looking through menus.
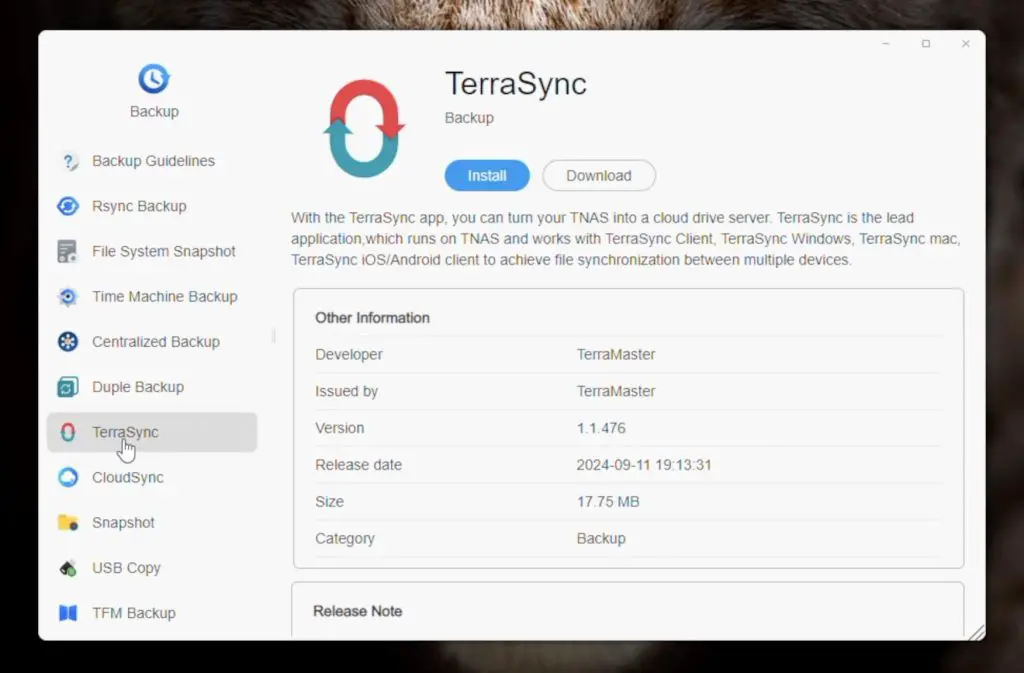
TerraMaster have also included a nice array of apps that you can install to add functionality to your NAS.
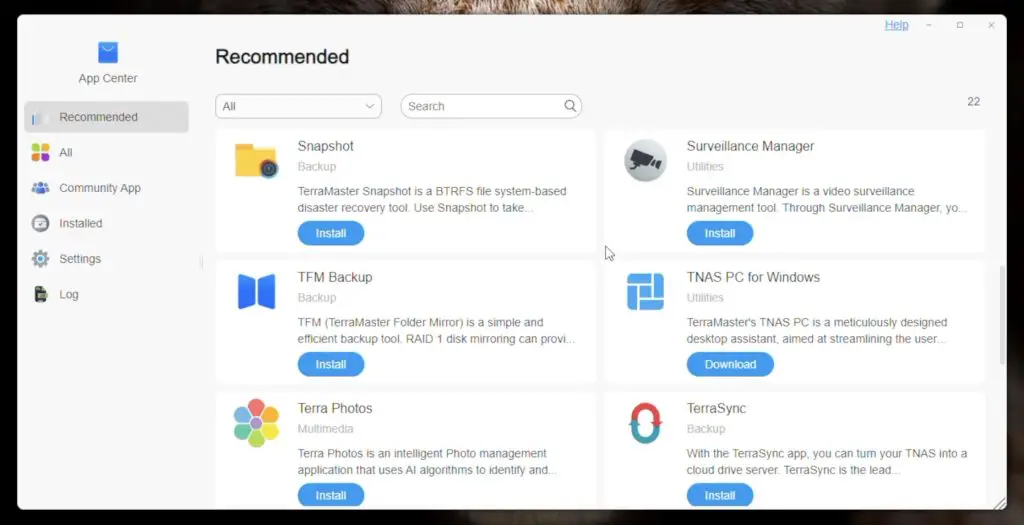
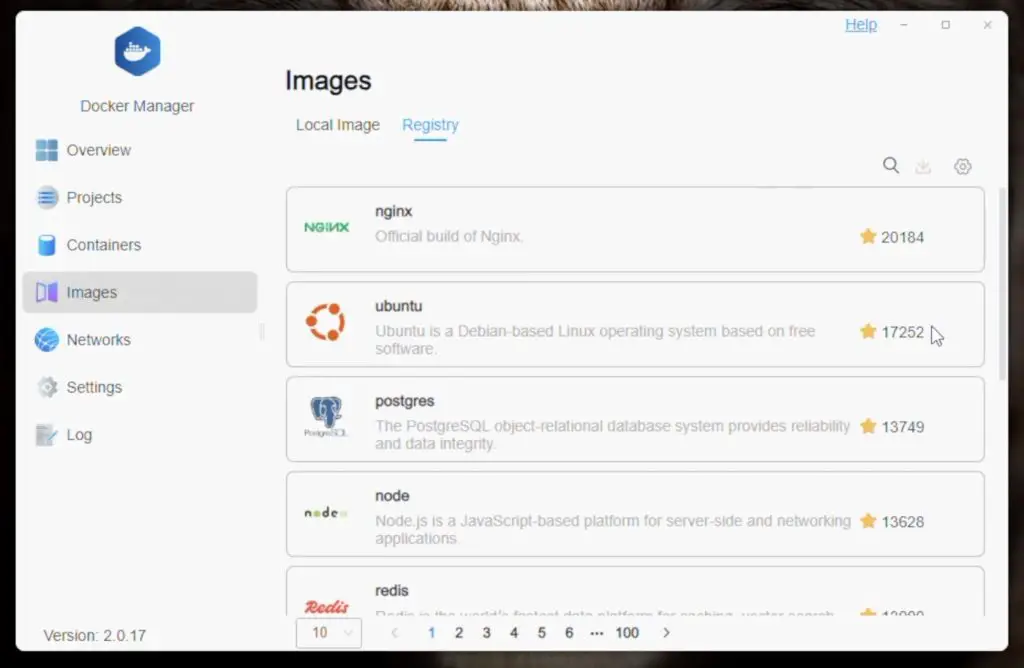
If you can’t find what you need with these apps, you can also quite easily install docker to deploy your own containerised apps. The CPU in this NAS has a fair amount of headroom to run these, so the F8 SSD Plus will work well as a small home lab.
That’s a brief overview of TOS 6. If you don’t like their software you can also install your own operating system like TrueNAS or Unraid on the NAS if you’d prefer.
Testing The F8 SSD Plus’ File Transfer Speed
Next, let’s do some transfer speed tests. I first used AJA System Test to automatically test the transfer speeds and then I did a real-world test on Windows 11.
AJA System Test
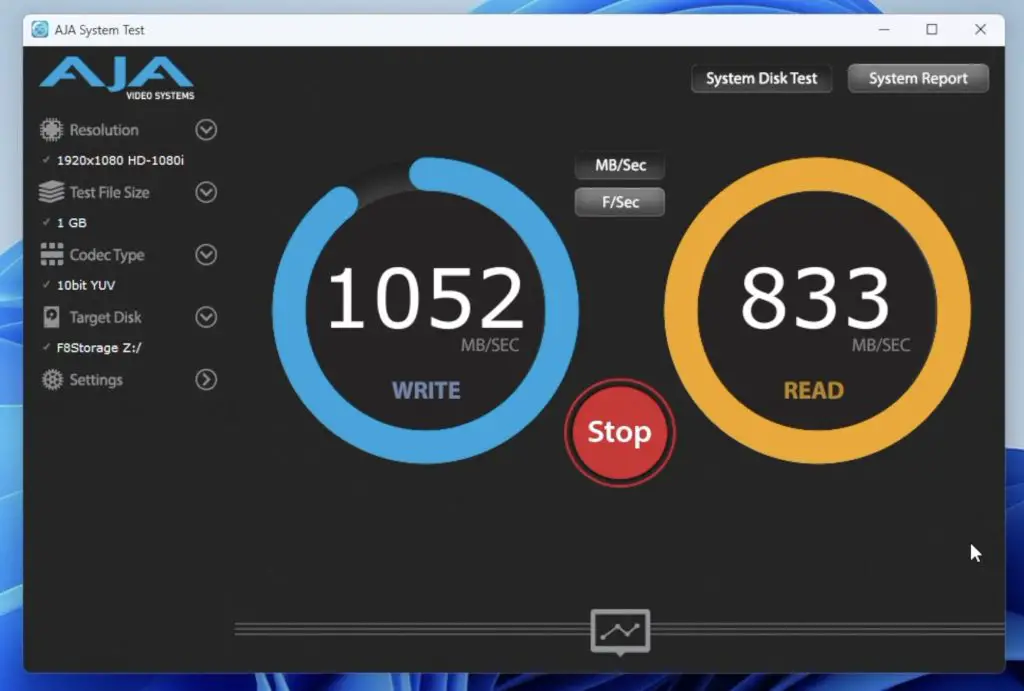
Transferring a small 256MB file, I got fairly consistent writes a little over 1000MB/s and reads around 850MB/s.

Going up to a 1GB file, we get very similar results – writes a little over 1000MB/s and reads around 850MB/s.
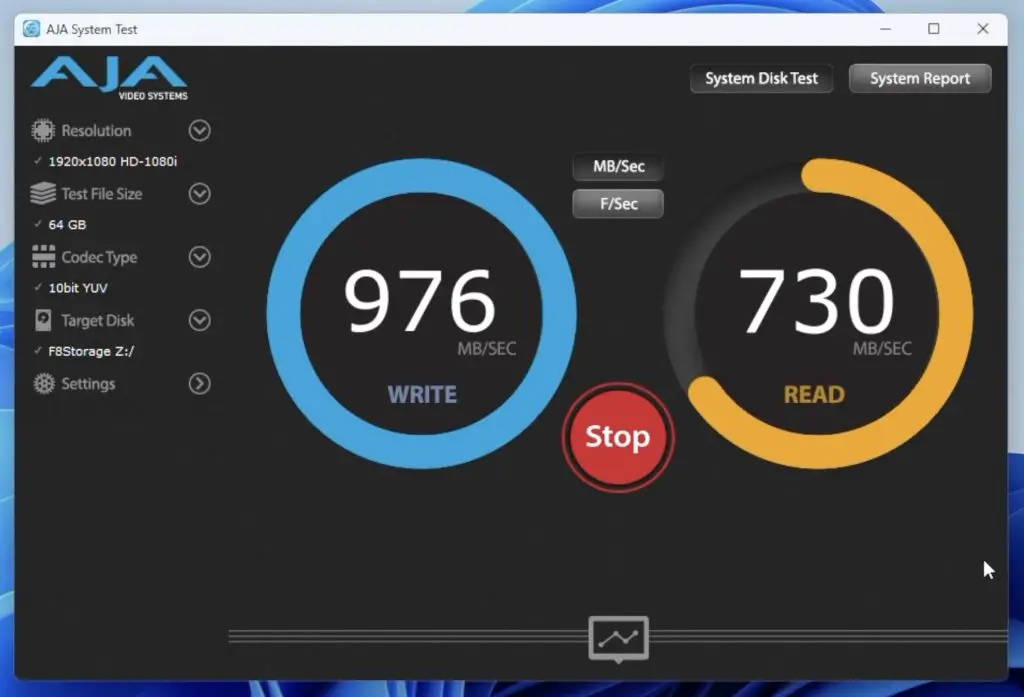
Transferring a 64GB file started off much slower than the previous two tests. Writing started off 500MB/s but then ramped up during the first half of the transfer and eventually settled at a little under 1000MB/s for the remainder of the write. Reading the 64GB file was stable but was again slower than with the smaller files. Reading remained at a bit under 750MB/s. So both reads and writes were about 100MB/s slower with the large 64GB file.
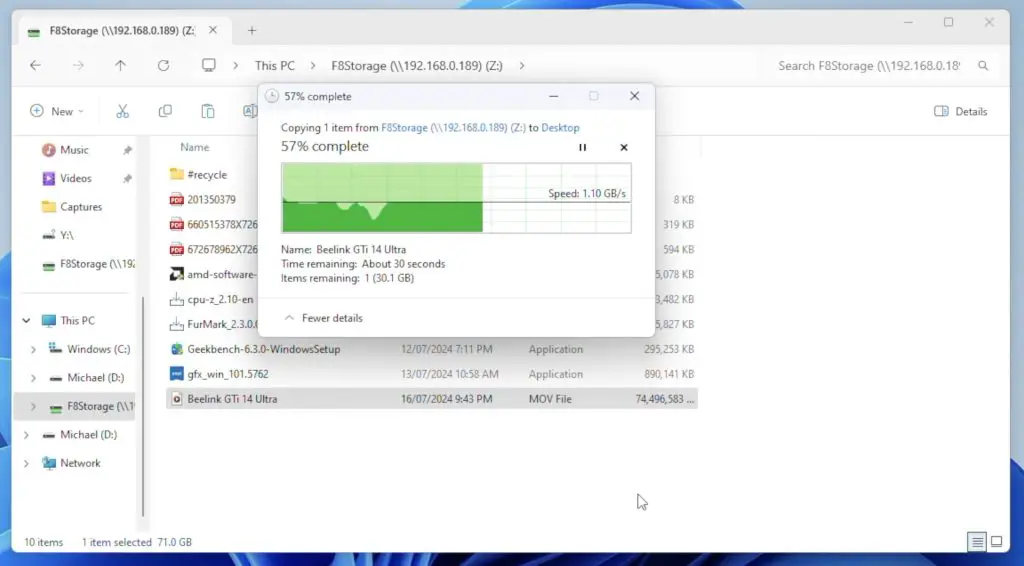
Windows 11 File Transfer Test
Running a real-world transfer test in Window 11, copying a large 70GB video file to the NAS, writes started off saturating the 10Gb Ethernet connection at 1.1GB/s. This dropped off quite quickly though and eventually settled at a little under 650MB/s for the remainder of the transfer.

Reading the same 70GB video file from the NAS was much faster. Reading stayed at 1.1GB/s for most of the transfer, with just a couple of short dips.
So, overall my testing proved pretty good performance for file transfers. Like with my other NAS reviews, this is straight out of the box with the default setup. I haven’t done any tweaking or optimising of settings.
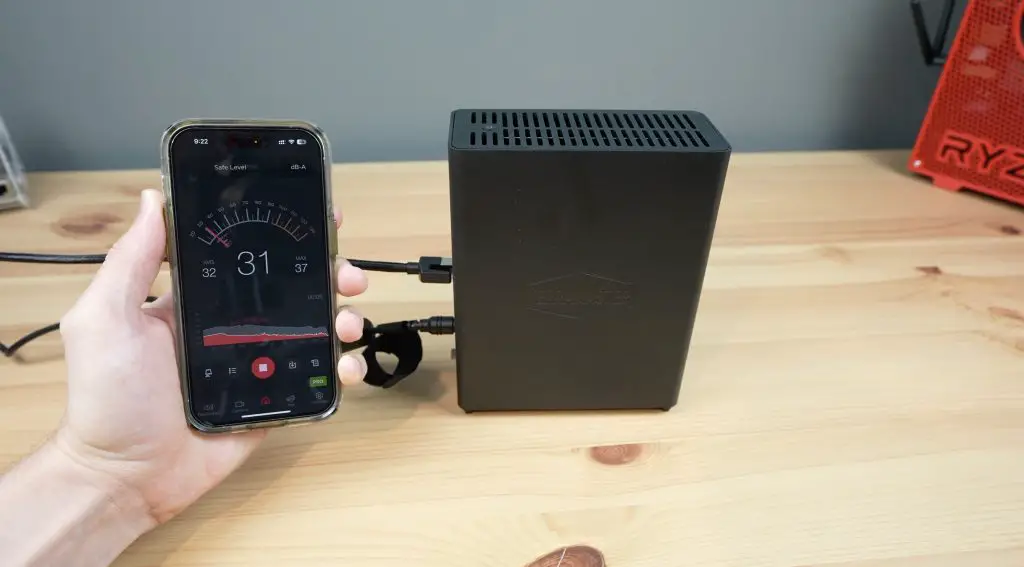
Fan Noise On The F8 SSD Plus
The F8 SSD Plus is very quiet as it doesn’t emit any physical drive noise. Fan noise is also minimal, you can hardly hear the fans running when at idle. The ambient sound level in my testing room is about 32 decibels, so the fans running at low speed barely register.
When writing to the drives or doing CPU-intensive tasks, you can hear the fans spin up but they’re not much louder. The sound level goes up to about 39-40 decibels.
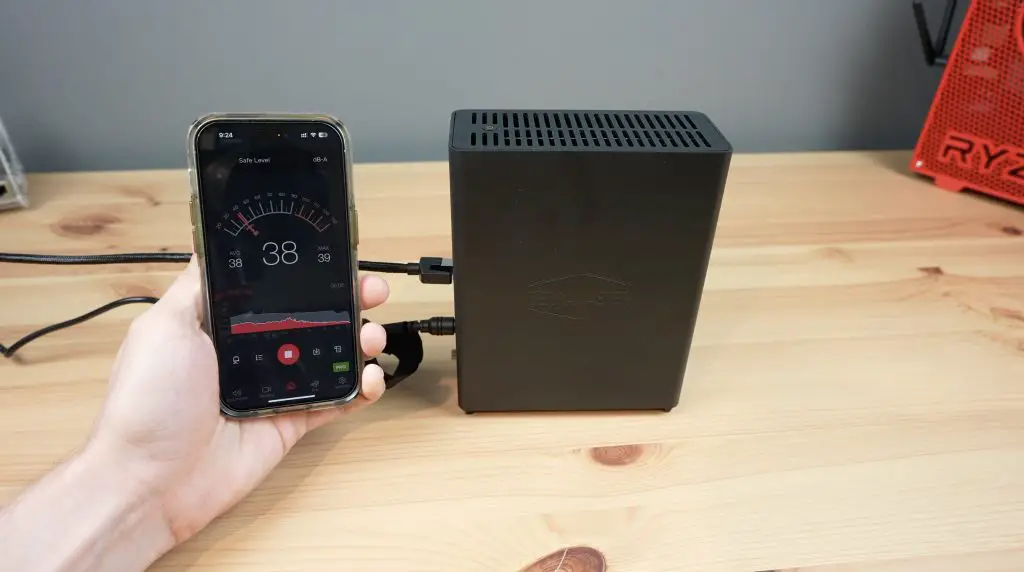
So this NAS is ideal for a home or small office where you’d have the NAS in the same room that you’re working in.
F8 SSD Plus Power Consumption
Keep in mind that power consumption will obviously vary with the type and quantity of drives installed, so you may get slightly different results. With my 4-drive setup and with the CPU under no load, we get a power consumption of 14W.
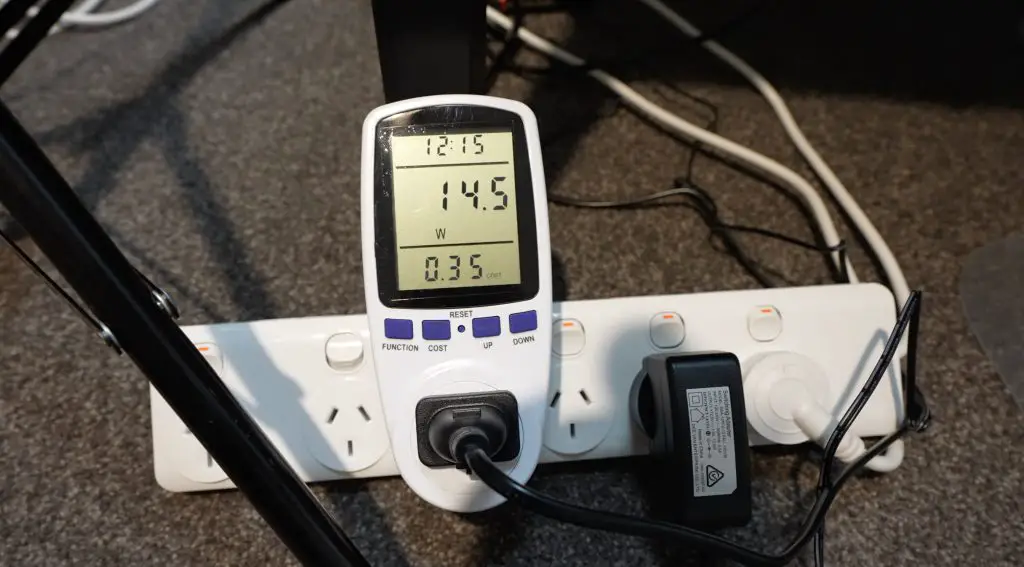
This goes up to 35W when writing to all four drives and saturating the network connection.
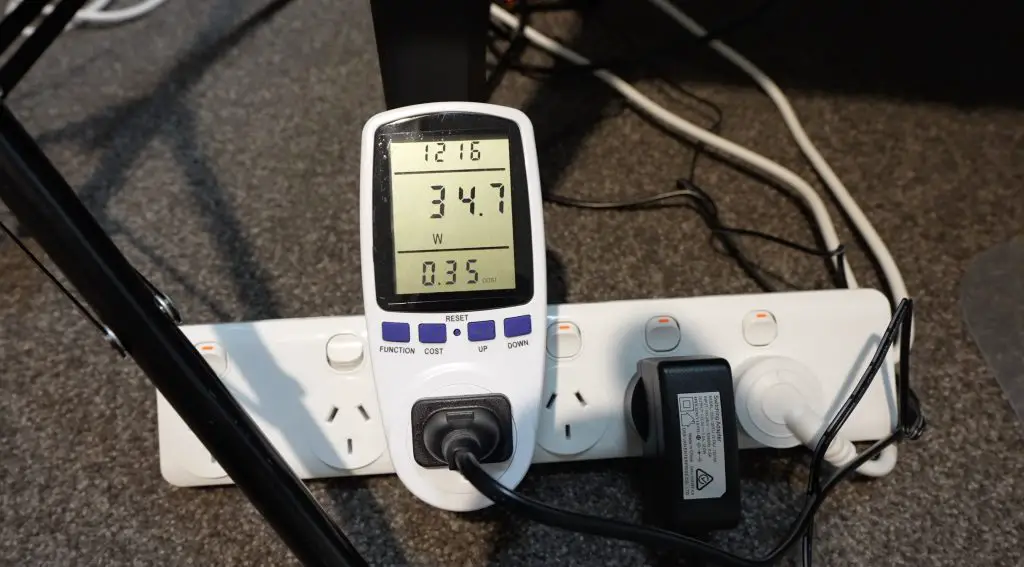
TOS 6 does have an option to put the drives to sleep if there is no activity for a period of time and this should further decrease the idle power consumption. In their documentation, they say that this will bring power consumption down to 9W. This seems reasonable from my test results.
Limitations of the F8 SSD Plus
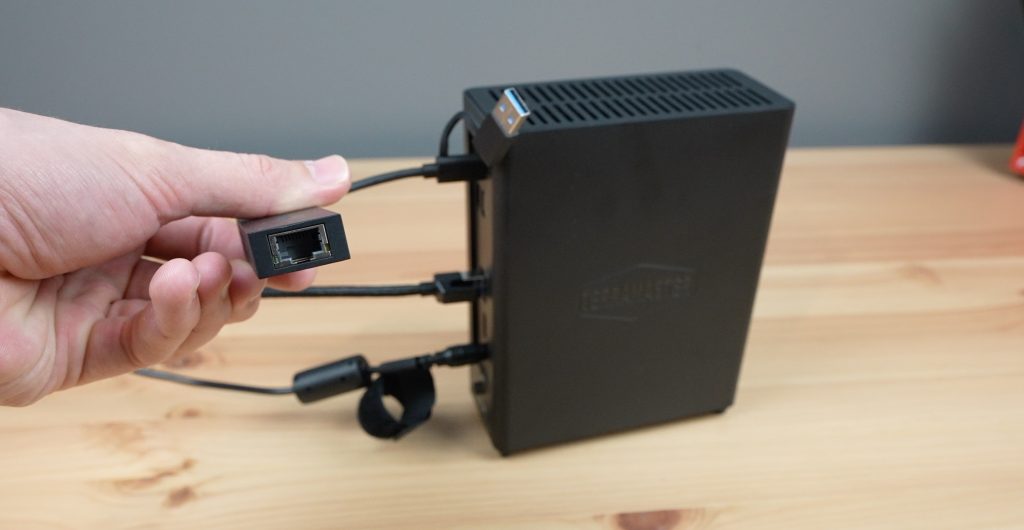
Most NAS products in this sort of price point would come with a secondary network connection, so it would have been nice to see a 2.5Gb network port alongside the 10Gb port as a secondary port or failover. You could add an external network adaptor to one of the available USB ports like I did with my Pi NAS, so this is not a major issue.
Each M.2 port also only supports PCIe gen 3 x 1 drive speeds. This sounds slow, but the limitation has to do with the available PCIe lanes on the processor. The i3 N305 processor has only got 9 PCIe lanes available. TerraMaster have distributed these over the 8 drives and the 10G Ethernet port, providing one lane each. I think they’ve made a fair choice here as the drives would individually saturate the 10G port in any case. So you’re not actually losing drive speed. This is worth keeping in mind when choosing drives though as you can save some money by buying older and/or slower drives that work well with the available interface.
The only other limitations I could find are that the F8 SSD Plus doesn’t have ECC memory and is missing native support for ZFS. Neither of these are particularly big concerns, they’re just worth noting.
Final Thoughts On The F8 SSD Plus
Overall I think this is a great product and I haven’t found any significant issues with it. There are a few features that would have been nice to have had included since it is quite pricey, but once you add an NVMe adaptor and 10Gb Ethernet adaptor to a mini PC of a similar size and performance, you’ll probably be around this price point too.

Let me know in the comments section below if you think I should have a go at building my own single board computer based NAS with similar functionality to see how it compares. Also, let me know what you think of the F8 SSD Plus.
This is a great review. I find this system particularly appealing due to the number of NVMe slots available. However, I believe building a NAS using the Minisforum MS-01 could offer greater flexibility. It features dual 10Gb SFP+ ports, a 2.5GbE NIC, a more powerful CPU, and a PCIe slot that could be utilized to add even more NVMe storage. Just exploring the possibilities…