If you don’t have run-flat tyres or your tyre gives up completely, you may find yourself on the side of the road needing to change your own tyre. Changing a tyre is quite straight forward and most cars have all the tools required to do so along with a spare wheel.
Firstly you will need to find a flat and stable area to park your car, you need to be on a level and hard surface. If you are alongside a road, move off of the road as far as possible and ensure that your emergency lights are on.
Put the hand or parking brake on and select first gear for a manual or park on an automatic. As an additional precaution, put a brick, rock, log or any large object in front and behind two of the undamaged tyres.
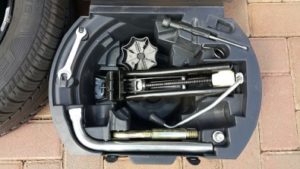
Take the spare wheel, jack and wheel spanner out, these are usually located in the boot/trunk underneath the carpet cover.
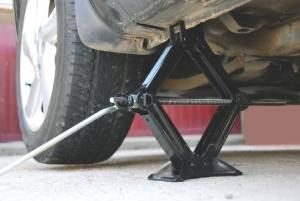
Now you need to locate the jacking point. The jack is designed to be used on a jacking pad or bar which is usually located just underneath the car, past the wheel arch on the door side of each wheel. If you are unsure of where these points are located, check in your vehicle owners manual. Do not attempt to jack up the car anywhere along the moulded plastic trim at the bottom edge of the doors, it will crack. Use the jacking point closest to the wheel you are going to be replacing. Turn the crank on the jack so that the jack becomes firmly seated but does not yet lift the car.
Remove the hubcap or wheel nut covers from the wheel. Loosen all of the nuts (turn them counter-clockwise) with the wheel still on the ground to provide additional rotational resistance. You only need to get them through the initial tight quarter turn, do not loosen them more than a quarter turn.
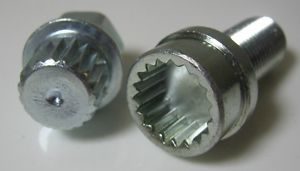
Some cars may have a security nut with a spline or star shaped head, there should be an adapter in the tool kit which fits over the nut and allows the normal wheel spanner to be used to loosen it. The wheel nuts may take quite a lot of force to loosen, especially if they have not been removed in a long time, you may have to use your body-weight to apply additional pressure to the wheel spanner to initially get them loose.
Continue turning the jack crank so that the wheel is at least 5cm (2″) off of the ground. Make sure that the car remains stable and is not moving forwards or backwards while you are jacking it up. If the car starts to move, lower the jack and add additional packers in front of and behind the grounded wheels.
Remove the already loosened wheel nuts. Put them on a piece of cardboard/paper/plastic so that they do not touch the ground. Dirt on the threads may damage the nuts and the wheel hub.
Place the spare tyre onto the wheel hub. Most wheel hubs have a locating spigot on which the wheel can rest while it is rotated so that the wheel holes align with the hub. Put the nuts back and hand tighten them. Now use the wrench to tighten them a little more, do not tighten the nuts each entirely at once. Move in a star pattern around the wheel tightening each nut one turn at a time until the are reasonably tight, this ensures that the wheel is properly seated. Do not apply too much force to the wrench as you may topple the jack.
Lower the car slowly by cranking the jack in the other direction. Once the wheel is firmly back on the ground, finish tightening the wheel nuts. You should only tighten the nuts as much as you can by hand, do not stand on the wheel spanner to tighten the nuts as you will not be able to loosen them again in a few days time.
Put the replaced wheel into the wheel well where the spare came out and replace the tools in their respective holders. Small punctures can be repaired at home using this guide. Alternately, take the tyre to a dealer who will repair or replace the tyre for you.


