The cost of cloud services might not be that significant for one month, but the recurring costs quickly stack up. In a couple of years you can easily be out of pocket over a thousand dollars. So today we’re going to be building our own personal cloud server to bring these services in-house for a single upfront cost and take back full control of our own data.
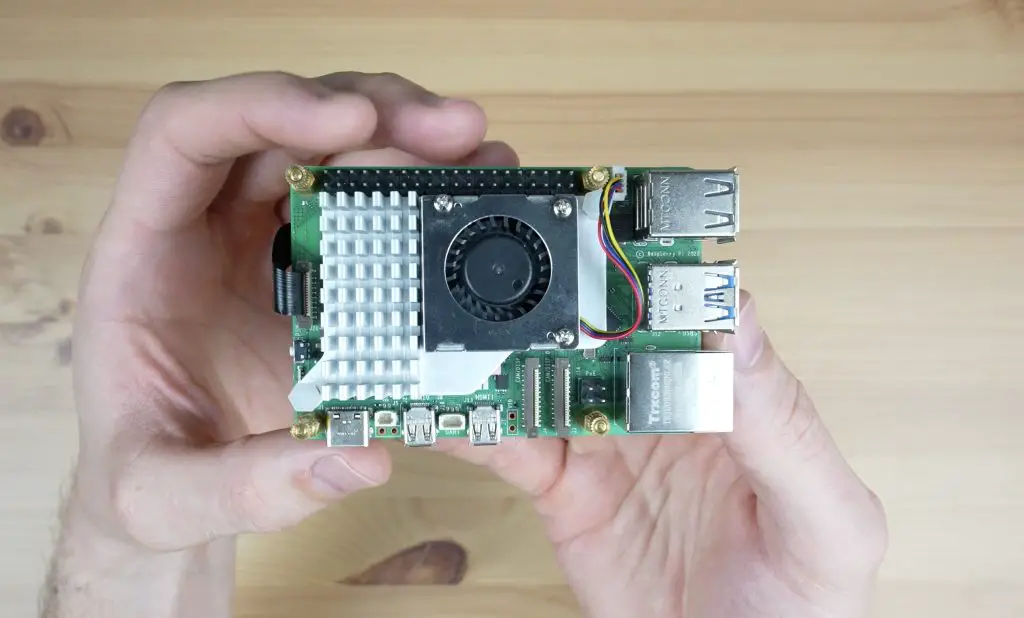
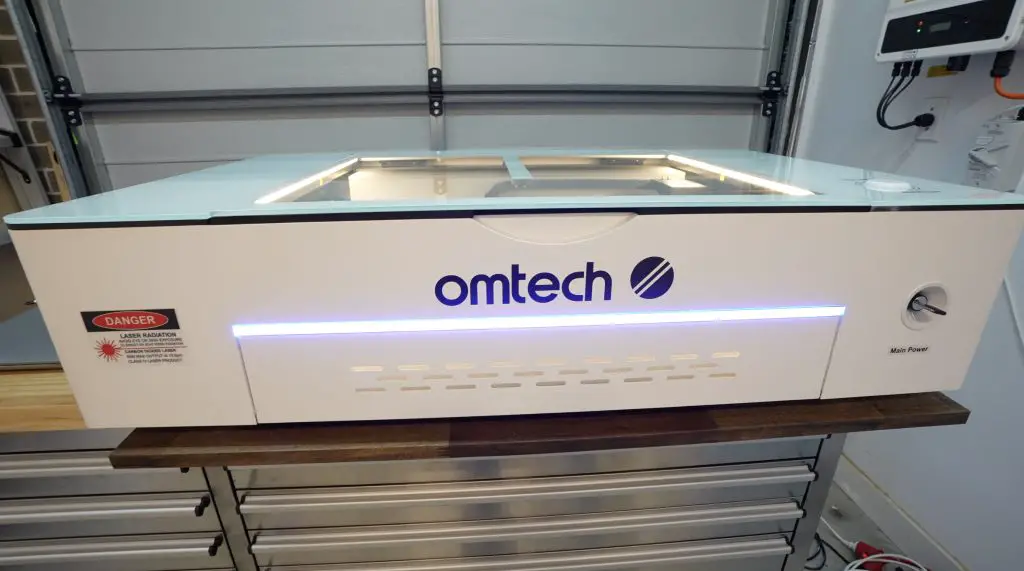
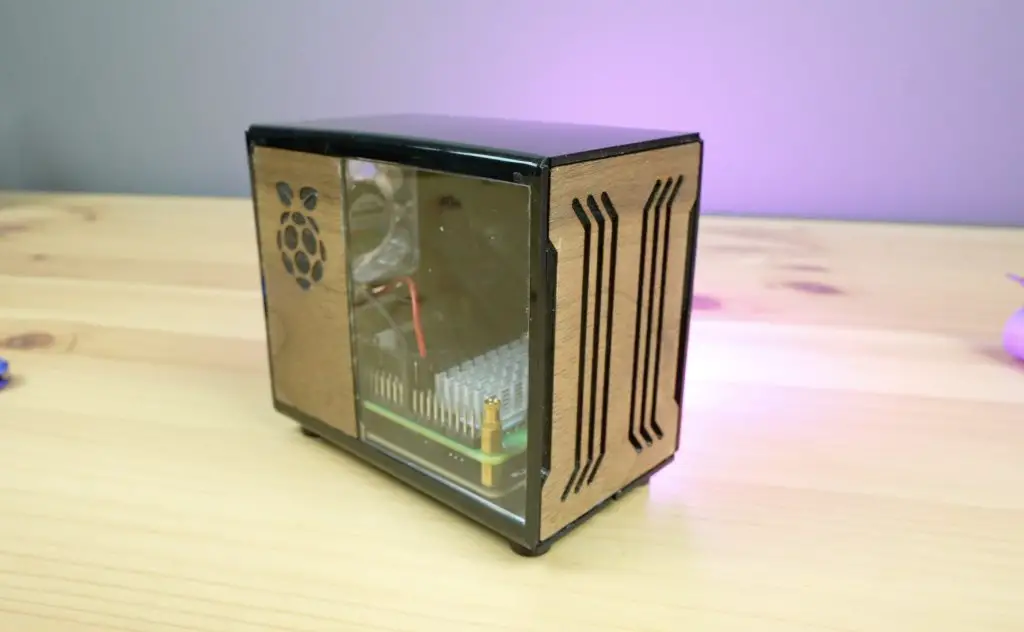
To do that we’re going to be using a Raspberry Pi 5 with an active cooler on it and a connected NVMe storage drive. To protect the Pi and drive, we’re also going to design and build a custom enclosure for it and I’ll be doing that using the Omtech Polar laser cutter and engraver.
Omtech sent me this new laser to tryout and share with you, so I thought the best way would be through a project that showcases its cutting and engraving capabilities on a range of materials.
Here’s my video of the build, read on for my written guide;
Components Required To Build Your Own Personal Cloud Server
- Raspberry Pi 5 – Buy Here
- Pi 5 Active Cooler – Buy Here
- Pimoroni NVMe Base – Buy Here
- Lexar NVMe Storage Drive – Buy Here
- Pi 5 Power Supply – Buy Here
- 40mm 5V Fan – Buy Here
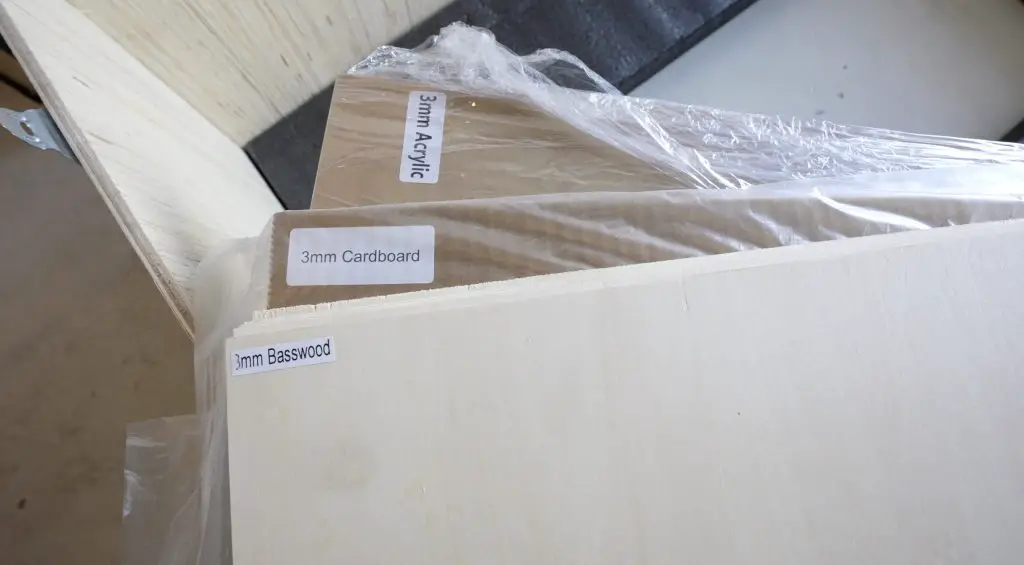
- Clear Acrylic Sheets – Buy Here
- Black Acrylic Sheets – Buy Here
- Walnut Plywood – Buy Here
- M2.5 Button Head Screws – Buy Here
- M2.5 Brass Inserts – Buy Here
- M3 Button Head Screws – Buy Here
Equipment Used
- Omtech Polar Laser Cutter & Engraver – Buy Here
- Acrylic Bending Tool – Buy Here
- USB C Pencil Screwdriver – Buy Here
- TS100 Soldering Iron – Buy Here
- Brass Insert Tips – Buy Here
Omtech Polar Unboxing and Setup
To start, let’s get the Omtech Polar unboxed and set up.

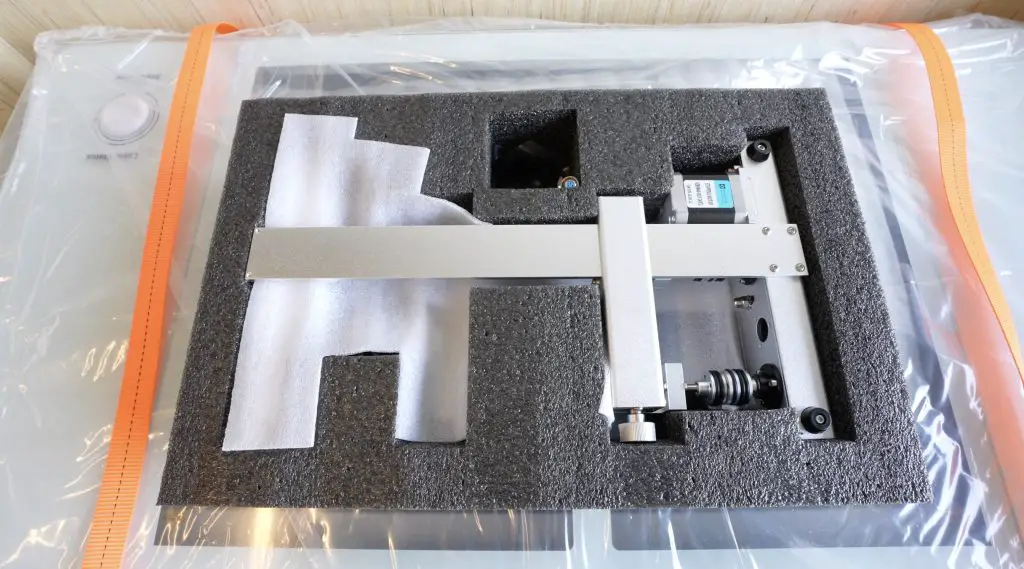
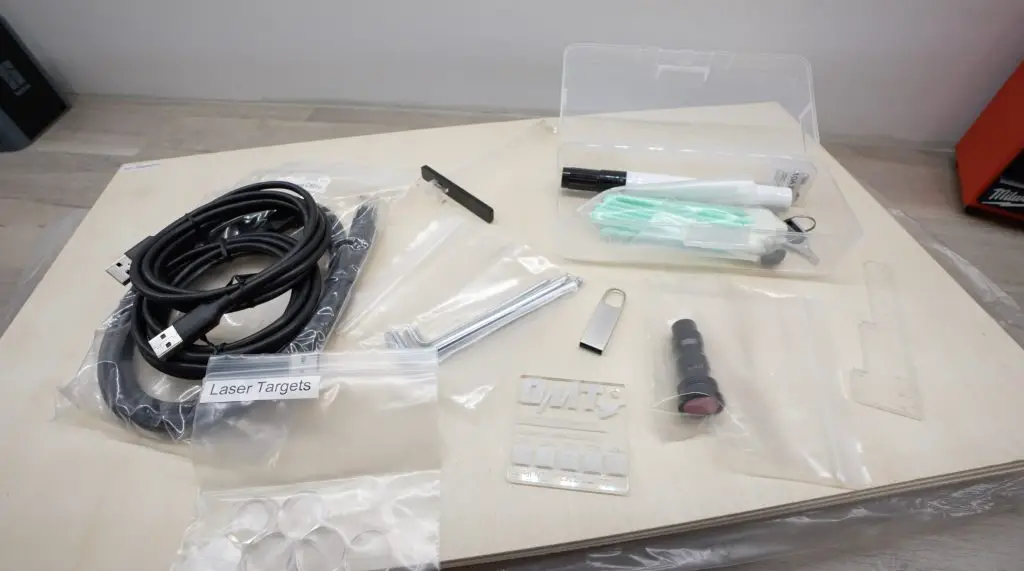
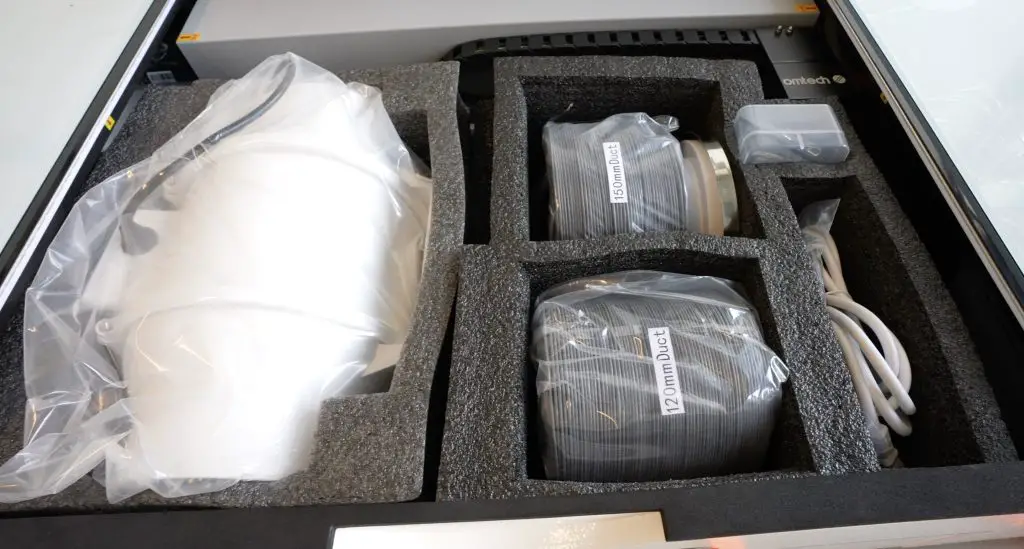
The Polar comes in a wooden crate and includes everything you need to get it set up and running. It even includes a rotary axis for engraving cylindrical objects and a materials pack to help you get started with some basic projects.
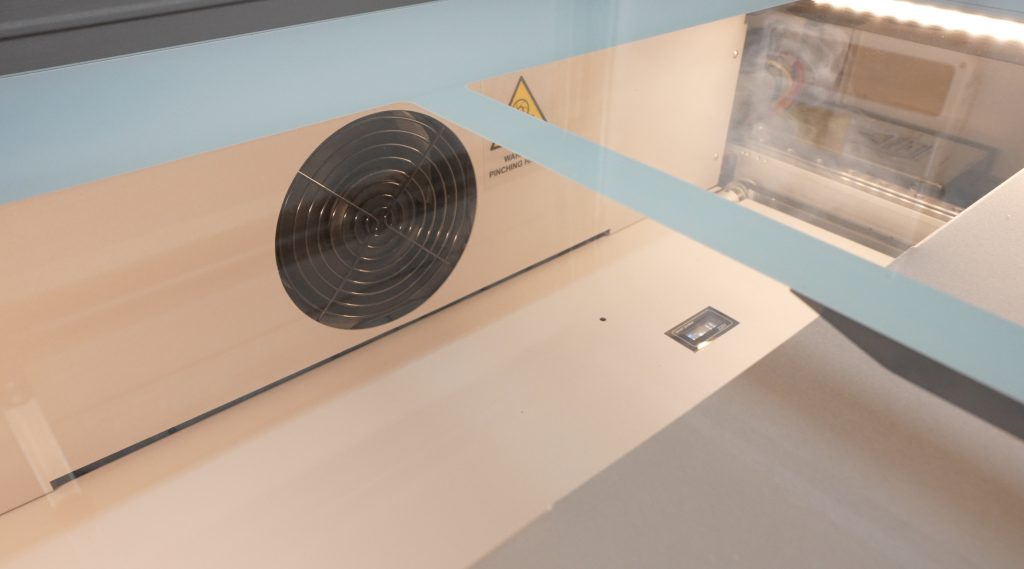
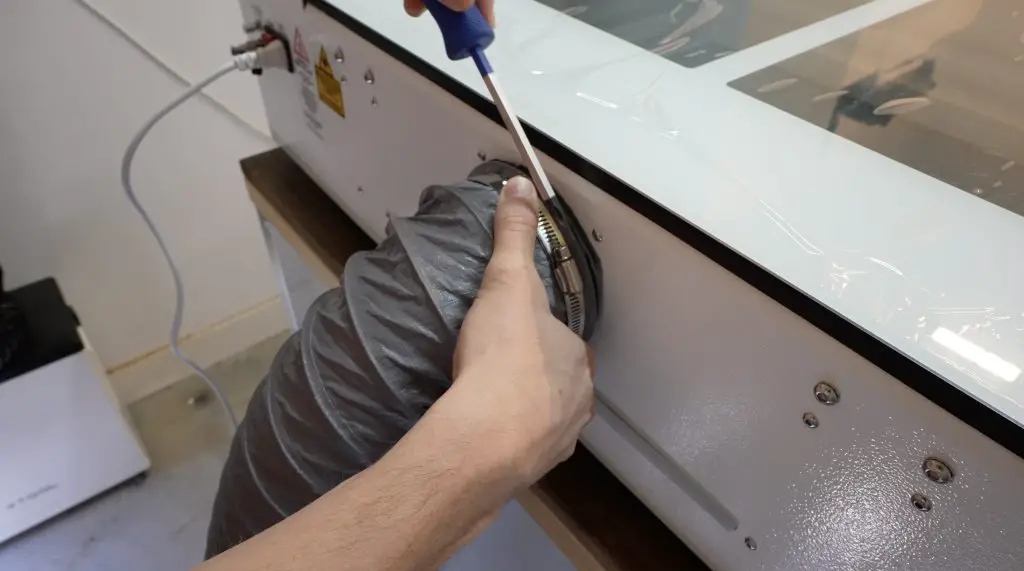
It is a fully enclosed design that contains the smoke and fumes while cutting and engraving, so it includes a ducted ventilation system to draw the smoke out of the machine and exhaust it outside. The full enclosure is also much safer for the operator than more common open gantry-style lasers.
The Omtech Polar doesn’t require much in terms of setup. It comes pre-assembled, so all you need to do is connect the ventilation system to the back and connect it up to your computer via a usb cable or through your home network via Ethernet or WiFi.
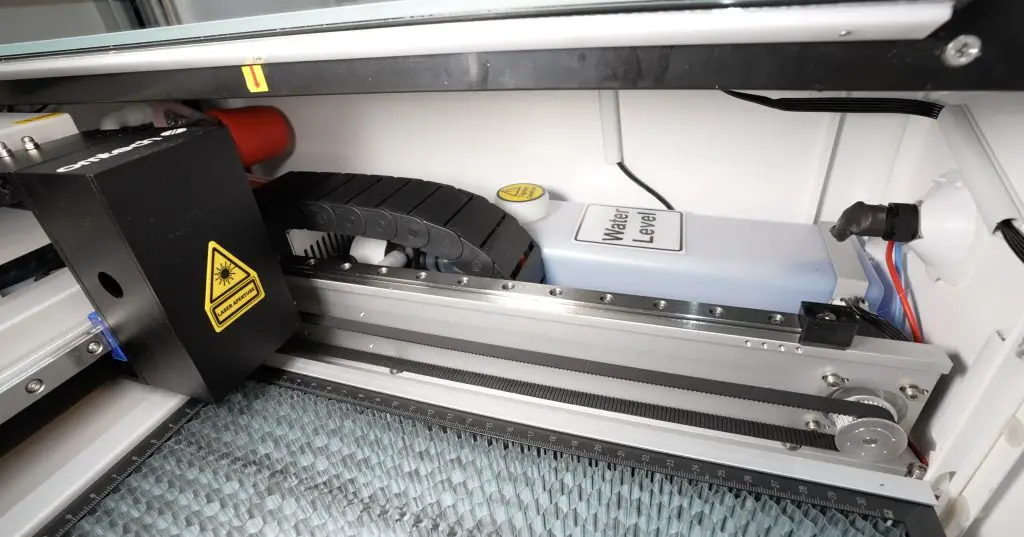
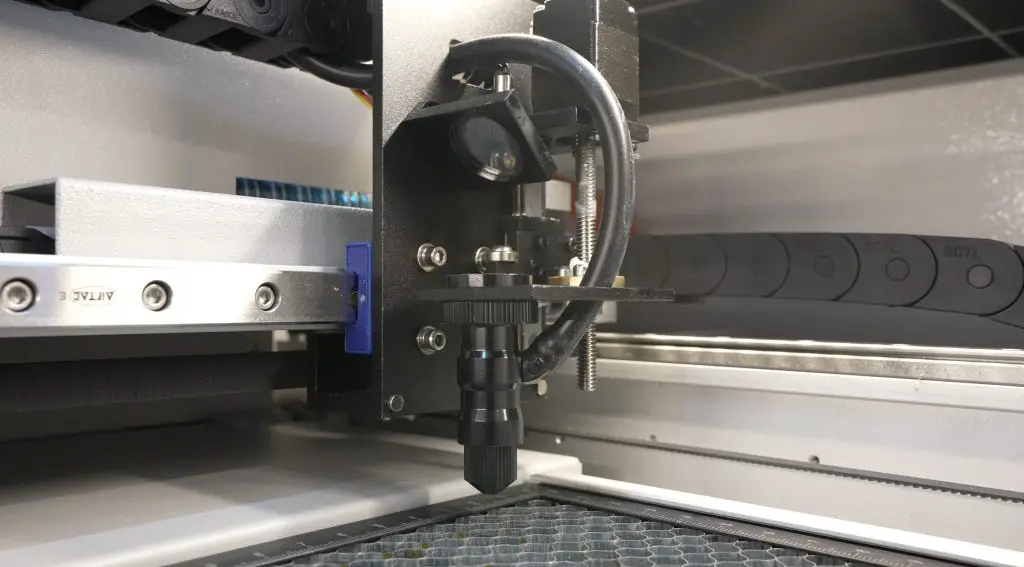
The build quality is also quite good. It’s an all-metal enclosure with a thick glass top and lid. Both axes run on linear rails and all of the cabling and air tubes run in a drag chain.
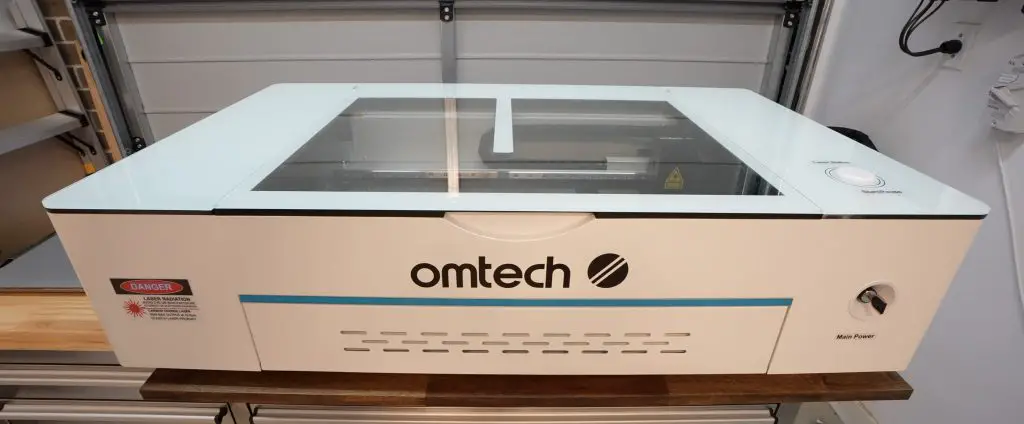

It also comes with some great features like integrated water cooling for the laser tube, built-in air assist and a 5MP camera to assist with positioning your artwork.

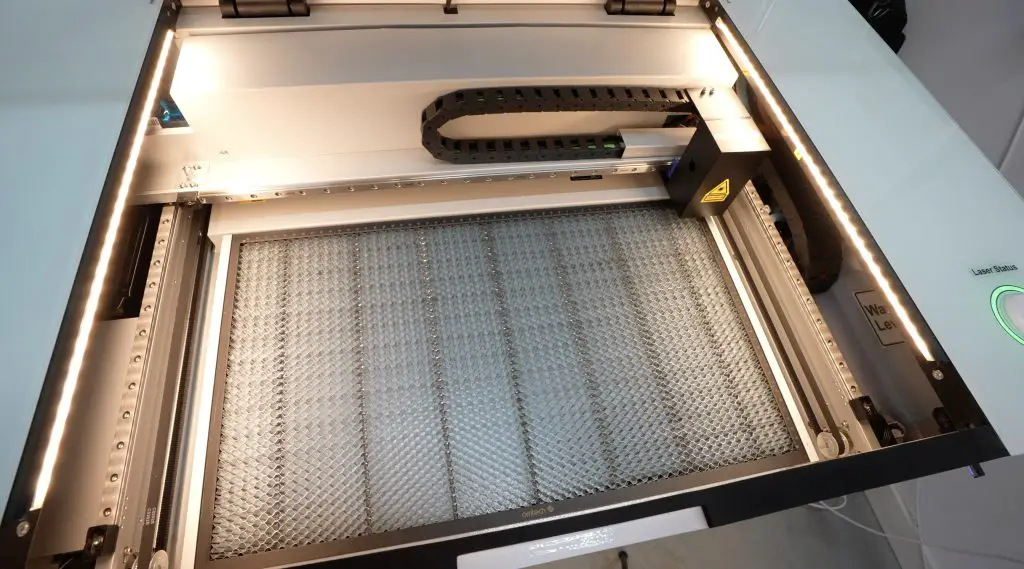
The working bed area is 500mm x 300mm, but it can accommodate larger materials using its pass-through tray.
Now that the Omtech Polar is set up, let’s get the case designed so that we’ve got something to cut and engrave on it.
Designing The Cloud Server Case
I used Fusion360 to draw up this case using the sheet metal designer.
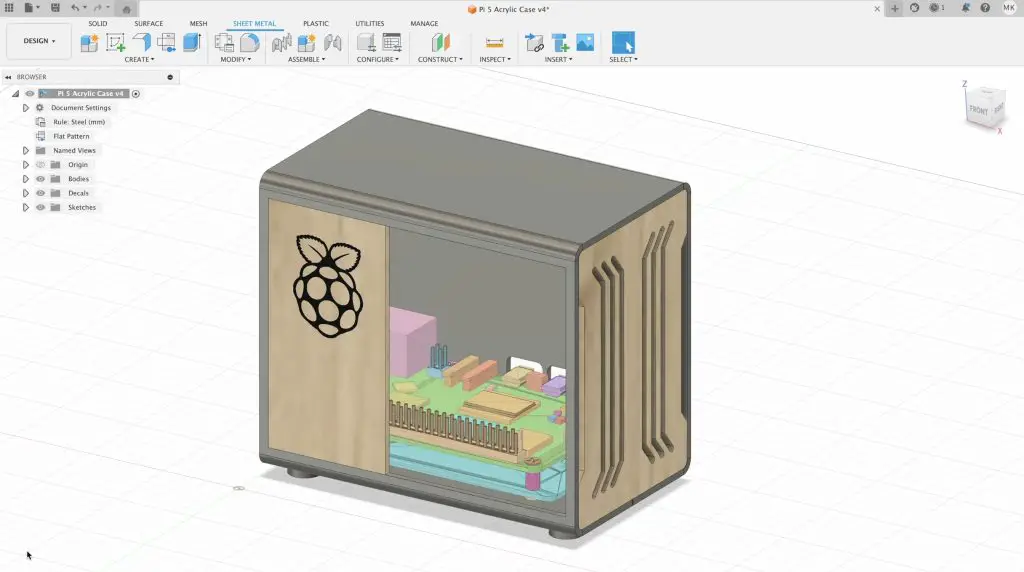
I chose this design feature so that we can open up the main body of the case into a flat pattern to cut out from a single piece of acrylic.

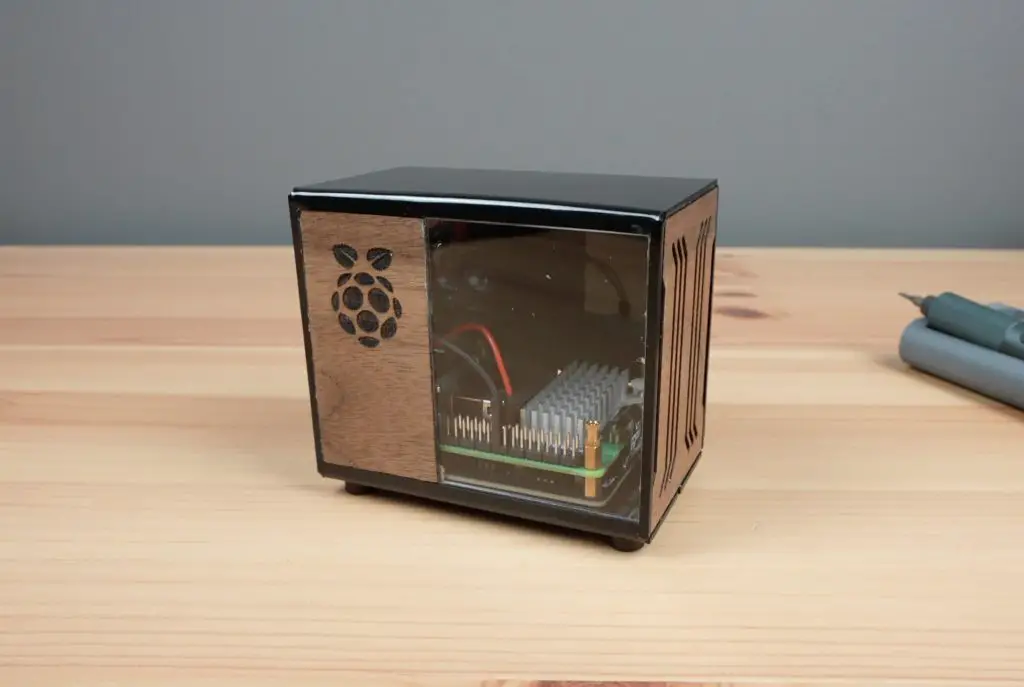
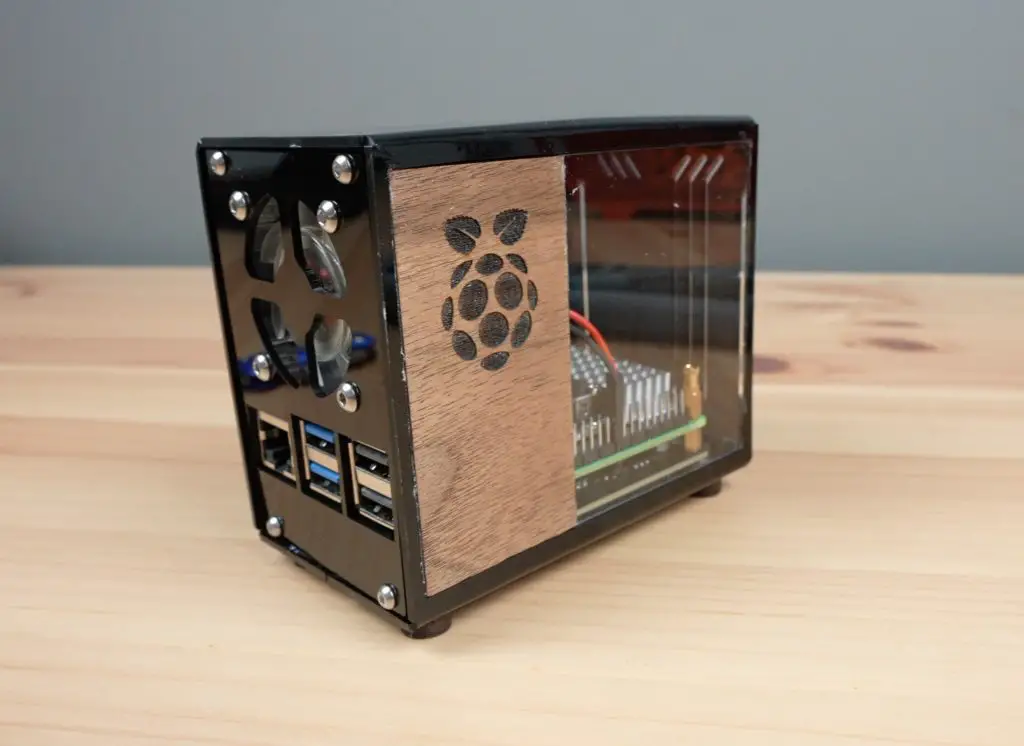
This sheet is then bent to form a rectangular tube and a front and back panel finish it off. I’ve also added a clear panel to one side and I’ll make the small side panel insert and the front panel out of walnut plywood as some accent pieces.
Making The Cloud Server Case
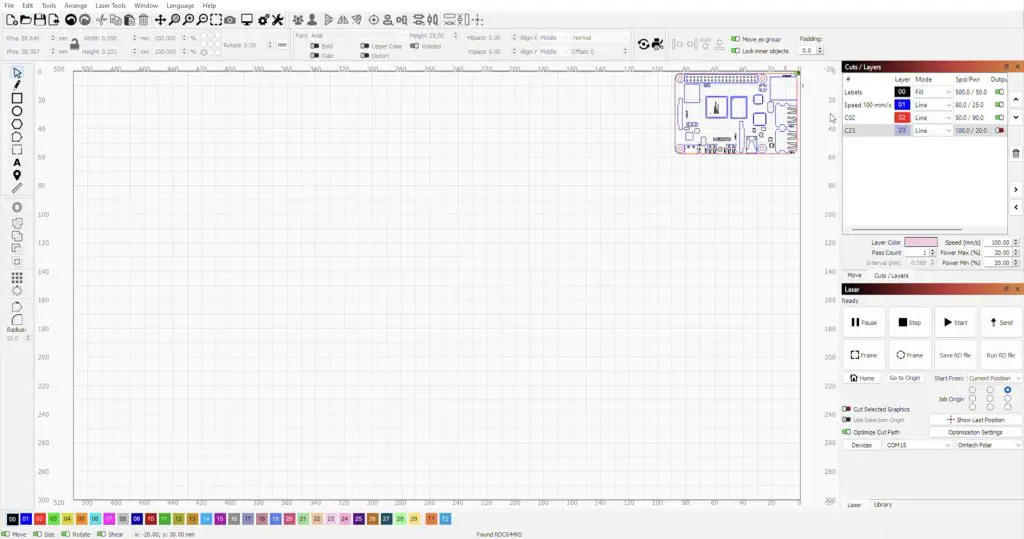
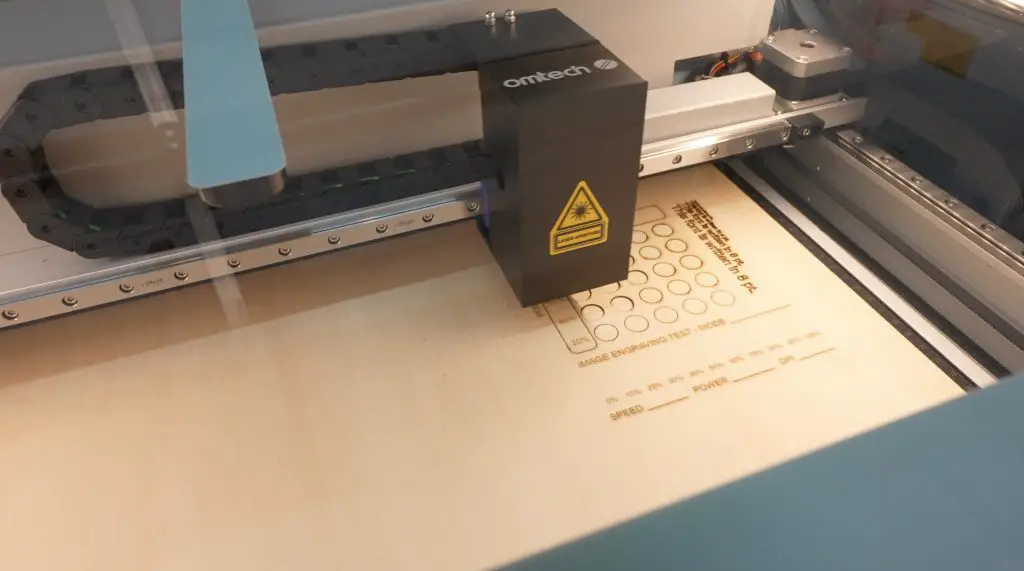
To cut out the components, I’m going to be using Lightburn to control the laser. Omtech include a copy of RDWorks with the Polar on a USB drive as a free option, but I already use Lightburn quite a lot on my other lasers, so I’m going to use it for this project too. It’s great that this is an option on the Polar as some systems like the Glowforge lock you into using their own proprietary cloud-based software with no alternatives.
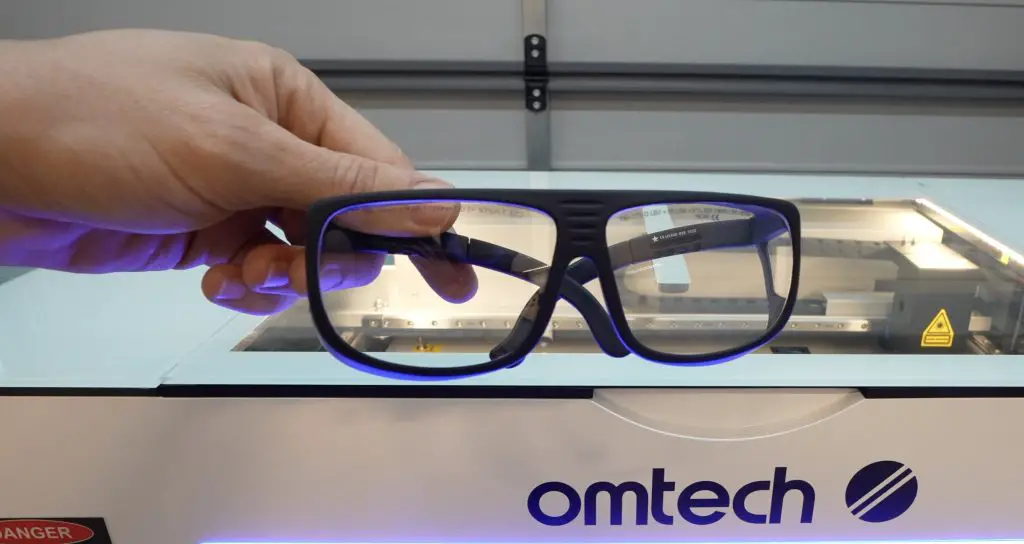
Before running the laser, remember to always use proper certified protective eyewear suitable for your laser type when working with these machines, even fully enclosed ones.
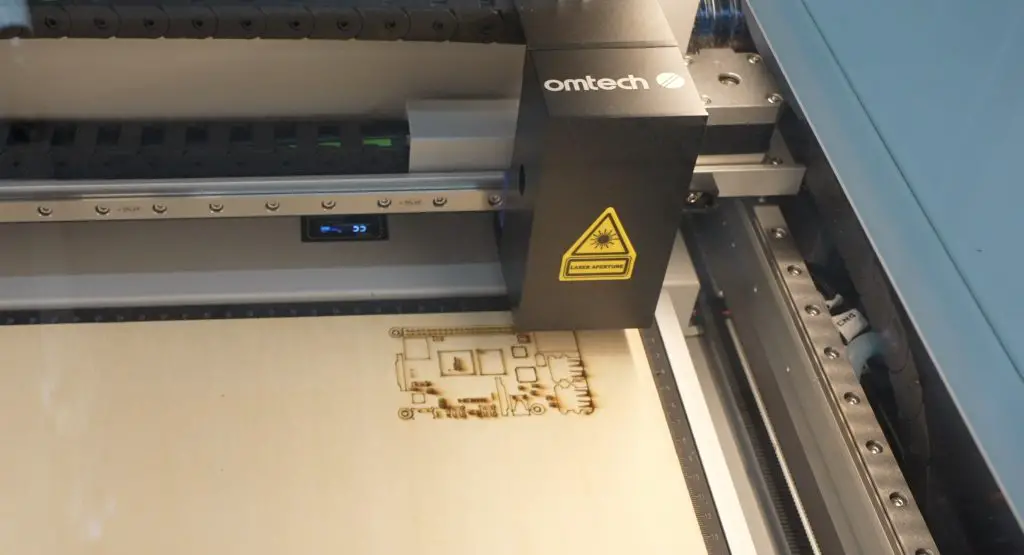
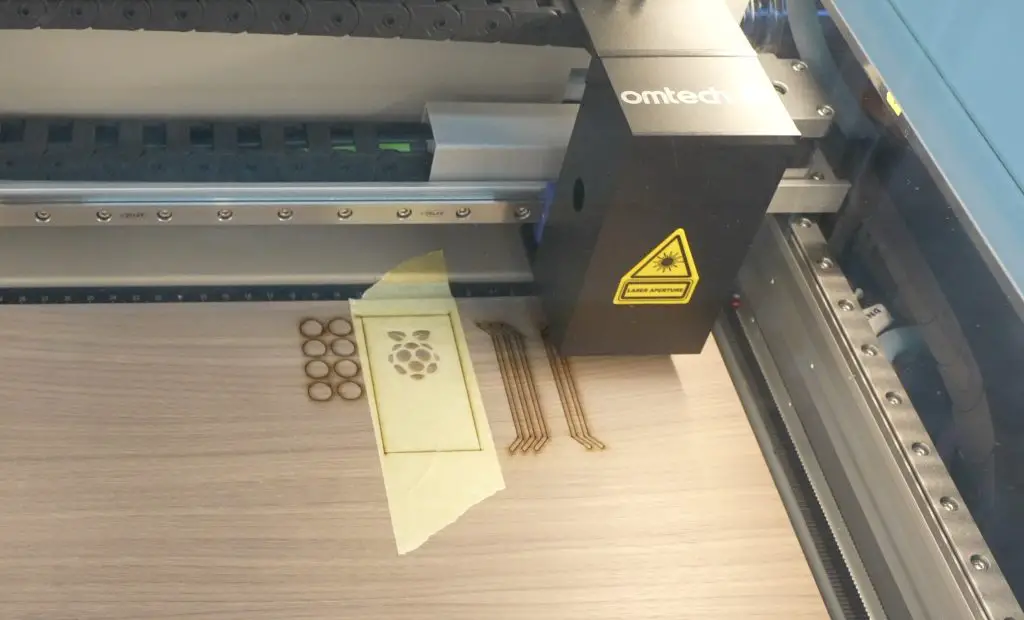
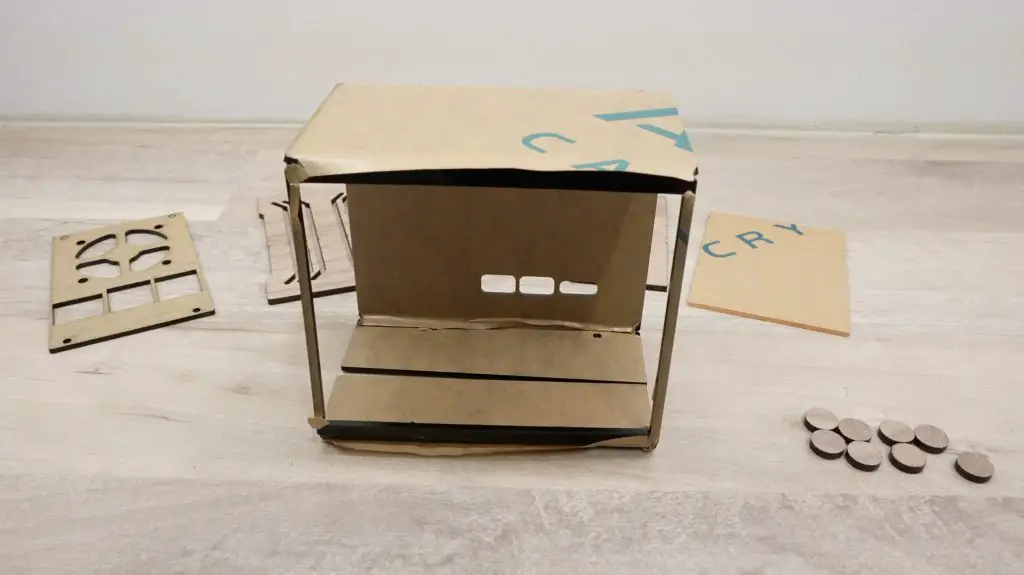
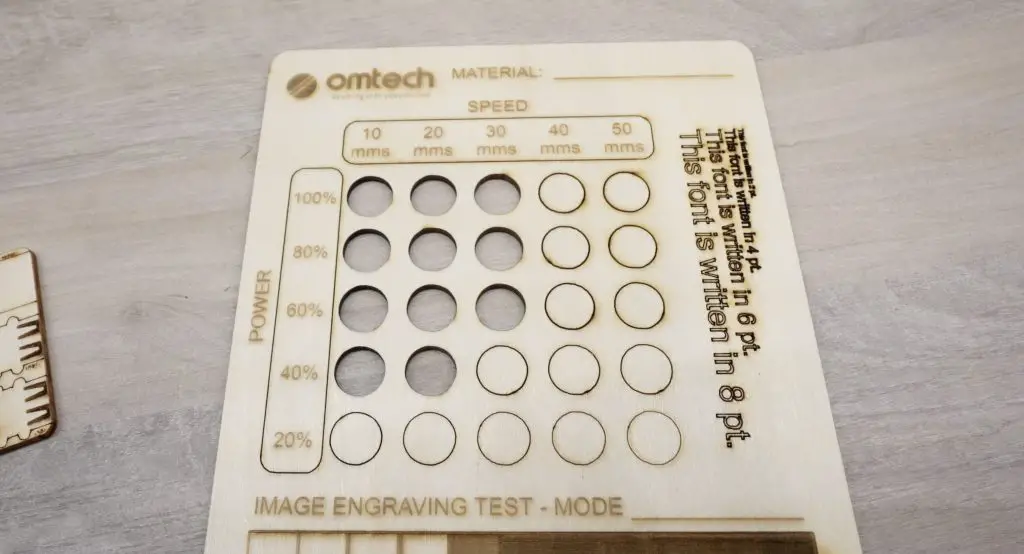
As a quick test to start with, let’s engrave and cut a dummy Raspberry Pi that I’ll use to test fit the case’s bends.
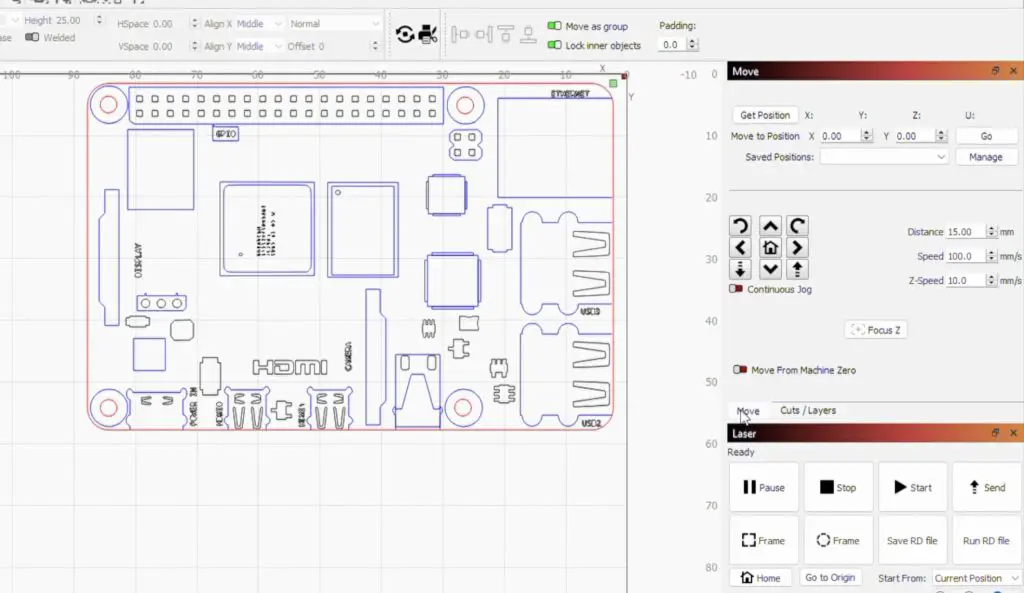
The Omtech Polar has a somewhat automated focusing system. You focus the laser using the distance parameter in Lightburn which tells the laser how high to position the head above the material. When set to 17mm, the laser focuses on the surface of the work bed. You then subtract the material thickness from this to get the focus height. I’m using 3mm plywood for the test piece, so the focus height needs to be set to 14mm.
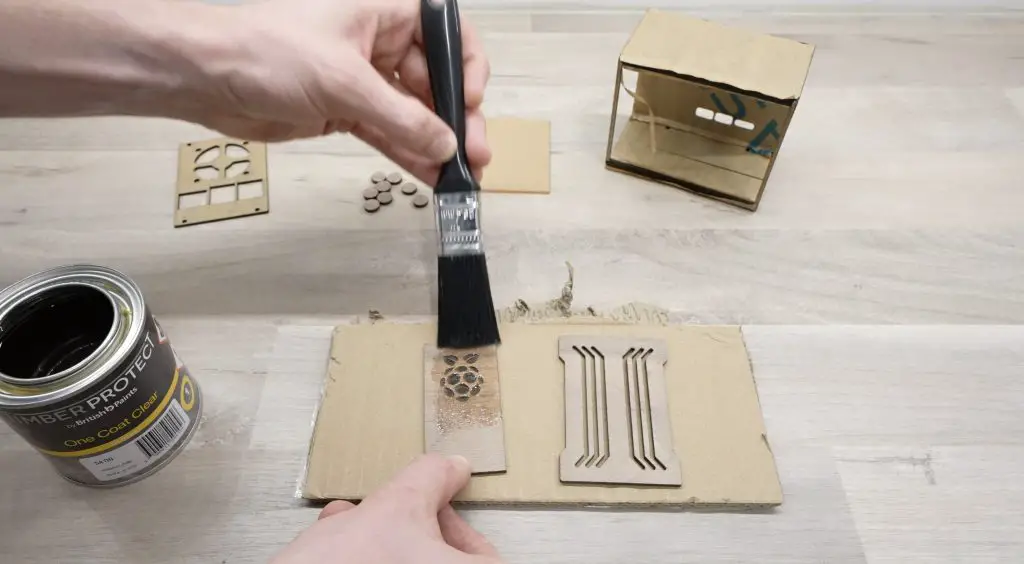
The quality of the cuts and engraves is pretty good, although it doesn’t seem like there is a way to turn the air assist off through software or hardware. This means that the engraving smoke is blown down onto the surface of the wood, which leaves the smoke marks you can see around the engravings.
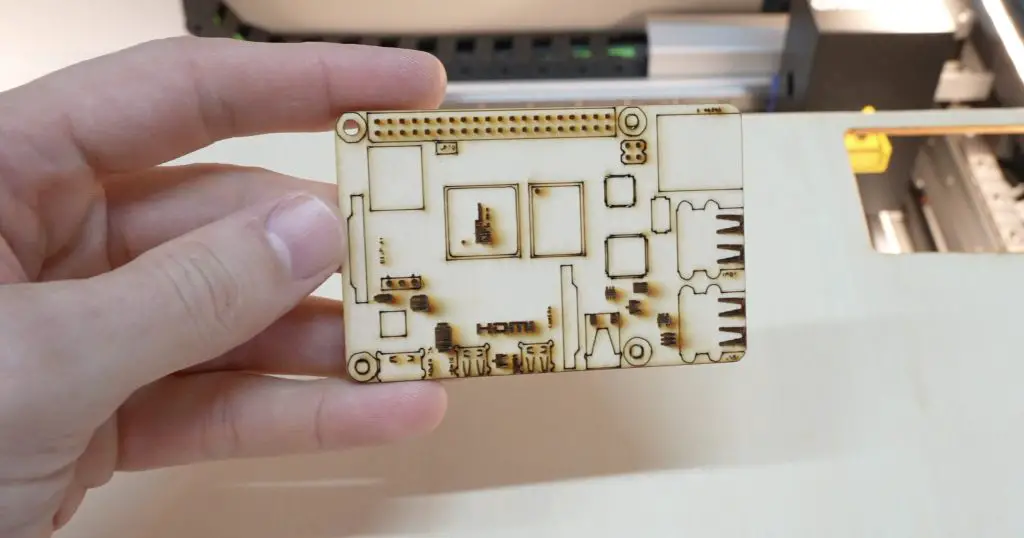
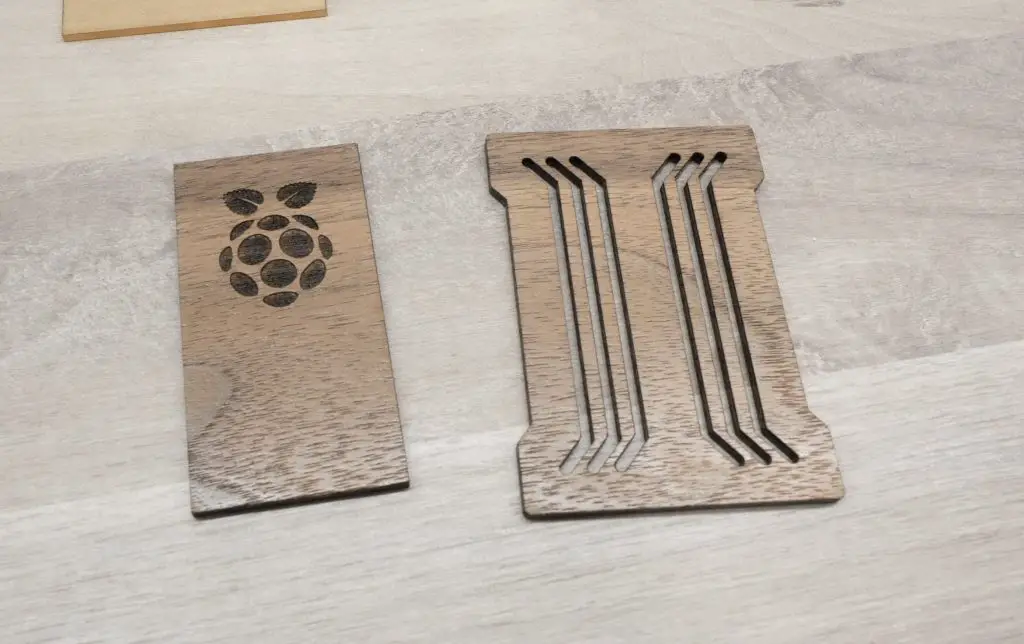
I’ll use masking tape on the engraved wooden side panel to stop this when we engrave the Pi logo.
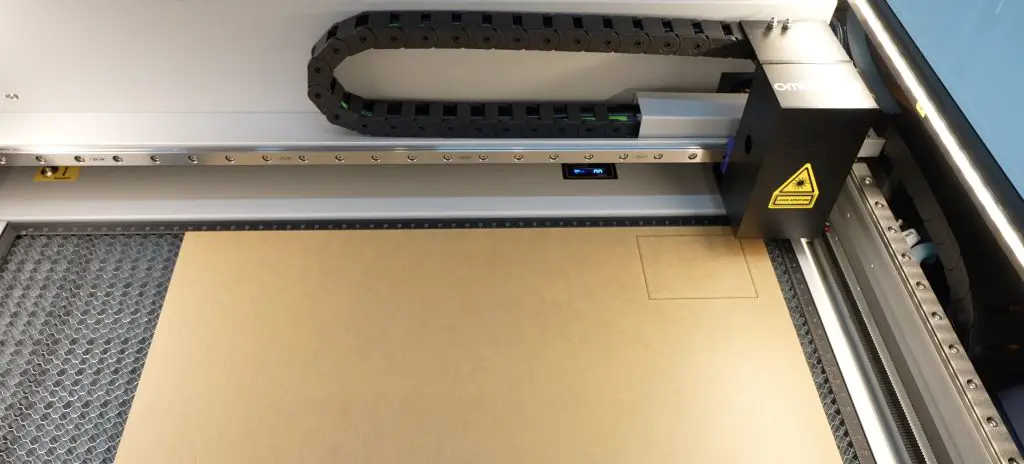
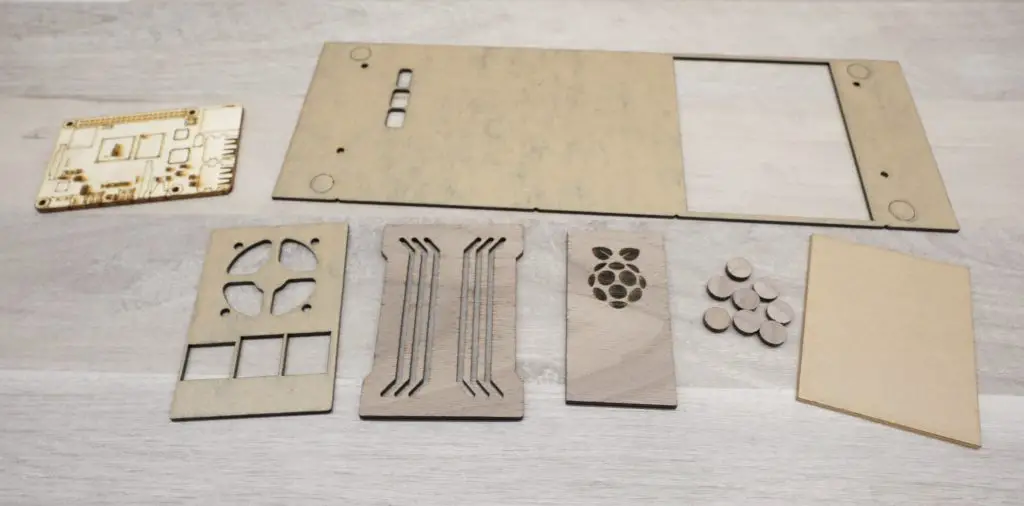
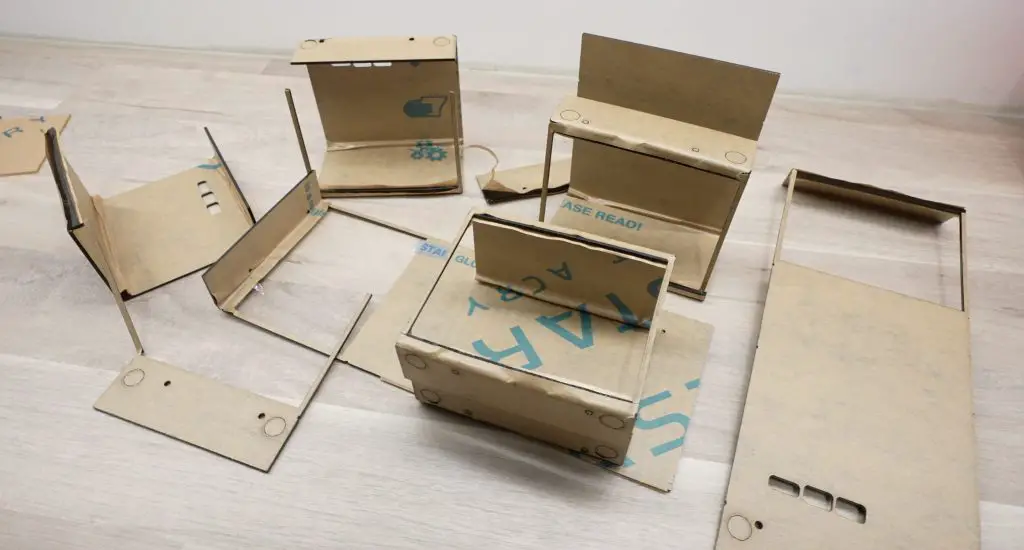
The main enclosure flat pattern and back panel are cut from 2mm black acrylic.
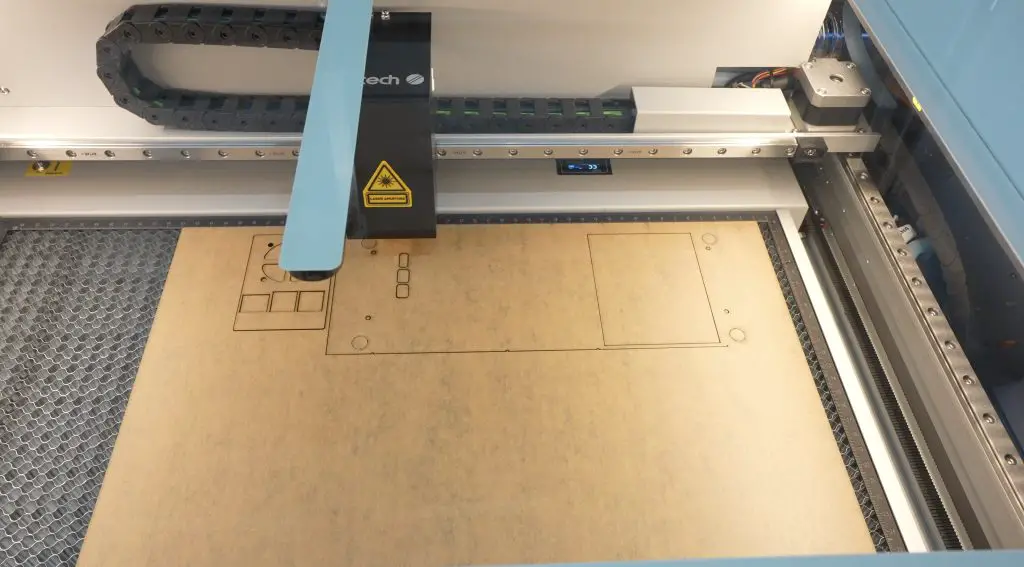
Then let’s cut the window from some 2mm clear acrylic.
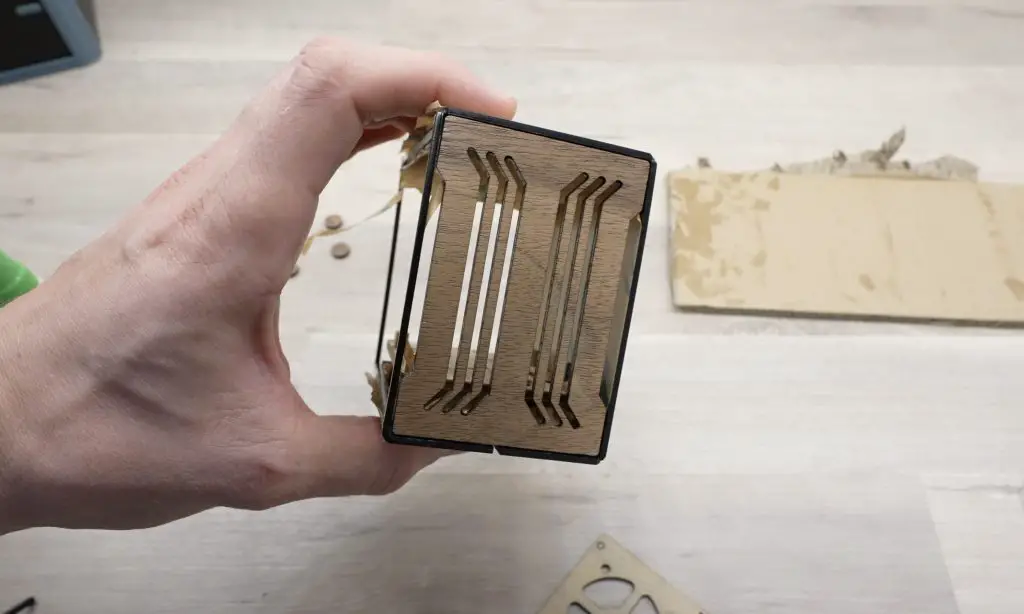
Lastly, we can cut the front and accent panel from a piece of walnut plywood. It’ll engrave the Raspberry Pi logo onto the side panel before cutting the panels out. I’ve put masking tape over the area where the Pi logo is going to be engraved so that the engraving smoke doesn’t mark it.
Now we’ve got all of the case components made up.
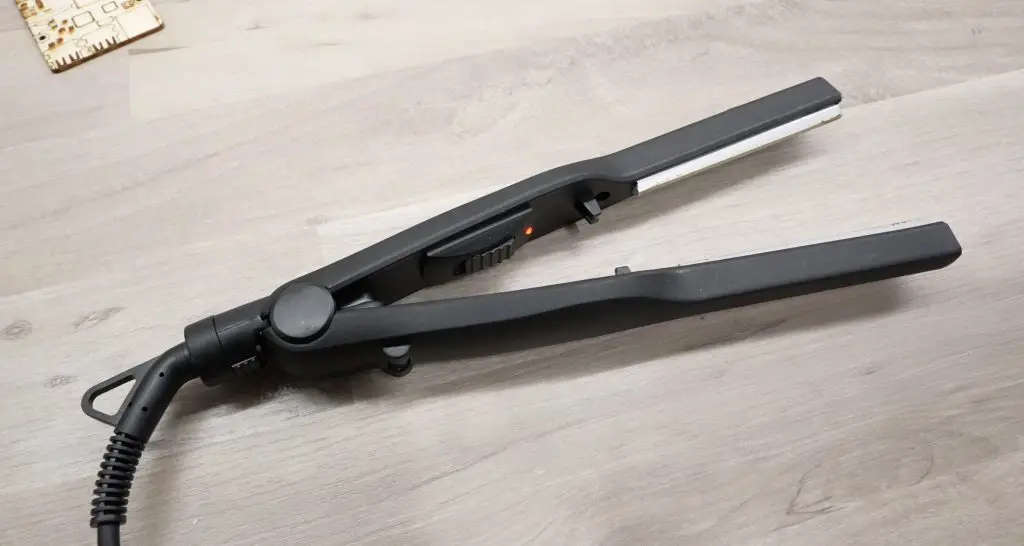
To bend the acrylic I’m using an acrylic bending tool, I’ve added little notches to the flat pattern as guides for the bend lines.
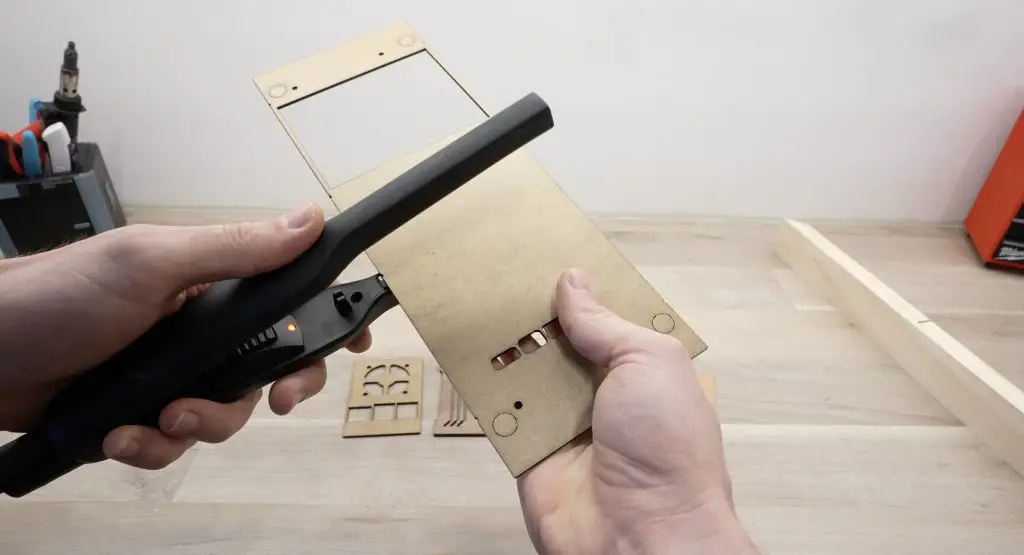

I know it looks like a hair straightener but you can get these bending tools from Aliexpress for about $15 (or from Amazon for a little more) and they work well for bending small sections of acrylic.
With the four sides bent, it’s starting to look like a Pi case.
I’m not going to pretend that I got this right on my first go, actually far from it. I cut this flat pattern out about 8 times before I got the bends in the right places without breaking one of the thin sides alongside the clear window.
Next, I’m going to give the walnut panels a quick coat of varnish to bring out their colour and seal them before gluing them into place.
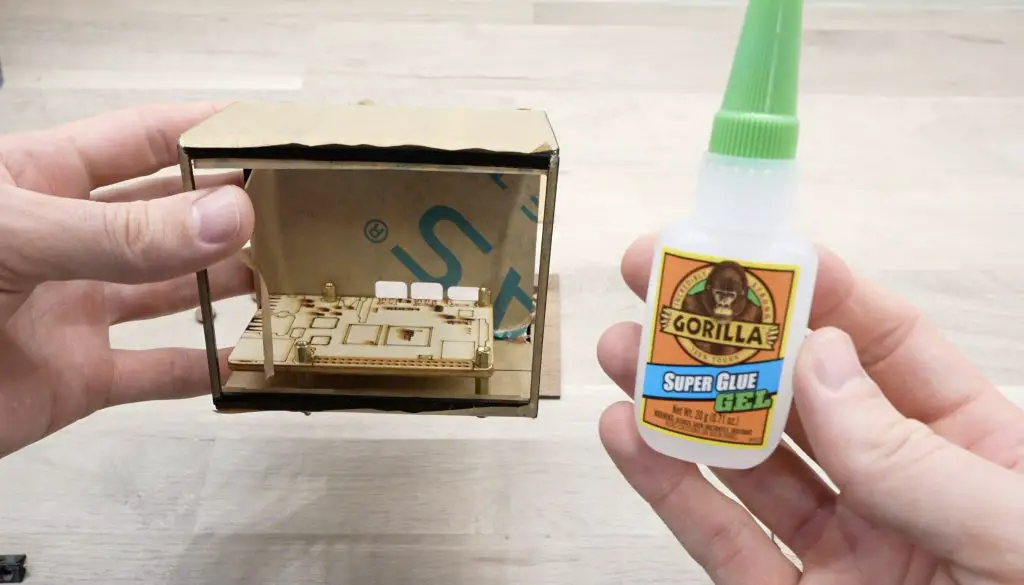
Then to finish the case off, we can glue the front section and side panels into place with some superglue. I’ve mounted the dummy Pi into the case while doing the front panel to help with alignment.
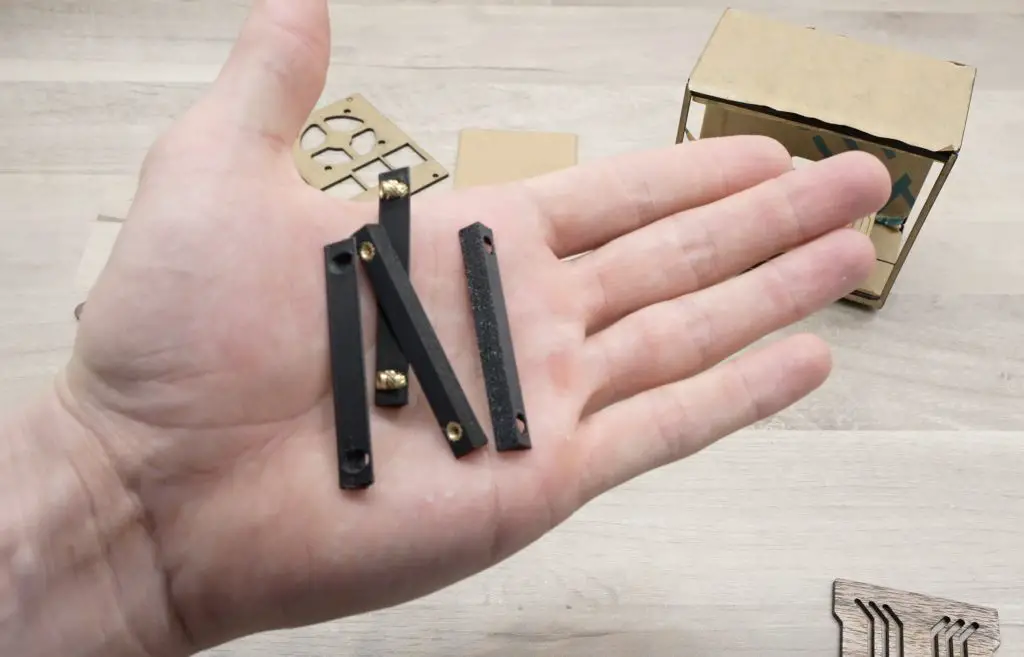
I’ve also 3D printed some small 90-degree pieces to help with supporting the front and back panels.
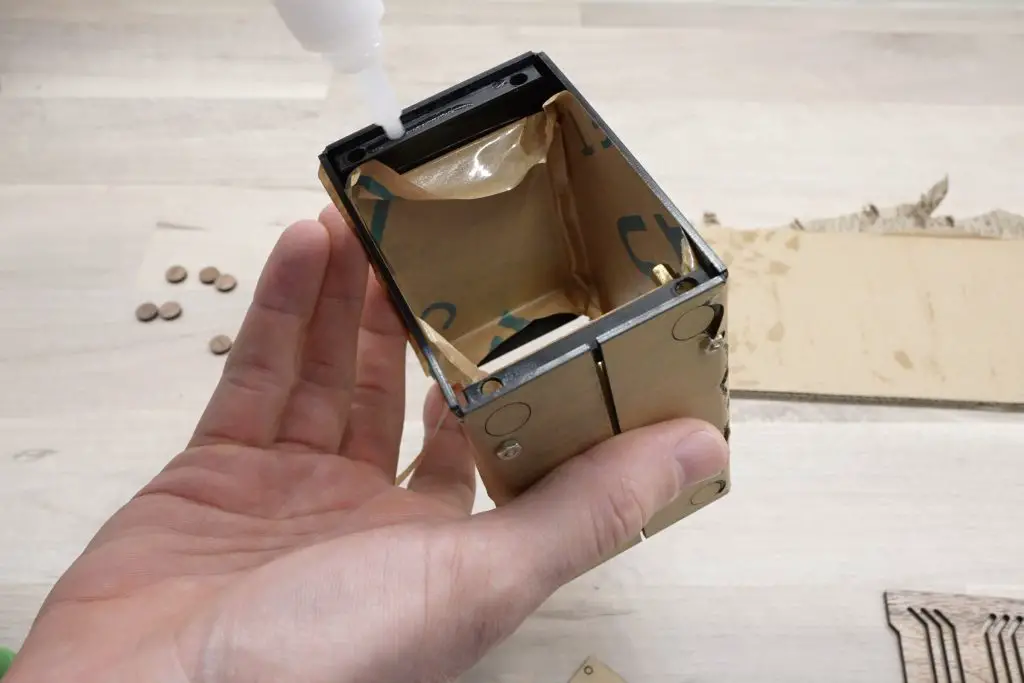
I’ve also glued the feet onto the bottom, using two of the feet circular cutouts to make up each complete foot.
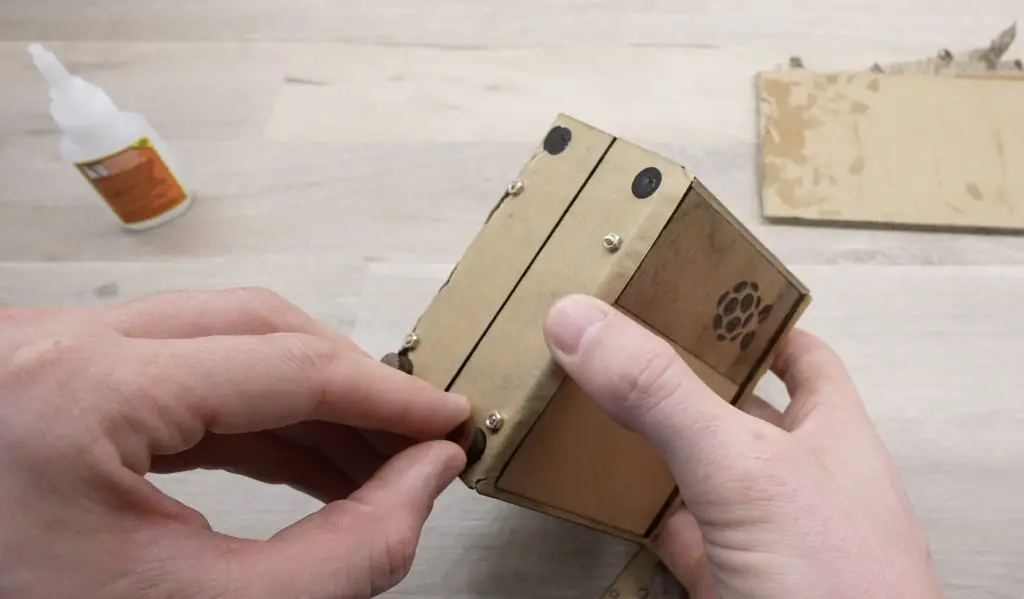
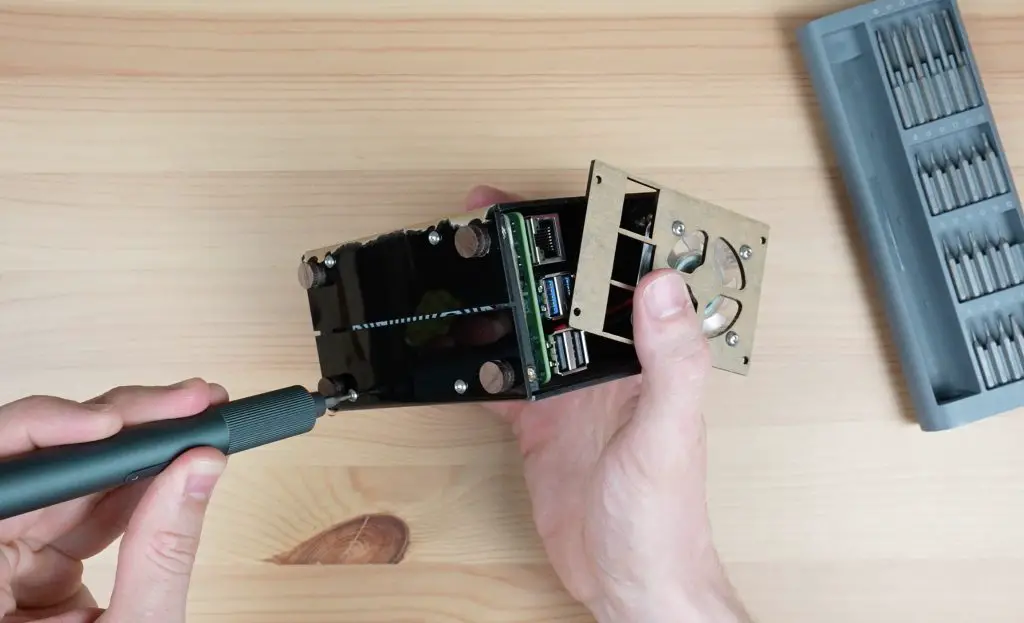
The back panel is held in place with some brass inserts in the 3D-printed parts and M2.5 button head screws to secure it. This panel has to be removable to get the Pi in and out of the case.
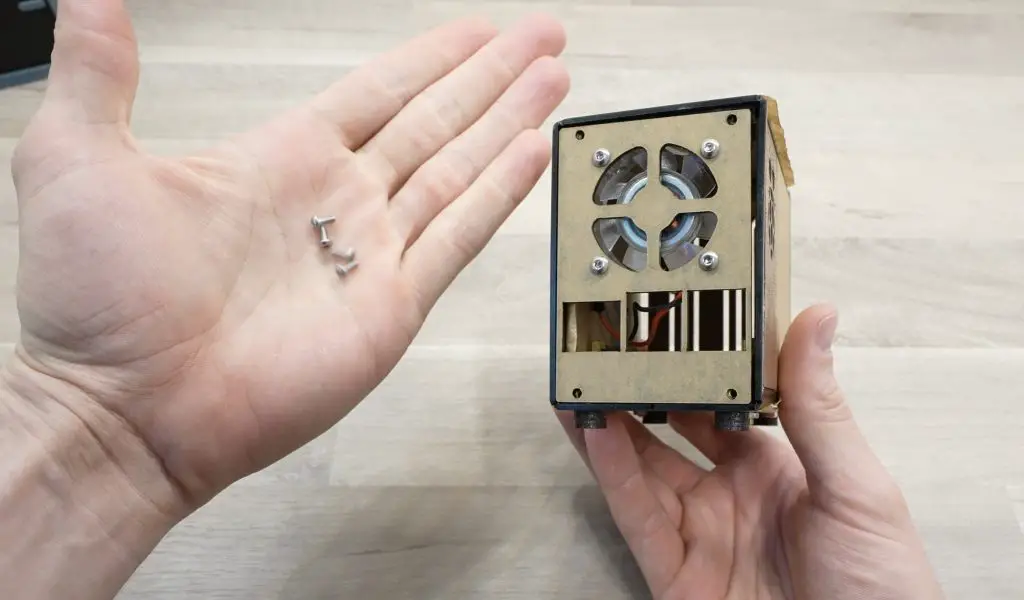
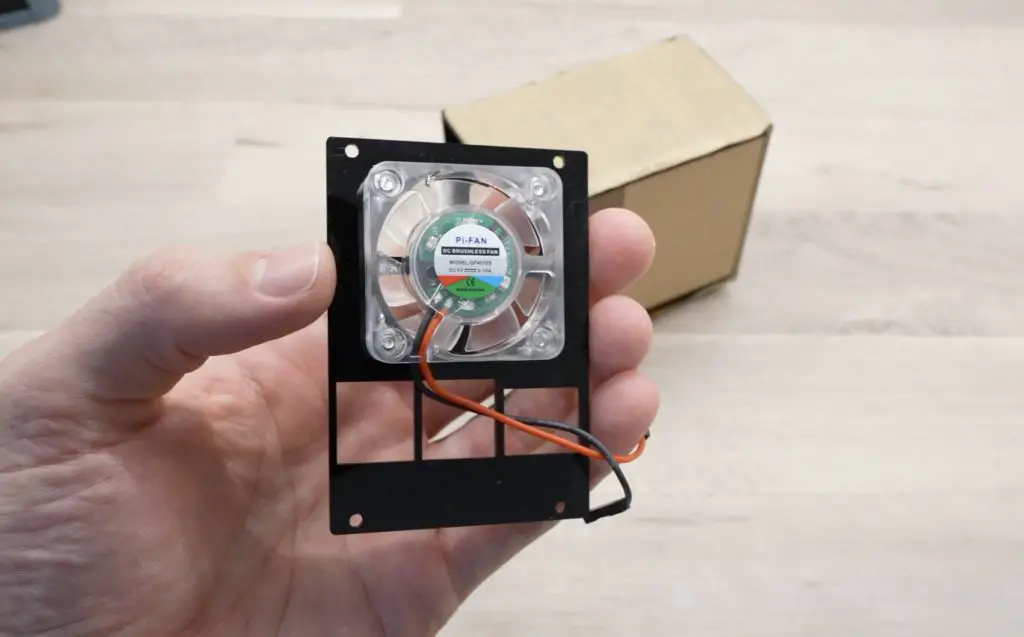
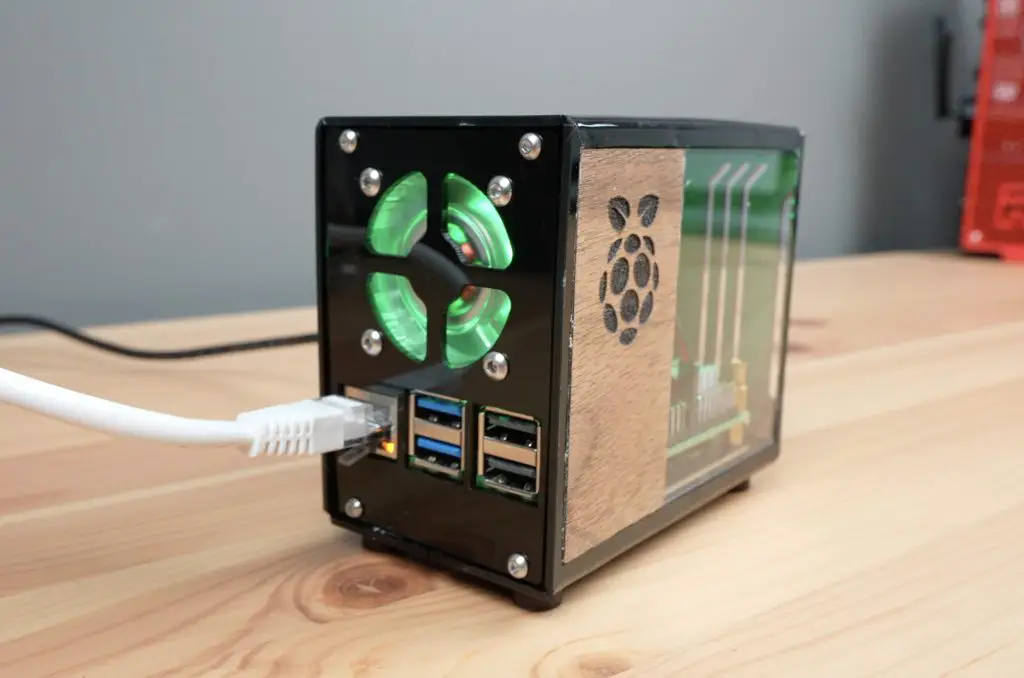
I’ve also added a 40mm fan to the back panel to push air into the case and out of the vents at the front. This is held in place with some M3 button head screws and M3 nuts.
And that’s the case complete, now we just need to install our Pi stack and load our software onto it to turn it into our personal cloud server.
Installing The Pi 5 and Software
I’m using a Pi 5 with a Pimoroni NVMe hat underneath it.
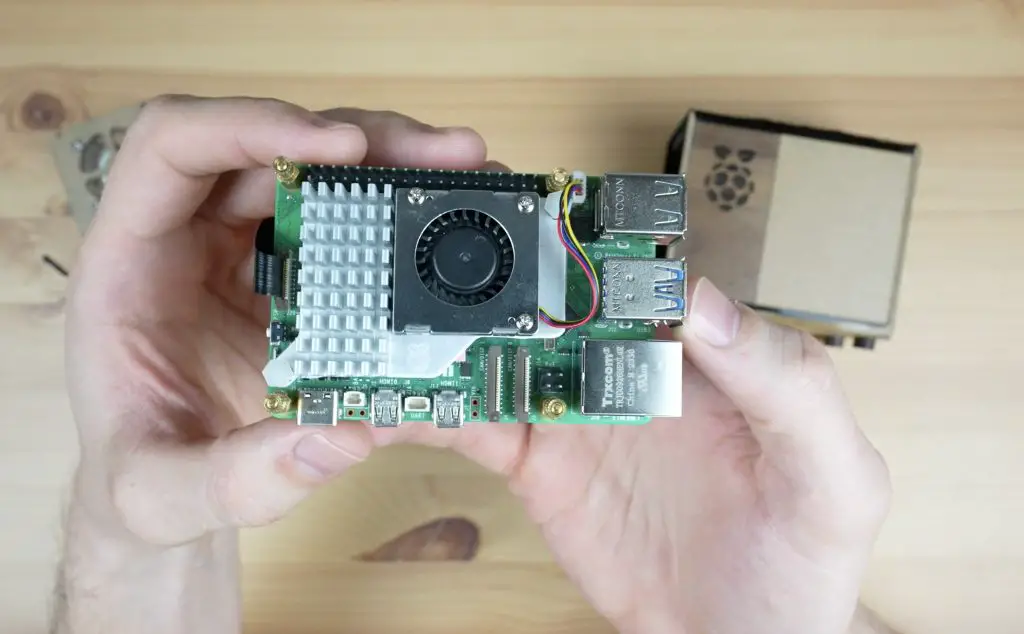
I’ve got a 1TB Lexar NVMe drive plugged into the hat. You can use a larger or smaller drive, or even a duo hat for two drives if you’d like additional storage capacity.
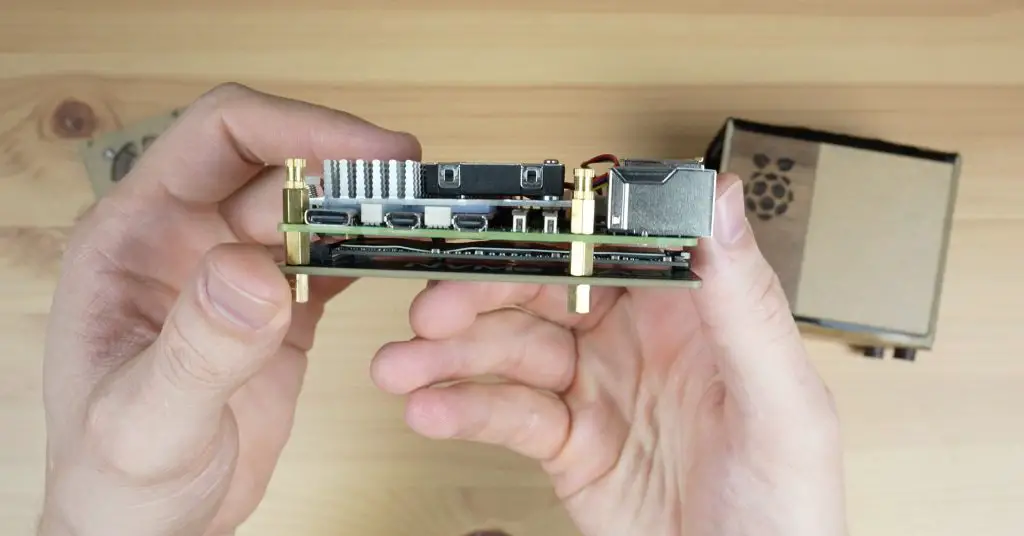
The Pi stack is held in place on some M2.5 brass standoffs that screw into the standoffs supplied with the Pimoroni NVMe base and then some M2.5 button head screws through the bottom of the case hold it in place.
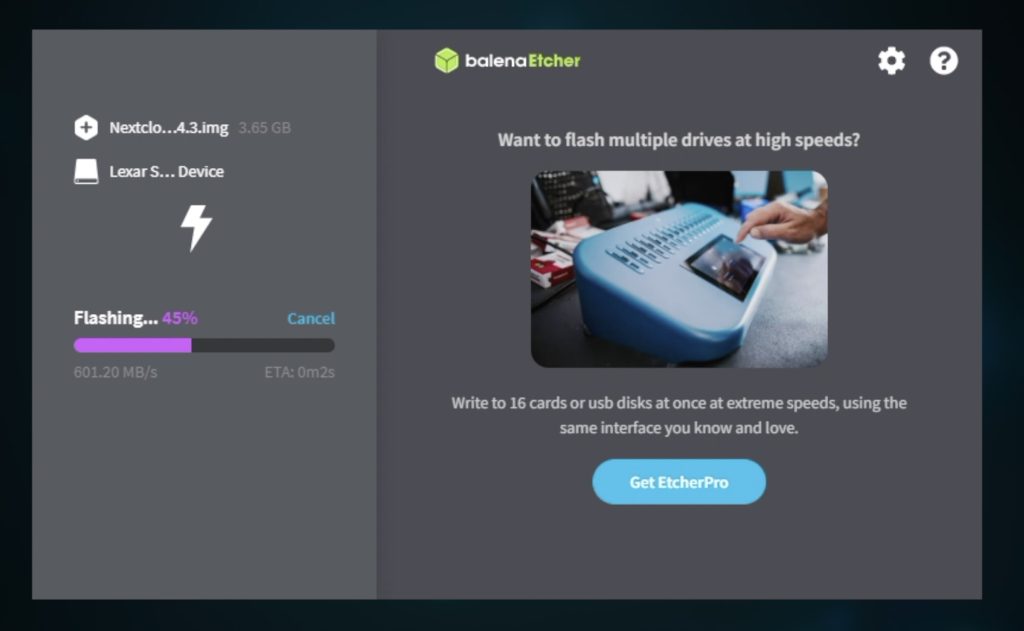
For software, I’m going to be using Nextcloud.
Nextcloud is an open-source software package that takes care of all of the backend work. To install it, we just download the prepared OS image for a Pi 5 from their GitHub repository and then flash it onto our NVMe drive.
We then plug in our network cable and add power to the Pi to boot it up.
Setting Up and Using Nextcloud
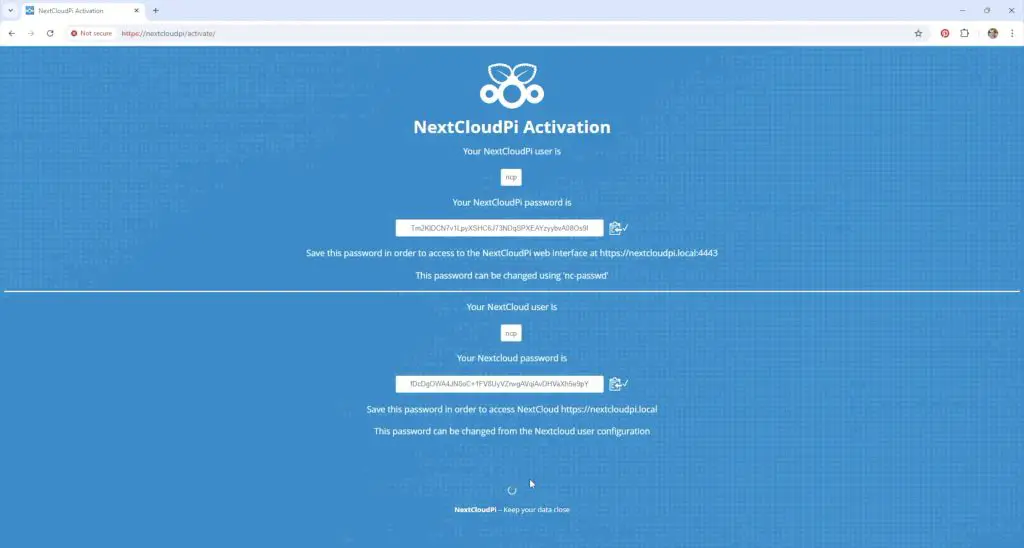
Leave the Pi to run through its first boot and setup process for about 5 minutes and you can then access it by going to https://nextcloudpi or https://nextcloudpi.local on a browser on a computer on the same network as the Pi.
The first time you go to this address you’ll be redirected to an activation page and you’ll need to copy the displayed temporary passwords to log in to your cloud server.
After clicking the Activate button on the bottom of the page, you’ll be prompted to login and then run through a quick setup wizard.
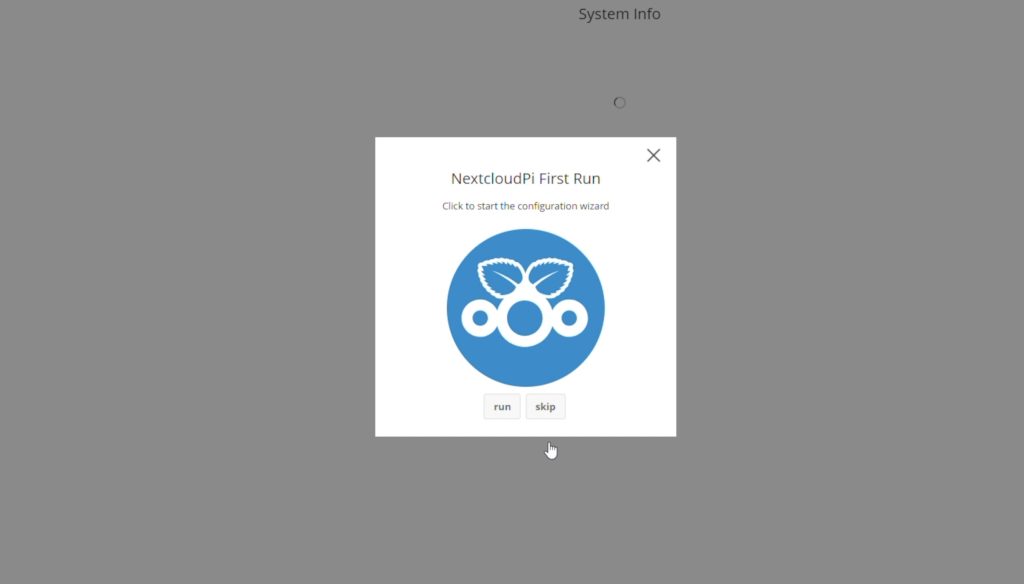
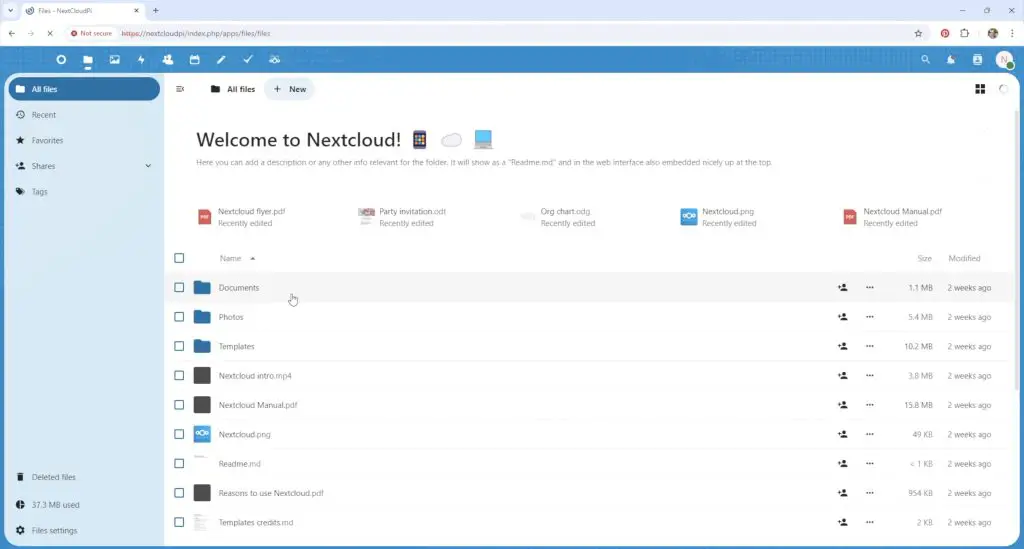
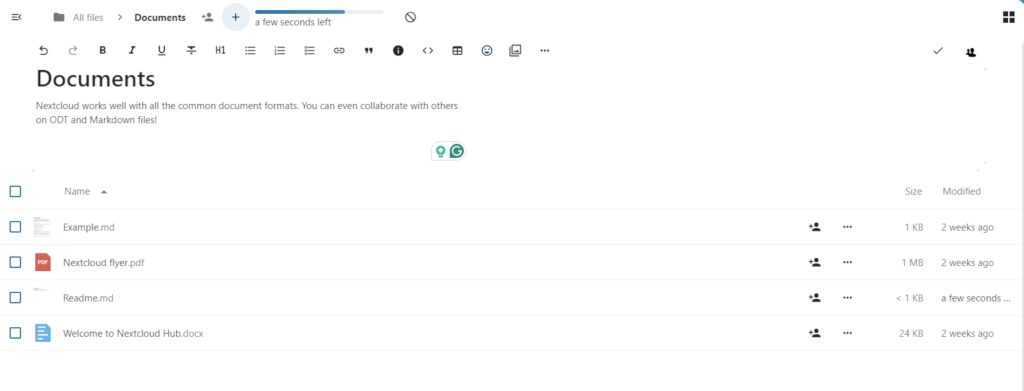
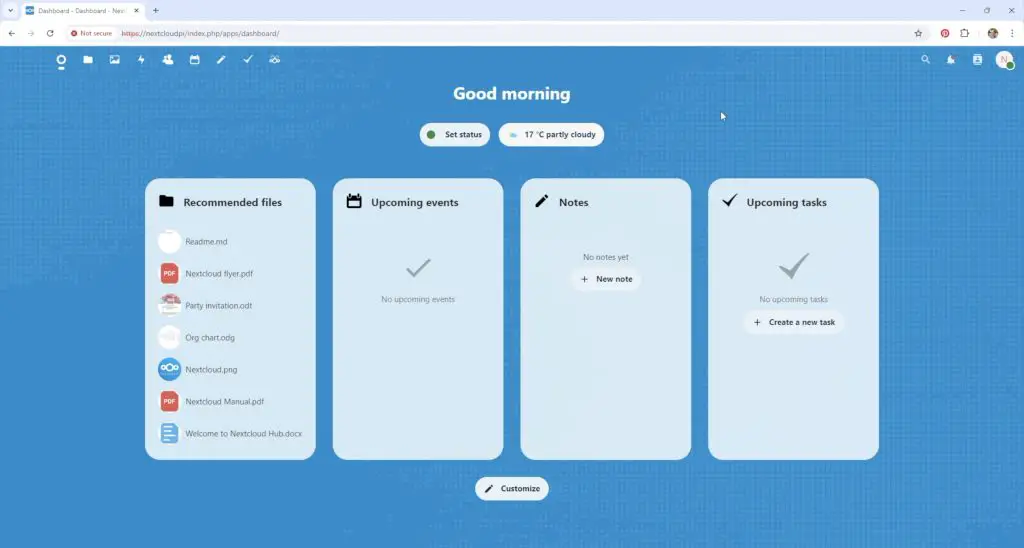
You’ll then land on your Nextcloud dashboard. This looks quite similar to Dropbox, iCloud or Google Drive and is fairly intuitive. You have a root directory which you can add folders to and you can then add and start sharing your files.
Since it’s on your local network and isn’t limited by your internet upload speed, it’s quite fast too. We can copy a 750MB video file to the cloud in under 10 seconds.
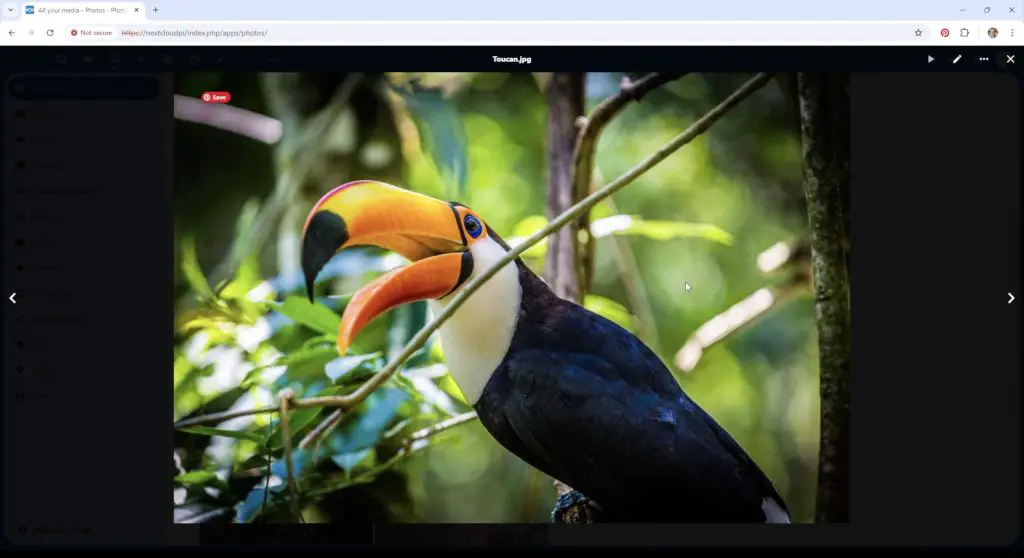
We can set up file or folder sharing with other users, similar to other cloud services. It’s also quick and responsive opening up other media like photos.
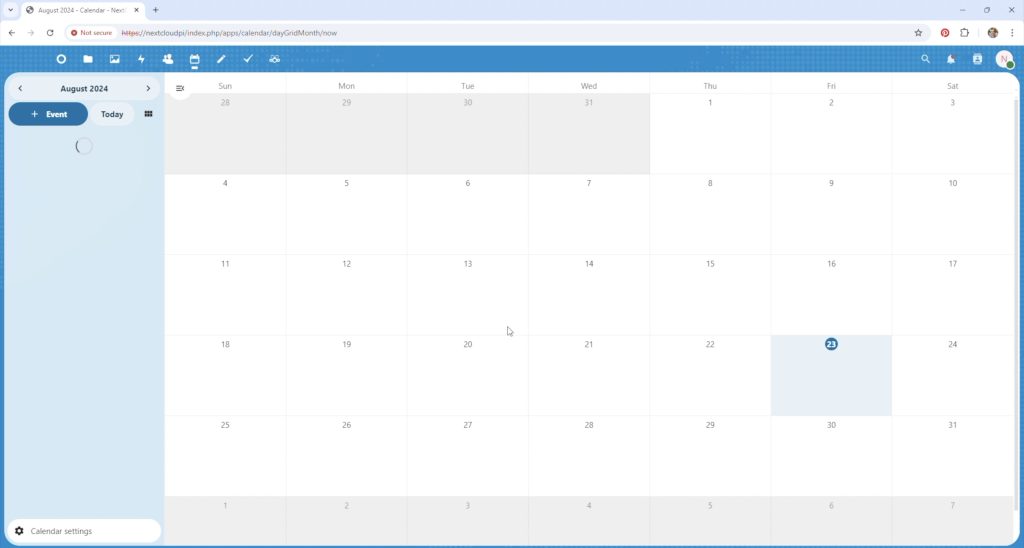
There are a few other features like contacts, a calendar, notes and tasks. So Nextcloud does quite a lot more than just file storage. You can configure how these work and allow them to be shown on your Nextcloud dashboard.
Final Thoughts On The Build and Omtech Polar
And that’s really all there is to it. You’ve now got your own personal cloud storage server running on your home network.
To access your server outside of your home network, you need to set up port forwarding on your router. I’m not going to go into this in this guide as you can open your network up to security issues if you don’t do it correctly, but it is an option so that you’re not limited to using it only within your home.
I’ve currently got mine set up to share documents and photographs with other users on my home network and I have a couple of digital photo frames that make use of the photo library on my server.
Omtech have recently started selling the Polar in Australia, so you can now get free and fast shipping within Australia too. The Polar looks like a well-built machine and Omtech have built up a good brand name, so I’m confident that I’ll be using this laser as my primary one on projects going forward.
I’ve already done some more testing on different materials to get a feel for the correct settings to use.
Let me know what you think of my Nextcloud Pi build and if you have any questions on the Omtech Polar in the comments section below.
I have a Pi4 – would it have enough power to set up a cloud storage similar to how you set yours’s up?
Yes you can do this project with a Pi 4, you’ll just need to use a Pi 4 compatible SSD hat for your storage drive.
Legit, how much to just have you make and sell one of these? I don’t see it on your etsy page but I love this.
You used continuous fan or PWM Fan Control on raspberry pi 5? i cant use PWM Fan Control on pi5
I used a PWM fan on the active cooler and a continuous fan on the case.
Building your own cloud server sounds super cool! I’m curious, how did you manage the wiring inside the custom enclosure? And did you run into any challenges with the laser cutter, like accidentally burning through a piece of acrylic? 😜 Also, how’s the performance of the personal cloud server so far?