Have you got a couple of old pallets lying around or have you seen some stashed at your local grocery store? With some effort, you can easily turn an old pallet or two into stylish furniture and decor for your home. The guys at fix.com have some great ideas for your next upcycling pallet furniture project, have a look at some of their ideas below.
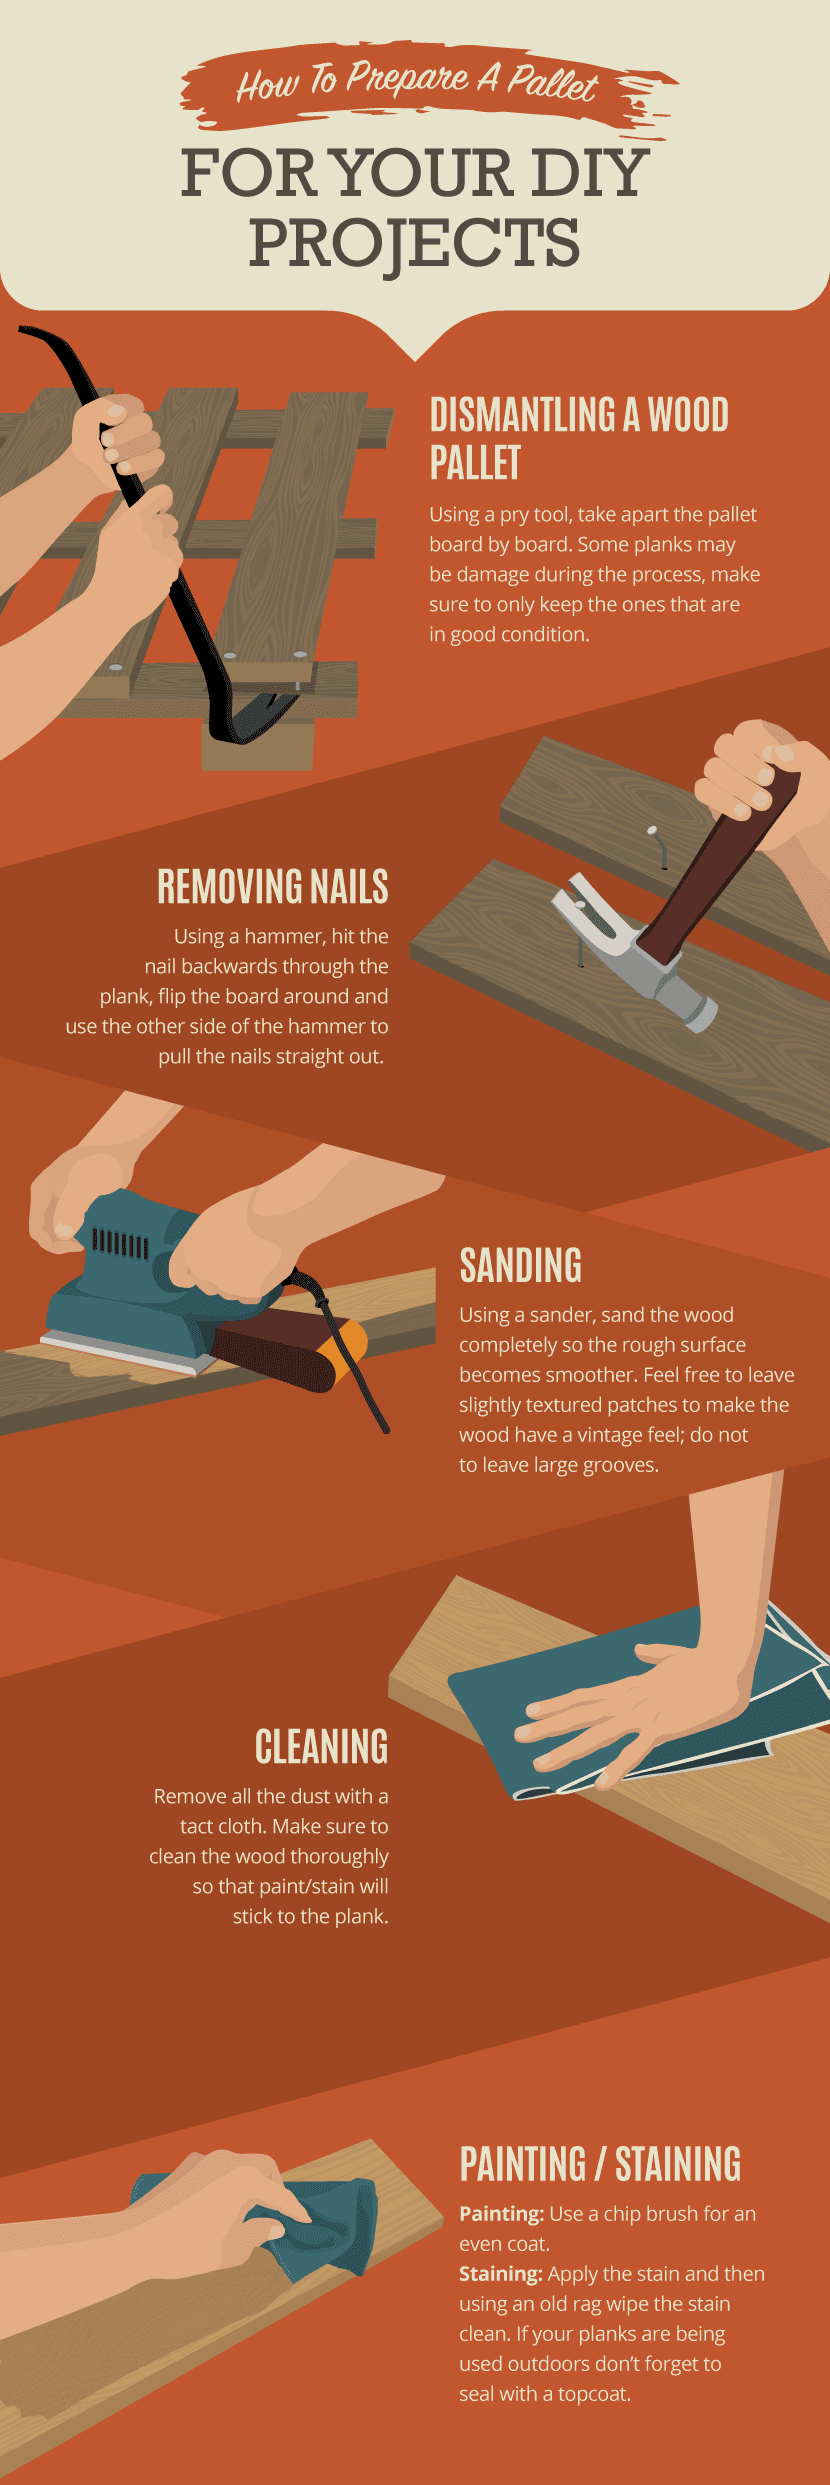
How To Prepare A Pallet For Your DIY Project
Pallets are great, but you have to make sure the wood isn’t chemically treated – especially if you’re building something like a raised vegetable garden bed. Also, ask someone if the pallet was used to haul hazardous materials. If so, stay away. But if it was hauling orange juice, furniture, or otherwise nontoxic items, you’re good to go.
Almost every project you do with pallets will require you to disassemble the pallet, remove nails, and sand down any rough edges. You’ll need a crowbar or pry bar, a hammer, and a power palm sander for these parts. This would also be a good time to give your boards a thorough cleaning with some basic soap-and-water solution.
Projects You Can Build Using Wood Pallets
Build an Awesome Table
You can use pallets to create a whole bunch of different style tables from scratch, or you can use pallet wood to update some sad outdoor furniture.
If you’re building one from the ground up, you’ll probably want to pick up a few extra supplies for the legs and supports and stick to using your pallet wood for the table top. To create your table top, determine the dimensions of your table and cut your boards (if you need to) down to size.
Lay them down on a flat surface and secure them on the underside using two parallel 1” x 3” boards and strong, long wood screws.
For the table legs, you can go industrial chic and use piping from the hardware store, order some retro hairpin legs, or use 4” x 4” wood pieces to create a more traditional X-leg trestle table. Stain or paint the top if desired – just make sure you seal it well if it’s going to be used outdoors.
Create a Cool Rustic-Industrial-Style Desk
This might be one of my favorite ways to re-purpose a pallet, especially if you’re in an urban setting. The good news is if you want to make a cool pallet desk, you don’t have to disassemble the pallet!
First step is to decide on the depth of your desk. The typical depth for a small-space desk is anywhere from 17” to 22” deep. Using a level, draw a line down your pallet at your chosen measurement and then cut straight through both pallet layers with a circular saw.
Using the wood left from the smaller piece, create a wall brace about 4” below your ideal desk height. Secure it to the wall using screws driven into the wall studs.
Next, you’ll want to add legs to the front of your pallet desk. I definitely recommend those cool hairpin legs for this project.
Place the back of your desk over your secured wall support and attach it using wood screws.
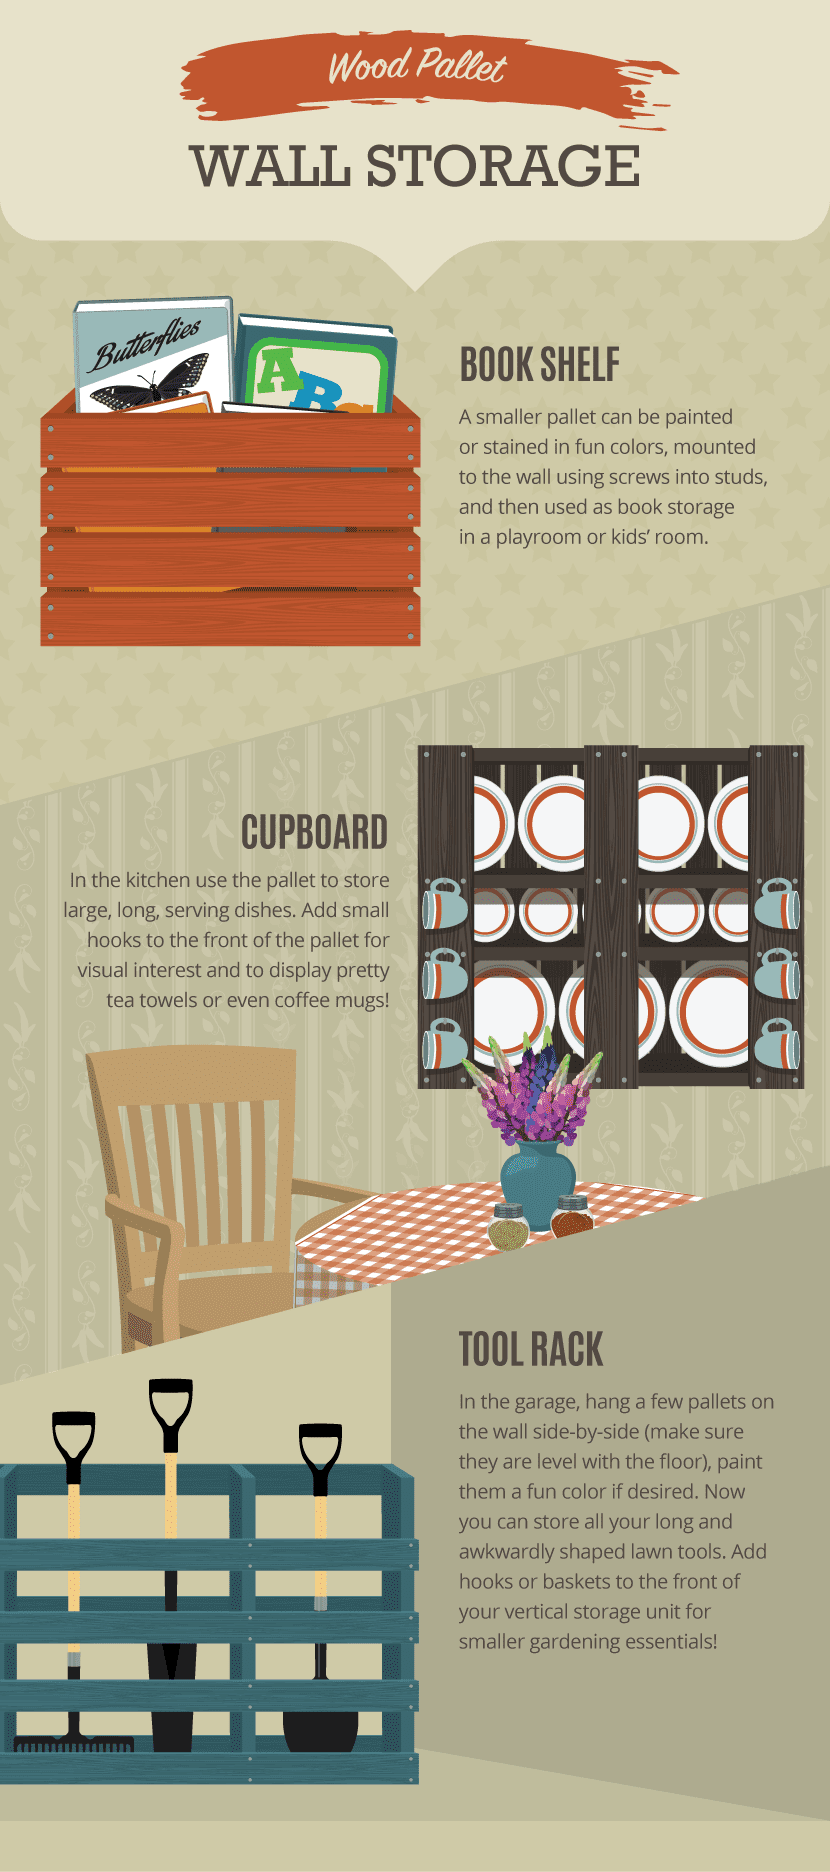
Boost Your Wall Storage
Often, if you tweak a pallet just a tiny bit, it can be used for awesome wall storage in all areas of the home.
A smaller pallet can be painted or stained in fun colors, mounted to the wall using screws into studs, and then used as book storage in a playroom or kids’ room.
Use the same basic principle in the kitchen or dining room but, instead of books, use the pallet to store large or long serving dishes. Add small hooks to the front of the pallet for visual interest and to display pretty tea towels or even coffee mugs.
Now head to the shed or garage! Hang a few pallets on the wall side-by-side and make sure they are level with the floor. Paint them a fun color if desired. Now add all your long and awkward lawn care tools! Rakes, brooms, garden hoes, and more will all stand propped up in your new vertical storage unit. Add hooks or baskets to the front of the pallets for your smaller garden essentials such as spades and gardening gloves.
Amp up Your Foyer With Pallet Bench and Shoe Storage
If you hit the motherlode and find a bevy of free pallets, this might be the right project for you. Just like with the wall desk, you’ll want to first determine the depth you’d like your combination bench-shoe storage cabinet to be. Make sure it doesn’t overtake your whole front-door area, but also ensure that it will be deep enough to sit on comfortably – 18” is probably a nice place to start for depth.
Use a circular saw to cut down your sanded and cleaned pallets to 18”, but do not discard the leftover wood!
This is the stage where you’ll want to paint or stain the pallets your desired color. Once they are dry, place one 18” pallet on top of another and secure with wood screws. Keep stacking and securing your pieces together. Once all your pallet pieces are stacked, cut down the leftover pallet boards to match the depth of your bench and use them to plank the top of your bench.
Stain the top the same color or a different color for added interest! Your shoes will sit in the pallet slats! Add a pillow for comfort and some coat hooks above your bench and you’ll have a stylish, rustic, DIY entryway solution.
Looking for some more creative pallet ideas? Here are another 8 creative pallet projects for you to try out. You could also try making these mini pallets as coasters or gift packaging.
As you can see, there are a ton of ways to use pallets in your home, both indoors and outdoors. Next time you’re out and about, keep your eyes peeled and your creativity dial turned up and you might just find yourself the proud owner of something DIY and fabulous.
Let us know in the comments below if you’re tried any of these or other projects involving upcycling wooden pallets in your home! If you’re looking for more project ideas, have a look at fix.com, they have a great range of projects and home improvement ideas for you to try.


