Beelink got my attention two weeks ago when they reached out about a new mini PC that they were about to launch, the GTi 14 Ultra, which has a built-in full-size PCIe gen 4 x8 slot.
One of the biggest weaknesses in these mini PCs is graphics performance. They typically rely on an integrated GPU, and while some have reasonably powerful integrated graphics, they don’t come close to having a dedicated GPU.
I recently showed a way to get around this by taping into an M.2 port on a PC with an Oculink adaptor. This worked fairly well but was limited by the single PCIe lane and looked like a bit of a hack job. Even in a custom 3D-printed case. So I’m super excited to try out this new PC with a fully accessible PCI slot built in.
Here’s my video review of the GTi 14 Ultra, read on for my written review;
Where To Buy The Beelink GTi 14 Ultra
- Beelink GTi 14 Ultra – Buy Here
Tool & Equipment Used
Unboxing The GTi 14 Ultra
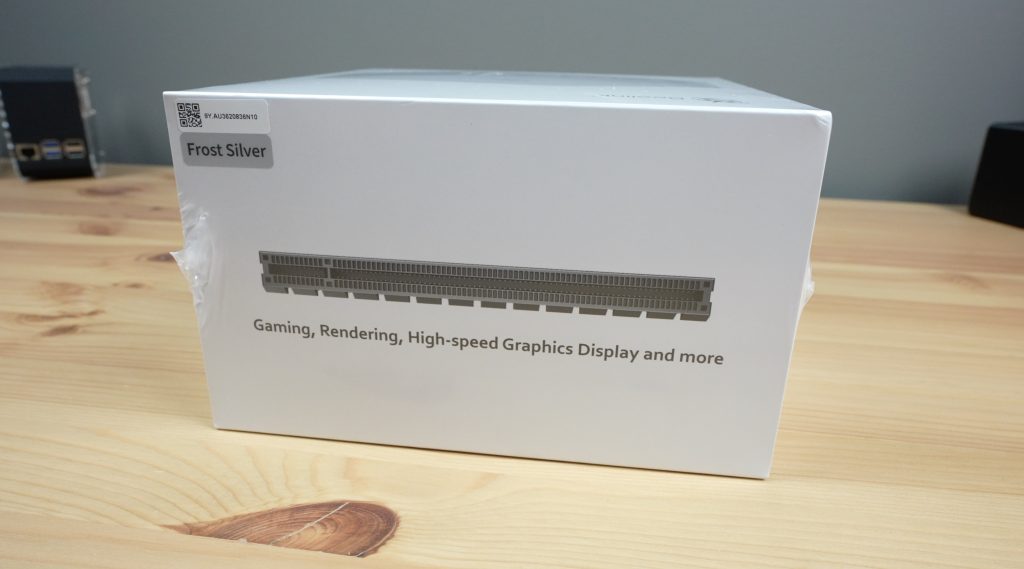
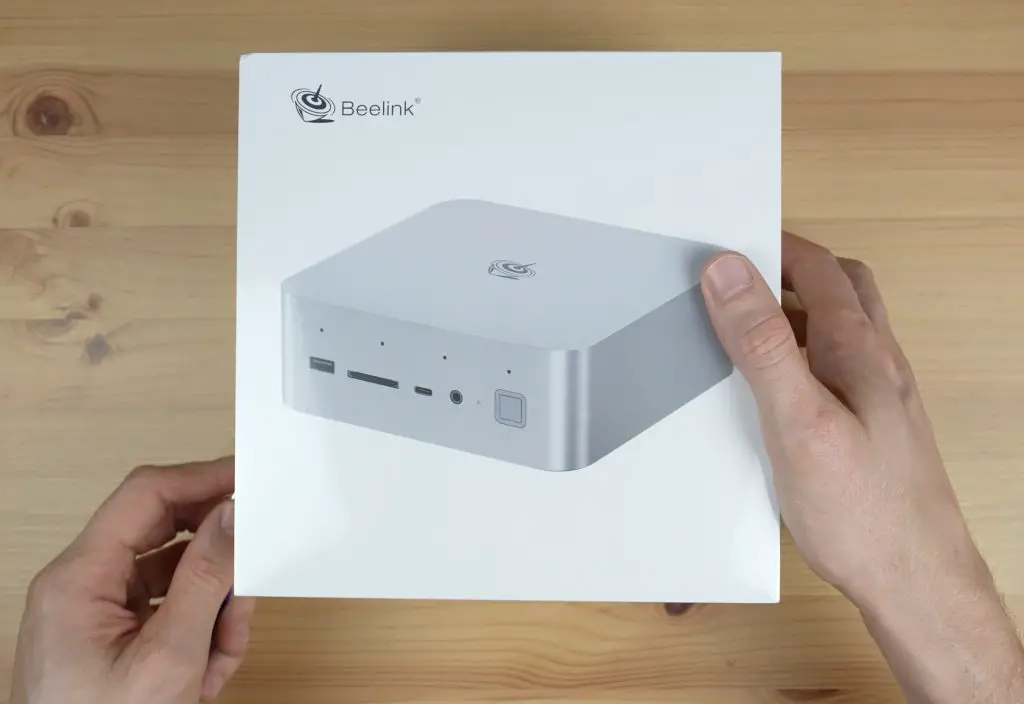
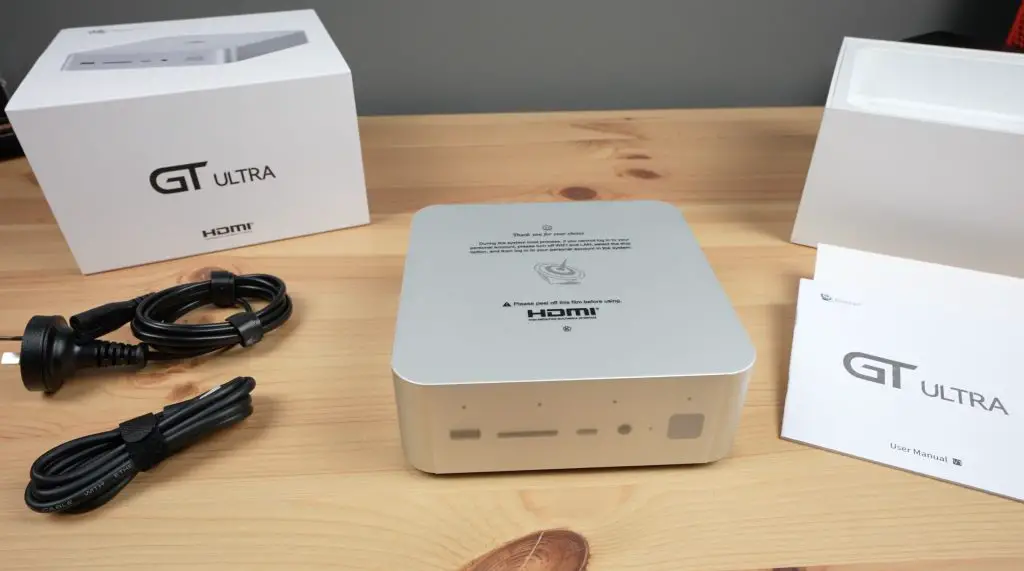
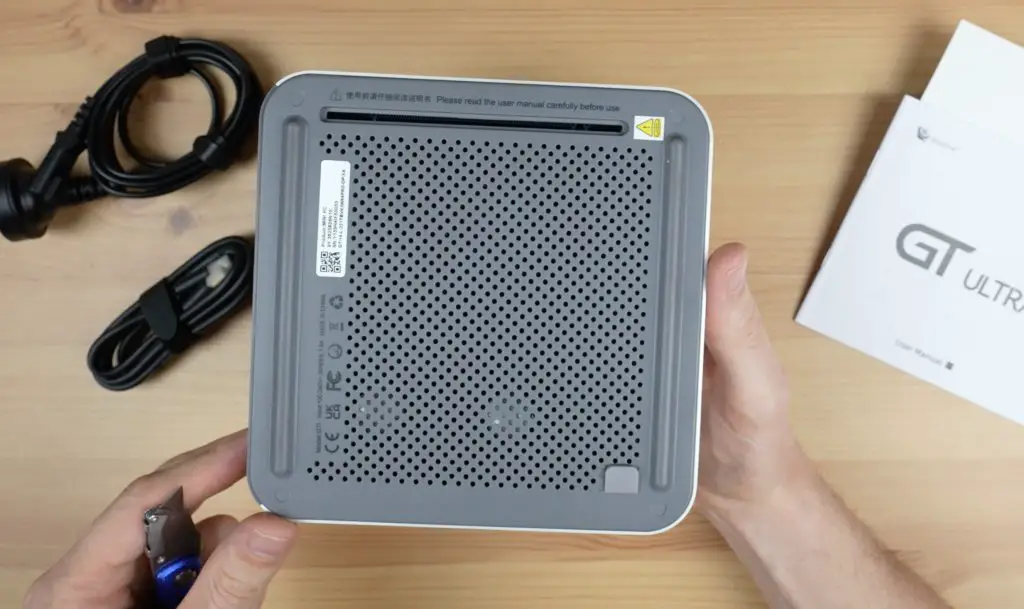
The GTi 14 Ultra comes in a white Beelink branded box with minimal text on it. Let’s get it unboxed and see what is included.
There are two versions of this PC that are going to be available. This is the less powerful Intel Core Ultra 7 version and it also comes in an Intel Core Ultra 9 version.
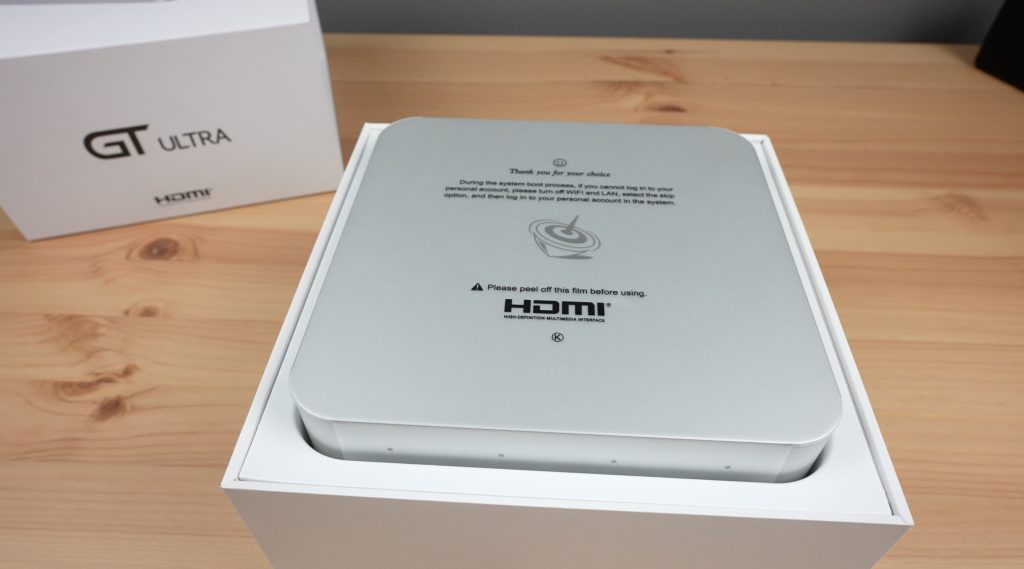
Removing the lid, we’ve got the GTi 14. It’s aluminium housing is protected by a matt plastic film.
Underneath the computer, we’ve got two cables. It looks like it’s got the power supply integrated into the PC enclosure, since we’re only provided with a power lead. This is a bit different to typical Mini PC designs which usually relay on a 19V laptop-style power supply to power them.
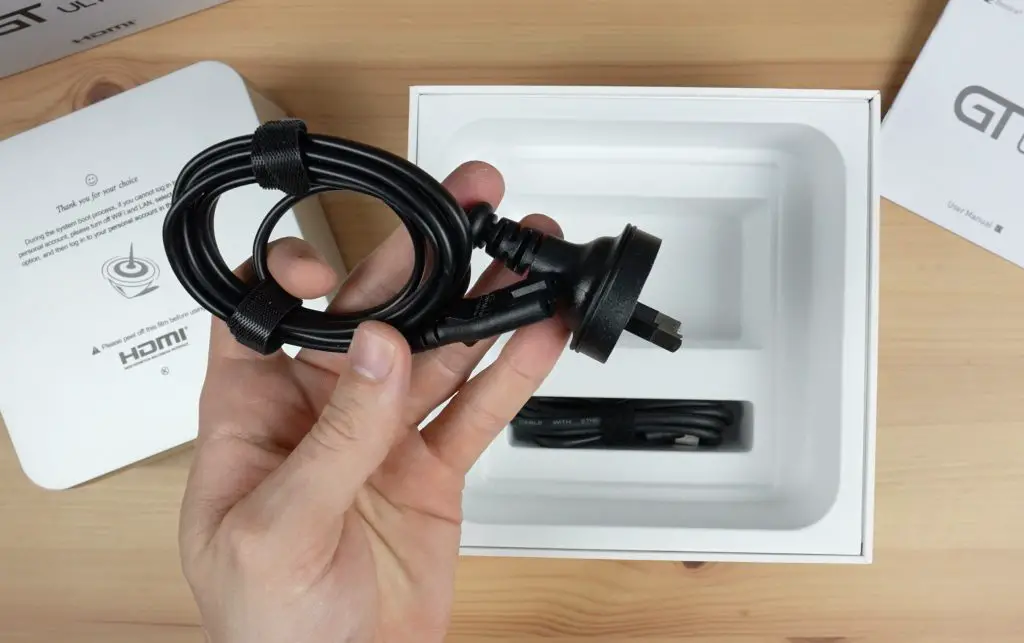
So included in the box is the mini PC, a power cable, an HDMI cable and a short user manual.
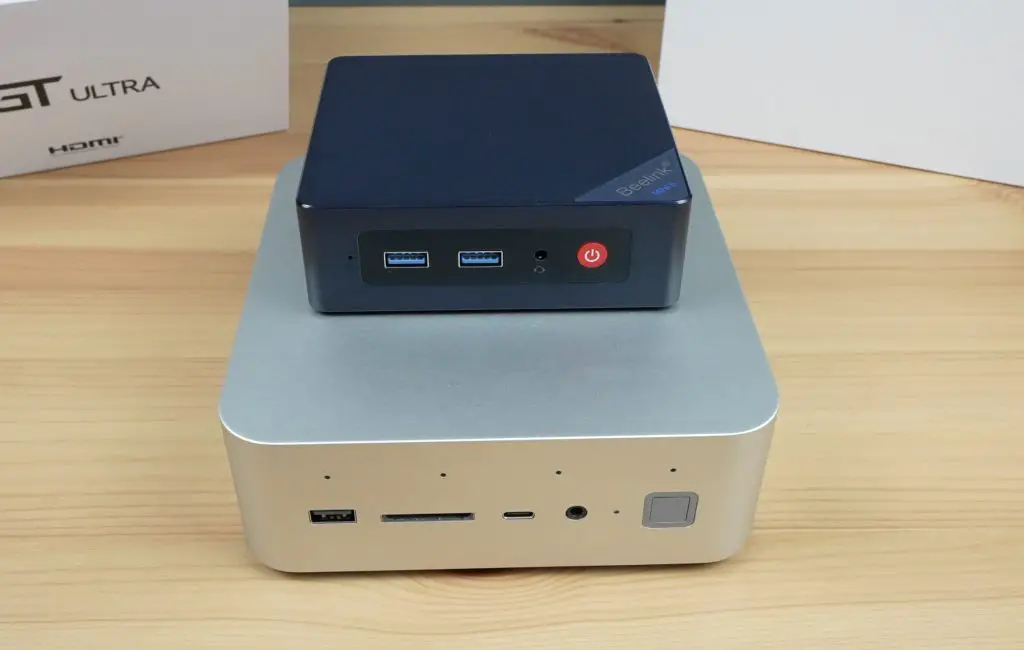
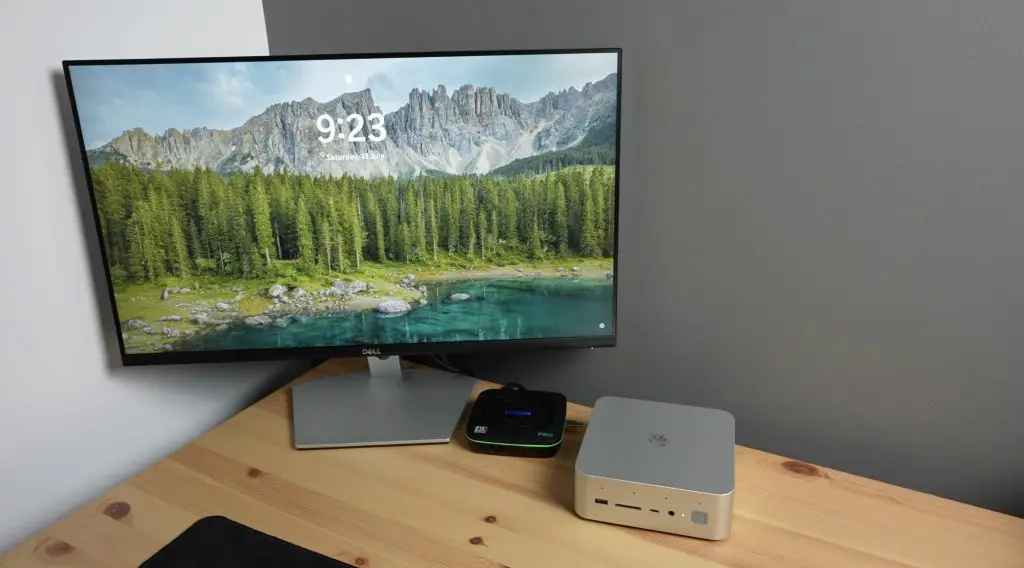
The GTi 14 Ultra is a fair bit larger than most mini PCs I’ve tried previously, but that’s due to the integrated power supply, the full size PCIe port and the need for better cooling on the more powerful CPU.
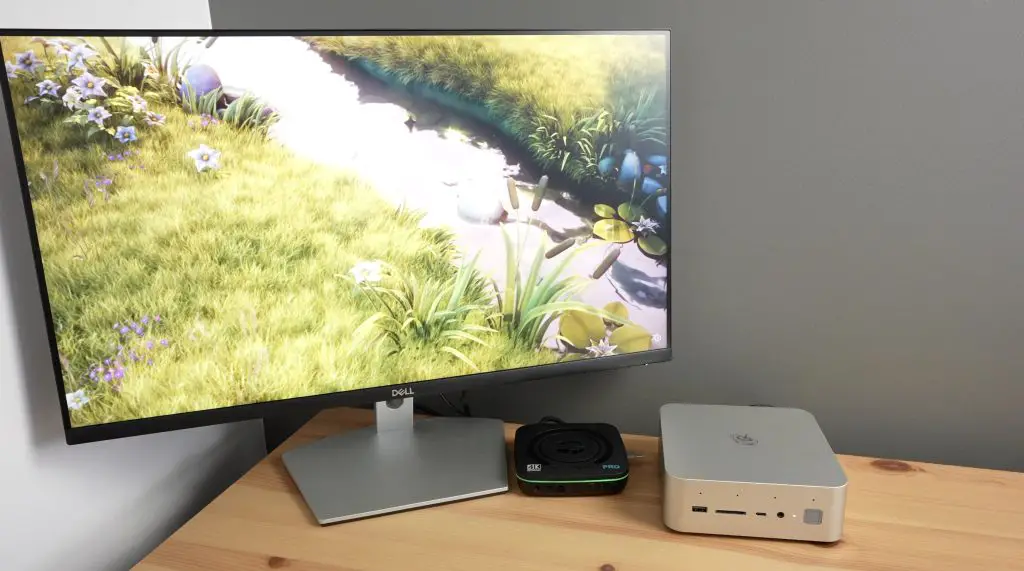
You definitely get Mac Mini vibes from it.
Another thing worth mentioning is that this mini PC doesn’t come with a VESA mount to mount it onto the back of a monitor. It’s designed to be placed onto a desk.
GTi 14 Ultra’s Specifications and Interfaces
The GTi 14 has an Intel Ultra 7 155H Processor, which is essentially a CPU, GPU and NPU all on a single chip. This is a mobile processor with 24MB of cache and 16 processor cores. It’s got 6 performance cores that can run at up to 4.8Ghz and 8 efficiency cores that can run at up to 3.8Ghz.
It has an integrated Intel Arc GPU with a maximum frequency of 2.25GHz and this supports hardware-based ray tracing, so we should be able to run some games on it to try that out.
It’s got 32GB of DDR5 RAM running at 5600MHz and a 1TB NVMe SSD.
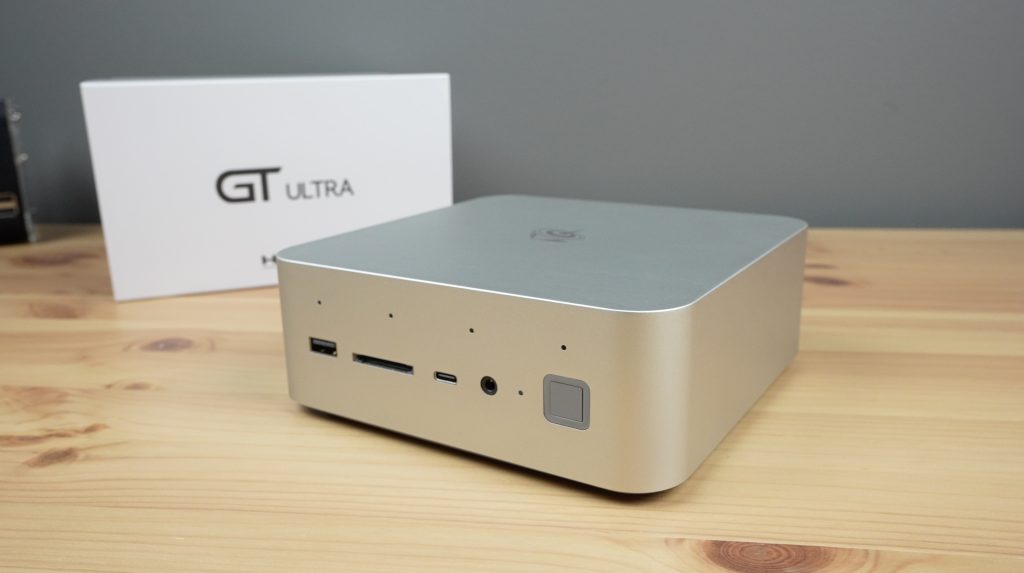
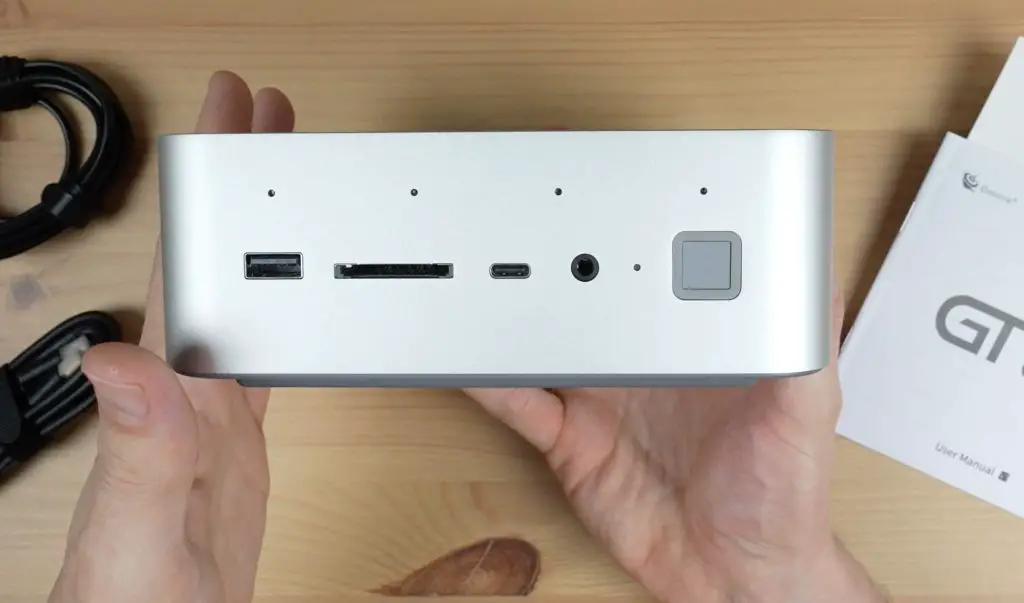
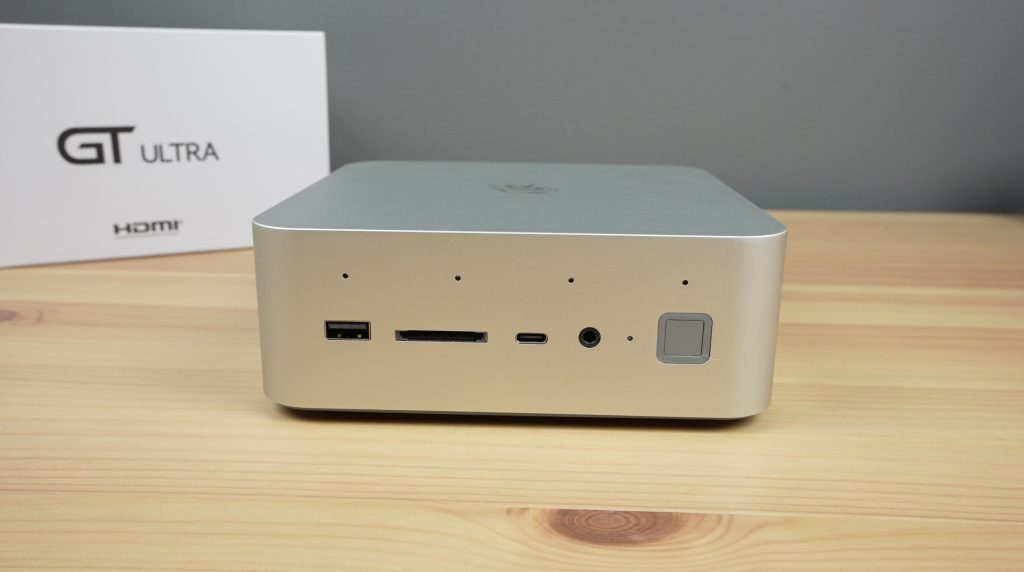
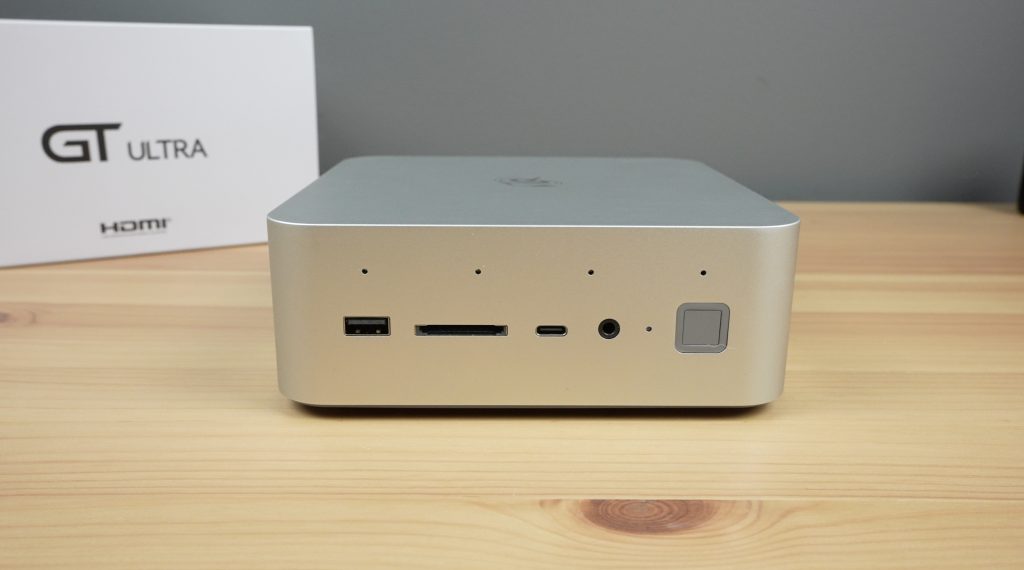
In terms of IO, on the front, we’ve got a USB 3.2 port, a full-size SD card slot, a USB C port, a 3.5mm audio jack, a power indicator LED and a power button. The power button also has an integrated fingerprint sensor on it. The four holes along the top are for a microphone array suited to voice recognition.
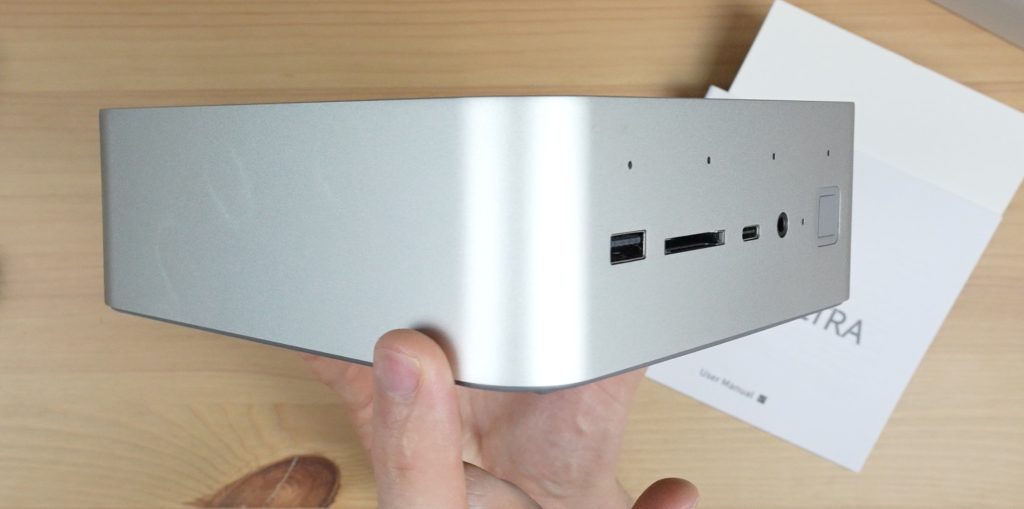
The two sides have nothing on them, they’re just bare aluminium.
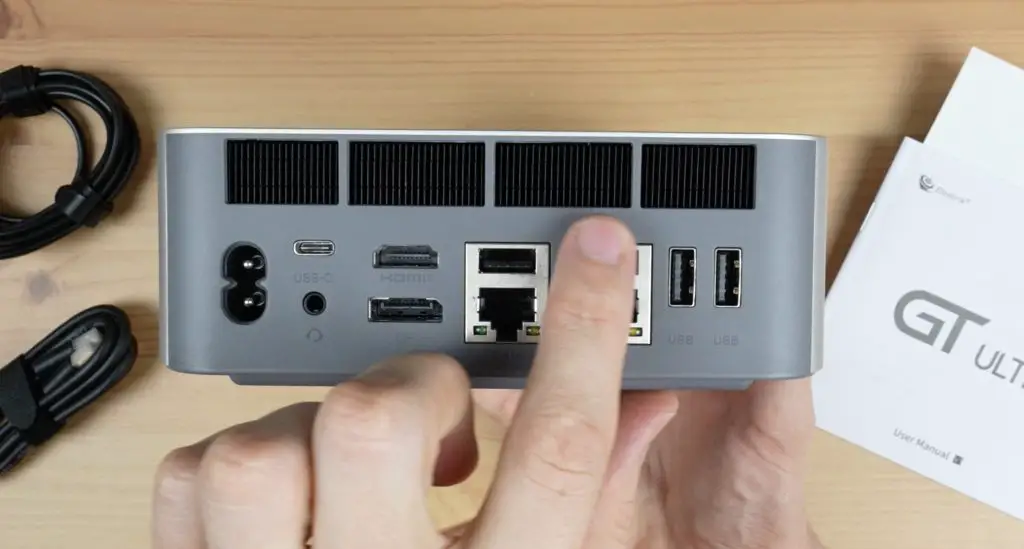
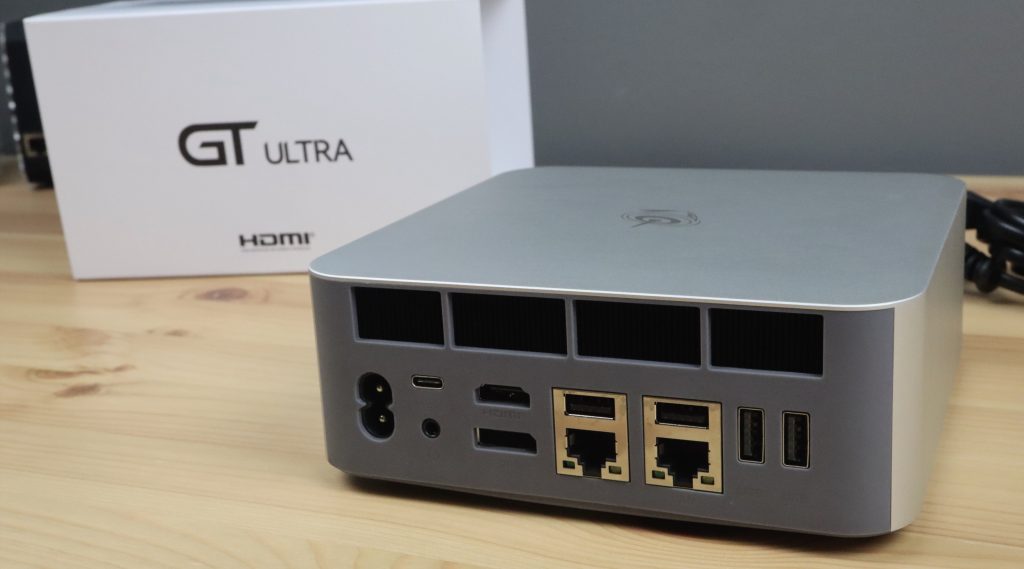
On the back, we’ve got our AC input, another USB C port (this one is a Thunderbolt 4 port), another 3.5mm audio jack, an HDMI port that can do 4K 60Hz, a DisplayPort that can do 4K 144Hz, two more USB 3.2 ports above two 2.5G Ethernet ports, and another two USB 3.2 ports alongside them.
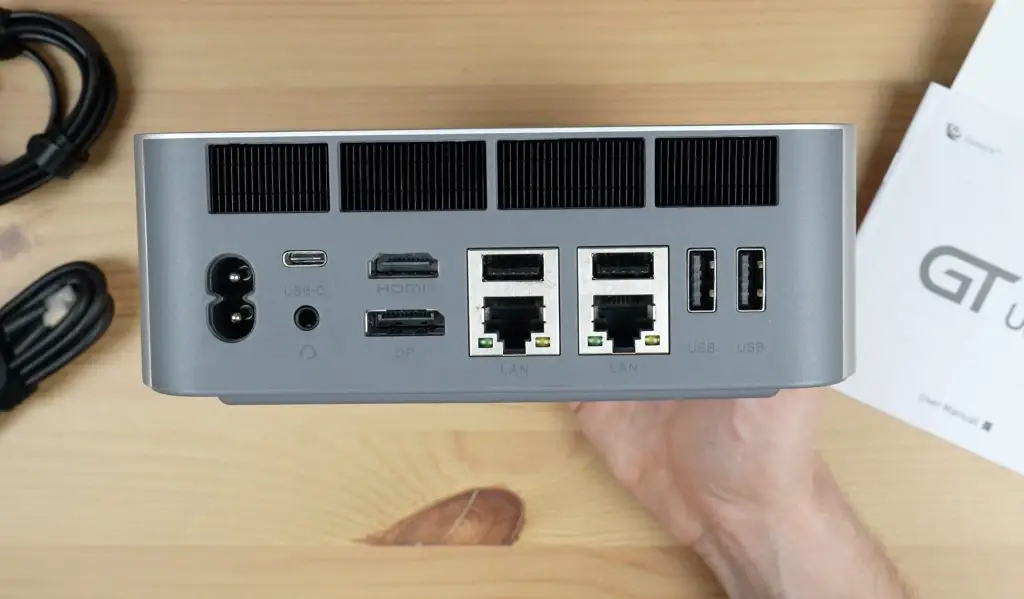
In addition to the 2.5G Ethernet ports, it’s also got WiFi 7 and Bluetooth 5.4.
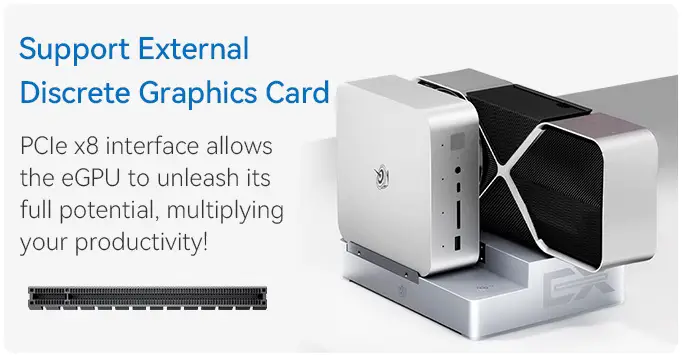
The last port, and the one I’m most excited to try out, is the PCIe gen 4 x8 slot, which is accessible through the bottom of the PC under a thin rubber cover.

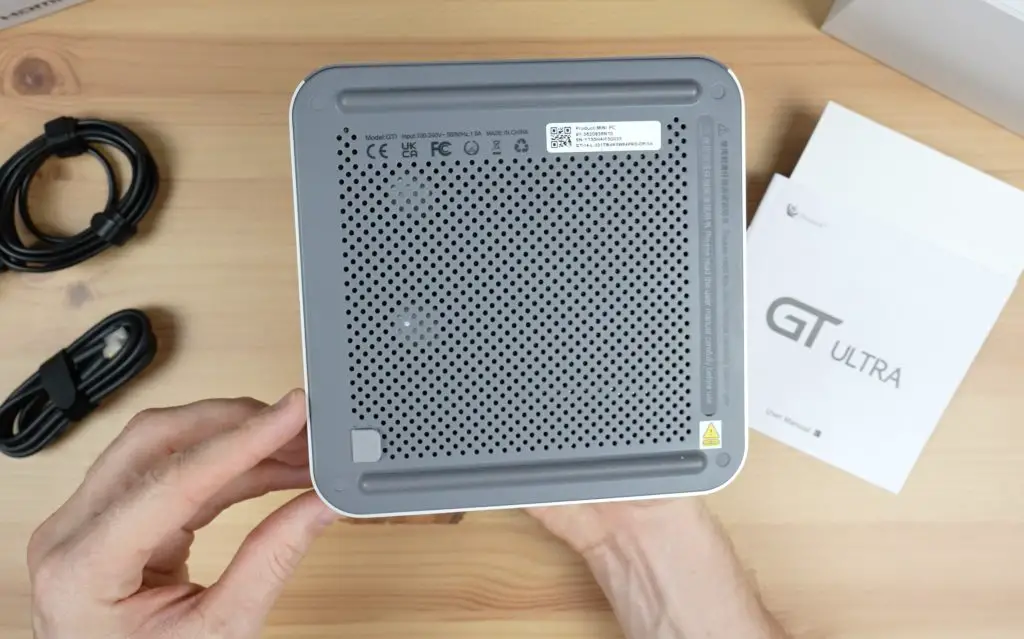
Cooling is achieved by drawing air in through the mesh on the bottom and then exhausting it through these vents at the back.
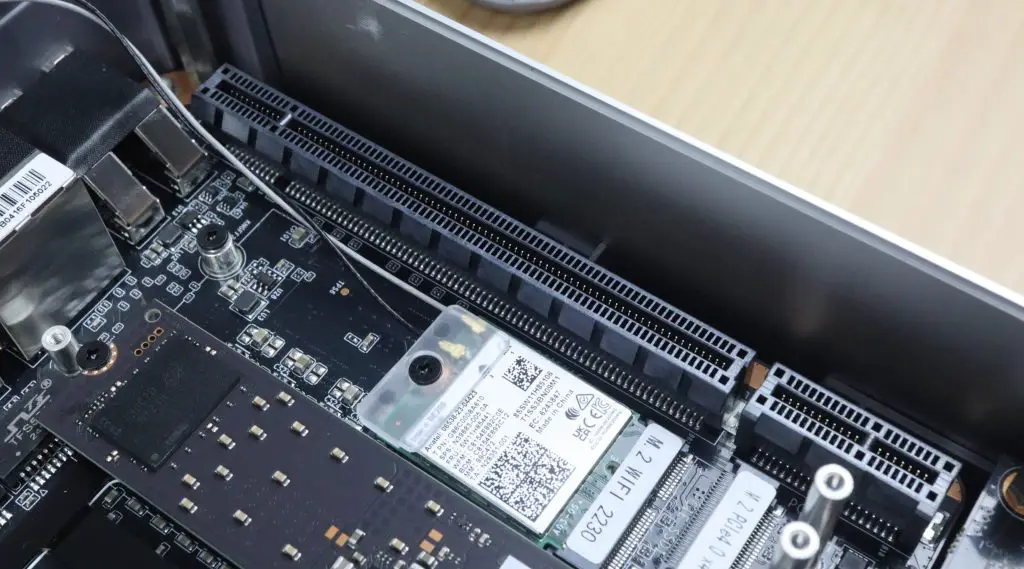
Taking A Look Inside The GTi 14 Ultra
Next, let’s open it up and take a look inside. Four screws hold the bottom cover in place. With those removed, we can see two integrated speakers and a dust filter to protect the components.
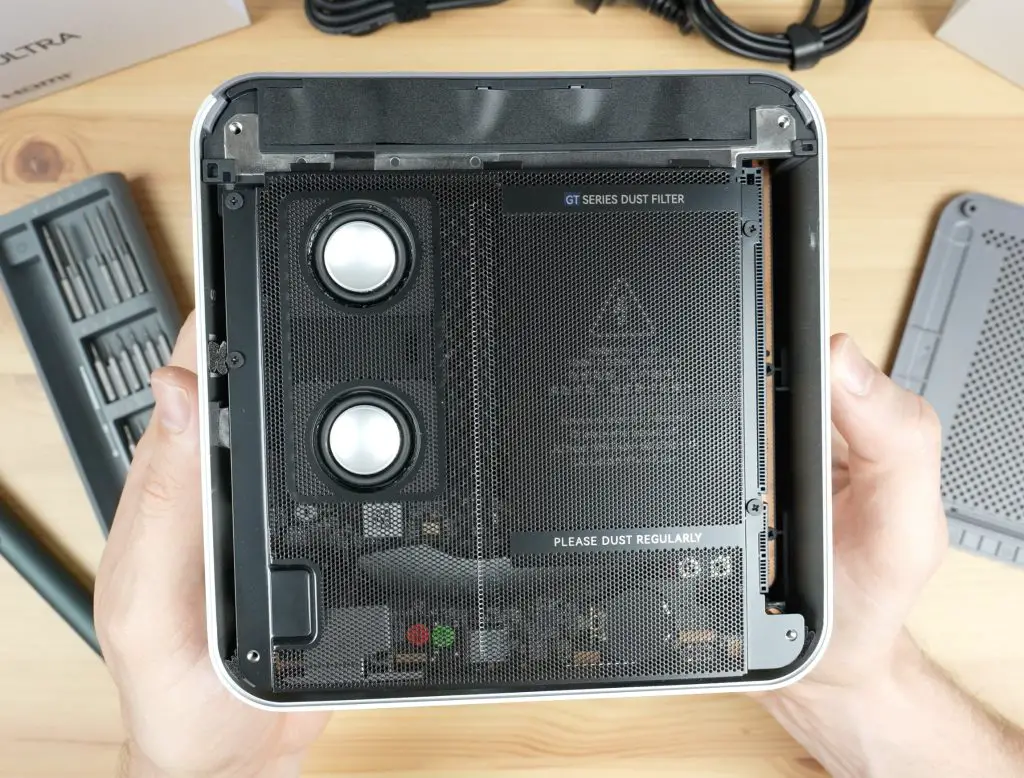
Under the filter is the speaker assembly and our power supply. These make it a bit more difficult to get to the RAM and SSD, but I’m going to go ahead and remove them so we can get a good look at them.
If you try this yourself, you need to remove the speaker assembly first. Once that has been removed, then remove the power supply. This is quite an interesting design. It gets AC power from the port at the back and then feeds 19V DC into the motherboard through these two standoffs. Lastly, remove the cover plate underneath them and then you’re in.
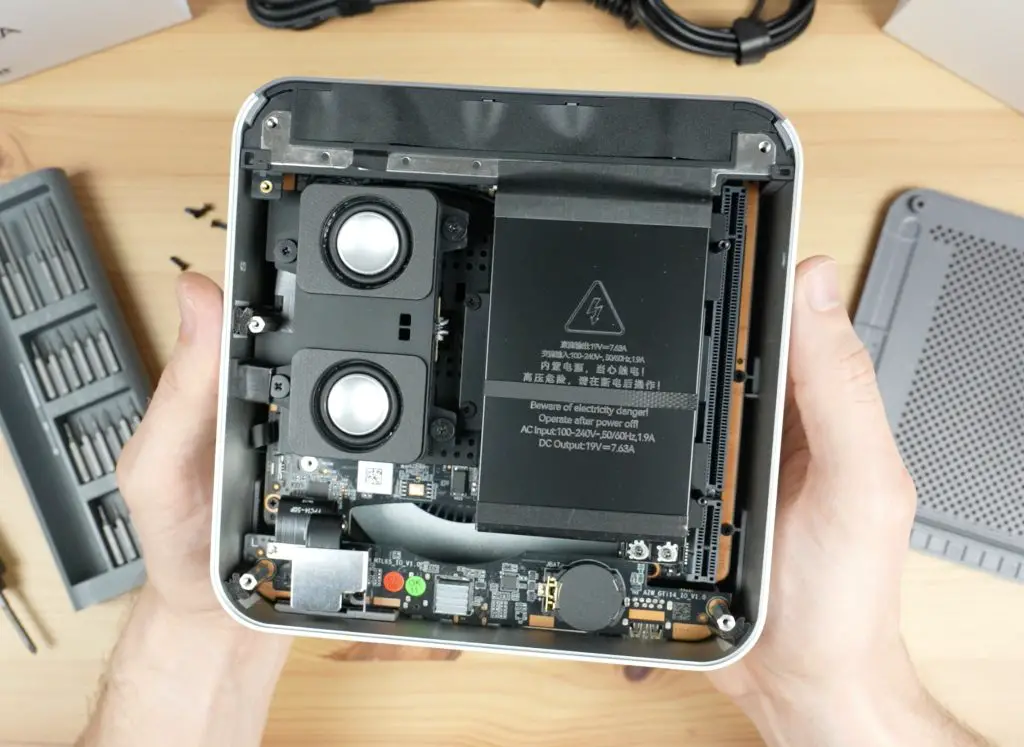
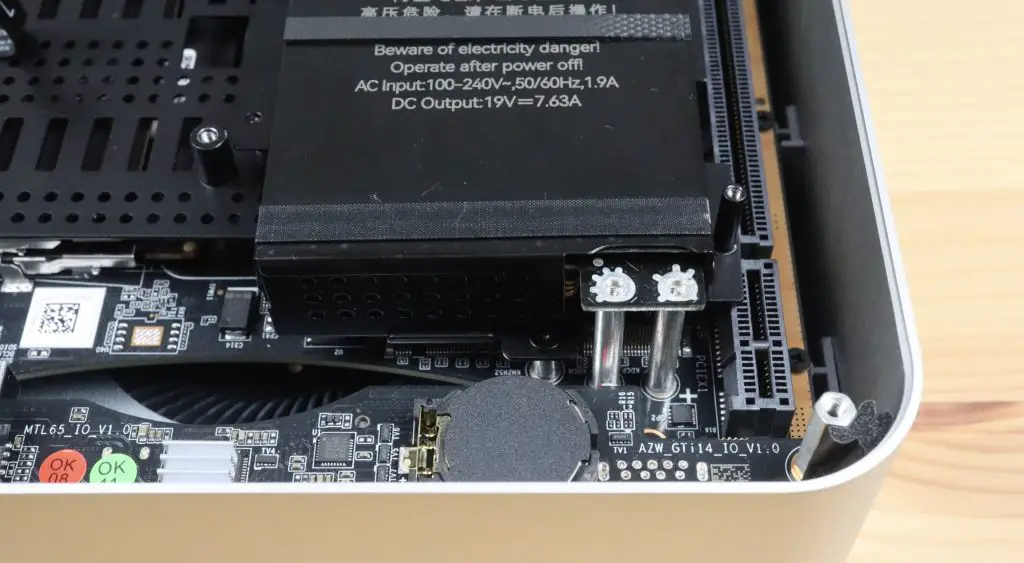
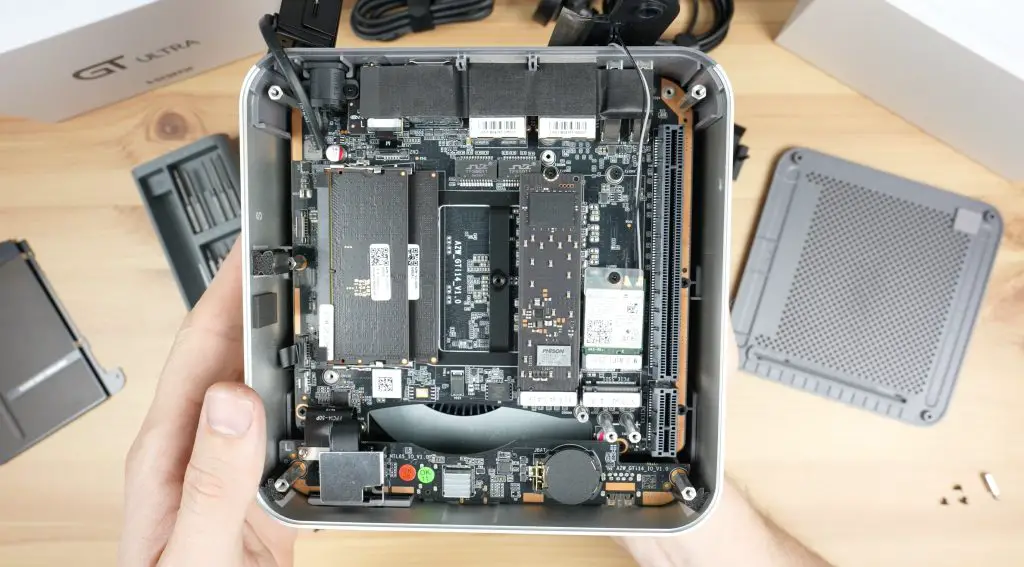
Then we can see our RAM and storage. The RAM is in a dual-channel configuration and is upgradable to a maximum of 96GB. There is also a second slot to add another M.2 NVMe storage drive. Alongside that is a removable M.2 WiFi adaptor and then our PCIe port. It looks like we’ve got a x8 and a x1 slot alongside each other.
First Boot and Benchmarking
Next, let’s close up the bottom cover and try boot it up. The GTi 14 Ultra comes with a clean install of Windows 11 Pro on it. Once set up, you can log in using the fingerprint sensor on the front, which is impressively fast.
I’ve had a look through the software and there doesn’t seem to be any preinstalled bloatware or spyware. You need to be careful buying mini PCs from Amazon or Aliexpress as they’re often filled with nefarious software. Beelink are a reputable brand and have been around for a while so they’re a safe bet.
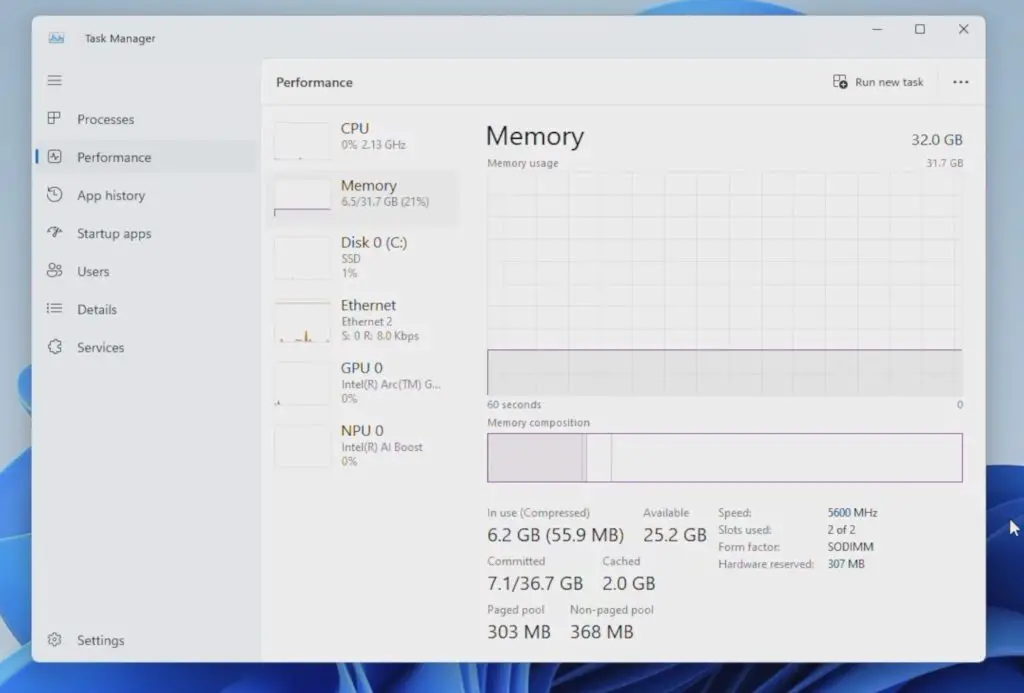
Opening up the performance monitor we can see our CPU is an Intel Core Ultra 7 and it’s running at a base speed of 3GHz. We’ve got our 32GB of RAM running at 5600Mhz and our 1TB storage drive shows up as well. Our GPU is an Intel Arc and it’s sharing 16Gb of RAM.

Next, we’ll run two benchmarks on it. The first is Geekbench to test CPU and GPU performance.
The CPU benchmark took 4:30 minutes to complete and the fan was surprisingly quiet throughout the benchmark. You could hear it running, but it’s nowhere near as loud as some other mini PCs I’ve tested. We get a single core score of 2,270 and a multicore score of 11,834. So single core scores are fairly average, but the multicore score is good.
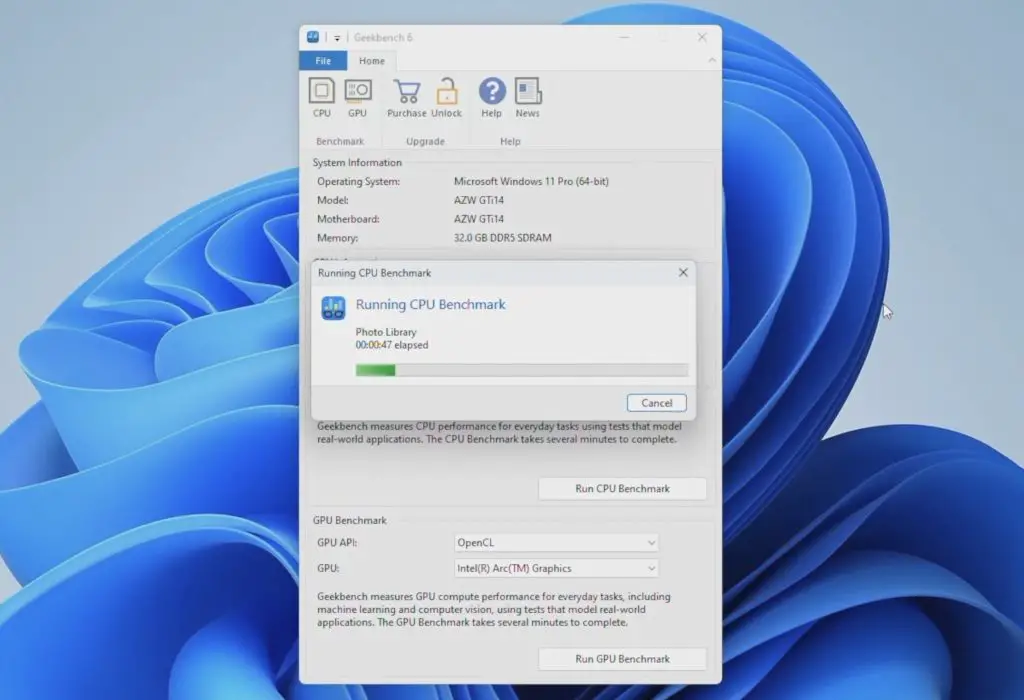

The GPU benchmark took just under 2 minutes and we got a score of 37,460. This is very good for an integrated GPU.
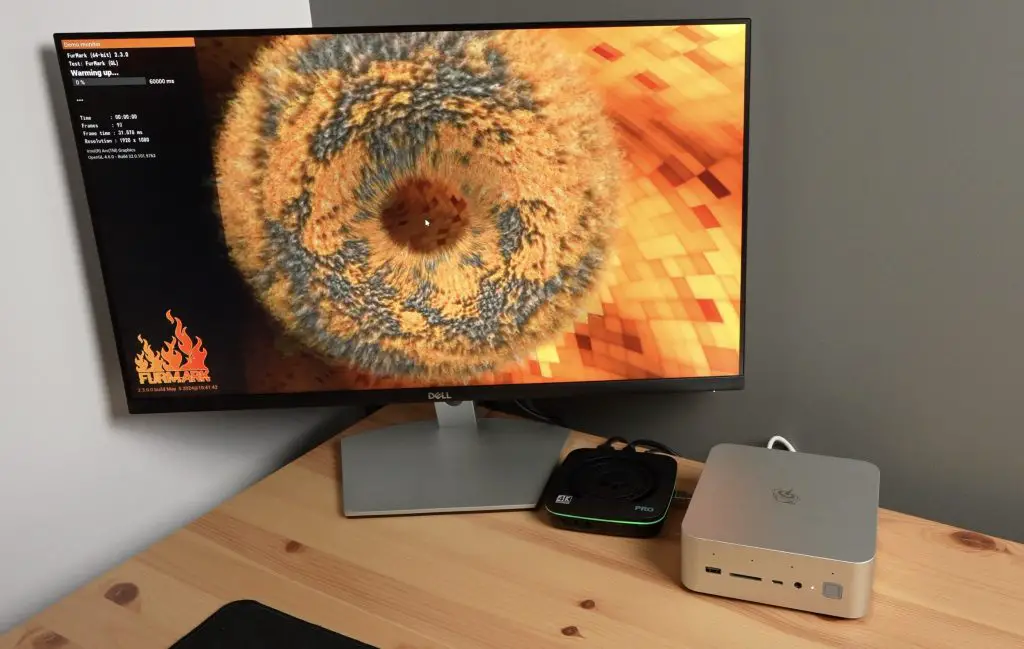
Next, let’s run Furmark to test the computer’s GPU and thermals. Like with the Geekbench benchmark, the fan came on almost immediately but wasn’t all that loud for the duration of the test.
On completion, we get a score of 1,920. Unfortunately, the GPU temperature was unable to be recorded.
Gaming On The Stock GTi 14 Ultra
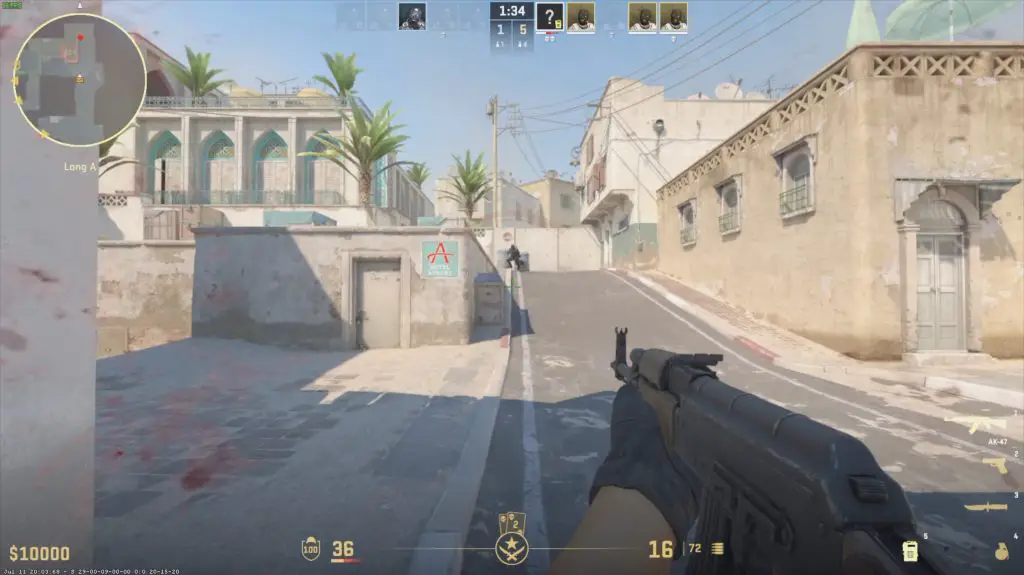
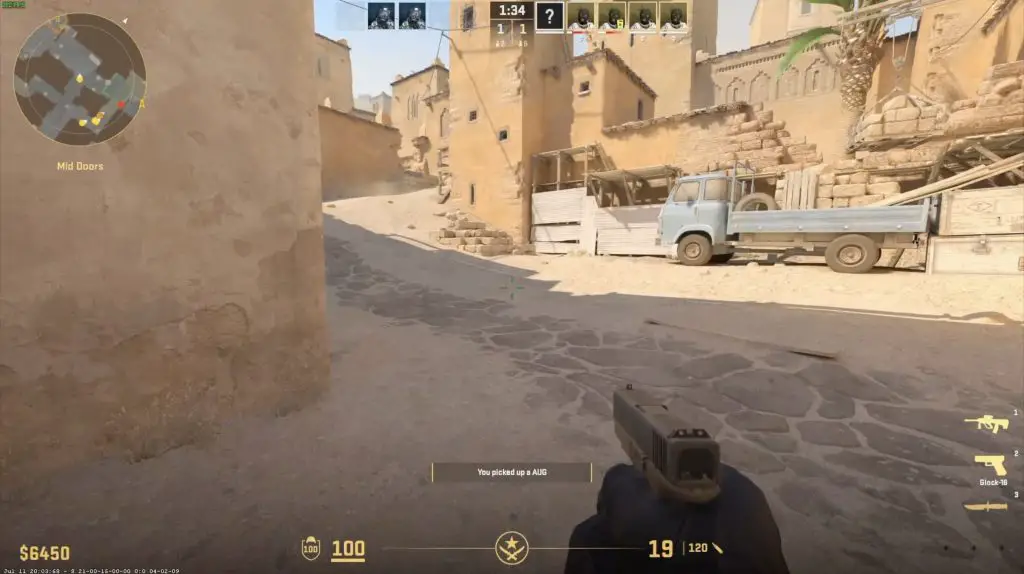
Now that we’ve run some benchmarks, let’s try running some games on it. We’ll start with Counterstrike 2.
It was handling the Home Screen pretty well so I set the graphics settings to Very High. In game, we get around 50-60fps, which is very playable. This is very good for a PC without a dedicated GPU and all settings on Very High. We’ll see how it compares when we add a GPU through the PCIe slot later.
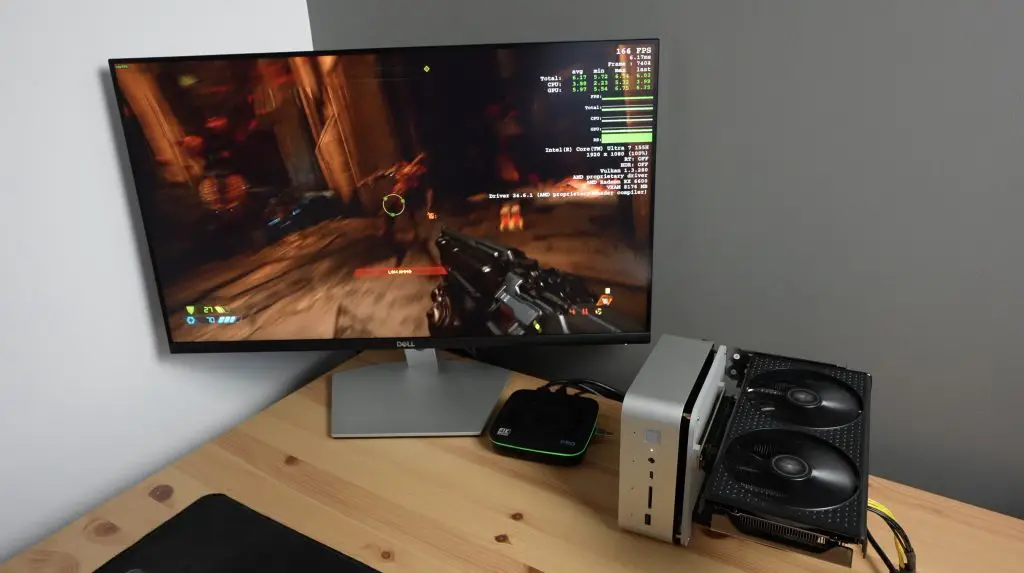
Next, I tried running Doom Eternal. It had a bit of a freak-out when starting the game but it ran well after fixing the aspect ratio and setting the resolution back to 1080P.
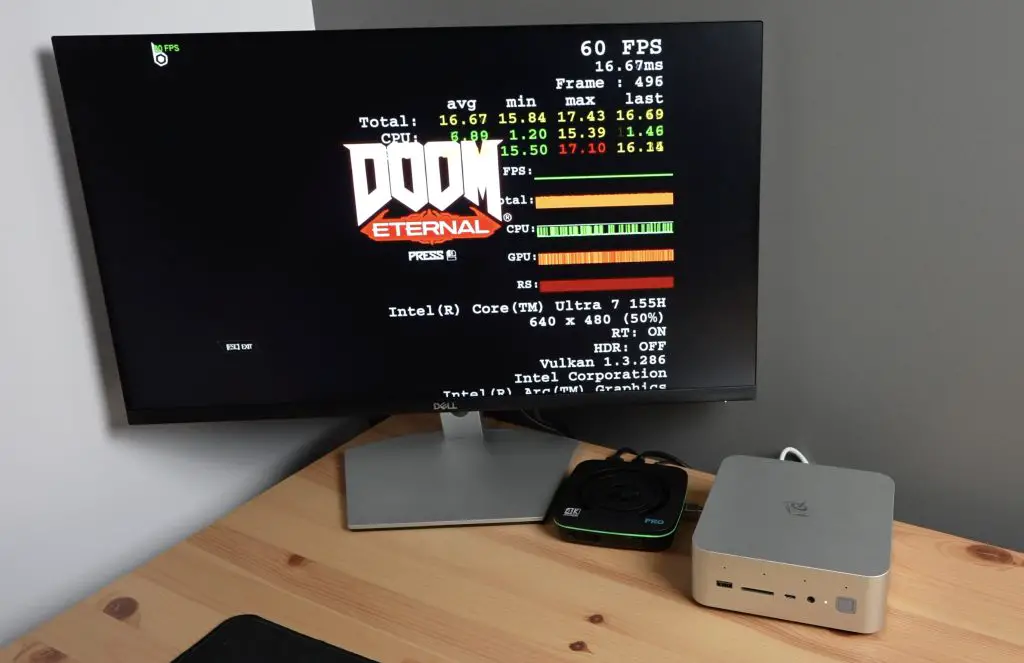
I had all graphics settings on Ultra Nightmare and Ray Tracing turned off. In game, I was getting a little over 60fps fairly consistently, which is also really good.
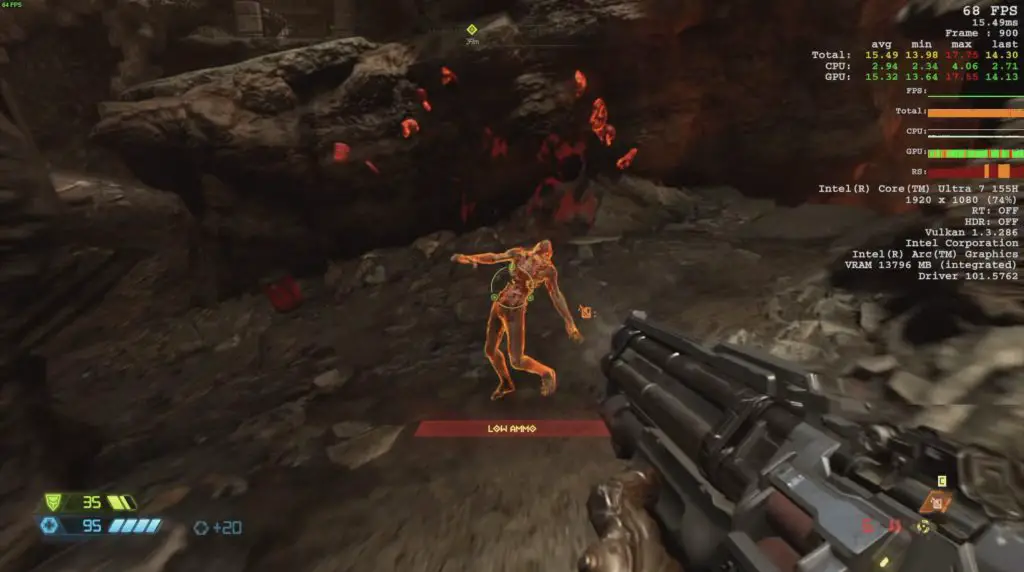
Turning ray tracing on didn’t make a significant difference to performance, we lost about 10fps.
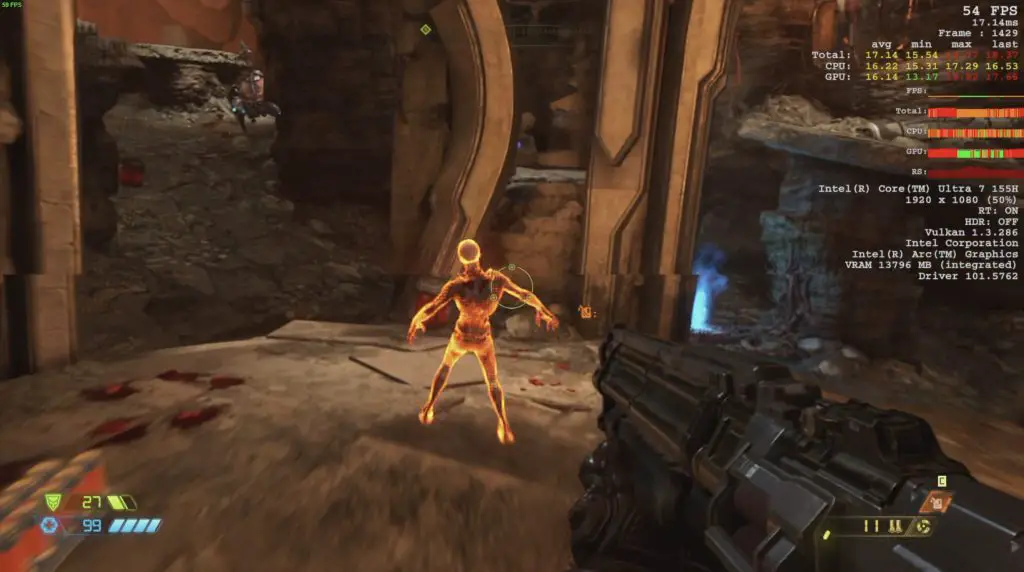
So for 1080P gaming on this mini PC, you really don’t need an external GPU. It does very well with the integrated Intel Arc graphics. Both games were easily playable, but we’re going to try to see how the PCIe port performs in any case.
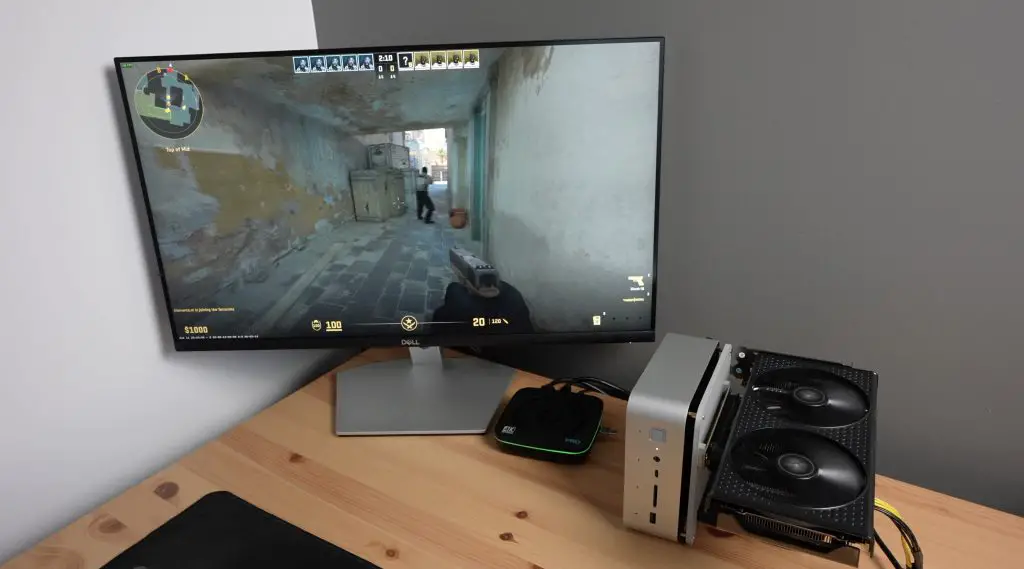
So let’s plug our GPU into the GTi14 and get the AMD drivers installed.
Gaming On The GTi 14 Ultra With An External GPU
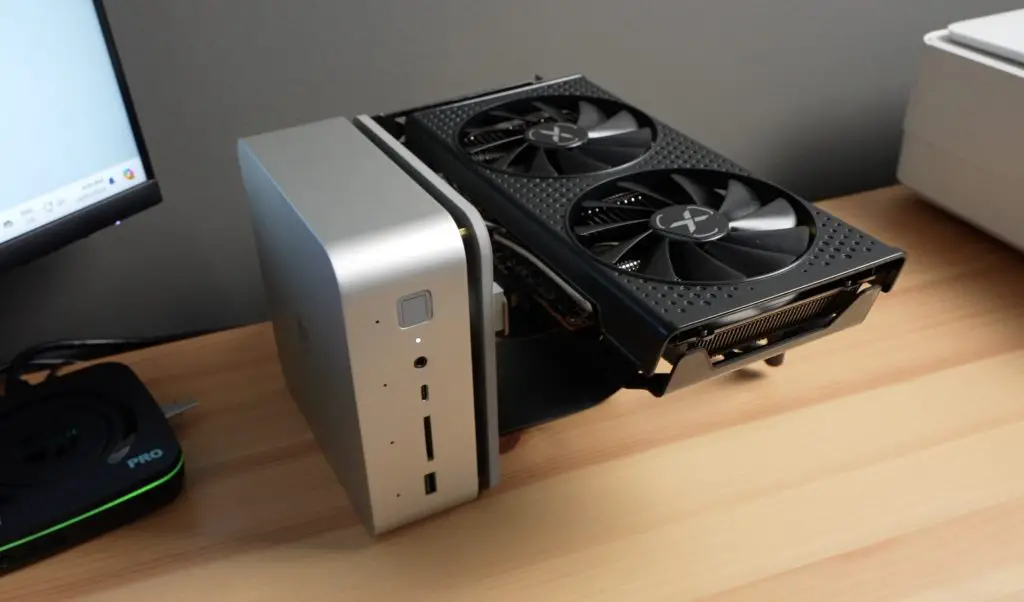
I 3D printed a new bottom cover for the GTi 14 Ultra which has some mounting points for a PCIe riser to plug the GPU into. I’m using a XFX Radeon RX 6600.
Adding The GPU To The GTi 14 Ultra
From the photographs on Beelink’s product page, it looks like they plan on selling an external GPU dock which will plug into the GTi 14 Ultra’s PCIe port. This isn’t yet available so I had to make another plan.
I 3D printed a new bottom cover for the PC. This picks up on the same cover plate screw holes but is offset with some M2.5x12mm standoffs.
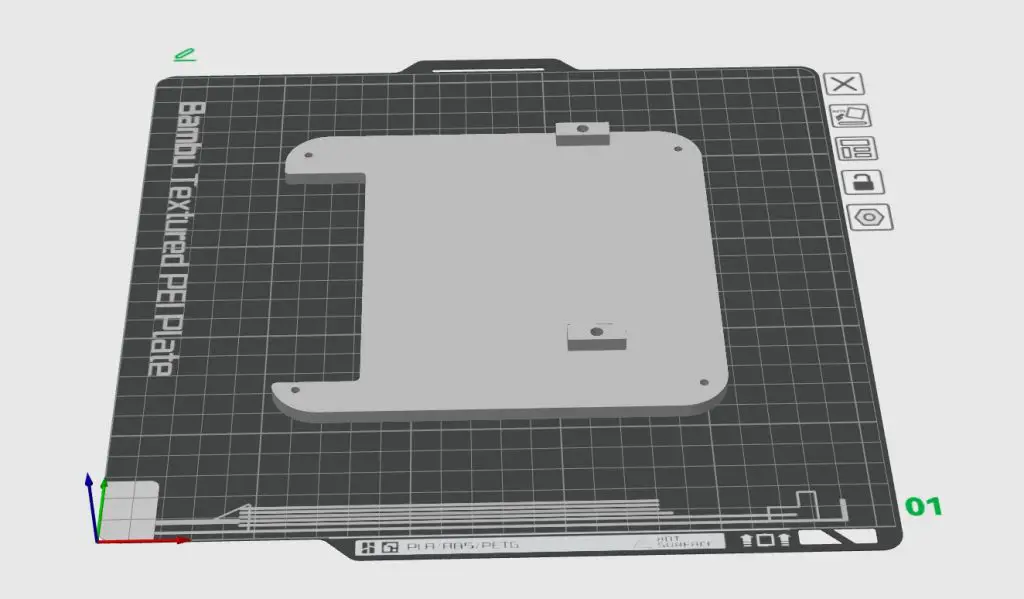
I then plugged a Coolermaster PCIe riser into the PCIe port and mounted the female port onto the 3D-printed cover plate with some M3x8mm screws into M2.5 brass inserts.

To power the GPU, I used a 12V 10A power supply which I soldered to an 8-pin plug that I salvaged off a Molex to 8-pin adaptor.
Gameplay With The GTi 14 Ultra
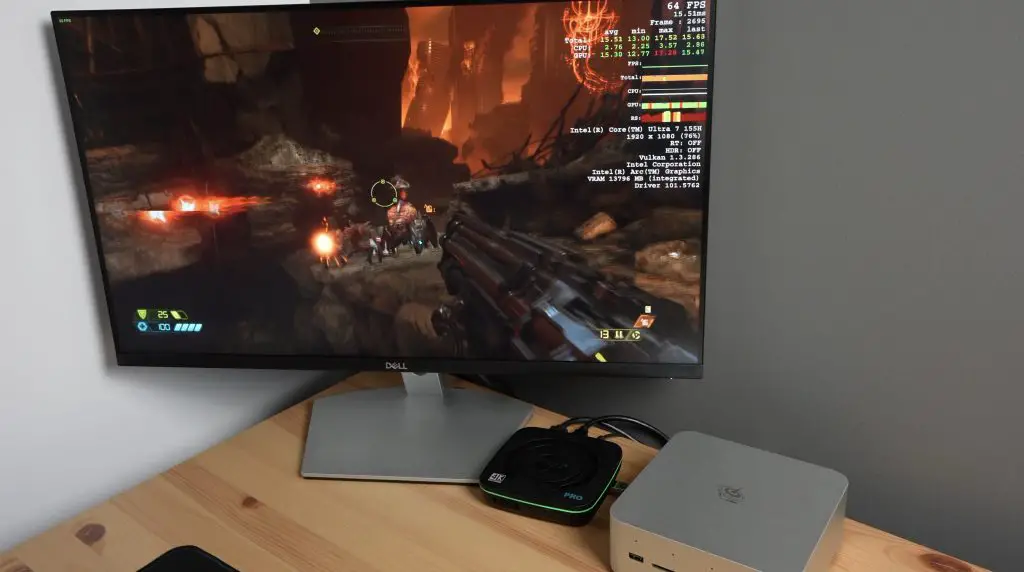
In Counterstrike, with graphics again set to Very High, we’re now getting over 200 fps. This is 3 times what we were getting on the integrated GPU. The game is responsive and the PC seems to be running a bit cooler, the fan is noticeably quieter.
Next, let’s try Doom Eternal. Again with the same Ultra Nightmare graphics settings and Ray Tracing turned off, we’re getting over 150fps. This is about 2.5 times better than on the integrated GPU. I also noticed significantly faster load times with this setup.
Testing Power Consumption & Speakers
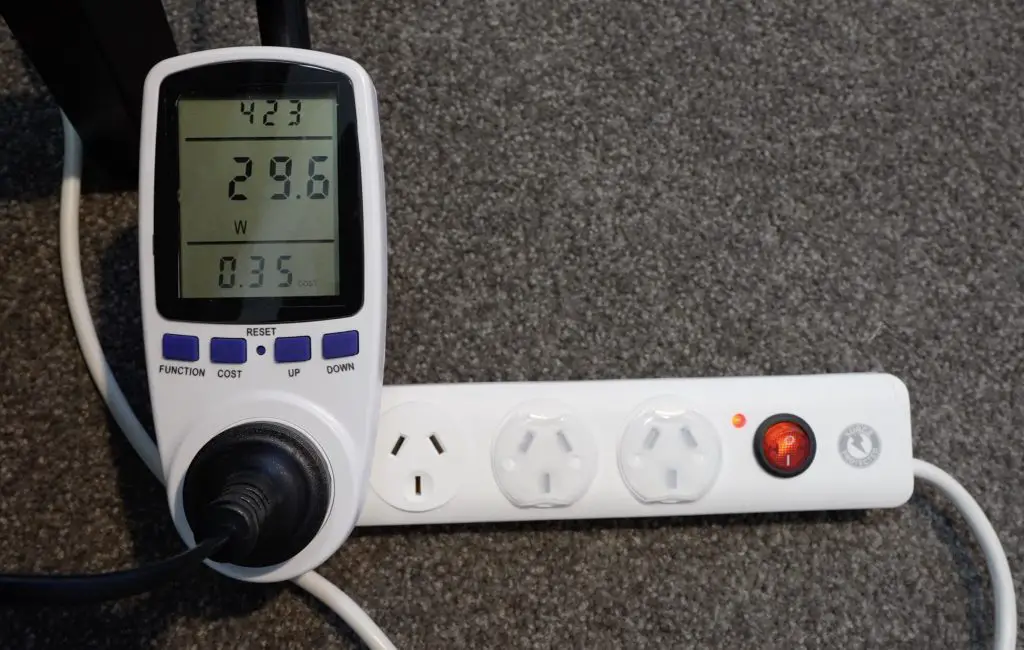
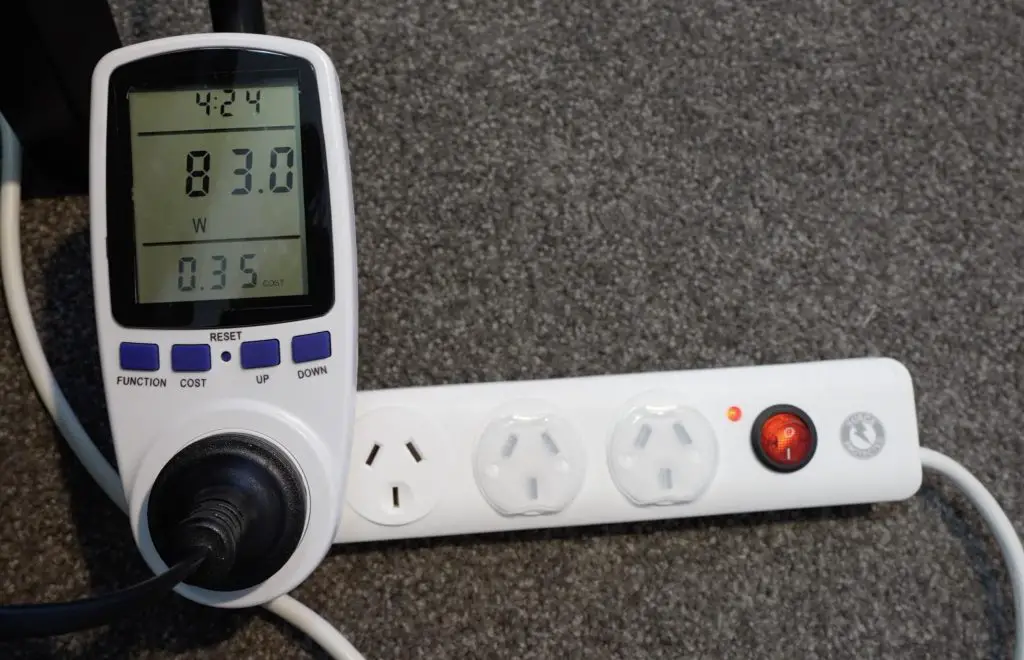
With the PC returned to its stock state with nothing plugged into the PCIe port, the GTi 14 Ultra uses around 30W when idle on the desktop. It maxes out at a little over 80W with the GPU and CPU being utilised during gaming.
The built-in speakers are a nice inclusion. They lack base because of their size but don’t sound terrible. They’re about on par with a mid-range laptop. You can hear a sample of the audio in my Youtube video.
Final Thoughts On The Beelink GTi 14 Ultra
Overall I think that this is a really awesome mini PC. It’s ultra-portable and having the ability to plug a GPU directly into it gives you the flexibility to use it for some fairly demanding gaming when you’ve got a bit more desk space and don’t need to carry it around. It’s also upgradable with non-soldered RAM and an additional M.2 port.
I have two criticisms though.
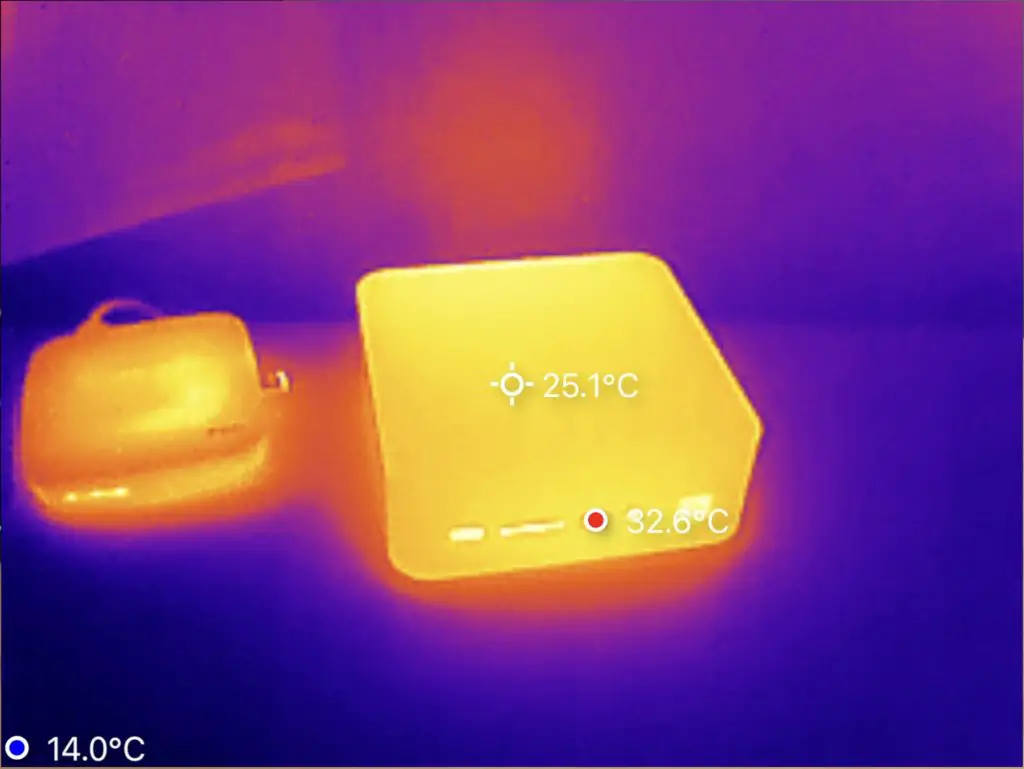
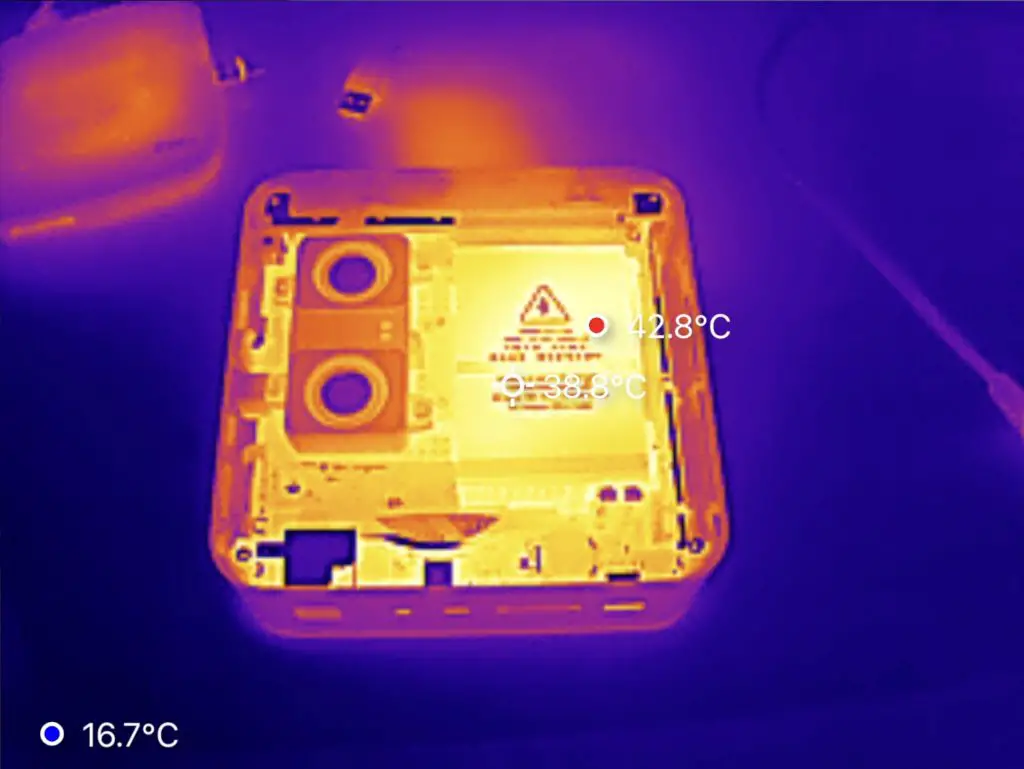
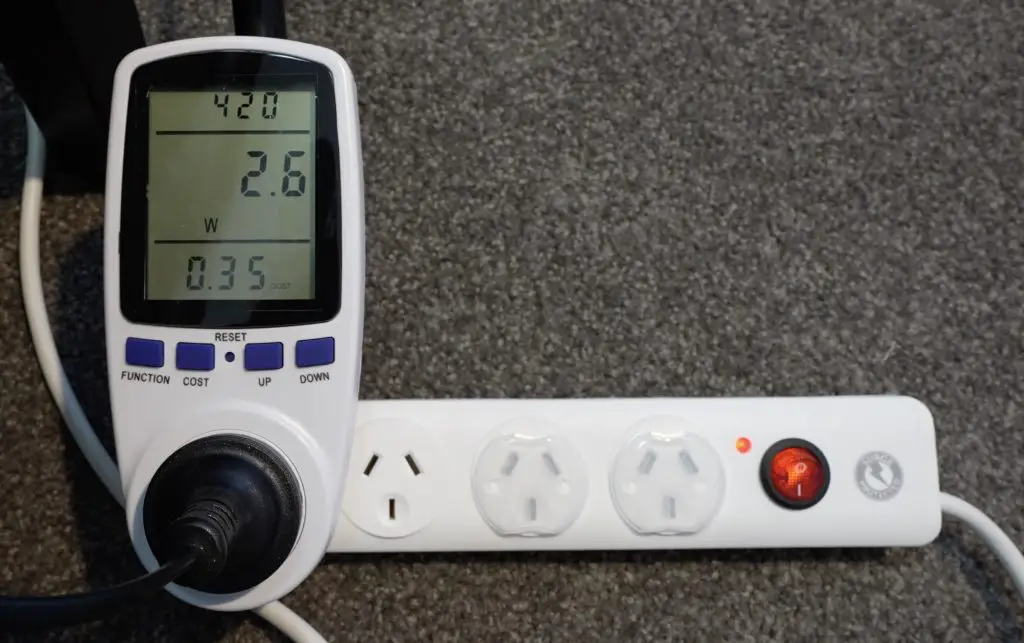
One is that the integrated power supply doesn’t seem to go into a proper dormant or sleep state, even when the PC is completely shut down. In the below images, it had been off overnight and the enclosure was still noticeably warm. The power meter registers about 2.5W with the computer shutdown, so it’s using power for no reason.
The second is the implementation of the PCIe slot. It is very deeply recessed in the enclosure and the access slot through the enclosure is too thin for most standard risers. I assume that Beelink are going to release some sort of proprietary dock, but it would have been nice to have the slot easily accessible through the bottom cover with a standard riser cable.
I’m not sure what the pricing is going to look like as they’re not yet for sale at the time of writing, but I’d imagine they’ll be around $800 for the Ultra 7 series and likely $100 more for the Ultra 9 series.
Let me know what you think of the GTi14 Ultra in the comments section below. What would you use it for?
Thank you for the excellent review.
I just purchased one and had the same problem with the power consumption when off. Beelink support helped resolve this by turning off “quick start”
in Control Panel\Hardware and Sound\Power Options\System Settings.
Also thank you so much for providing the 3d model for the modified cover. I will be implementing it this week.
Thanks for letting me know about the “quick start” setting. I wonder what this keeps active if the PC is shutdown and not just sleeping. In any case, thats good to know.
Totally agree that you would assume “quick start” setting would be active during sleep mode rather than a total shutdown.
I did however mention something misleading in my post above. Turning off “quick start” prevented the system from getting warm when shut down. I naturally assumed it stopped power draw. I just measured power draw and it is still drawing ~3.2 Watts when completely shut down. I have a call into support again to see if they can explain it. I looked around in the bios settings for a Wake on Lan settings assuming this could be the issue but could not find it.
I just purchased the PCI riser cable and will be trying out your setup, however in the meantime I have had great egpu performance with the “JMT ADT-UT3G USB4.0 Docking Station 64G PCIe4.0x4” from Amazon using a Radeon 6900 XT. You can see my review on Amazon with a couple of photos.