These days, almost everyone has a WiFi router in their house and yet the majority of us suffer from poor WiFi signal strength. Where you have your router placed and how it is placed may be causing you a lot of problems with the speed and strength your devices receive. It’s worth noting that you need to have a good provider and a good quality router as well, however, improving on what you already have can go a long way towards improving your internet experience.
Location For Best Signal Strength
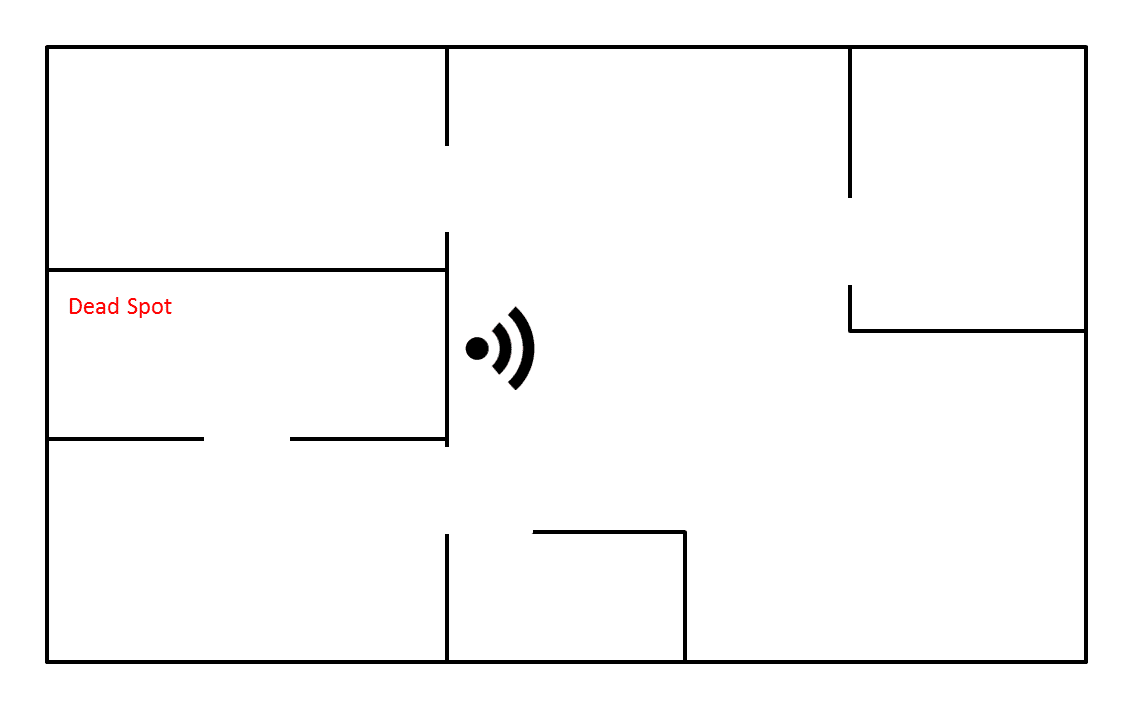
Firstly and possibly the most obvious is the location. You need to place your router in the most open and most central part of your house so that the waves are able to reach each side of your home. If you have a home with all of the bedrooms on one side and the living spaces on the other side then you want to install your router in the closest living space to the bedrooms so that the signal is able to reach all of the rooms and living spaces.
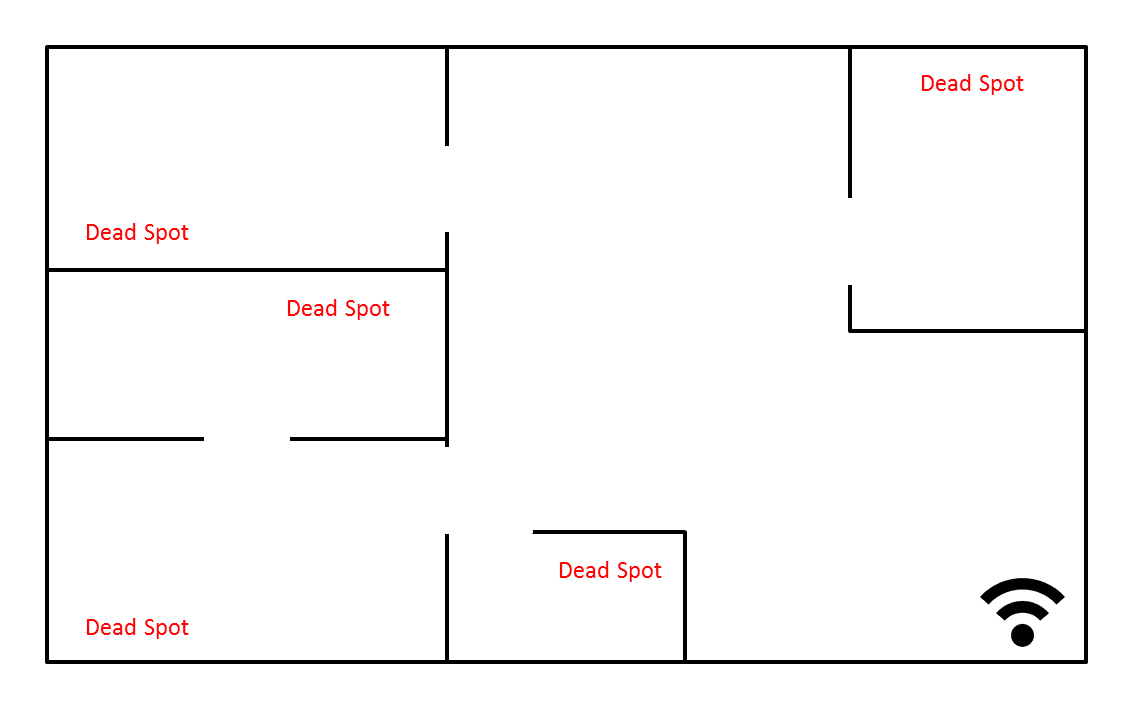
Most people place their router near the kitchen or entrance to their home and unless this is near the centre of your home, it has a negative effect on your WiFi signal.
Bad Router Placement:
Good Router Placement:
You will also get the best results from your router if it is placed out in the open and not in a cupboard or on a cramped up shelf. An ideal location is mounted high up on a wall in an area where there is not a lot of furniture or decor. If you can’t mount it on a wall then an open counter near the centre of the house is the next best option. A router can broadcast through walls but at the cost of signal strength so always consider placing your router such that there are the least number of walls between your router and where you usually connect to your WiFi.
Distance From Devices
WiFi uses radio waves to transmit information, they do this at a fairly short wavelength of around 12cm (4 1/2″). In general, you shouldn’t expect a single router to broadcast more than 45m (150ft) and that should be further reduced if you live in a concrete building or a house with many walls and rooms.
If you need your router to transmit further than about 30m (100ft) then you should consider connecting a range extender to your network in a location midway between your router and the location you need signal.
Router Antenna Direction
Your router has two antennas for a reason. The antennas transmit stronger in a certain direction therefore two are provided and are meant to be pointed in different directions in order to maximise coverage. Point one of the antennas vertically and the other horizontally for the best signal coverage.
Use an App To Improve Your Wifi Signal Strength
Finally, there are a number of apps available to measure your WiFi signal and help you find sweet spots, position antennas and position the router for the optimal signal strength. WiFi SweetSpots is a great free app to do this, here is the iPhone link and the Android link.
Connect to your WiFi network, open the app and then use it to map out your WiFi signal. Play around with different antenna directions and different router locations until you find the optimal solution for your home.
Do you have any other tips and tricks to get the most out of your WiFi router? Let us know in the comment section below.
Cover Image: Unwired by delta_avi_delta used under CC BY 2.0


