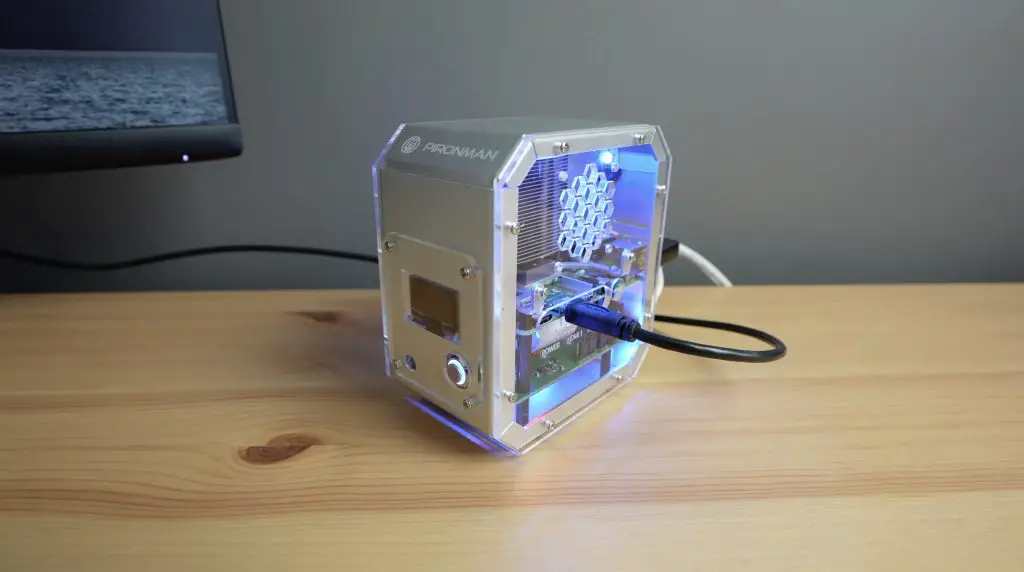
Today we’re going to be taking a look at new the Pironman 5 case by Sunfounder. This case has been designed to house a Raspberry Pi 5 along with an NVMe storage drive.
It’ll set you back almost $80, but it has quite a lot to offer. So let’s see how easy it is to put together, how the Pi and NVMe drive perform in it and whether it’s worth the money.

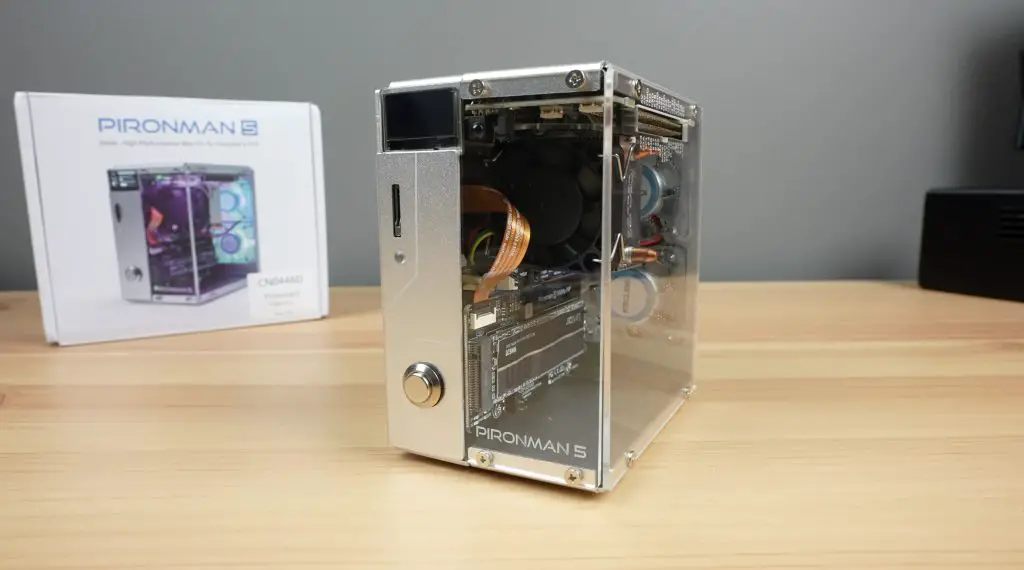
This is the second generation of Pironman case, although it doesn’t look all that similar to the first. The first generation was made for the Pi 4, which didn’t have a PCIe port. This case takes advantage of the port to add an NVMe drive to the Pi without the need for an external USB jumper. They’ve also shifted from a two-opposite clear side panel design to a wrap-around clear panel design.
Here’s my unboxing and review video, read on for the write-up;
Where To Get The Pironman 5 Case
- Pironman 5 Case – Buy Here
- Raspberry Pi 5 – Buy Here
- NVMe Storage Drive – Buy Here
- Pi 5 USB C Power Supply – Buy Here
Unboxing and Assembly
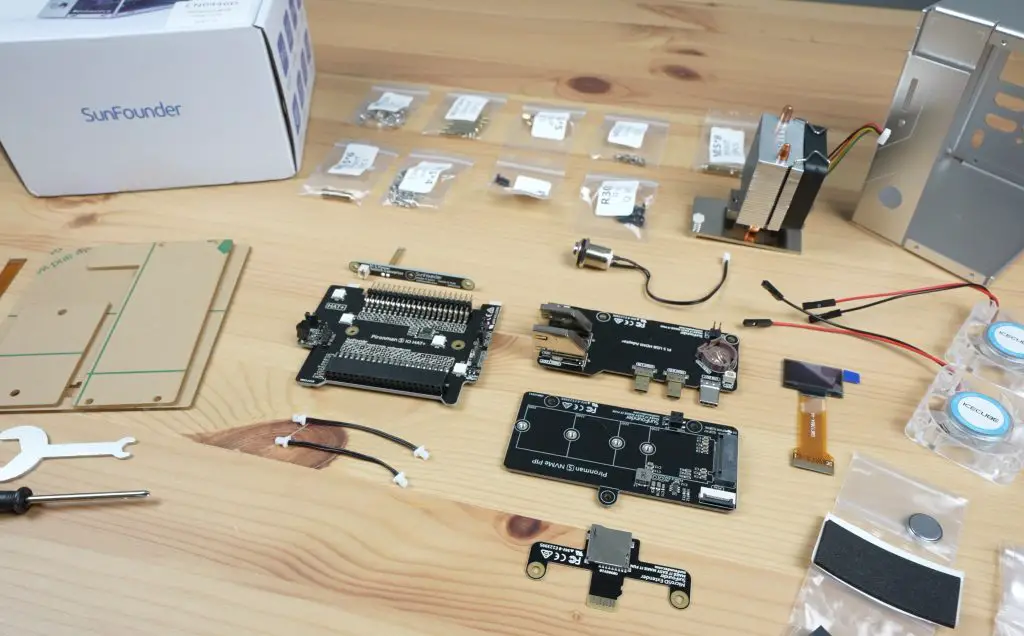
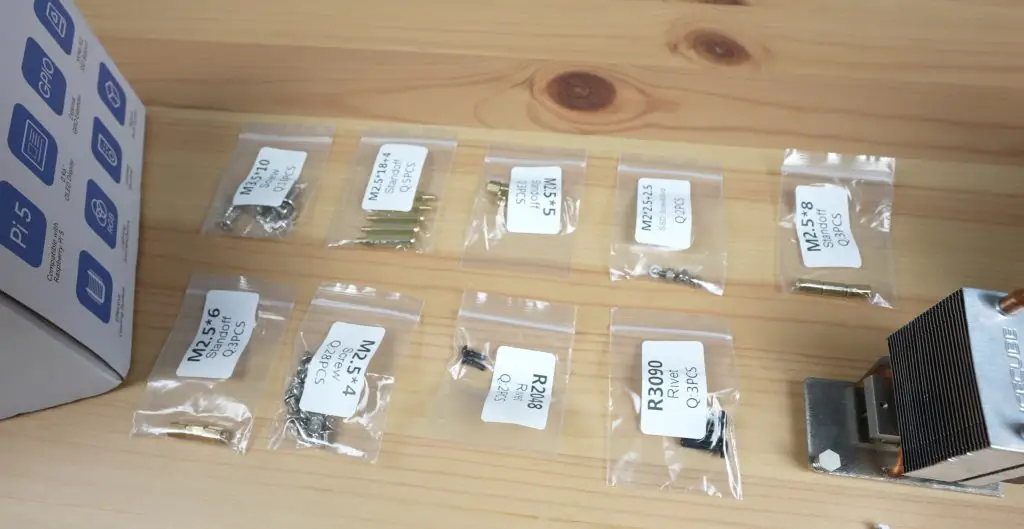
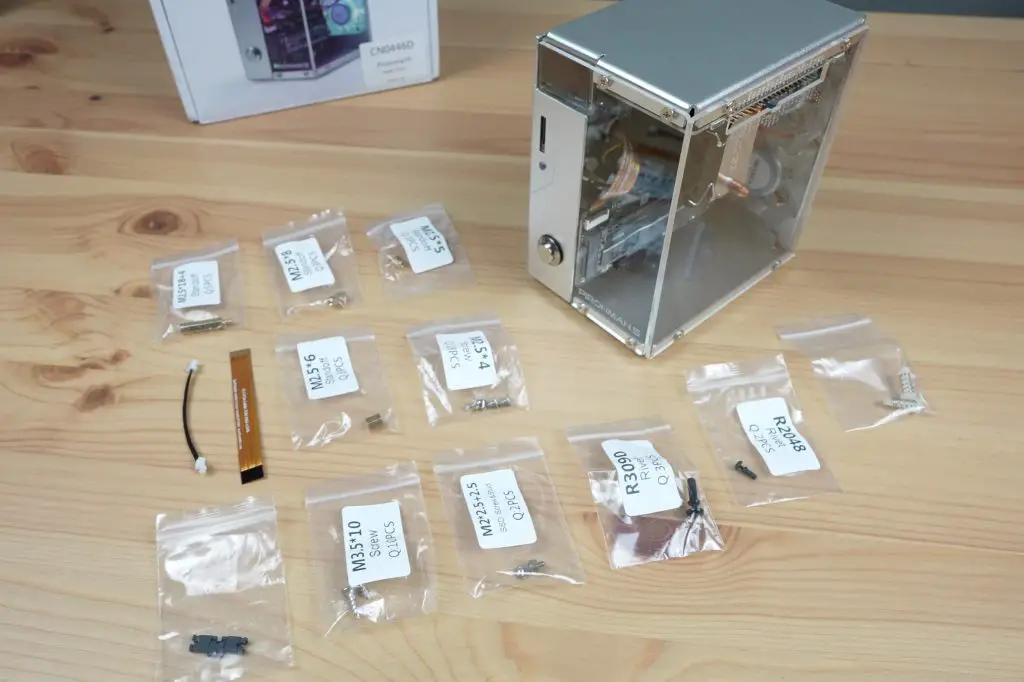
The case comes in a fairly large white branded box. Inside it is the aluminium case shell packed full of the case components, including fans, cooler, expansion boards and mounting hardware.
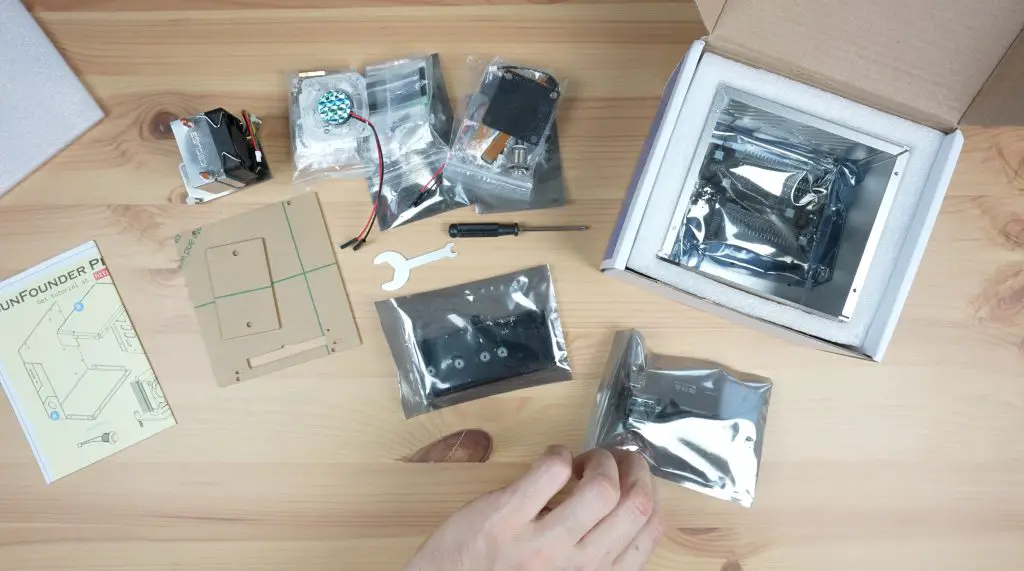
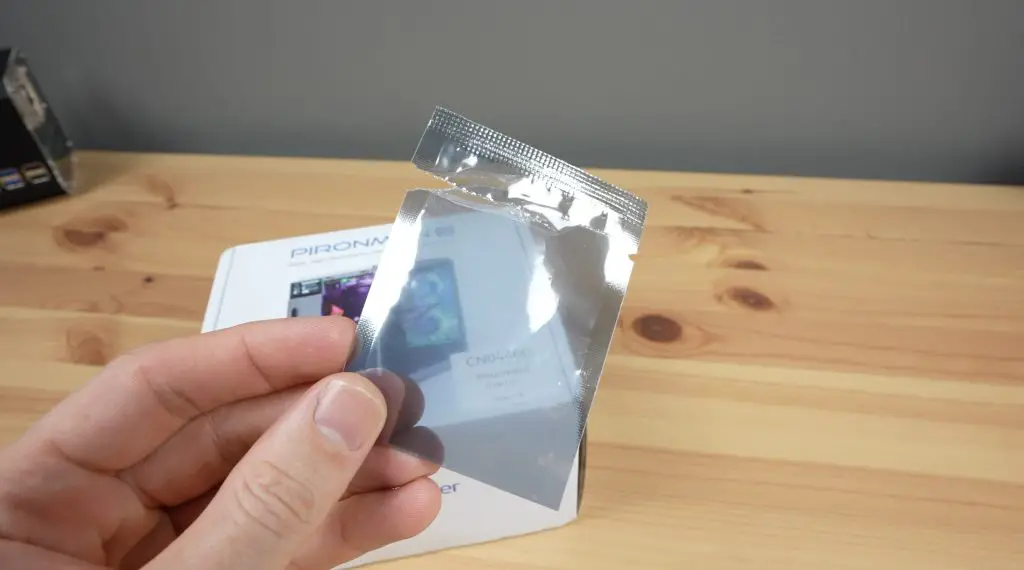
Oddly, I did get a random open and empty sleeve in mine. I don’t know if that means something is missing or if it just found its way into the box but I guess I’ll find out when assembling it.
You can see from the spread that there are a lot of components to this case. Like with the previous Pironman case, it’s going to take more than a couple of minutes to put it together.
Assembling The Pironman 5 Case
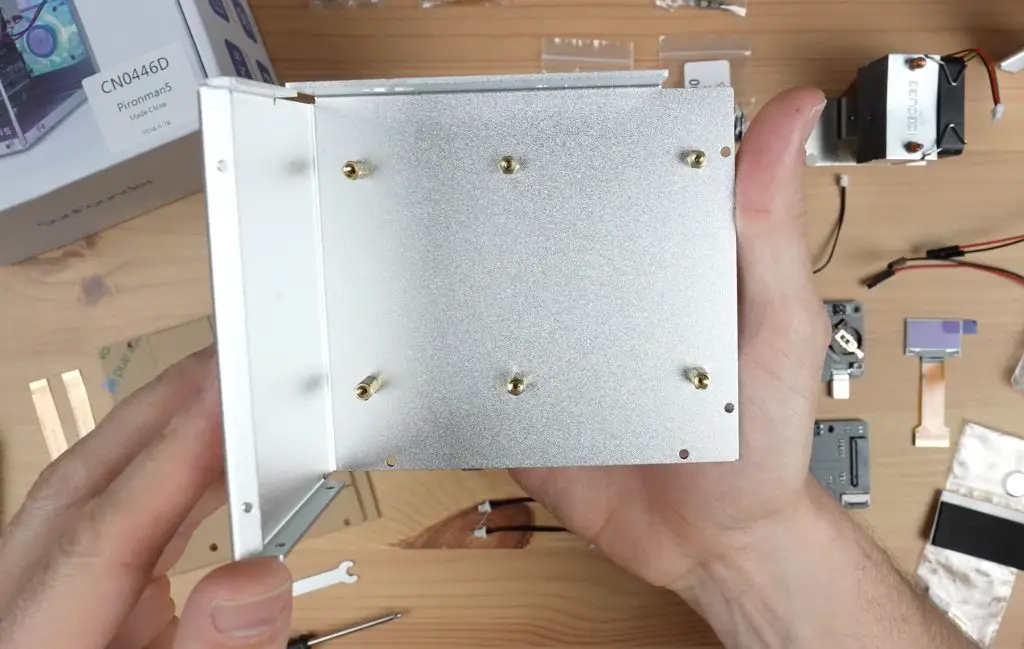
To assemble the case, you start by adding standoffs to one enclosure half.
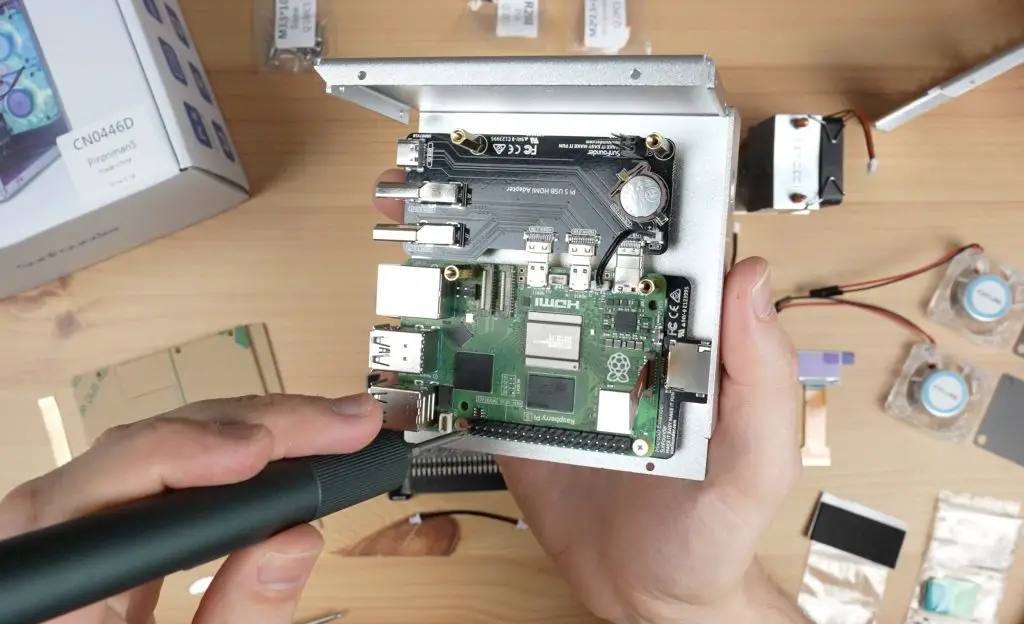
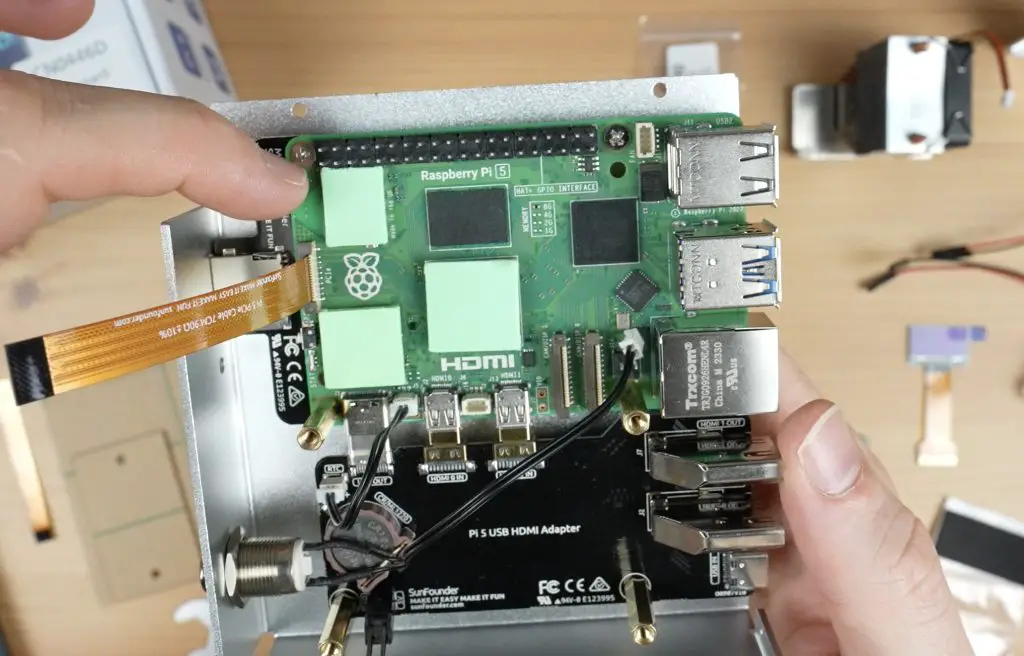
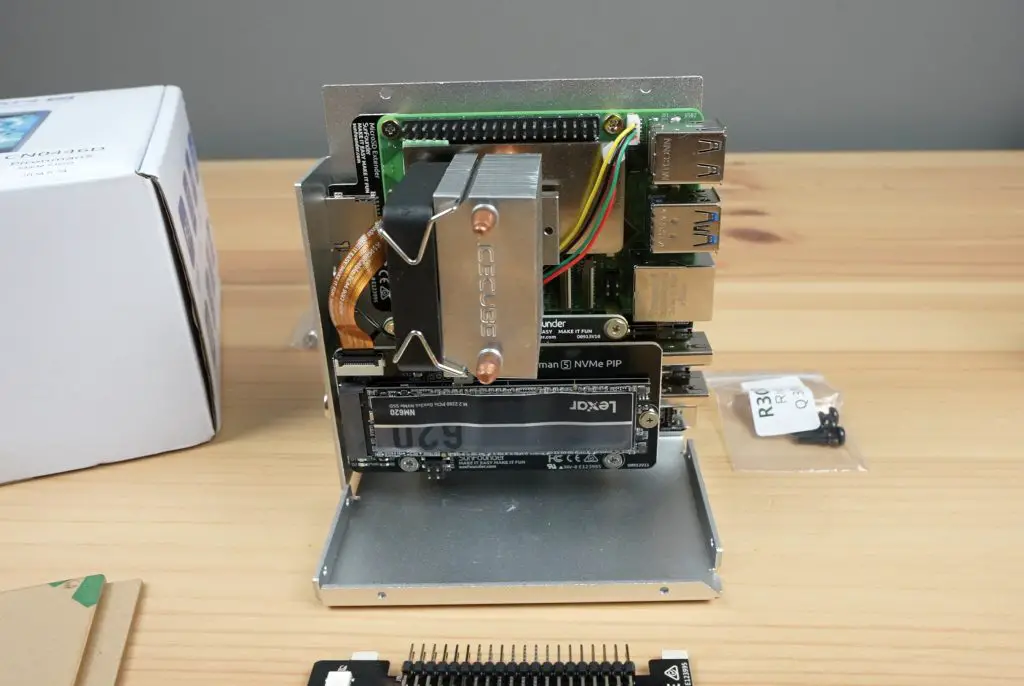
You then plug some of the carrier boards into the Pi, then mount the assembly into the case.
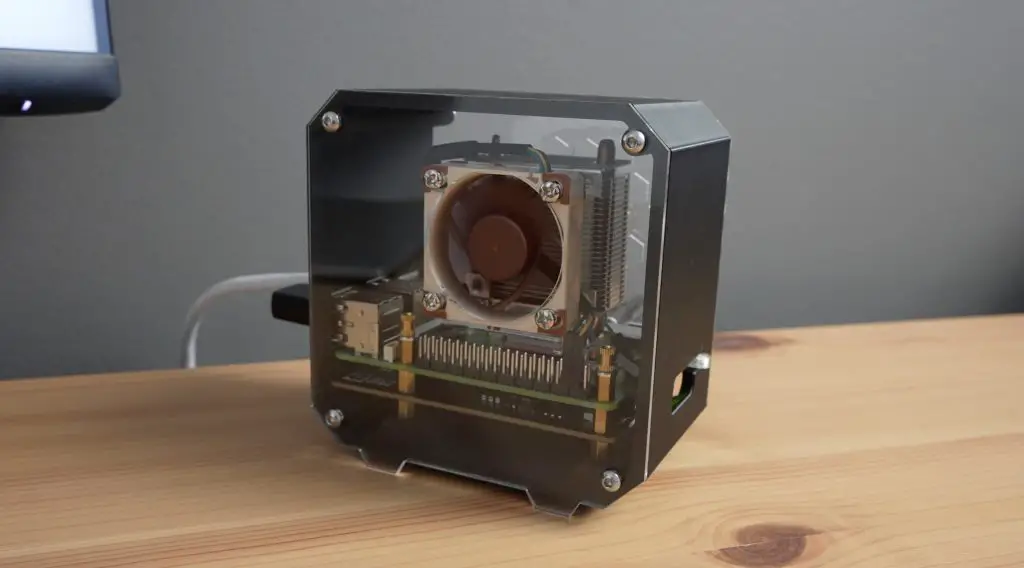
The power button and cooler go in next. They supply pads for the WiFi chip and power circuitry which is a bit different. Previously this cooler covered the RAM chips, USB and Ethernet controller.
Next, we install the NVMe drive.
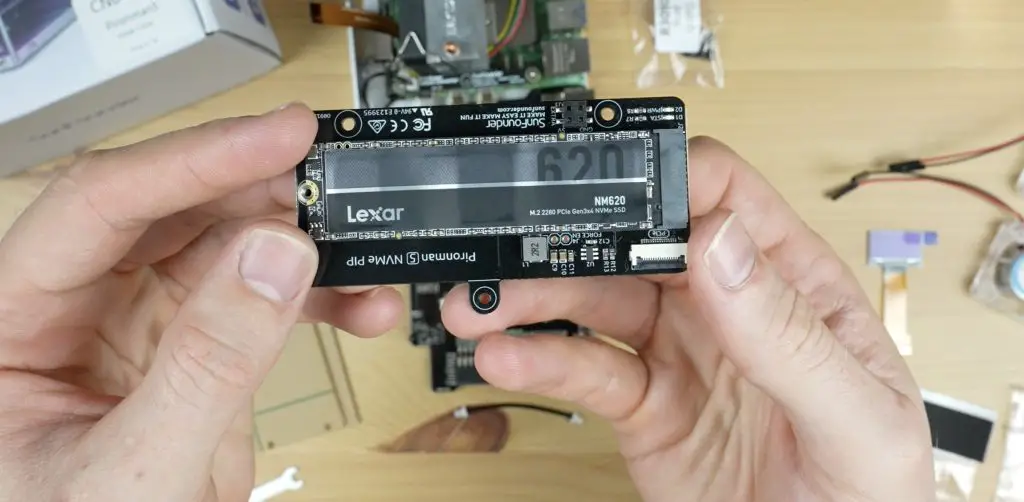
The NVMe drive carrier board supports multiple drive sizes from 2230 to 2280. I’m going to be using a 2280-size Lexar drive in the case. This is not all that fast as far as NVMe drives go, but it runs at gen-3 speeds, so it should get quite close to the maximum speed that the Pi can handle.
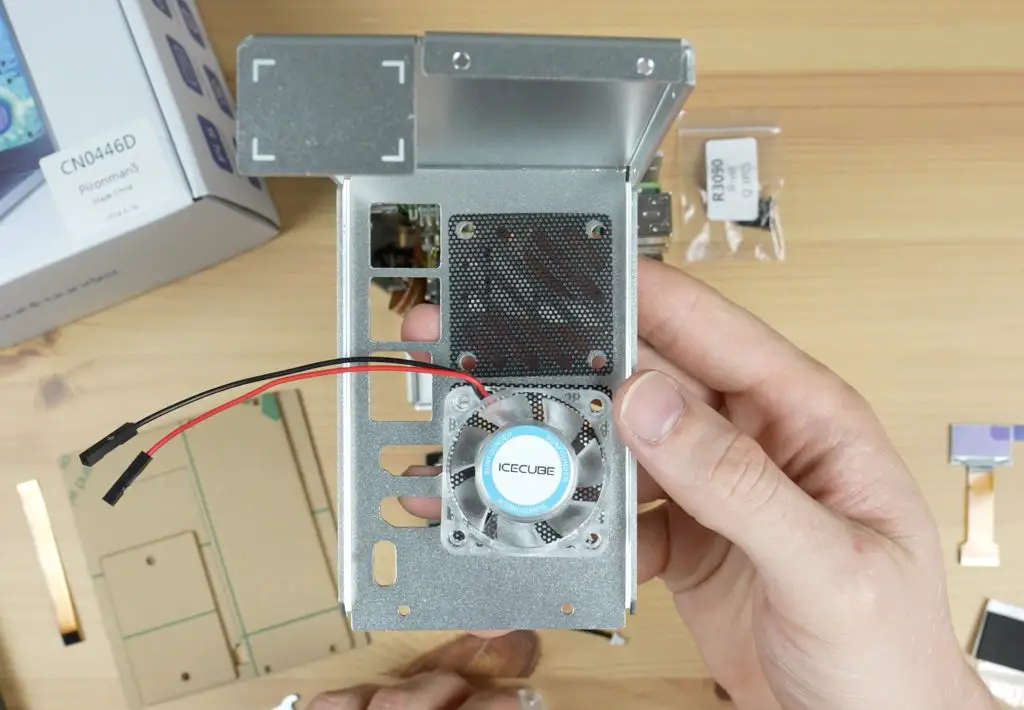
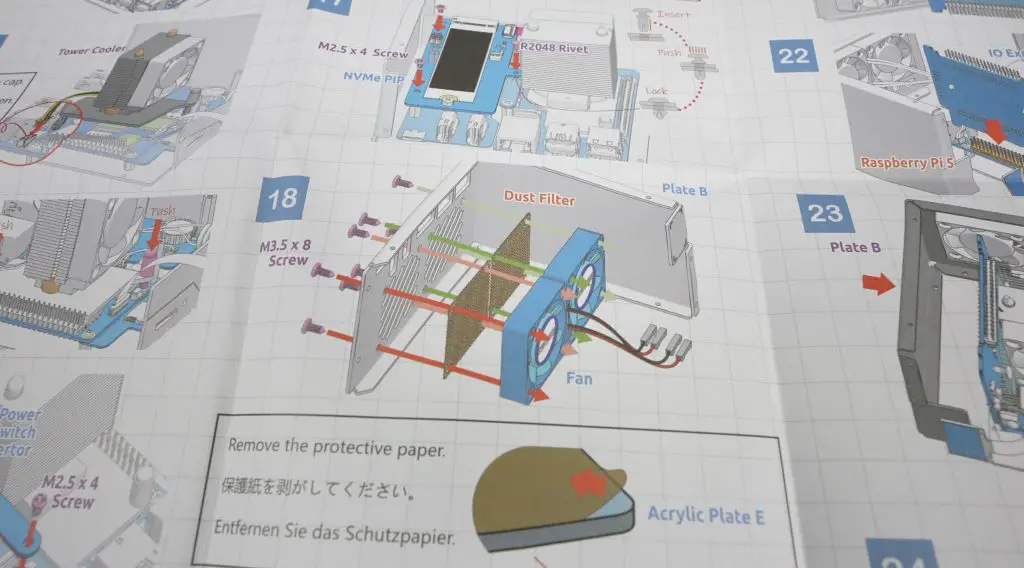
We then attach the fans to the back panel.
With that done, we can mount the GPIO expansion board with the OLED display.
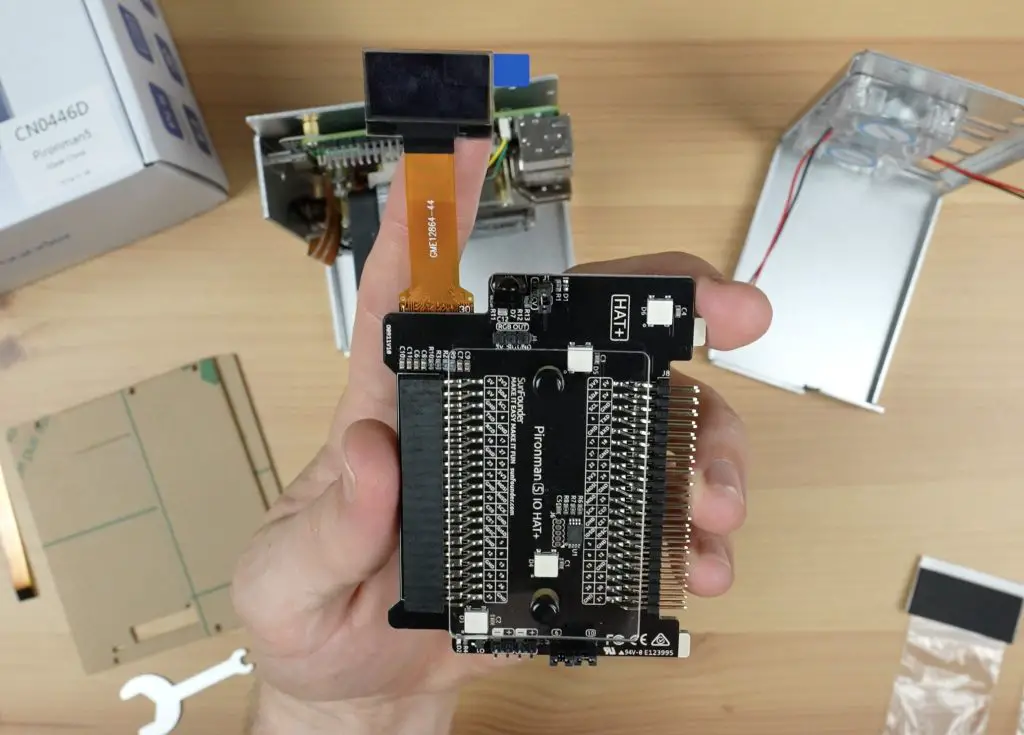
Then screw the two aluminium case halves together and stick the display onto the front panel.
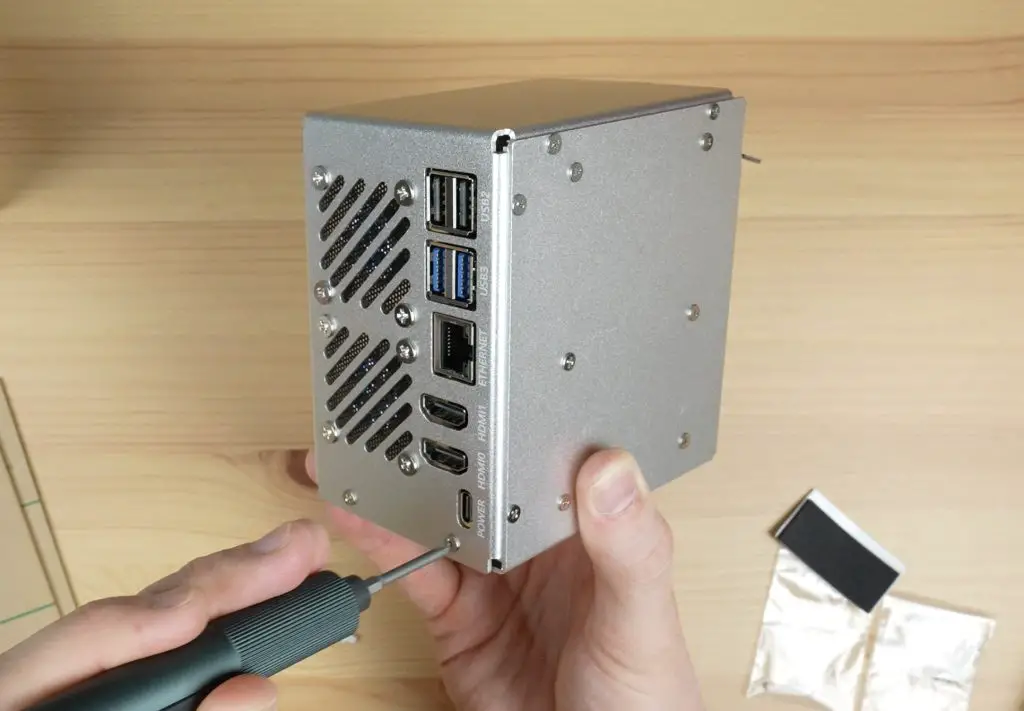
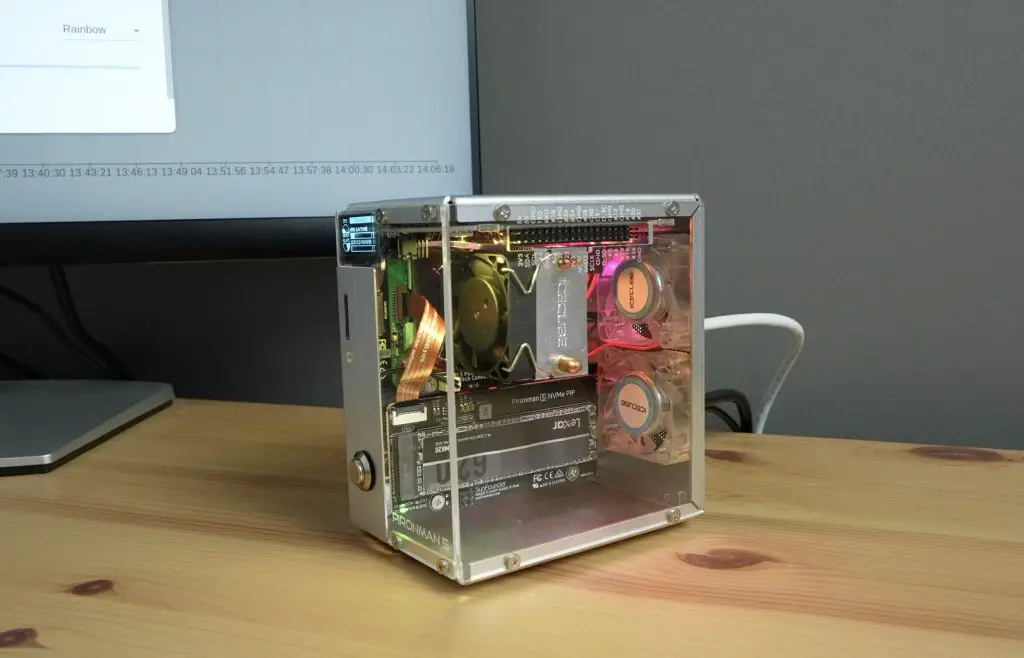
To finish it off, we add the clear acrylic panels.
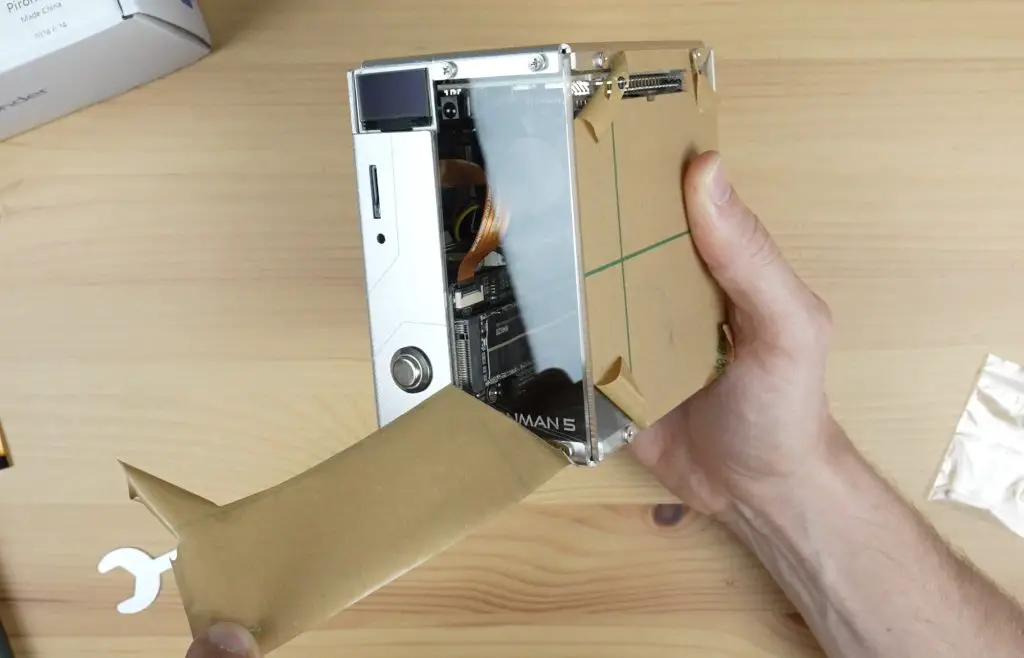
Assembly is relatively easy. The case comes with a good step-by-step illustrated instruction sheet and the hardware is labelled well too. It took me about 30 minutes to have the case complete and ready to boot up.
Pironman 5 Software and Web Dashboard
Booting up the Pi is done by pressing the power button on the front of the case.
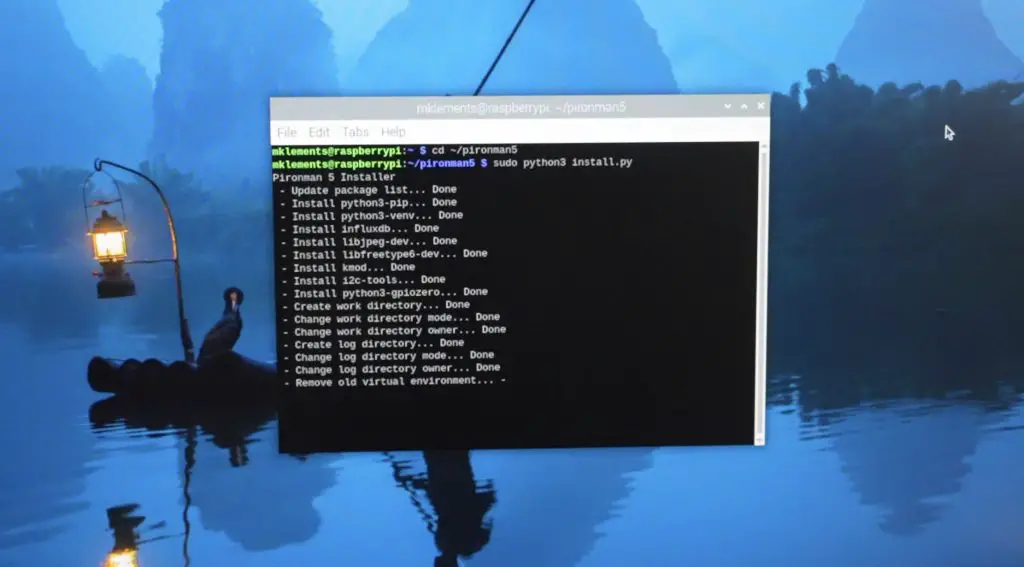
To get the display and lighting to work, we need to install some additional software. This is a fairly simple GitHub install by entering the following commands in the terminal:
cd ~
git clone https://github.com/sunfounder/pironman5.git
cd ~/pironman5
sudo python3 install.py
The script took about a minute to install and I didn’t run into any issues with it.
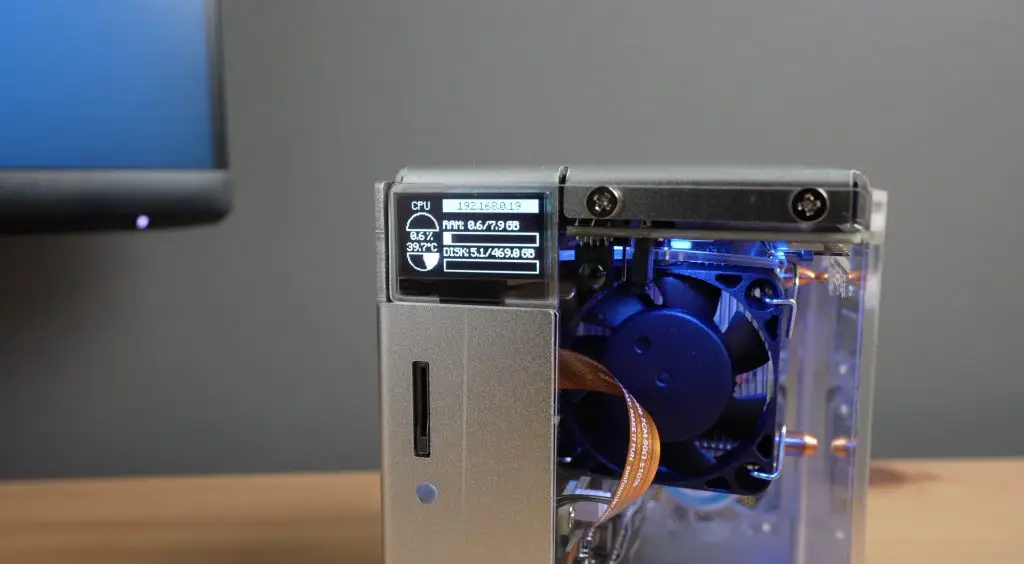
The fans turn off and the OLED display comes on when the installation completes, but it still recommends a reboot. The OLED display on the front shows the CPU usage and temperature, the computer’s IP address as well as the RAM and storage capacity.
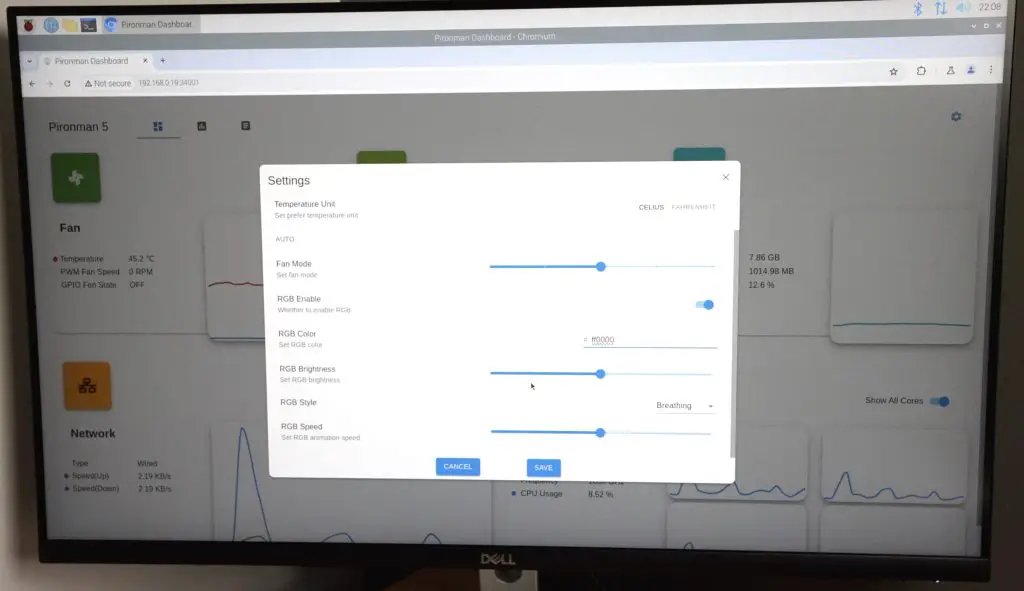
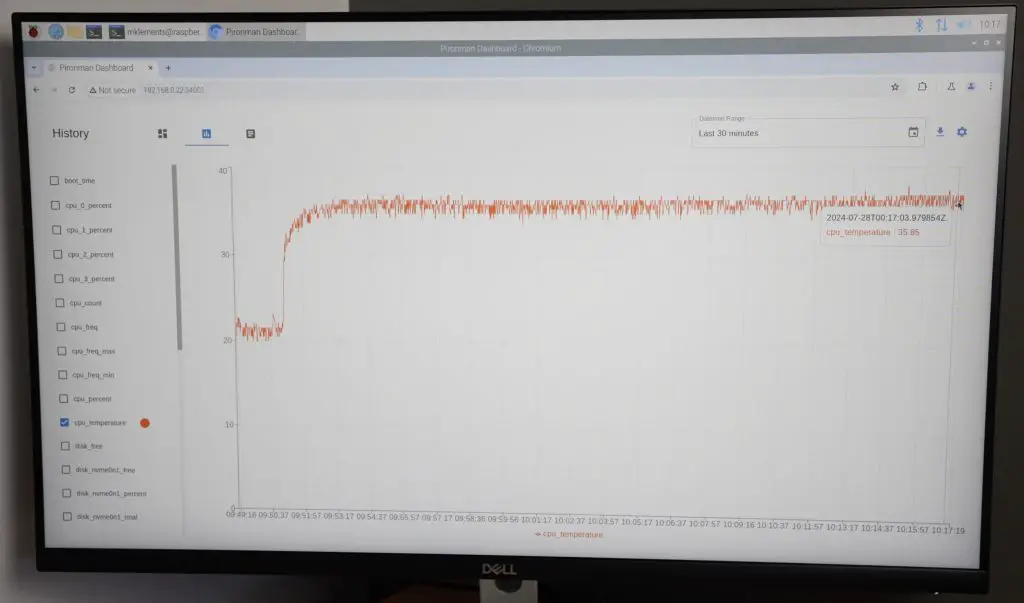
Their software also has a really nice web dashboard, accessible by entering the IP address and port 34001 into the browser.
http://<ip>:34001This dashboard allows you to see your system stats, plot graphs of the stats, see logs and access some of the case script settings.

You can also change the style and colour of the RGB lighting, adjust its pulse mode or set it to cycle through different colours.
Testing The Case’s Cooling Performance
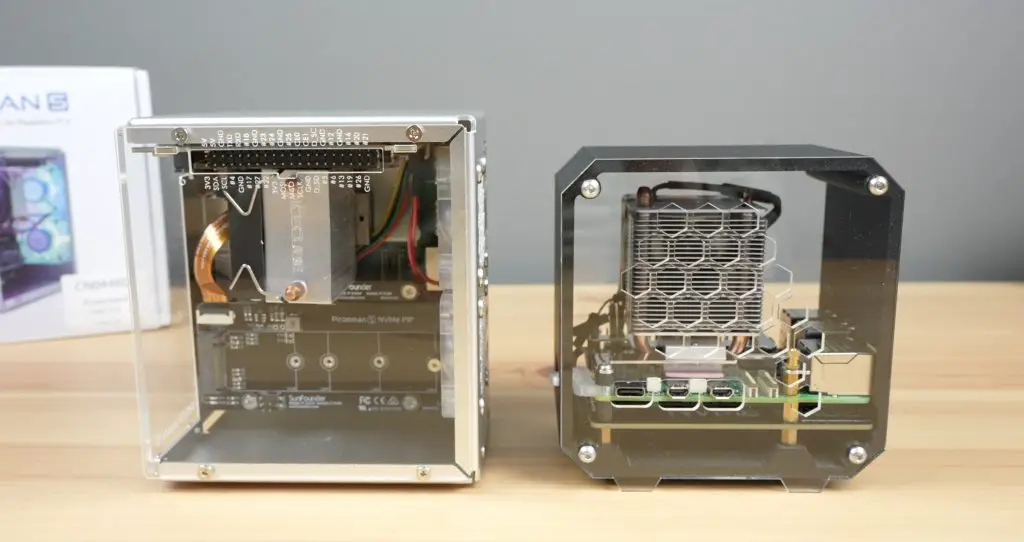
One of Sunfounder’s claims about the case is superior cooling. I personally use one of these tower-style coolers on my Pi 4s and 5s running in my 3D-printed cases. So I’ll use that as a baseline and see if the additional fans and this slightly different cooler base make any difference to the thermals.
I’m also interested to see how loud the case is when it is running as we’ve got three 40mm fans in it. The back two are not PWM fans, so they’re either on at full speed or they’re off. The default setting is for them to turn on when the CPU reaches 60°C, but this can be adjusted.
I’m going to adjust them to have the back two fans running at full speed for the stress test to see how it compares to my case’s thermals.
My case has a single 40mm PWM fan and I’ll set this to 100% for the comparison as well.
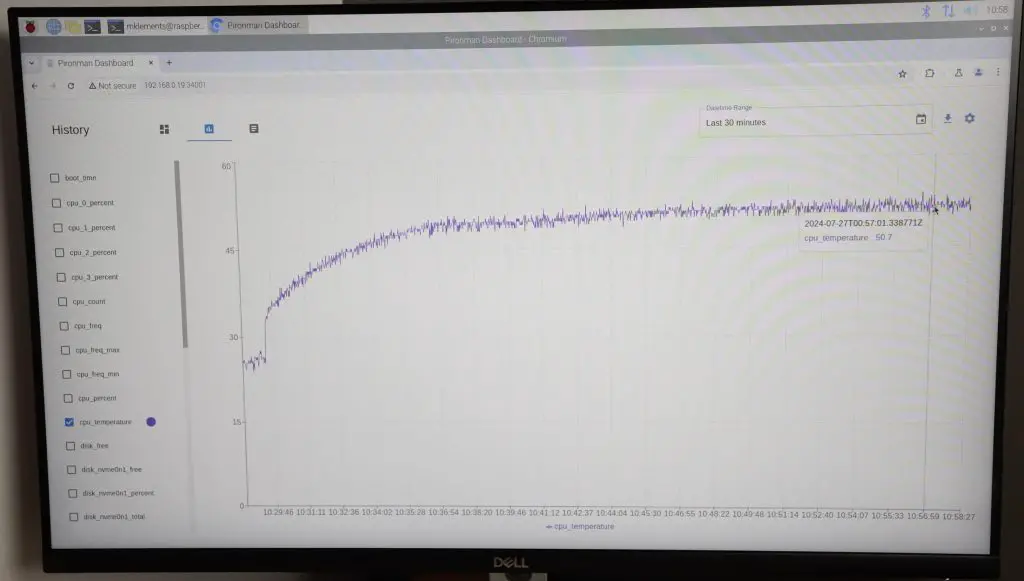
I’m going to be using CPU Burn to apply full load to the CPU and we’ll leave that running to see what temperature it stabilises at. I doubt we’ll get anywhere near thermal throttling with this cooling setup.
To install CPU Burn, we enter the following command into the terminal;
wget https://raw.githubusercontent.com/ssvb/cpuburn-arm/master/cpuburn-a53.S
gcc -o cpuburn-a53 cpuburn-a53.S
Then to run the test, we enter the following command;
while true; do vcgencmd measure_clock arm; vcgencmd measure_temp; sleep 5; done& ./cpuburn-a53
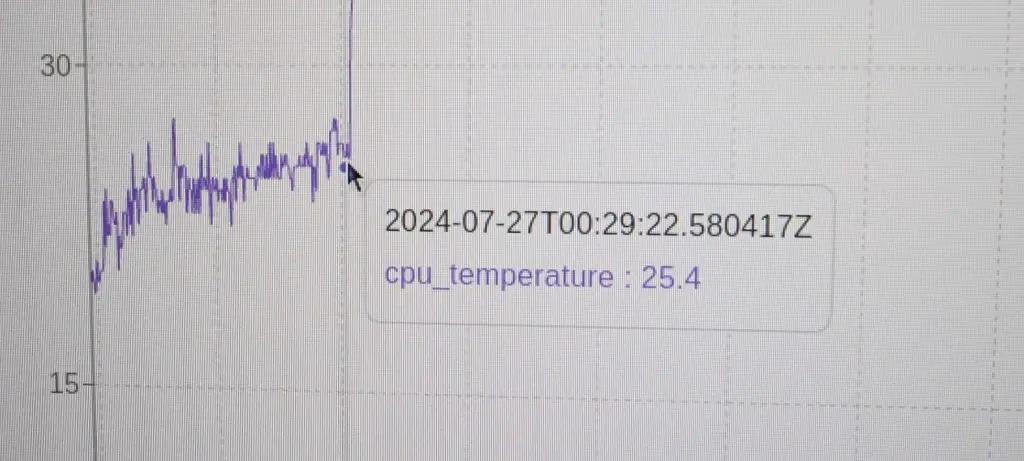
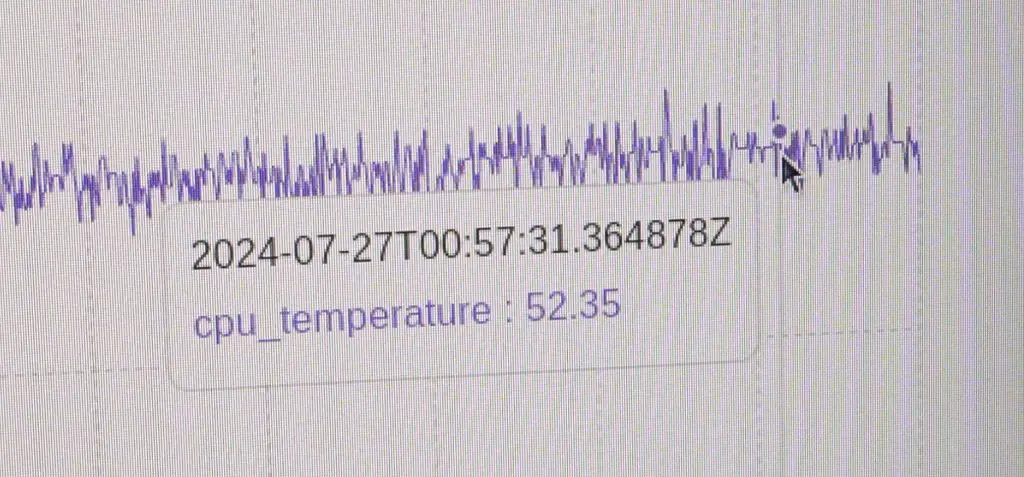
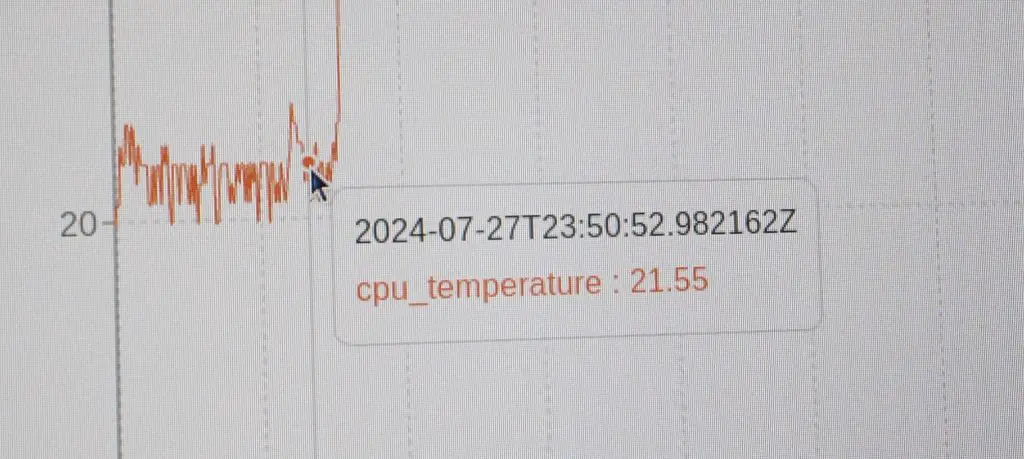
At the stock CPU frequency of 2.4GHz, at idle, the CPU temperature started at 25°C. I left the test running for a little under 30 minutes and it stabilised at 52°C. So we’ve got a delta of about 27°C, which is really good. This means you’ve got a lot of headroom for overclocking.
The fans are not as noisy as expected, but they would be annoying if you had this on a desk next to you and they were running the whole time. I’ve put an audio clip of them running into my video at the beginning of the post. Thankfully, having them only turn on at 60°C means that they’re off most of the time and only come on when you put a demanding load on the Pi.
With the fans still on, the Pi’s CPU drops back down by 10°C in about 5 minutes.

I ran the same test on my case. This time the starting temperature was 22°C, so 3°C below the Pironman case. The temperature reached equilibrium much faster but I left it running for 30 minutes too. It stabilised at 36°C. So we had a delta of about 14°C, which is significantly better than on the Pironman 5 case.
I think this is mainly down to the airflow path. My case design has airflow straight across the cooler and out some large ventilation holes on the opposite side.

The Pironman case doesn’t really have air inlet vents and the fans at the back are each pushing air through a restrictive dust filter. So although it’s got two more fans than my setup, they aren’t working as effectively.
Testing The NVMe Drive Speed
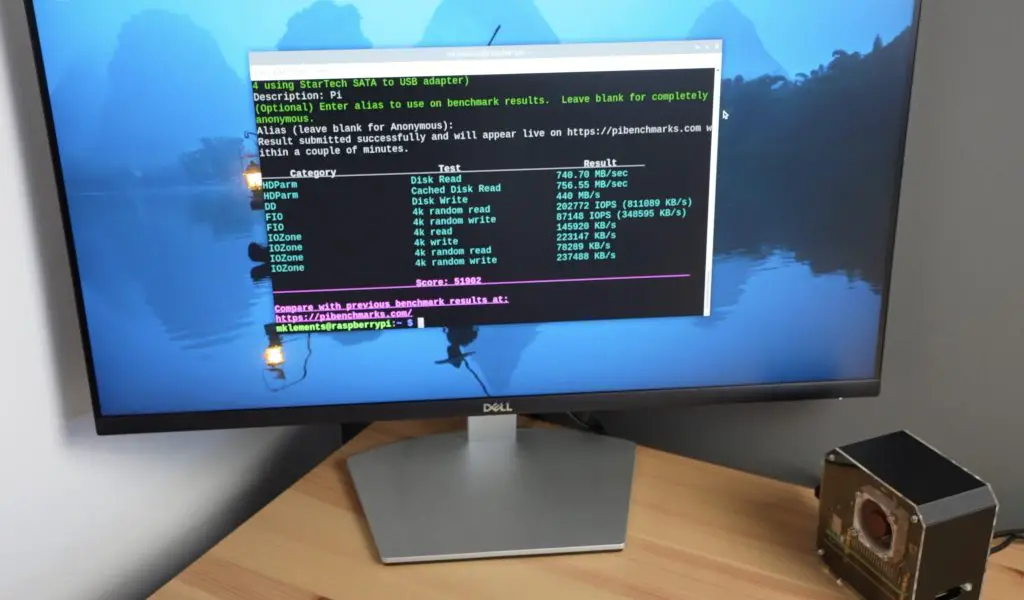
To test the NVMe drive speed, I’m using James Chambers Pi Benchmarks script. This script favours random read-write performance, so is a good representation of how an OS would be using the drive.
To install and run the test, we enter the below command into the terminal;
sudo curl https://raw.githubusercontent.com/TheRemote/PiBenchmarks/master/Storage.sh | sudo bashOver 3 consecutive tests, I got an average score of 51,963.
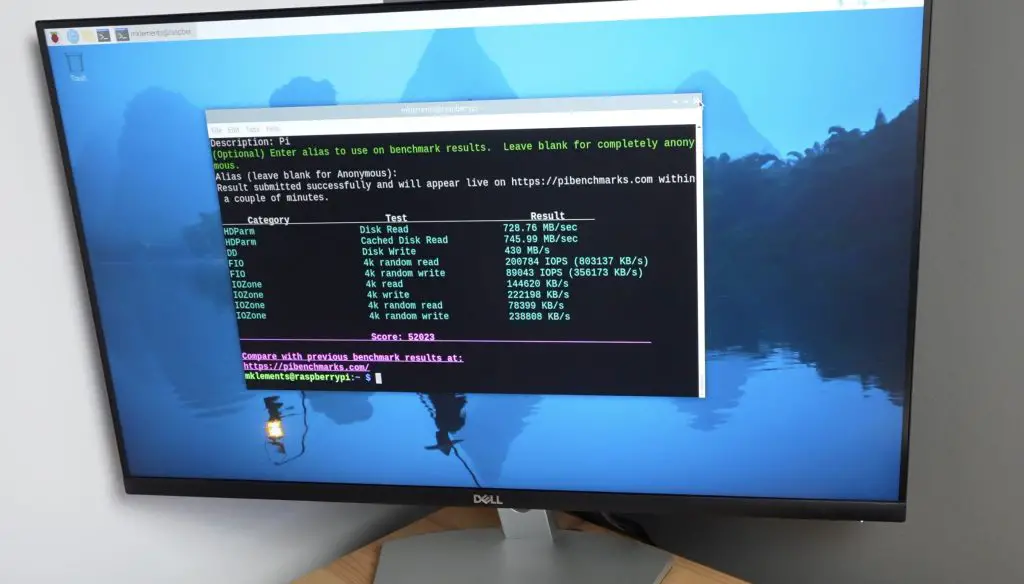
This is a similar score to what I got using the Piromoni NVMe base with this drive on my setup, I got 51,902 and an average of 51,865. So that’s a good indication that there are no issues with the drive adaptor.
It is quite a bit slower than the speeds I got in my recent NVMe hat comparison, but that was done with a Sabrent Rocket drive which is much faster than the Lexar drive I’m currently using.
Final Thoughts On The Pironman 5 Case
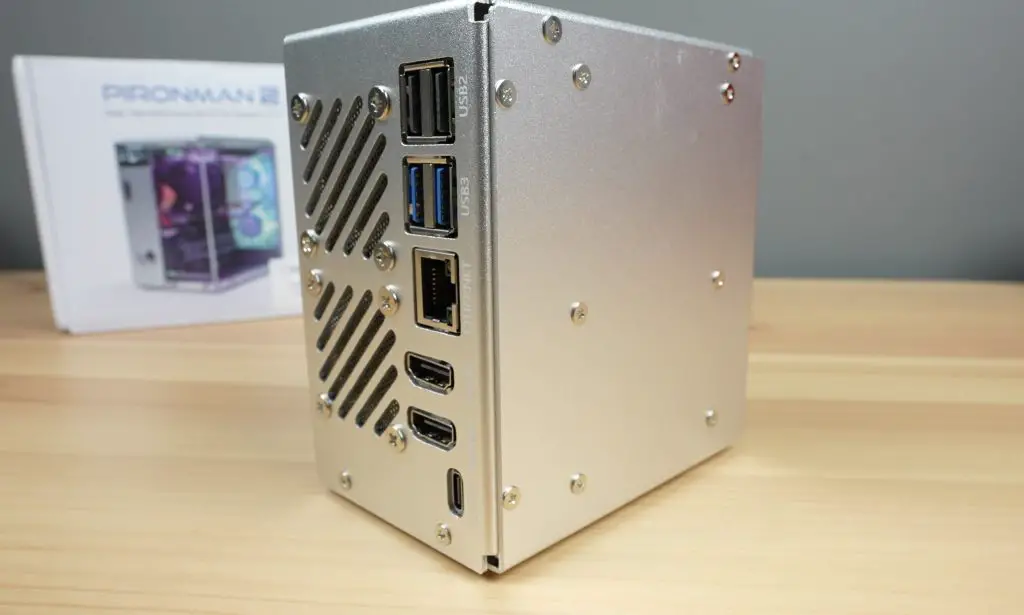
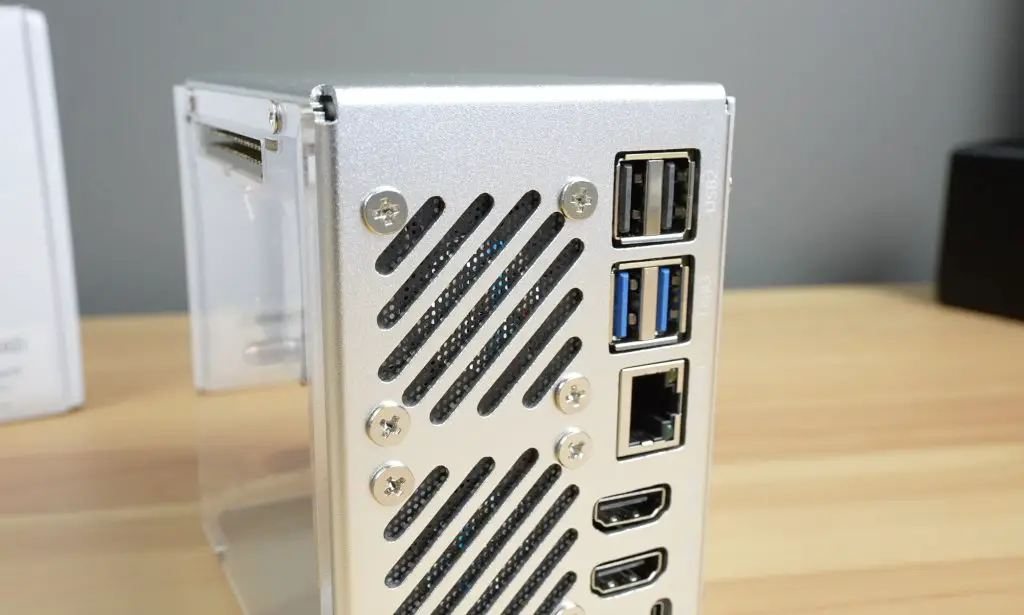
Overall I think the case looks great and provides some nice functionality over the stock Pi. I particularly like the full-size HDMI ports over the stock micro HDMI ports and the fact that the cables run out the back of the case rather than on the back and side.
There are also a few good improvements on the original design, assembly is quite a bit easier and it doesn’t rely on the side panels to hold the metal case components in place. So you can have the side panel removed to work on the Pi without compromising on the case’s structural integrity.
In terms of size, it is slightly larger than my 3D-printed case. It measures 112 x 117 mm and is 79mm wide, but they’ve managed to cram a lot of features into the small space.
It’s obvious that Sunfounder have tried to make this the best case for a Raspberry Pi 5. It comes with quite a high price tag, but in terms of value for money, it is fairly good. You can pick this up and you don’t need to worry about getting a separate cooler, NVMe hat, fans or an OLED display, and you still have access to the core Pi’s functionality like its GPIO pins.
It also comes with some nice finishing touches, like labels for the ports, and includes plenty of additional screws and mounting hardware so you’re covered if you lose some of them.
I never found anything missing from the case hardware so I assume that the empty sleeve I found made its way into the package by accident.
If I had to pick out some things to be critical about, I probably would have made the back fans PWM controllable as well. They would then run a bit quieter, although being able to turn them off most of the time in software partially helps with this already.
The dust filters on the back fans are also unnecessary as these are exhaust fans, so you’re filtering dust out that would be leaving the case. These would be better positioned onto some inlet vents and doing so would improve airflow through the exhaust vents.
Let me know what you think of the Pironman 5 case in the comments section below.