Making pillow covers used to take some time but with this guide you can make your own pillow covers using scraps of material in only 10 minutes. Each cover only requires one piece of fabric and two lines to be sewed. These covers also make great slip overs for existing pillows which have become faded or outdated.
What You Will Need To Make A Pillow Cover
- 1 Pieces of Fabric Per Pillow 40cm x 90cm (16″ x 36″)
- Sewing Machine With Matching Thread
- Iron
- Pillow Insert
How To Make A Pillow Cover
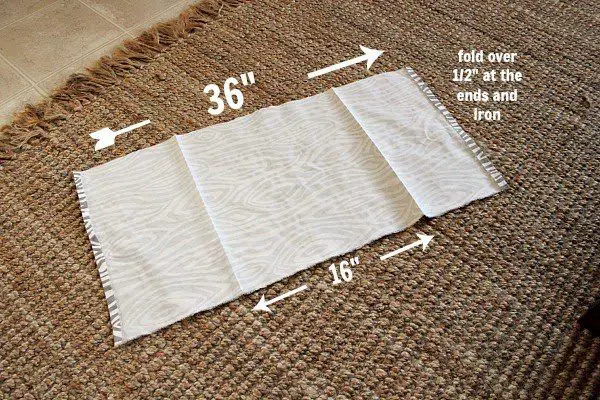
Start by cutting your fabric to the correct size, 40cm x 90cm (16″ x 36″) works well for a lounge scatter cushion.
Next iron the cushion in four places. Firstly fold the edges over about 1cm (1/2″) and iron the edges flat. Next measure out a 40cm (16″) section in the middle (roughly) of the fabric and iron the edges to form the pillow edges.
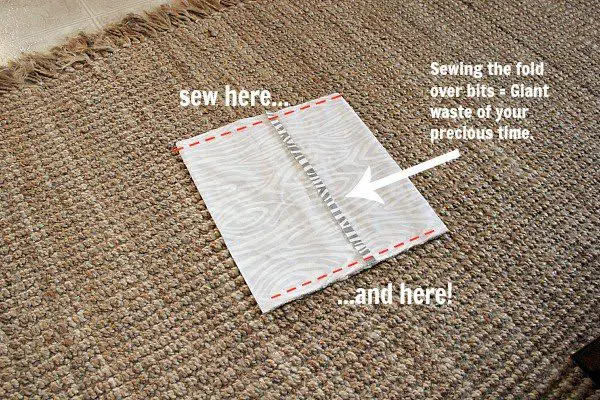
Fold the ironed edges back over with the patterned side of the fabric facing inwards. Sew along the full length of the two edges as shown below.
That’s it! Your cover is now complete, stuff the insert into the folded over sections, fluff it out and place it on the couch. As with all pillows, the trick to getting them looking good lies with the insert, a good quality down or micro-fiber insert will make all the difference and give your pillows a professional finish.
While you’re updating your lounge or bedroom, why not try making your own designer mirror? If costs way less than a store bought one, can be made to suite your wall size and really adds size to your room, making it feel more spacious. You could also have a look at our guide to decorating on a budget for some inspiration.
Original Article Taken From: Creek Line House


